
In the Target configuration tab, you can find the settings that let you define the context of the work items that will be created by your recipe.
Number of targets
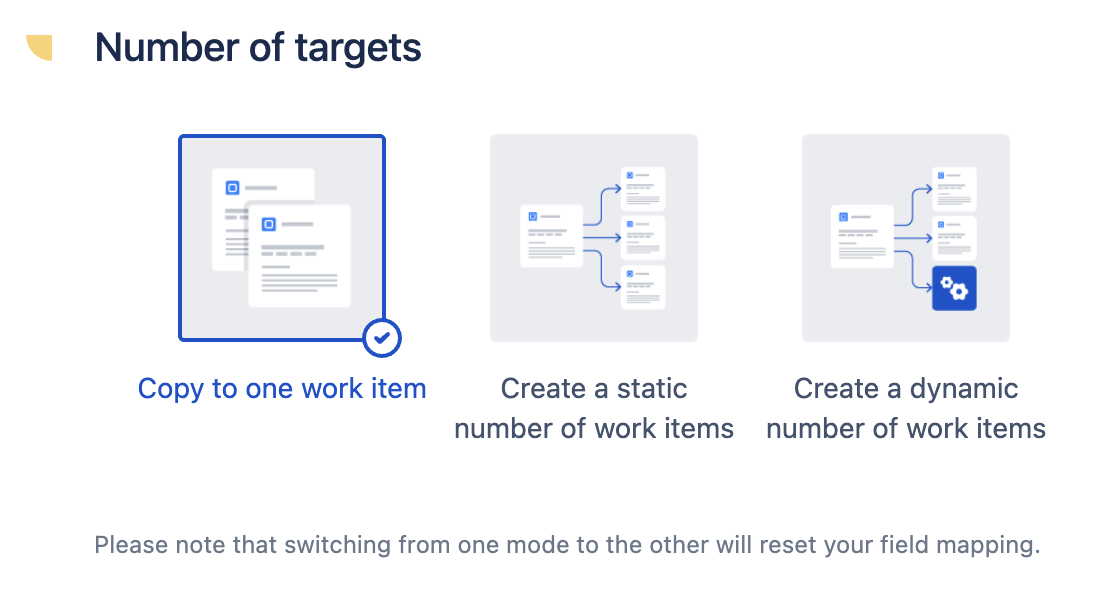
This section lets you configure how many work items will be created from your source work item.
-
Create one work item will let you create a copy to your source work item.
-
Create a static number of work items will let you create several work items from your source work item at once.
-
Create a dynamic number of work items will let you create several work items from your source work item at once based on a primary field.
Work item to create: Copy to one work item
This section is only available if you have selected the Copy to one work items option.
This section lets you configure where and how your copied work items will be created.
These options restrict the target spaces and work items types that will be available to a user triggering the recipe from the Jira work item view.
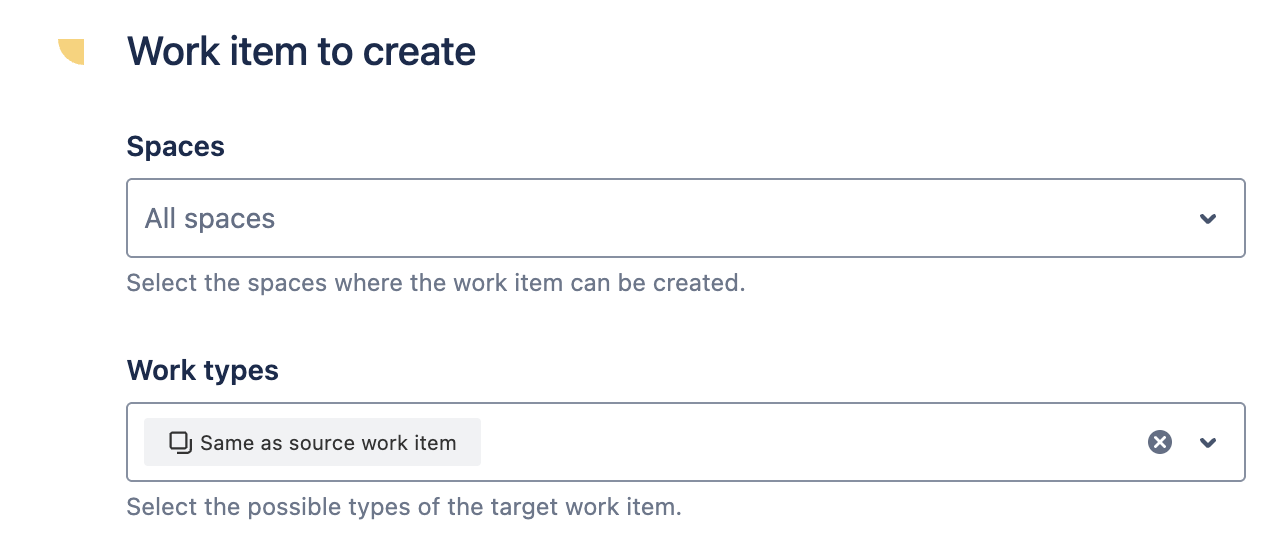
Spaces
Use this setting to restrict the spaces where the work items can be copied to. Only these spaces will be available as a target when the recipe is triggered.
If only one space is selected, this space will be preselected as the recipe target.
If you leave the field empty, all spaces will be available as a possible target when the recipe is triggered.
You can also select the "Same as source work item" option here, which means than the copied work item will be created in the same space as the source work item.
You can also select a "Project Picker" custom field here, which means that the copied work item will be created in the space specified in this custom field in the source work item.
You can learn more about this use case in the following tutorial : How to clone a Jira issue to another project based on a custom field value.
Work types
Use this setting to restrict the types of work items that the work item created by your recipe can have. Only these work types will be available to the end-user when the recipe is triggered. Please make sure that the work types selected here are available in the Spaces selected in the previous step, otherwise your recipe will have an inconsistent configuration which will prevent creating work items with it.
If only one work type is selected, it will be preselected automatically.
If you leave the field empty, all work type will be available to the end-user when the recipe is triggered.
You can also select the "Same as source work item" option here, which means than the copied work item will have the same work type as the source work item.
If only one space and one work type are selected in this section, the execution of the recipe will be shorter. Indeed, the end-user will not have to decide manually which space and work type to target when triggering the recipe, and the work item creation dialog will be opened immediately.
Recipes can be used in a workflow post-function only if one space and one work type have been selected here.
Work items to create: Create a static number of work items
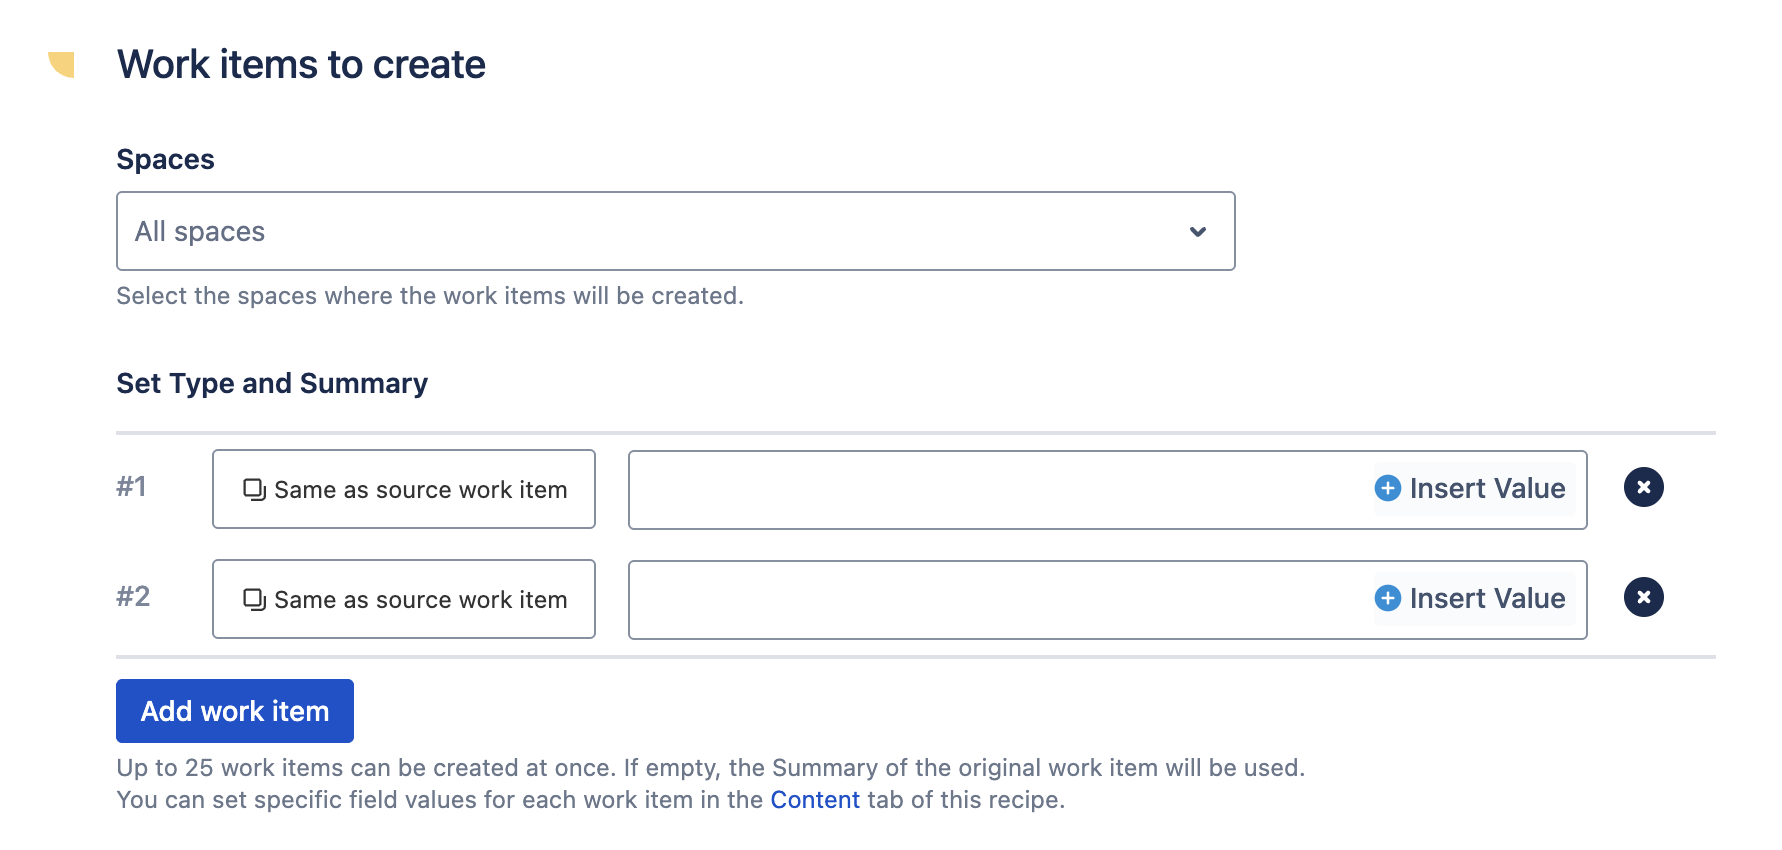
This section is only available if you have selected the Create a static number of work items option.
This section lets you configure how many work items will be created and how their Summary fields will be initialized.
Create up to 25 work items and initialize their Summaries and fields.
Set Type and Summary
This table lets you initialize the type of work items and the Summary field of each work item that will be created by the recipe.
Use the select list at the start of each row in the table to select which type of work items will be created, among all the types available on your Jira instance.
If the selected type is not available in the space where the recipe is triggered, no work item will be created.
Use the text field on each row in the table to set up the Summary of one of the work items. If left empty, the Summary of the source work item will be reused as the Summary of the created work items.
You can use the "Insert" button at the right of each field in order to select values from the source work item. These values can be used to initialize the Summary of each work item with a dynamic value.
Add work item
Use this button to specify how many work items will be created each time the recipe is triggered.
Up to 25 work items can be created for each trigger of the recipe.
The following tutorial shows all the steps required to create a static number of issues: How to create multiple Jira issues based on a template.
Work items to create: Create a dynamic number of work items
This section is only available if you have selected the Create a dynamic number of work items option.
Create a number of work items that depends on the value(s) of a field in the source work item.
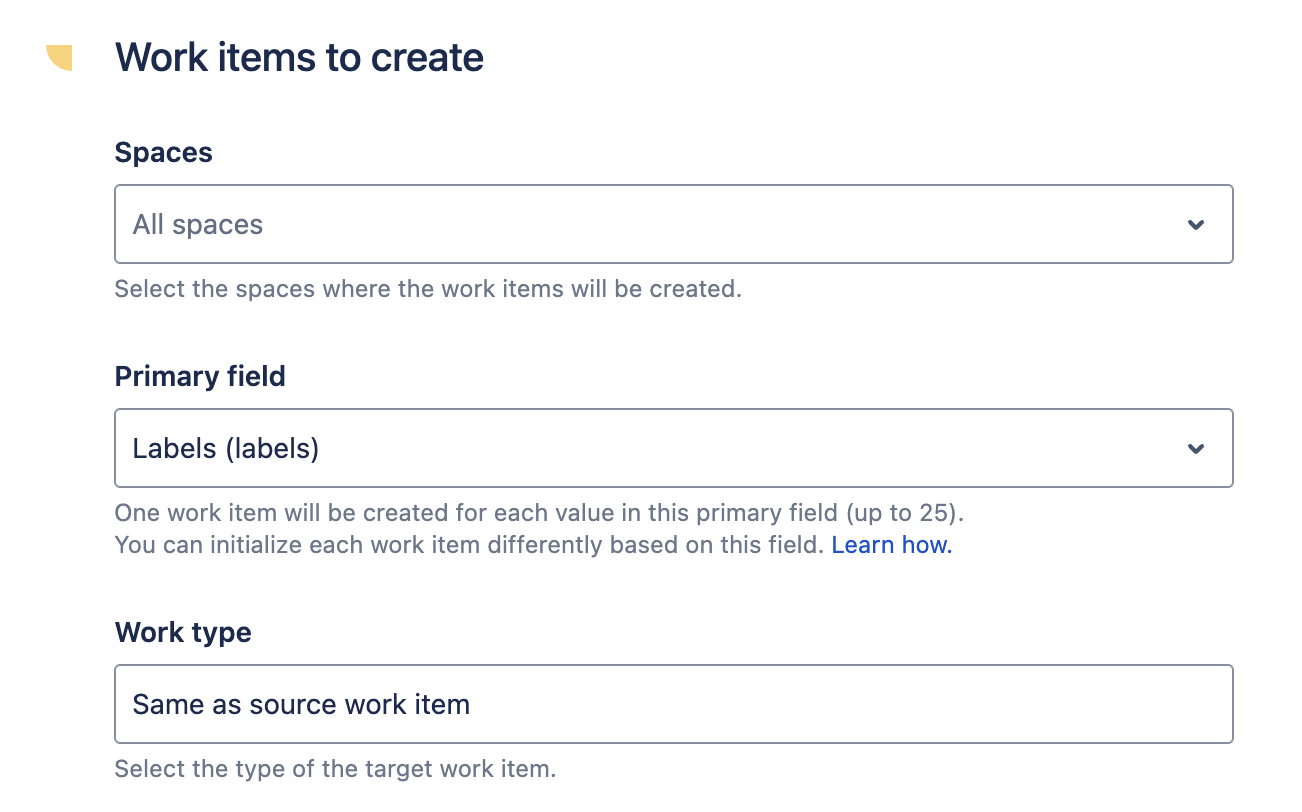
Primary field
Use this option to select the field that will be used to automatically decide how many work items will be created.
For example, if you select the "Labels" field, the number of work items created will depend on how many values there are in the "Labels" field: if your source work item has 3 labels, then 3 work item will be created by the recipe.
Many different types of custom fields are available here : labels, components, user pickers, checkboxes, group pickers, select lists, or version pickers.
Work type
Use this option to define the type of the work items that will be created by the recipe.
The following tutorial shows all the steps required to create a dynamic number of work items: How to create a dynamic number of Jira issues.
Monitoring
This section lets you configure how the created work item can be monitored by the user who triggers the recipe.
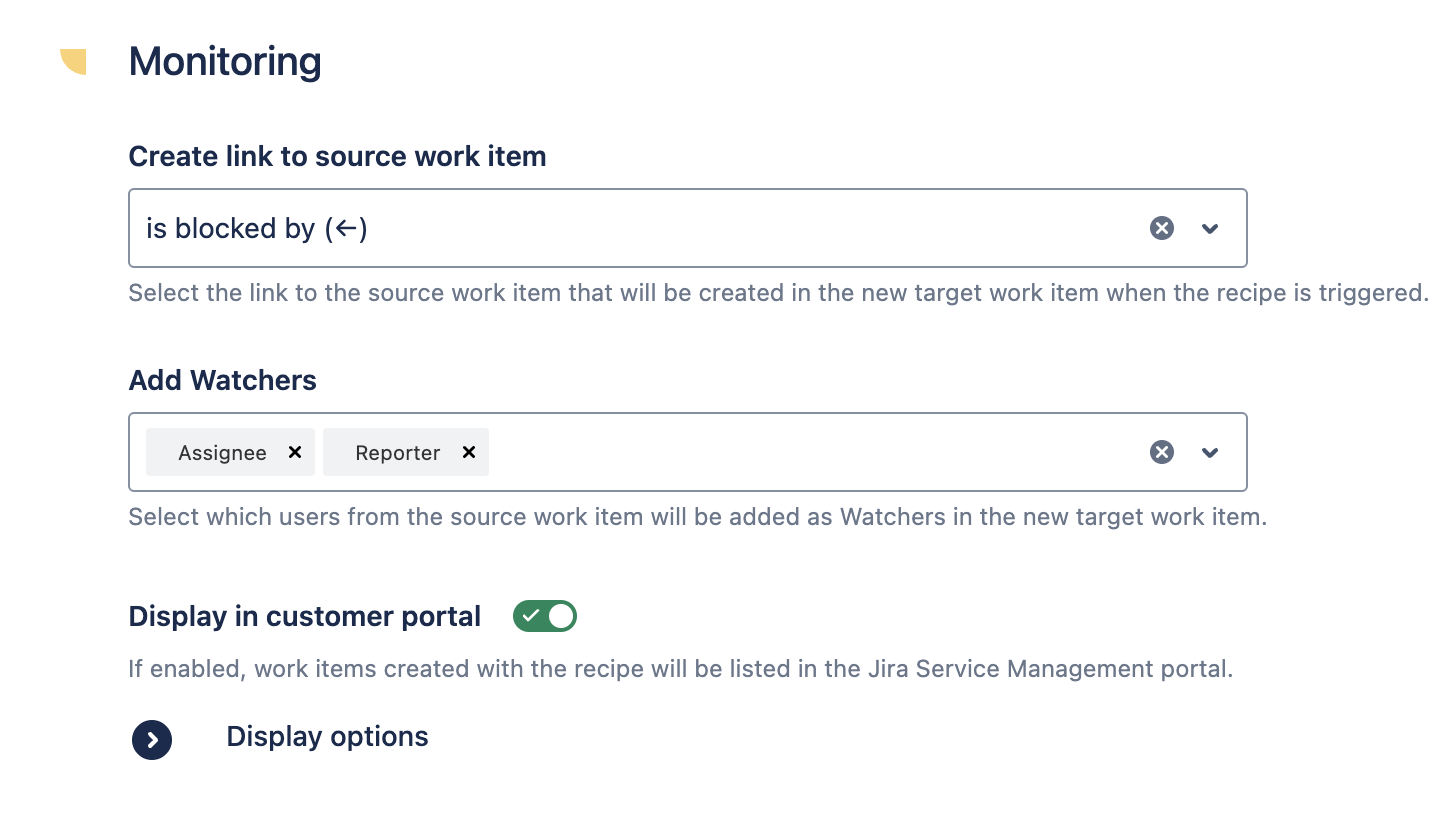
Create link to source work item
Use this setting to select the type of link that will be created between the original work item and its copy.
All the link types available in the "Issue linking" configuration of your Jira instance are listed here.
Add Watchers
Here you can select which users to add as Watchers of the new work item created by the recipe among:
-
the Reporter of the original work item
-
the Assignee of the original work item
-
all the Watchers of the original work item
-
the Current user who triggers the recipe
Display in customer portal
This option lets you display the work items created by the recipe in the Customer portal.
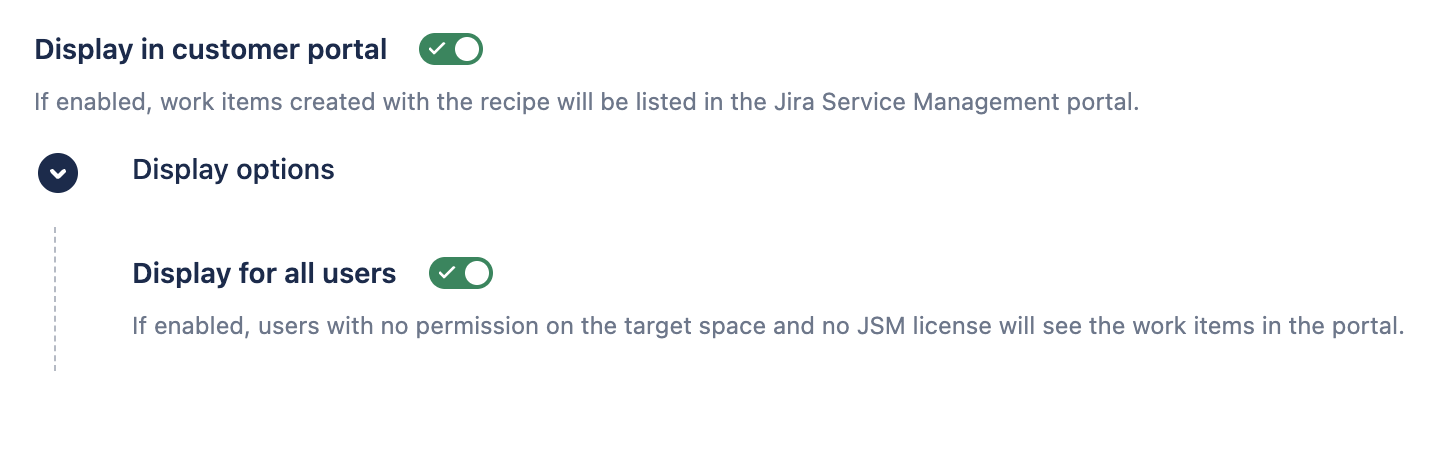
If this option is enabled, work items created with this recipe from a Jira Service Management ticket will be displayed in the "request view" of the Customer portal, along with their work type, status, and a direct link to the work items.
By default, only users with the "Browse project" permission on the related work items' space will be able to see them in the Customer portal panel.
Display for all users
If this option is enabled, all users will be able to see the work items created by the recipe in the Customer portal view, even if they don't have a Jira Service Management license or the "Browse project" permission on the target work item’s space. However, for these users, there will be no link to the created work items available in the panel, as the users don't have the permissions to open them anyway.