
The need: clone a task with its checklist
Using customized checklists in Jira issues is an easy way to make sure that your users never forget all the tasks they are supposed to do.
One of the most popular checklist add-ons on the Atlassian Marketplace is Issue Checklist for Jira, which is available in free and pro versions, which lets you create and reuse checklist templates. But what if you want to clone an issue with a checklist and include the checklist in the new issue?
The solution: compatibility of Issue Checklist for Jira with Elements Copy & Sync
Thanks to the app integration of Issue Checklist for Jira and Elements Copy & Sync, you can copy and synchronize the values of any checklist between any issue, create checklists with initialized values, or even create checklists by retrieving their items from another issue and clearing their completion.
Tutorial
In this example, we will copy an issue with the key SUP-1.
This guide explains how to copy the issue checklist from SUP-1, all its values, and synchronize them with the copied issue.
Prerequisites
Issue Checklist for Jira has been installed on your Jira instance (get the free version or pro version on the Atlassian Marketplace).
At least one checklist must have been created on your instance.
A recipe called "Escalate ticket" has been created, activated, and is available on issue SUP-1.
Configuration steps
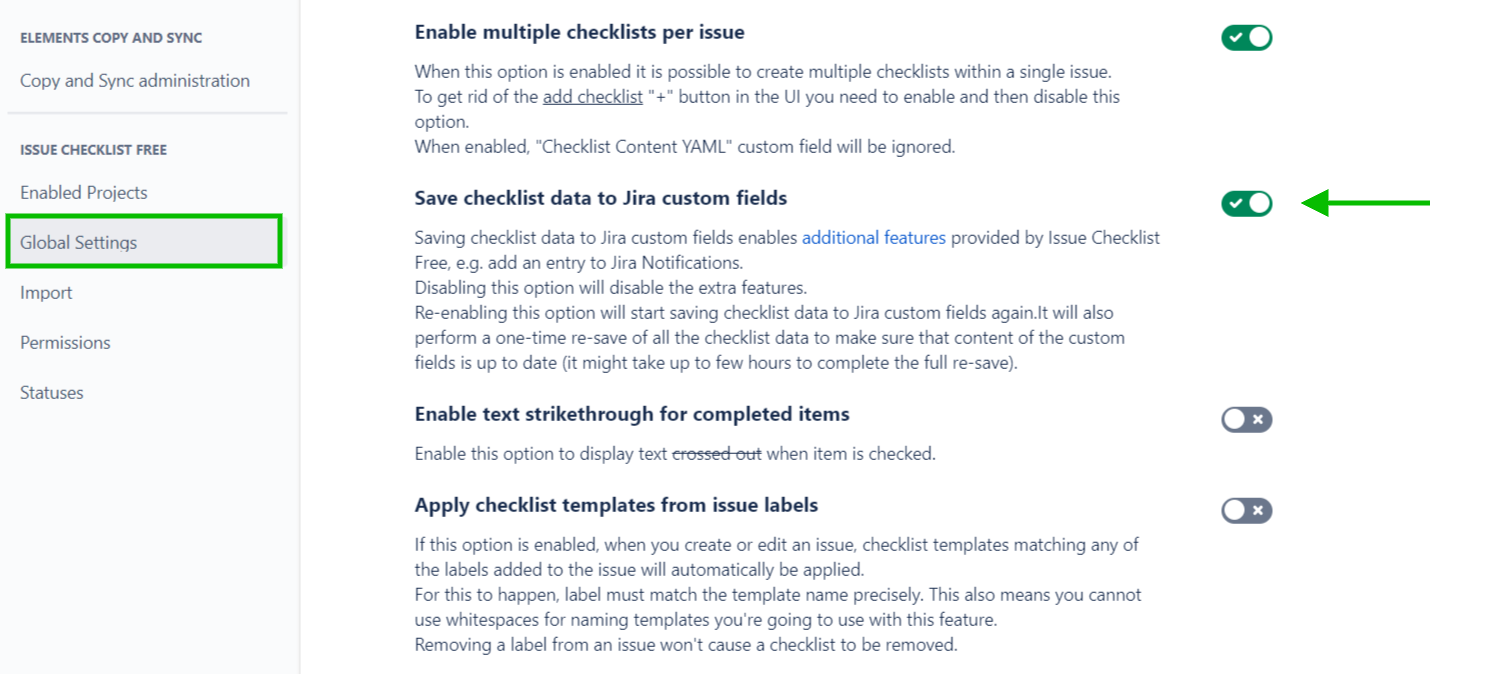
1 - As a Jira administrator, go to the "Issue Checklist for Jira" administration and click on Global Settings in the navigation bar.
2 - Enable the Save checklist data to Jira custom fields in order to let Elements Copy & Sync integrate with the Issue Checklist for Jira add-on. This is mandatory.
3 - As a Jira administrator, go to the "Elements Copy & Sync Cloud" administration and click on Recipes in the navigation bar.
4 - In the Recipes listing page, select "Escalate ticket" in the Active Recipes list.
5 - In the Recipe configuration page, click on the Content tab.
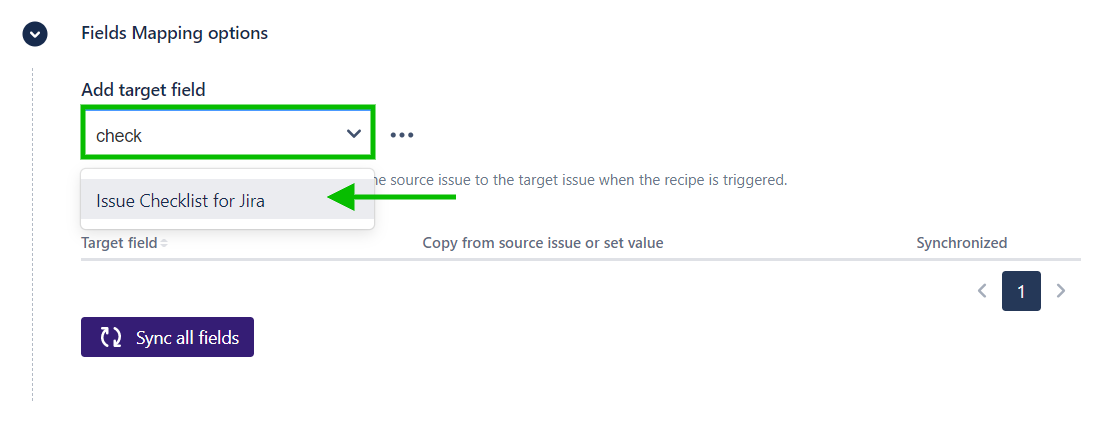
6 - In the "Fields" section, activate the Set and synchronize fields option. The "Fields mapping options" subsection is displayed.
7 - Click on the "..." button at the right of the Add target fields option, and select "Issue Checklist for Jira" (this option is only available if the Issue Checklist for Jira has been installed on your instance).
8 - Save the recipe.
Result
At this point, every time this recipe is triggered from an issue, it will copy all the checklists in the source issue to the target issue, including the status of its items.
For example, if your source issue SUP-1 has a checklist with three items, and if the first two items are marked as done, then the copied issue will have the same checklist, with the same three items, and the first two items will be marked as done as well.
There are two other options that can be used, depending on which behavior you want to follow during your issue copy:
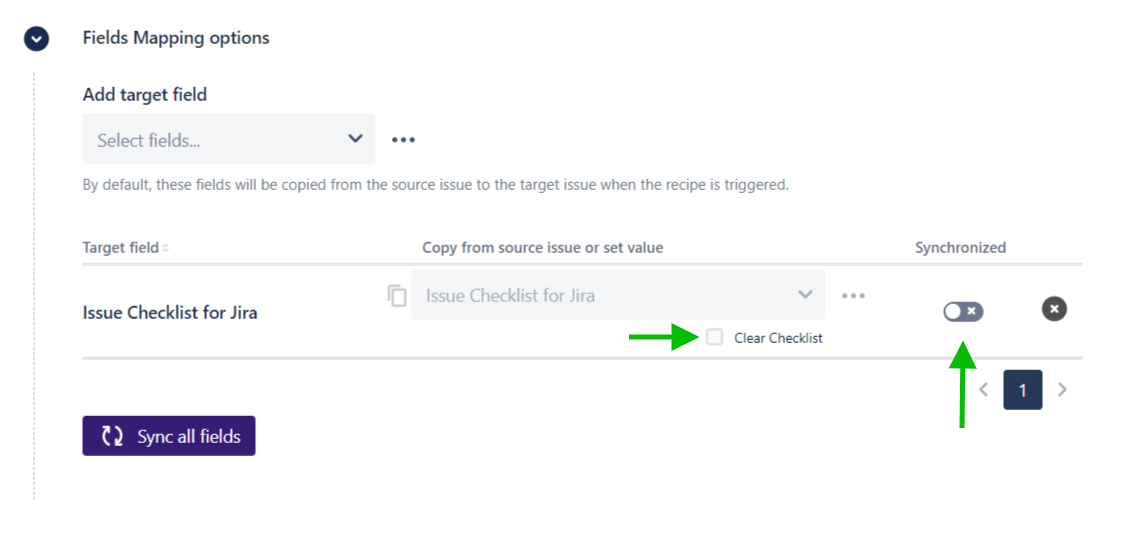
The Clear Checklist option, when enabled, copy the checklist items but not their statuses.
For example, if your source issue SUP-1 has a checklist with three items, and if the first two items are marked as done, then the copied issue will have the same checklist, with the same three items, but no item will be marked as done.
The Synchronized option, when enabled, let you keep the checklists of your two issues (the original issue and its copy) perfectly in-sync.
So, each time an item is marked as done in the checklist of your source issue, the same item will automatically be marked as done in the checklist of your copied issue.
•••
New to Elements Copy & Sync?
If this tutorial has stirred your imagination, why not give it a try?
• Try Elements Copy & Sync for free •