
The need: create multiple subtasks template
If your process often requires the creation of several subtasks at once, each one containing specific information from its parent issue as well as static data, creating and initializing each subtask manually can take a lot of time. Let's be clear: nobody wants to lose time on repetitive tasks.
The solution: subtask recipes with Elements Copy & Sync
With Elements Copy & Sync, you can define subtask templates that can be reused as often as needed to create multiple subtasks at once, so you will never have to waste time creating the same issues over and over again.
Tutorial
This guide explains how to create a recipe that will create three subtasks from a parent issue each time it is used.
These subtasks will have distinct summaries and descriptions, but each subtask will inherit the value of the "Priority" field from their parent issue.
Prerequisites
Elements Copy & Sync has been installed on your Jira Cloud instance.
Configuration steps
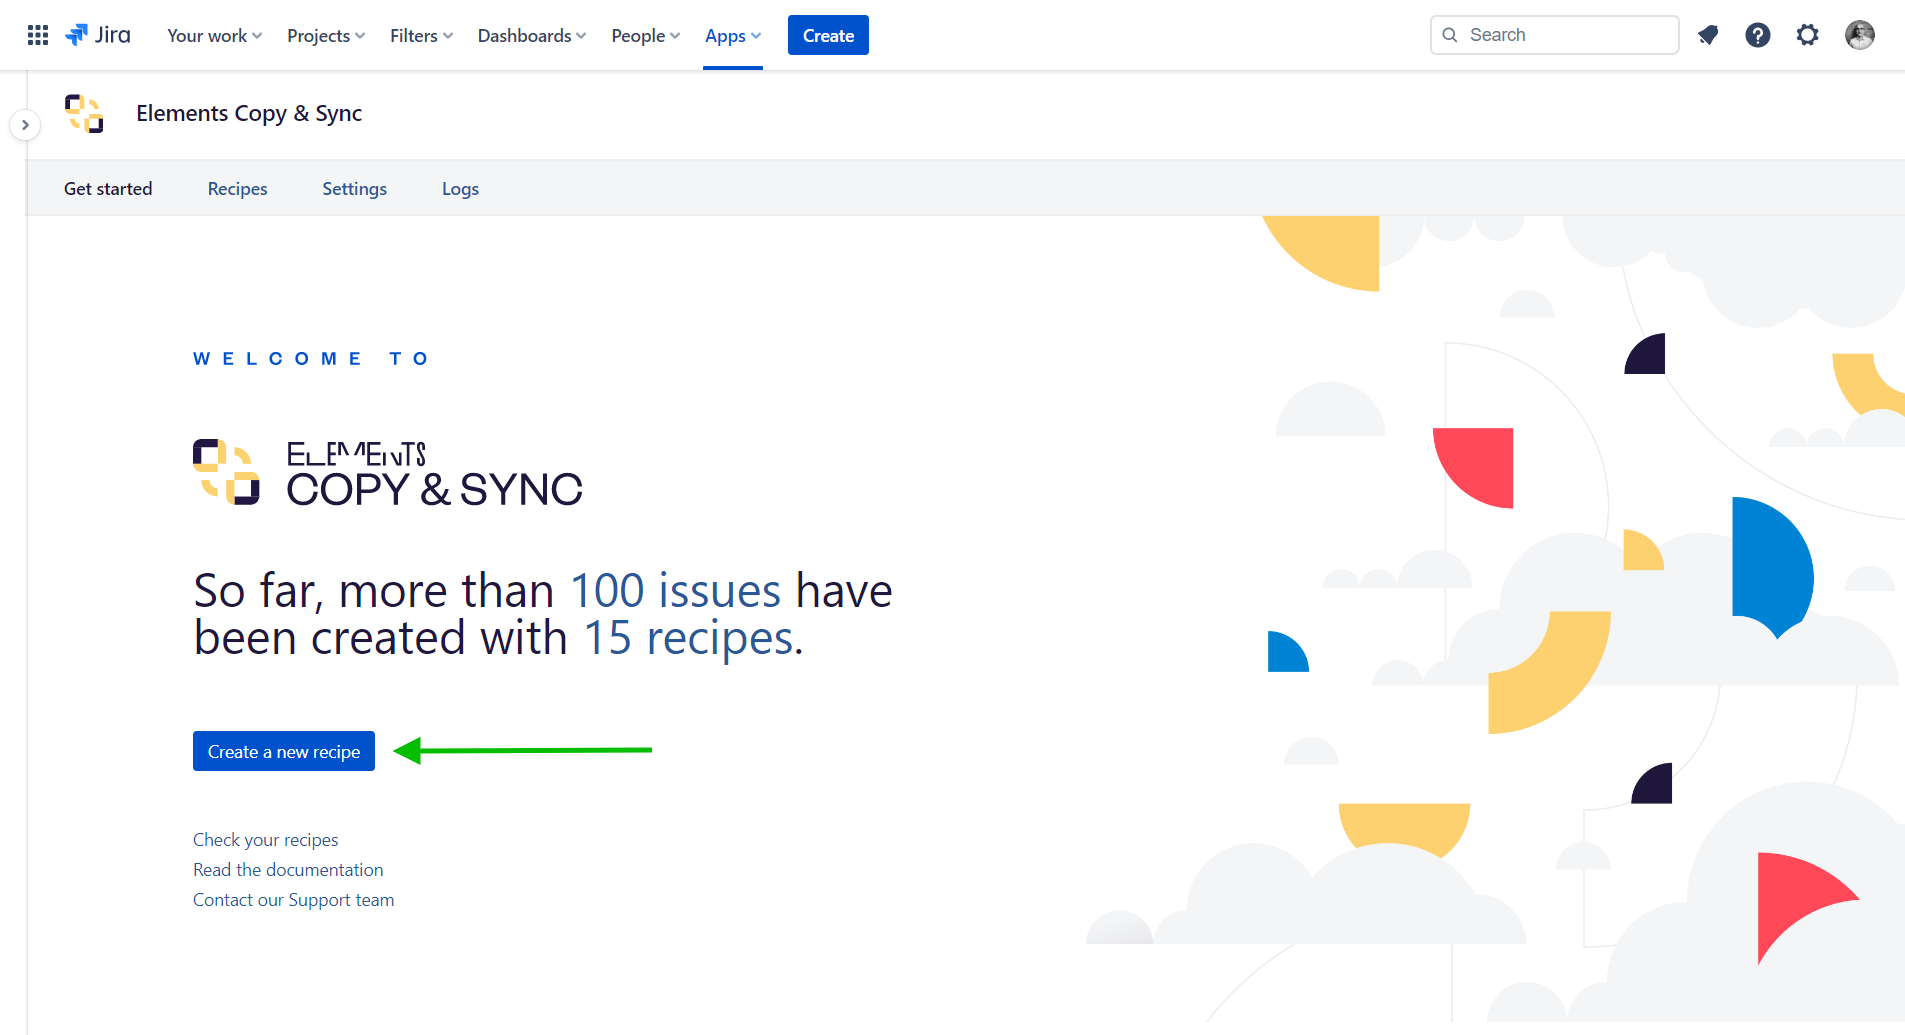
1 - As a Jira administrator, open the "Elements Copy & Sync" administration and click on the "Create a new recipe" button.
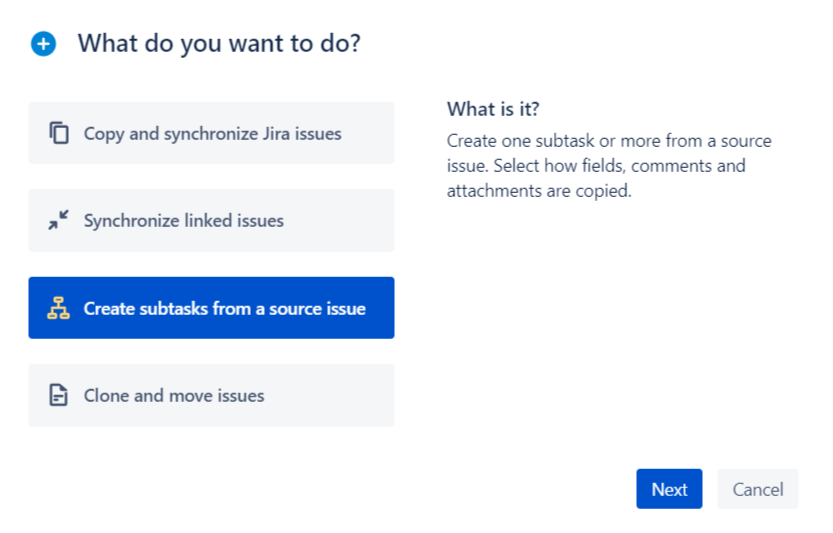
2 - In the dialog, select Create subtasks from a source issue and click on the "Next" button.
3 - In the next screen, enter a Name and a Description. They will be used to identify your recipe.
In our example, the name of the recipe will be "Create three Subtasks".
4 - Click on the "Create" button. The recipe configuration is open.
5 - In the Source tab, you can define on which issue this recipe can be used.
For now, we can leave this tab empty. Please refer to the related tutorial to learn how to set up these options.
6 - Click on the Target tab in the navigation menu.
7 - In the "Subtasks creation" section, use the Add subtask button to define how many subtasks will be created by the recipe each time it is triggered.
In this example, we will create 3 subtasks.
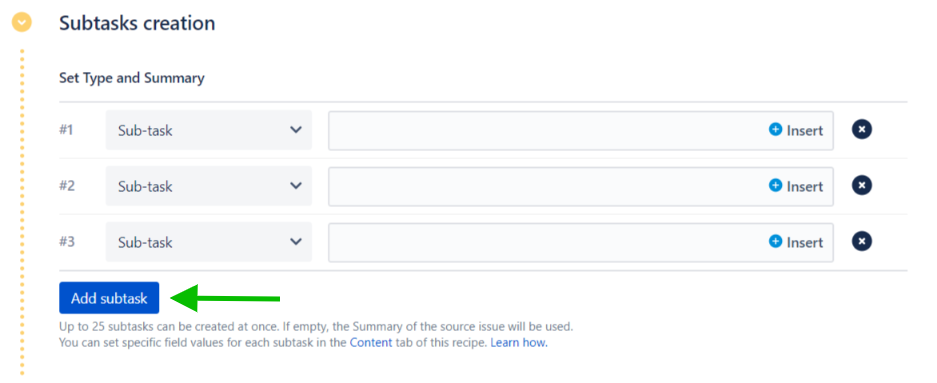
8 - Use the Set Type and Summary option to initialize the summaries values of each subtask.
In this simple example, these subtasks will be titled "First subtask", "Second subtask", and "Third subtask". You can also use the Insert button in each field to inject the value of a field from the parent issue to a given subtask.
9 - Click on the Content step in the navigation menu.
10 - In the "Fields" section, enable the Set and synchronize fields option.
11 - Use the Add target field option to add the "Description" and "Priority" fields to the Fields Mapping table.
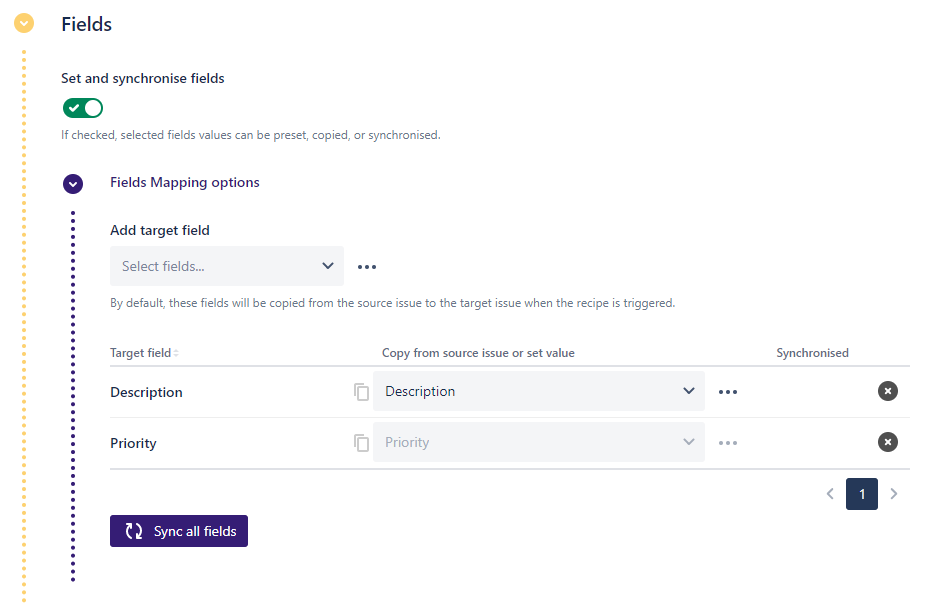
At this point, each subtask created will inherit the "Description" and "Priority" values from the parent issue when they are created.
In this example, we want each "Description" to be distinct.
12 - Click on the Set value for each subtask option in the "Description" line of the Fields Mapping table.
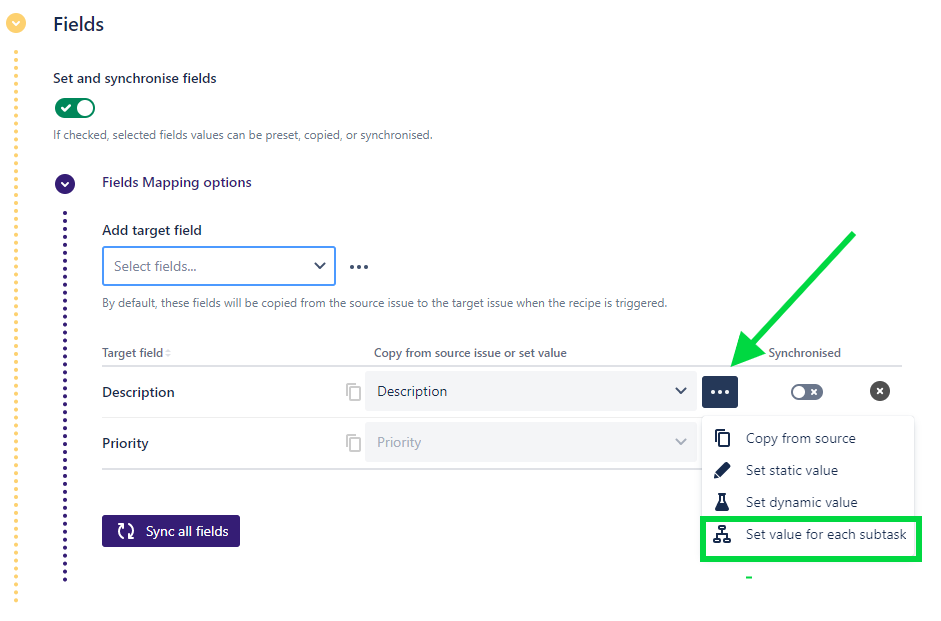
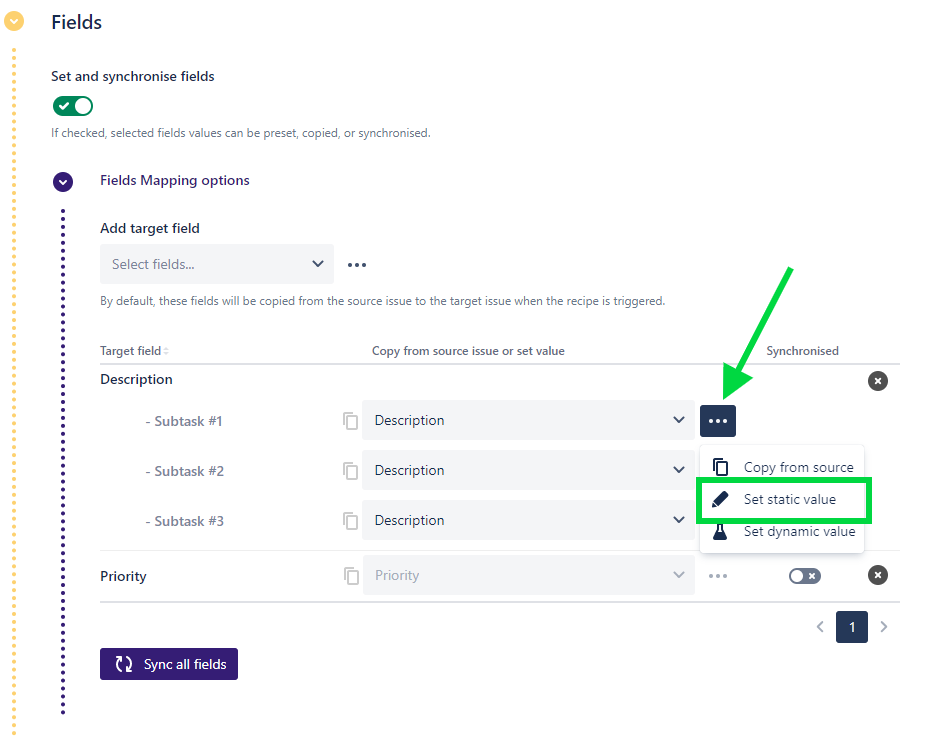
A new line, specific to each subtask, is displayed in the table.
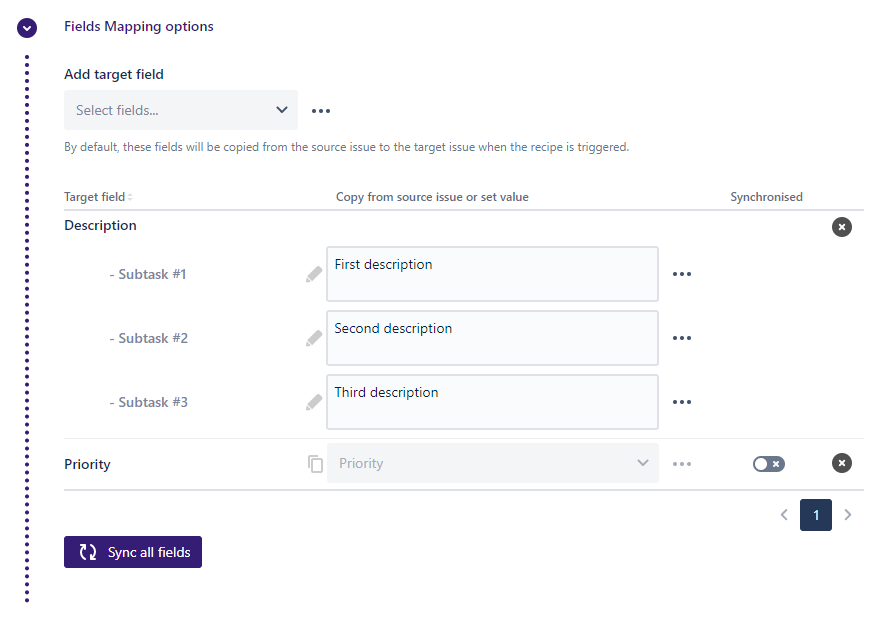
13 - Use the Set static value option in each of these lines to initialize the Description of each subtask with a distinct value.
In our example, the description of these subtasks will be "First description", "Second description", and "Third description".
14 - And that's it! Click on the Save button.
15 - Close the recipe.
16 - In the "Drafts" section of the recipe listing, use the Activate option.

The recipe is now available on your Cloud instance and can be used on any issue.
Result
With the previous steps, you have created and activated a recipe that can create three subtasks each time it is used. If you open any issue on your instance and trigger the recipe, three subtasks will be created under the issue with the defined Summary and Description fields. The Priority of the subtasks will be automatically inherited from the Priority of the parent issue.
You can also trigger this recipe with a workflow post-function to automatically create these subtasks each time the status of an issue changes.
Learn more
•••
New to Elements Copy & Sync?
If this tutorial has stirred your imagination, why not give it a try?
• Try Elements Copy & Sync for free •