Configure a URL datasource - Okta
Table of contents
Why connected field to Okta?
Okta REST API gives you access to Applications, Users, Groups, ...
Documentation: https://developer.okta.com/docs/reference/api/apps/
Oauth2 or Token based?
You can use two authentication modes to connect to Okta:
- OAuth2
- Token
OAuth2 is more secured but you must be an Okta administrator to configure this datasource.
This documentation shows how to configure both
OAuth2
You must have access to Okta administration and be a Jira admin to configure a datasource with OAuth2 authentication between Elements Connect and Okta.
Okta
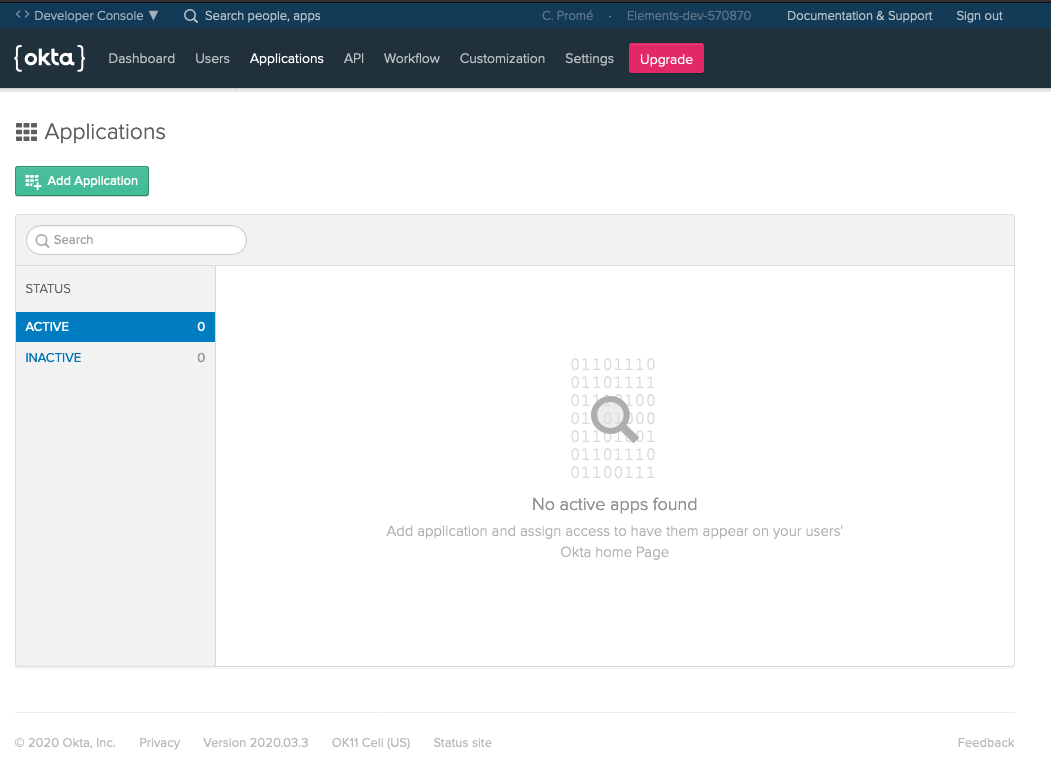
- Go to Okta administration pages, select the Applications section
- Click on the green Add Application button
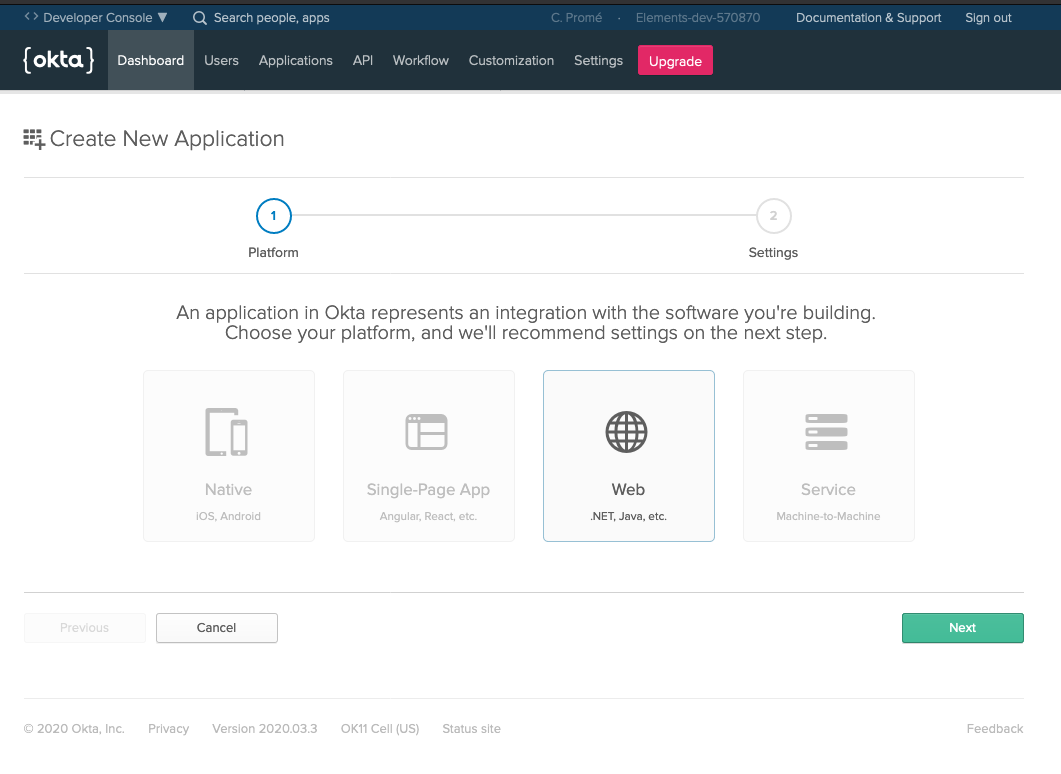
- Select a Web application
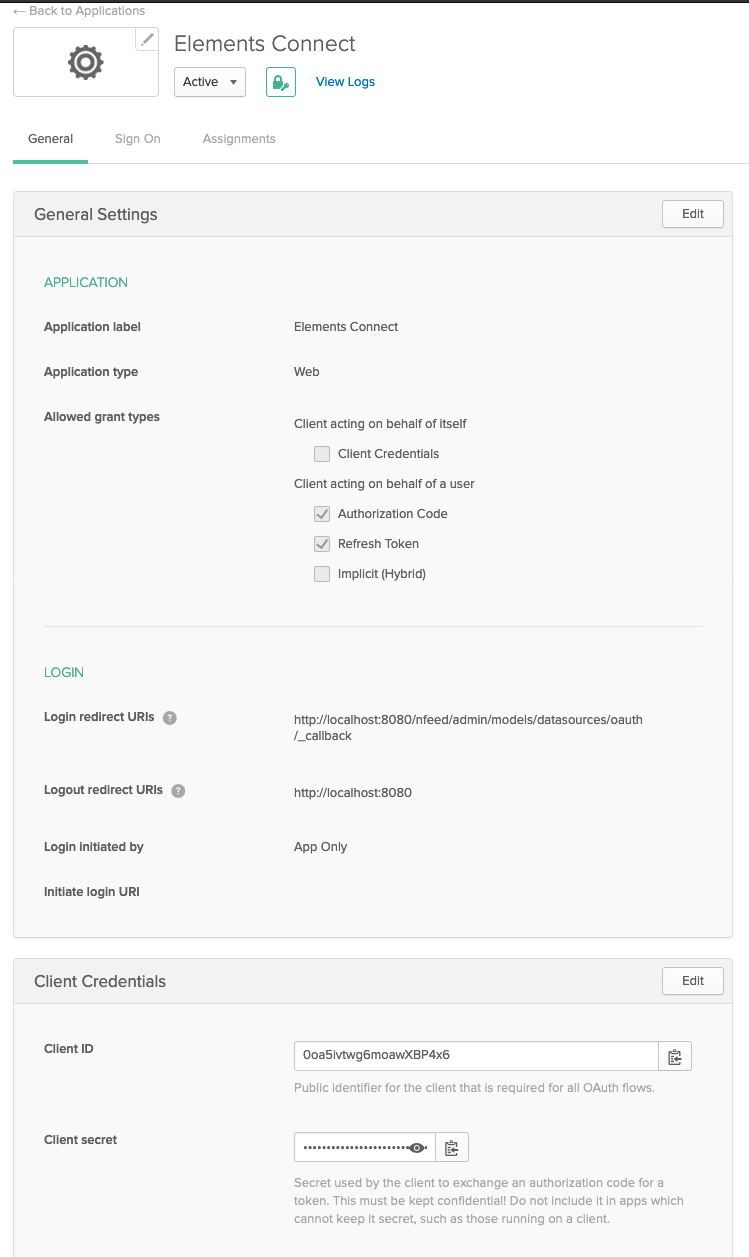
- Configure the application:
- Name: Any value, "Elements Connect" is valid option

- Base URIs: your Jira instance base URL
- Login redirect URIs: https://yourjirabaseurl/nfeed/admin/models/datasources/oauth/_callback
- Grant type: Check "Refresh token" - you might need different options according to your use case, check Okta documentation
- Name: Any value, "Elements Connect" is valid option
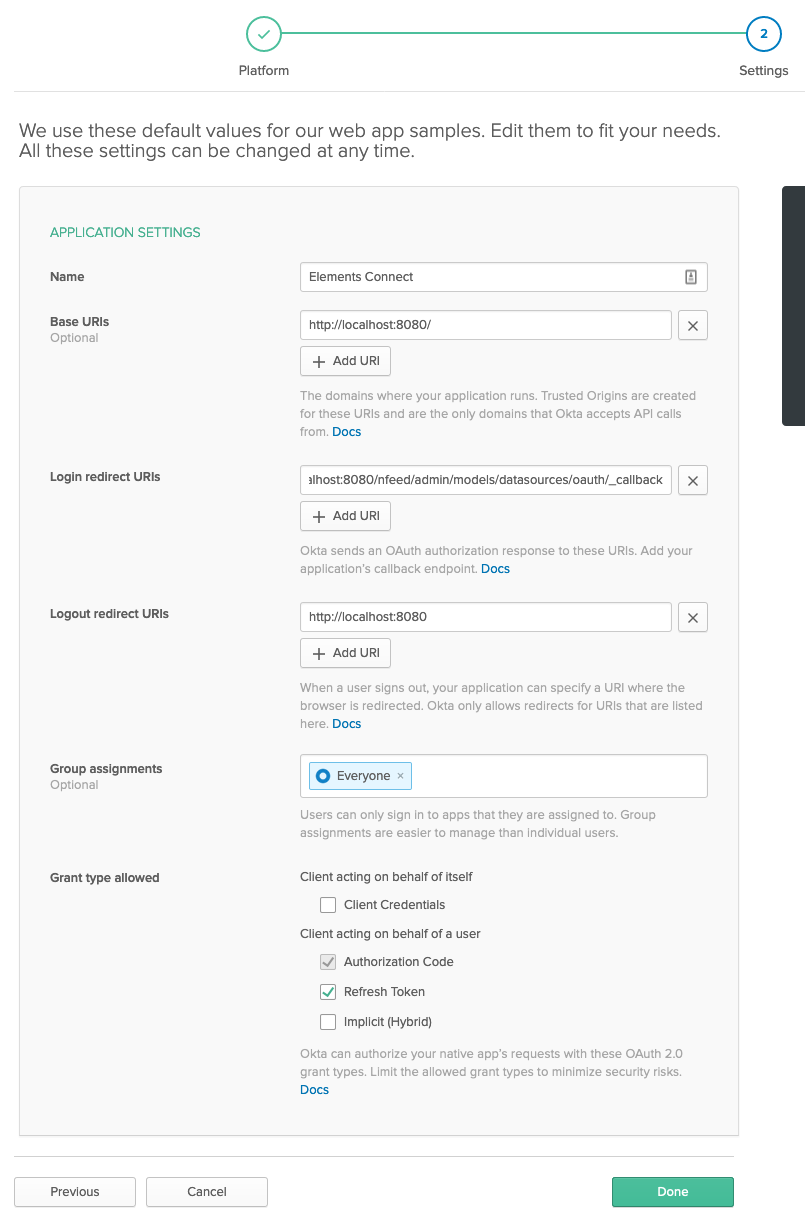
- Click on the green Done button
- That's it! you're redirected to your new application page.
- You'll find two useful information on this page:
- Client ID
- Client secret
Connect
Replace YOURCOMPANY.okta.com with your okta URL in all the Okta urls given below.
- Go to the Elements Connect administration, click on "Datasource"
- Add a new datasource of type "URL"
- Configure the datasource
- Name: Any value, "Okta" is a valid option
- URL: https://YOURCOMPANY.okta.com/api/v1
- Authentication: OAuth2
- Name: Any value, "Okta" is a valid option
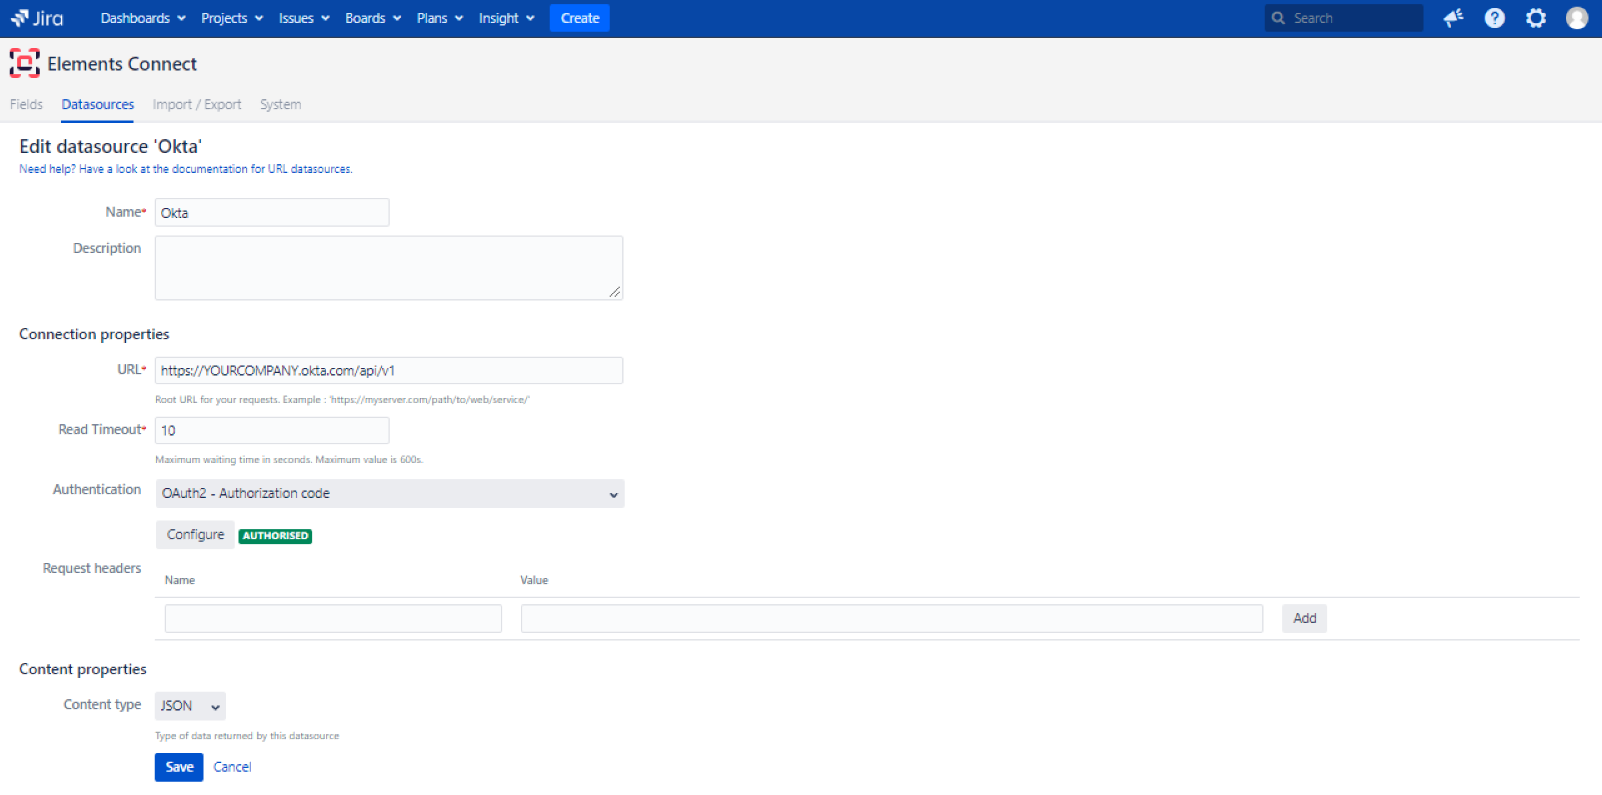
- Click on the "Configure" button
- In the "OAuth2 Configuration", enter the following values:
- Client ID: Your okta client id retrieve at the previous step from your application configuration screen
- Client secret: Your okta client id retrieve at the previous step from your application configuration screen
- Authorise URL: https://YOURCOMPANY.okta.com/oauth2/default/v1/authorize
- Token URL: https://YOURCOMPANY.okta.com/oauth2/default/v1/token
- Scopes: openid offline_access
The offline_access scope must be requested as part of the /authorize endpoint to get a refresh token.
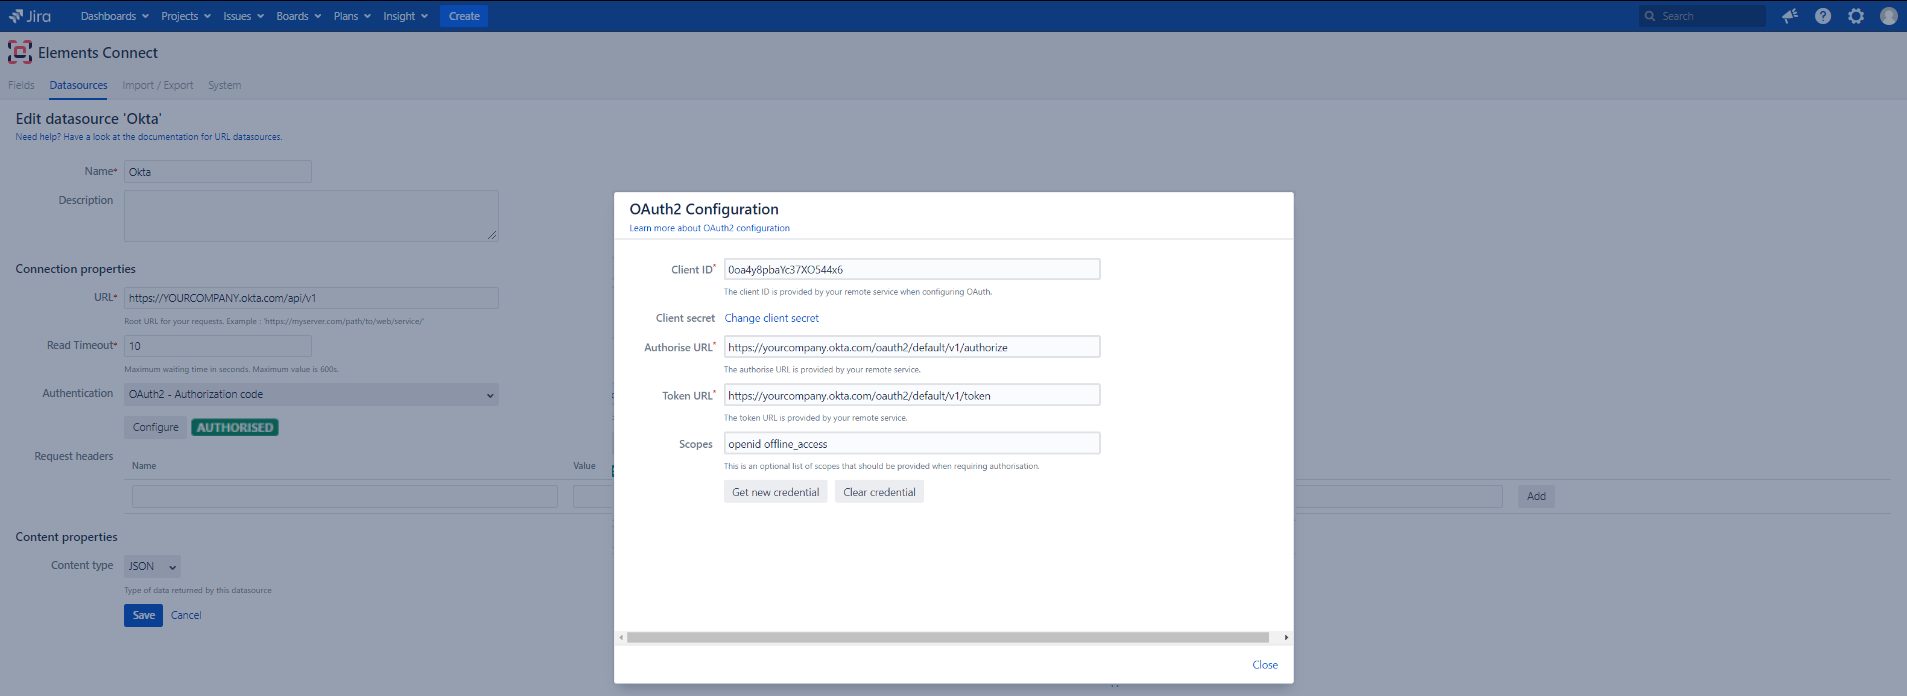
- Click on "Get new credential"
- Once you get the configuration message, click on "Close"
- Then "Save"
- That's it! the Okta datasource is now configured!
Token based authentication
This authentication method is no longer supported by OKTA (please refer to this page).
This authentication mode requires less efforts:
Okta
- Go to Okta admin, go to "API" > Token
- Click on the "Create Token" button
- Give it a name, click on "Create Token"
- Make a note of the token
Elements Connect
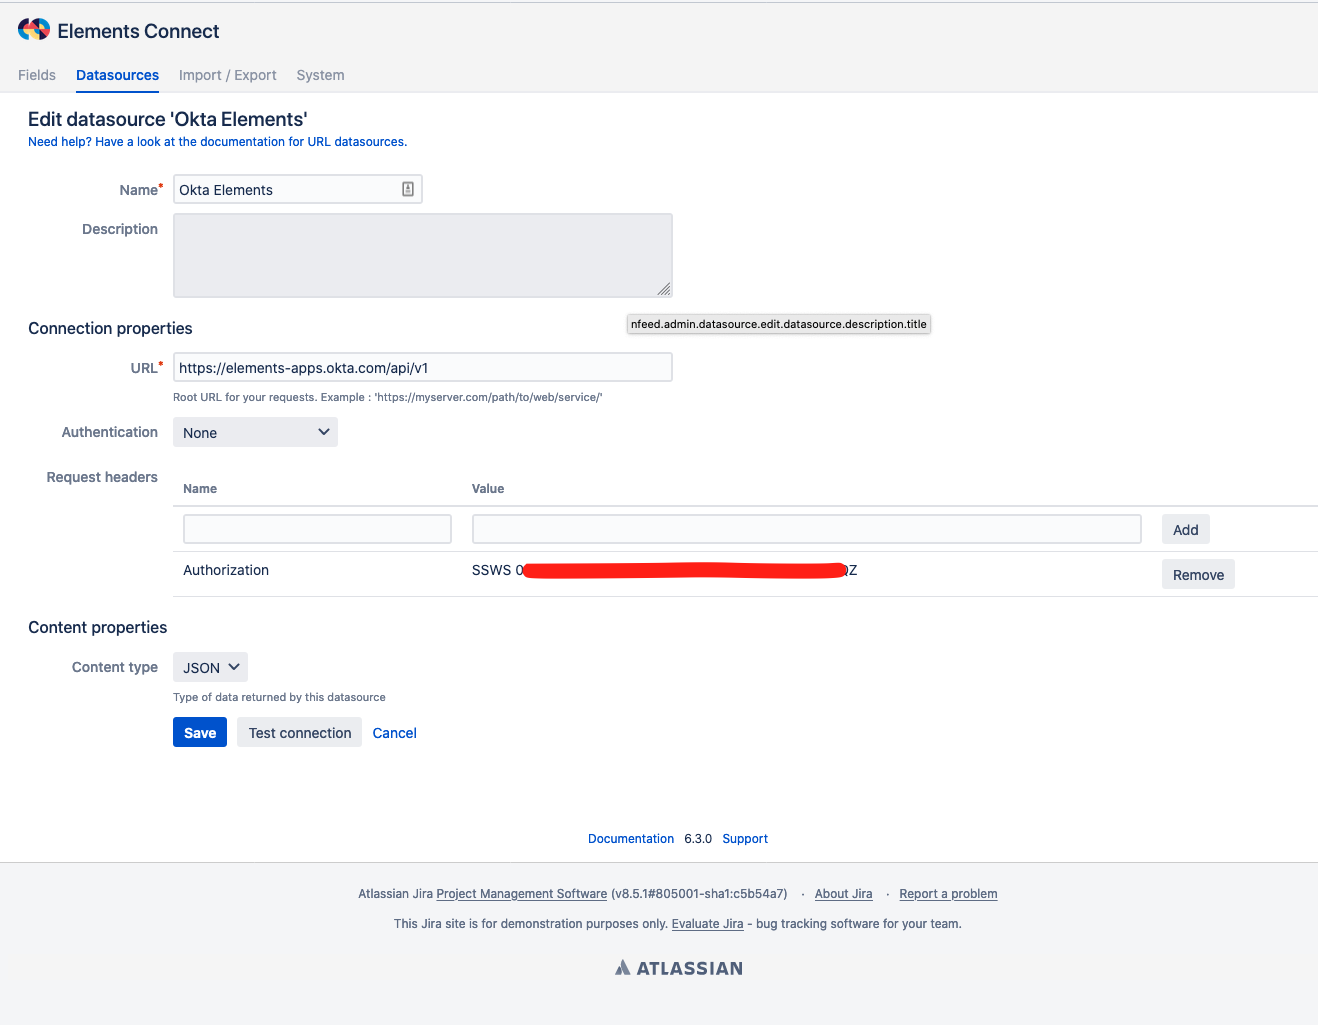
- Create a new datasource of type "URL"
- Name: "Okta"
- URL: https://YOURCOMPANY.okta.com/api/v1 (replace YOURCOMPANY.okta.com with your actual okta URL)
- Authentication: None (we'll use a header)
- Add a request header:
- Name: Authorization
- Value: "SSWS THE_OKTA_TOKEN_GENERATED_PREVIOUSLY"
- Content type: JSON
- Click on Save, that's it.