Prerequisites
-
A Jira Cloud instance with Elements Connect installed.
-
Access to Asana's API and a personal access token (PAT) from Asana.
Configuration steps
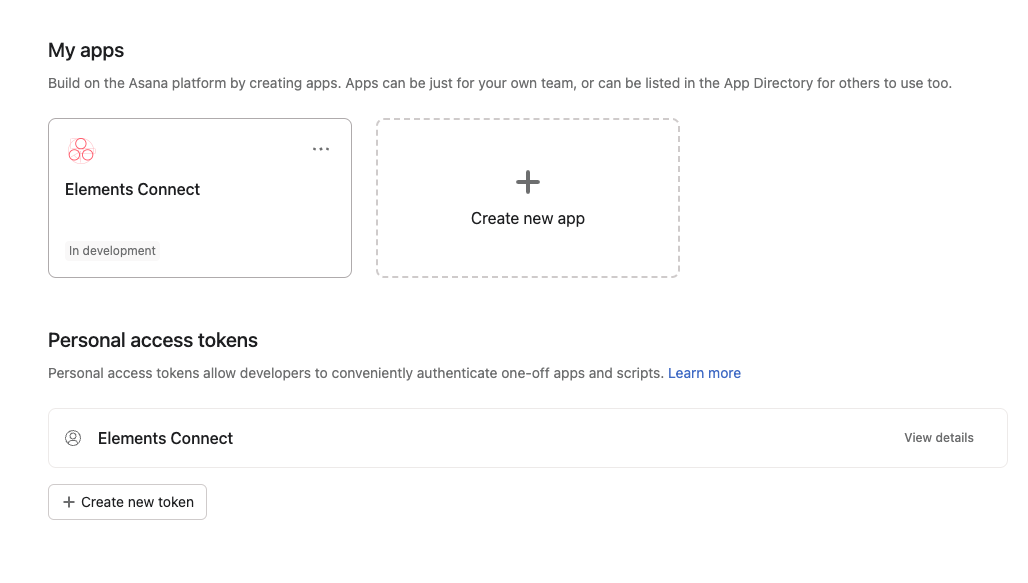
Generate a token on Asana
-
Log in to your Asana account.
-
Navigate to your profile settings > Apps > View Developper Console
-
Create a new app
-
Generate a Personal Access Token (PAT)
-
Configure Asana as a Datasource in Elements Connect
-
Go to Elements Connect Administration:
-
In Jira, navigate to the Elements Connect administration panel.
-
Select the "Data Sources" tab and click "Create data source."
-
-
Choose REST API as the Data Source Type:
-
Name your datasource (e.g., "Asana").
-
For the API Base URL, enter:
https://app.asana.com/api/1.0. -
Provide an API Documentation link for reference: Asana API Documentation.
-
-
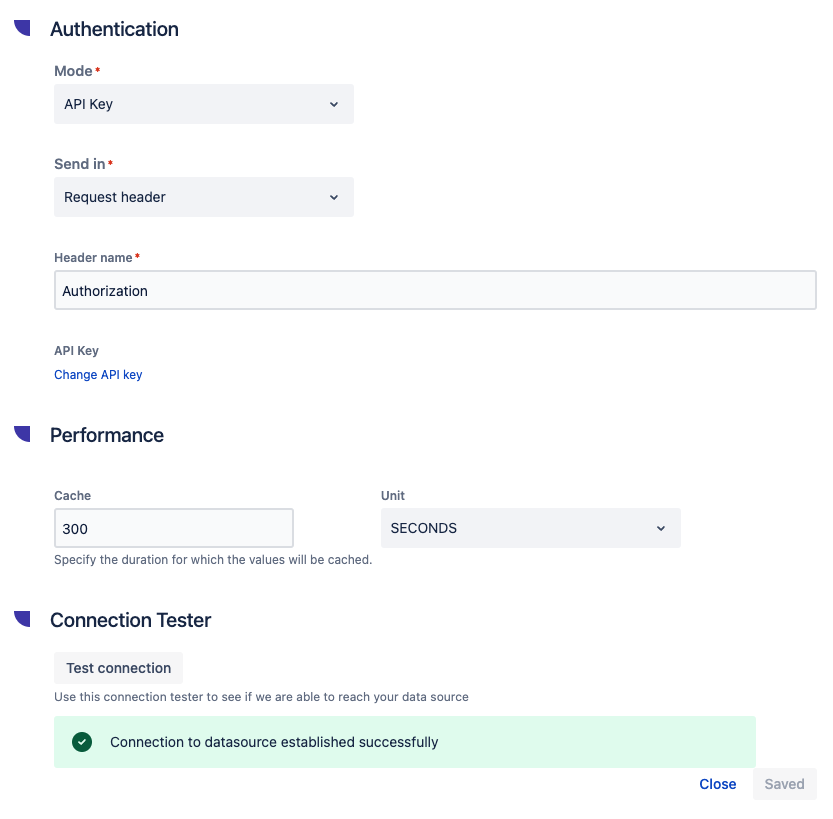
Set Authentication:
-
Choose the "API Key" authentication mode.
-
Set the header name as
Authorization. -
Add the value
Bearer YOUR_PAT(replaceYOUR_PATwith your Asana PAT).
-
-
Test the Connection:
-
Provide a valid API endpoint, such as
https://app.asana.com/api/1.0/projects, as the test URL. -
Test the connection to confirm it works.
-