
The need: Display customers' information coming from a remote CRM
It is common for companies to use a CRM system to manage customer data and interactions.
When customers submit a support request in Jira Service Management, it can be helpful to fill relevant information such as contracts, contacts or accounts. It results in easy tracking and resolution by agents.
To avoid data duplication, manual input errors and ensure that customer data is always up to date, it is important to link the CRM system with Jira. This integration can save time and resources, as it eliminates the need for manual data entry and updates between the two systems.
Integrating a CRM with JSM is an efficient way to manage customer requests while keeping customer data accurate and up to date.
Solution: Use Connected items fetching Salesforce data in JSM
You can either watch the video or follow the step by step tutorial. Please keep in mind that the video only shows Elements Connect configuration. If you need assistance in configuring Salesforce, please read the first configuration step.
Prerequisites:
-
Have Salesforce as your Customer Relationship Management tool (CRM)
-
Have Elements Connect installed on your instance
Configuration steps:
Configure an app in Salesforce
Prefer a video? Follow along in our video tutorial How to create a connected app in Salesforce for Elements Connect for Jira
Step 1: Log in to your Salesforce account.
Step 2: Navigate to the Salesforce Setup by clicking on the gear icon in the upper-right corner and selecting "Setup" from the dropdown menu.
Step 3: Navigate to “Apps” → “External Client Apps” → “Settings”, and activate the “Allow creation of connected apps“ option
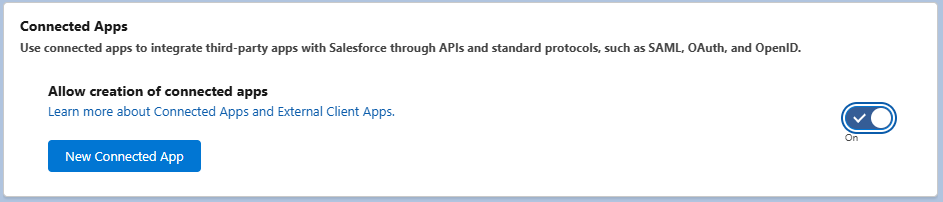
Then, click on “New Connected App”
Step 4: Fill in the required information for the connected app:
-
Connected App Name: Provide a name for your app.
-
API Name: The API name will be auto-populated based on the connected app name.
-
Contact Email: Enter your email address.
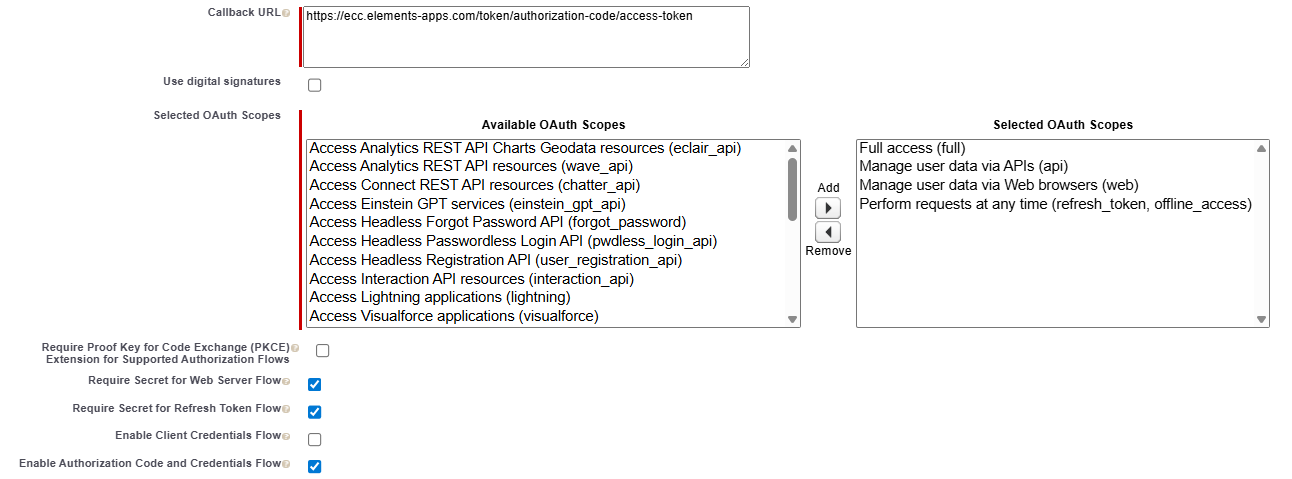
Step 5: Under the "API (Enable OAuth Settings)" section, configure the following settings:
-
Enable OAuth Settings: Check this option to enable OAuth for your app.
-
Callback URL: Enter https://ecc.elements-apps.com/token/authorization-code/access-token
-
Selected OAuth Scopes: Choose the required OAuth scopes based on the permissions your app needs (In this example, we select the “full” scope).
Always make sure to have at least these permissions selected:-
Full access (full)
-
Manage user data via APIs (api)
-
Manage user data via Web browsers (web)
-
Perform requests at any time (refresh_token, offline_access)
-
-
Disable the “Require Proof Key for Code Exchange (PKCE)”
-
Activate the “Enable Authorization Code and Credentials Flow” option
Step 6: Click on the "Save" button to create the connected app.
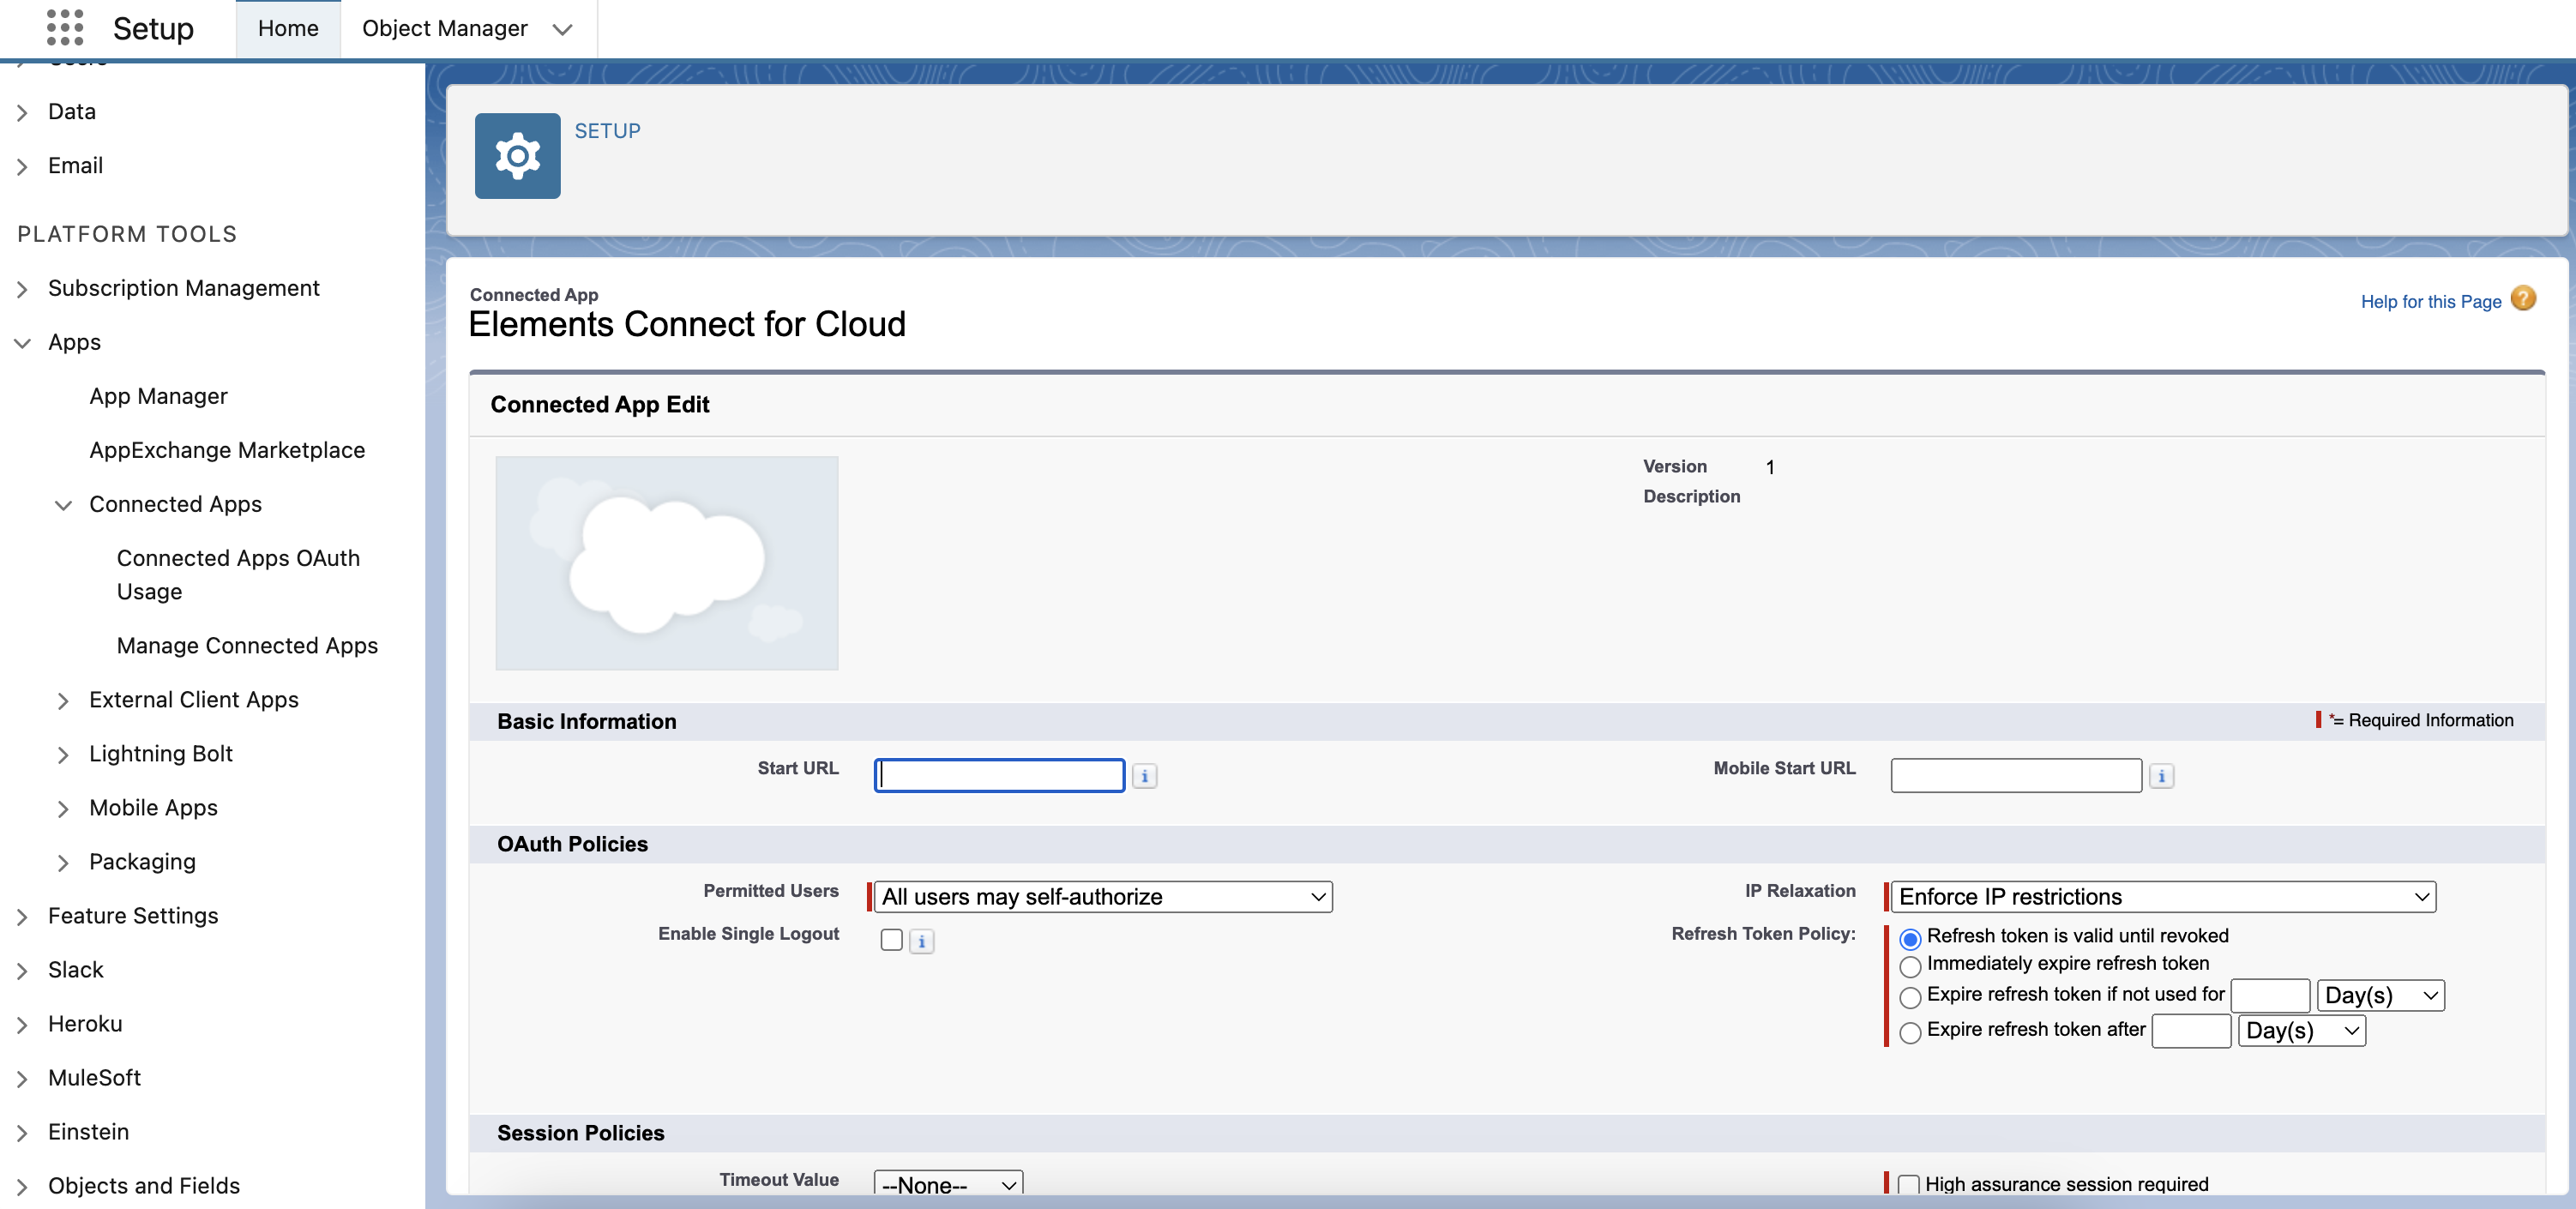
Step 7: If you do not want to refresh your token manually, click on “Manage”, then “Edit policies” in your Connected app, and make sure refresh token policy is set on "Refresh token is valid until revoked"
Step 8: Go to “App Manager”, find your app and access to “View”:

Click on “Manage Consumer Details”:
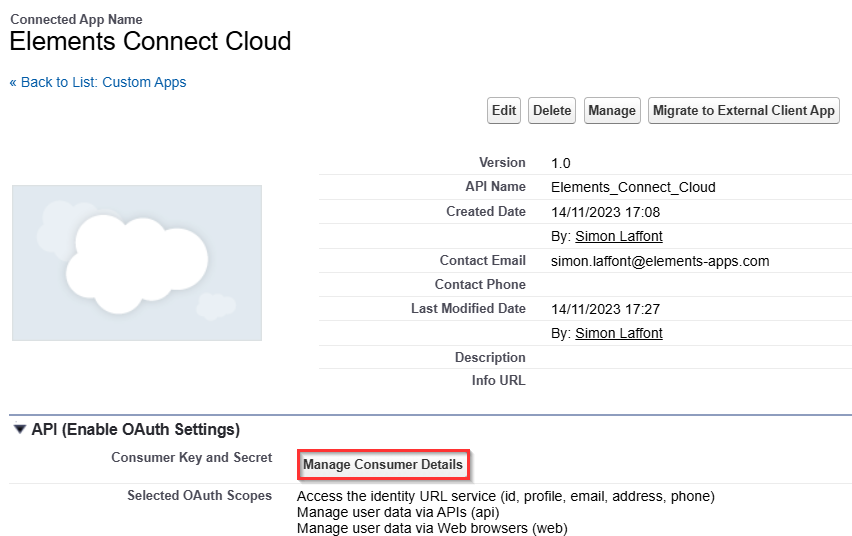
Note down the "Consumer Key" and "Consumer Secret" values. These will be used for authentication with Salesforce.
Congratulations!
You have successfully created a connected app in Salesforce. You can now use the consumer key and consumer secret to integrate your app with Salesforce APIs and Jira using Elements Connect.
Configure a data source in Elements Connect
Make sure you have Elements Connect installed on your Jira instance.
→ Go to Elements Connect administration by clicking on “Apps”, then Elements Connect
Create a REST API data source
Click on “Create datasource” and select REST API.

Enter a name for your datasource, then configure the relevant fields:
-
Base URL: https://yourcustomurl.my.salesforce.com/
-
API Documentation: https://developer.salesforce.com/docs/atlas.en-us.api_rest.meta/api_rest/intro_rest.htm
-
Authentication
-
Authentication mode: OAuth 2
-
Grant type: Authorization code
-
Auth URL: https://login.salesforce.com/services/oauth2/authorize
-
Access Token URL: https://login.salesforce.com/services/oauth2/token
-
Client ID: Copy the Consumer Key from your Salesforce app
-
Client Secret: Copy the Consumer Secret from your Salesforce app
-
Credentials: Send in request body
-
Scope: Add “full” (or any other access you've decided to grant) and “refresh_token” (not included in any other scope, mandatory to avoid manual refresh of tokens)

-
Be aware that the scope configured in your datasource must match the Selected OAuth Scopes you have defined in your Salesforce app.
Specifically, if the “Full access (full)” scope is not included in the Salesforce app, the “full” scope should not be added in Elements Connect either.
If you are using a Salesforce sandbox environment, the Authentication URL and Access Token URL change. Please use the following:
Click on Get access token. You will then be prompted to enter your Salesforce credentials and allow the app to communicate with Elements Connect
Once the access token status is valid ( VALID ACCESS TOKEN ), you can save your data source.
Configure Connected items in Elements Connect
In this part, we will configure 2 dependent Connected items:
-
Accounts: A single select list that fetches every accounts from Salesforce and display their name
-
Contact opportunities: A read-only that displays dynamically every opportunities Amount and Name from the previously selected Account
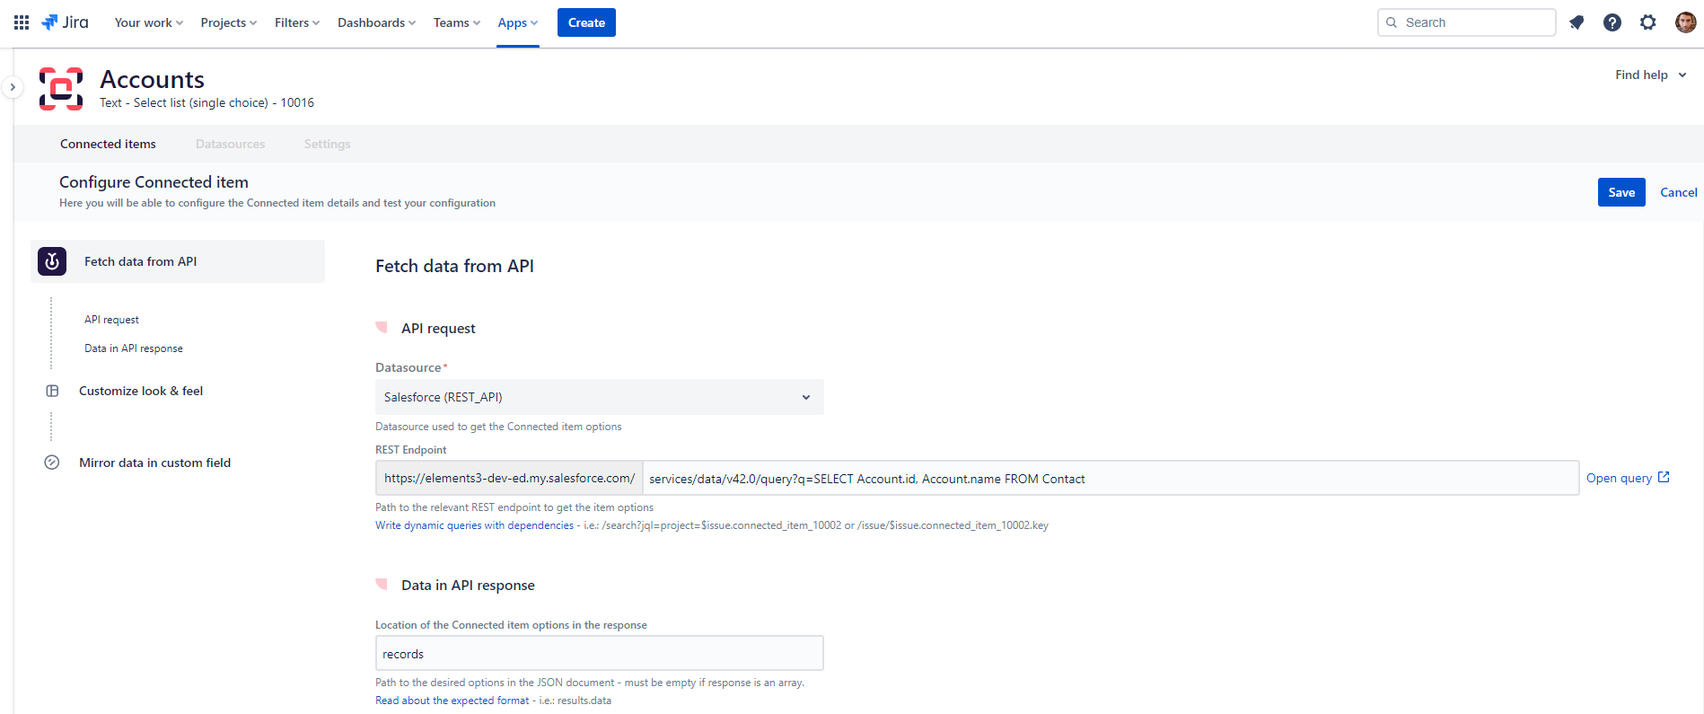
Accounts
Fetch data from API
In the API request, write the following in the endpoint:
-
/services/data/v42.0/query?q=SELECT http://Account.id , Account.name FROM Contact
In the Data in API response, enter the following location:
-
records
Note on using special characters with the Salesforce API:
When using the % wildcard (allowing partial matching) along with a dependency on a variable such as $userInput (https://doc.elements-apps.com/elements-connect-cloud/dependencies-on-what-the-user-is-typing) to filter results from your Salesforce REST API, the % character needs to be URL-encoded as %25 for the query to work.
Example:
/services/data/v42.0/query?q=SELECT Name FROM Account WHERE Name LIKE '%25$userInput%25'
Customize look & feel
The previous query’s response has the following structure:
As we want to only display the names of Accounts, we configure our freemarker template accordingly:
-
${row.Account.Name}

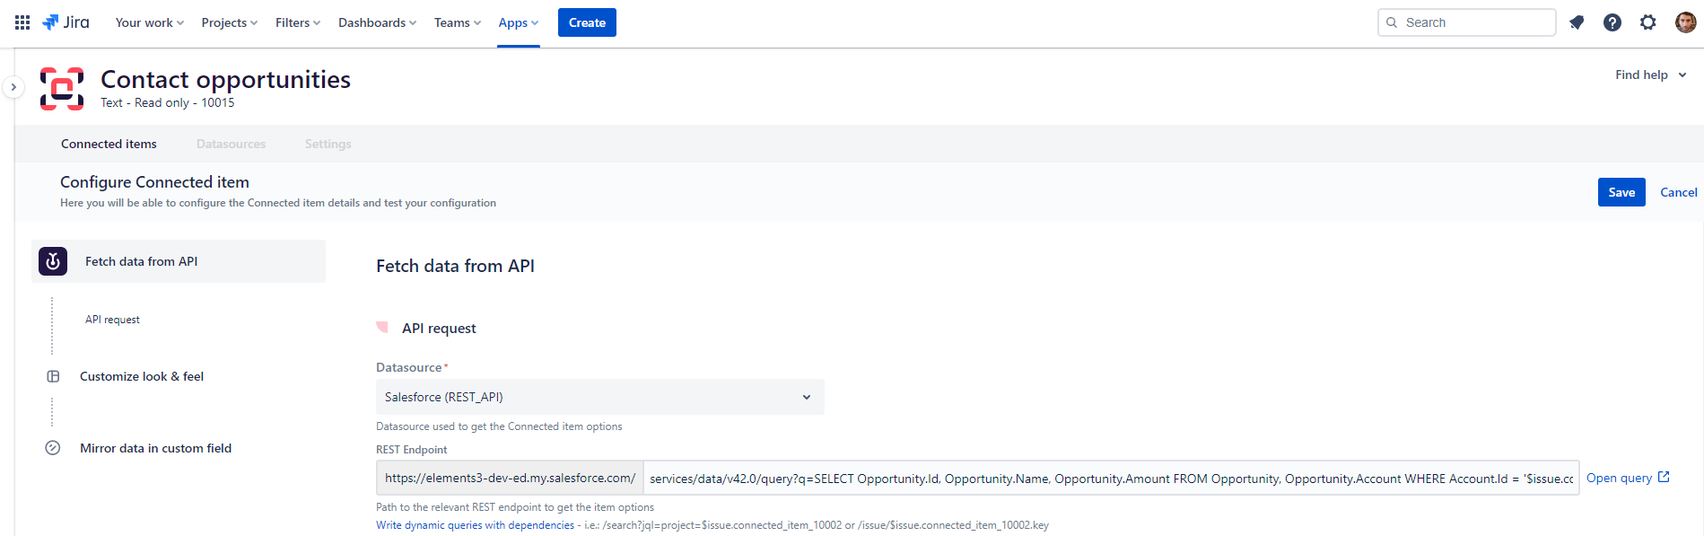
Contact opportunities
Fetch data from API
In the API request, write the following in the endpoint:
/services/data/v42.0/query?q=SELECT Opportunity.Id, Opportunity.Name, Opportunity.Amount FROM Opportunity, Opportunity.Account WHERE account.id ='$issue.connected_item_10024.Account.Id'
$issue.connected_item_10024.Account.Id is to be understood as followed:
For a given issue, it will be replaced by the Account ID of the selected Account (which is the connected item with the ID 10024 in our case)
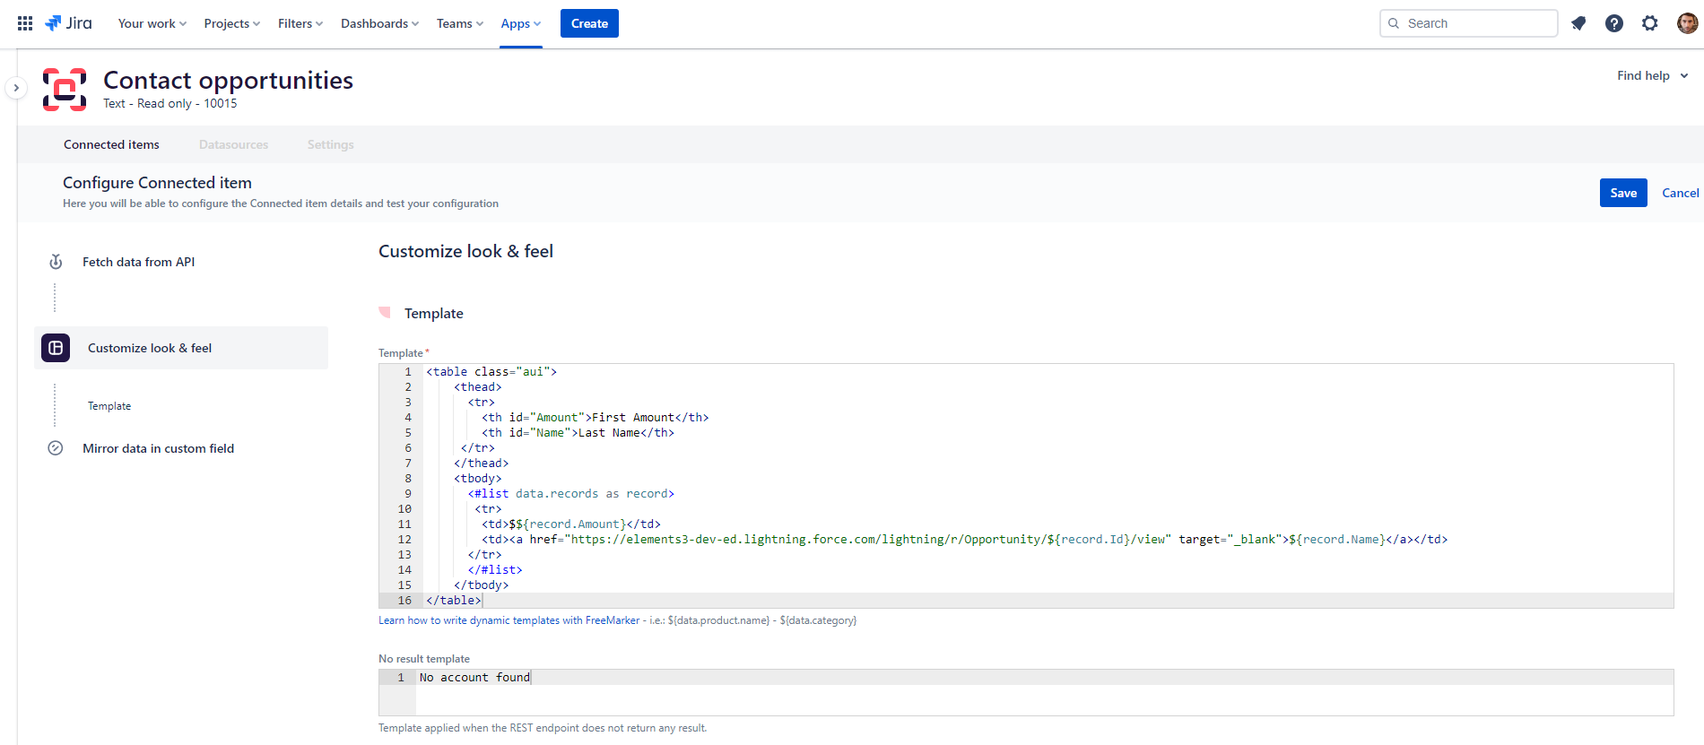
Customize look & feel
The previous query’s response has the following structure for a given account (number of records can change depending on the account)
We want to display dynamically every opportunities for a given account in a table. As freemarker handles and interpret HTML, you can configure the template as the following:
Associate to a project
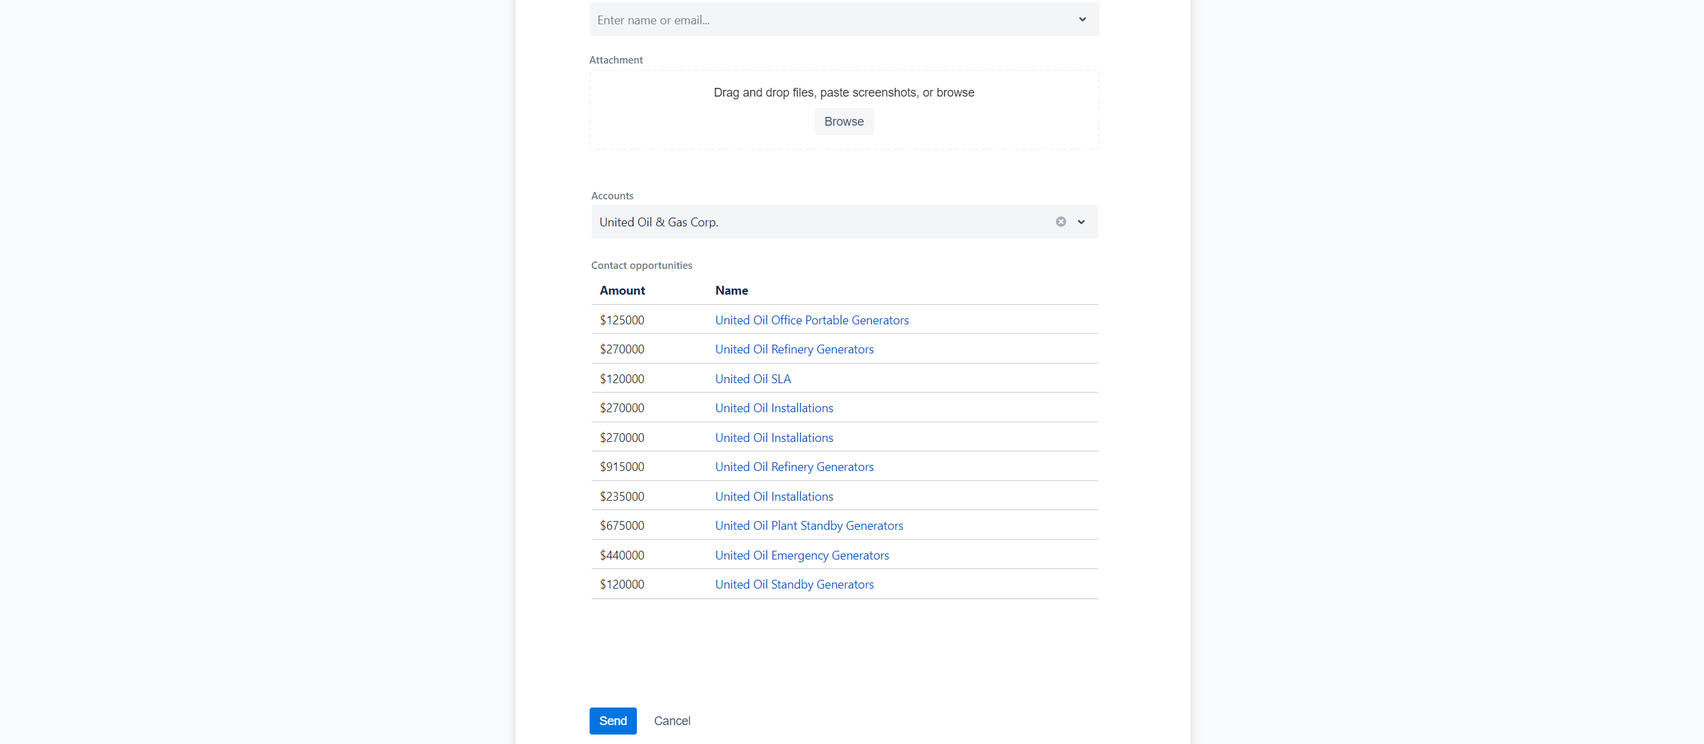
You can now associate your newly created Connected items to a project and test them in real life!
With this tutorial using our Authorization code grant type feature, you can give access to external customer data stored in Salesforce automatically in Jira issues. Bring both tools closer together and decrease errors caused by manual entries.