
The need: Grant access to customers to applications managed in Okta
In this context, we use a JSM portal to manage application access requests from users or customers, and Okta as access management tool.
When requesting for a new application access on the Jira portal, users must select which app they need to have access to. This means that Jira administrators must maintain a list with application names in order to keep it synchronized with what’s configured in Okta. In addition, agents don’t know if the user has the rights to request this access, or how to contact their manager easily.
We would like to:
-
populate a select list with the active applications stored in Okta and keep it synchronized
-
provide Jira agents with customer information stored in Okta (e.g. phone number, job title, manager)
Solution: Populate Connected items with Okta application names and user information
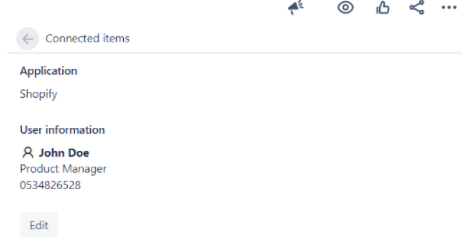
We use Elements Connect to fetch directly applications from Okta by configuring a direct connection between Jira and Okta. We also provide Jira agents with user information stored in Okta, such as the user’s phone number or their job title.
Okta application selection with user information automatically calculated
How to configure an application selector and fetch logged-in user information directly from Okta
Prerequisites:
-
Have Okta as your access management tool
-
Have Elements Connect installed on your instance
Configuration steps
The configuration is done in 4 steps:
-
Generate an API key in Okta to be able to connect Jira and Okta with Elements Connect
-
Create and configure the datasource in Elements Connect
-
Create and configure the Connected items in Elements Connect to retrieve Applications and User information from Okta
-
Associate the Connected items to a request type in the JSM portal
Overview of Okta’s configuration
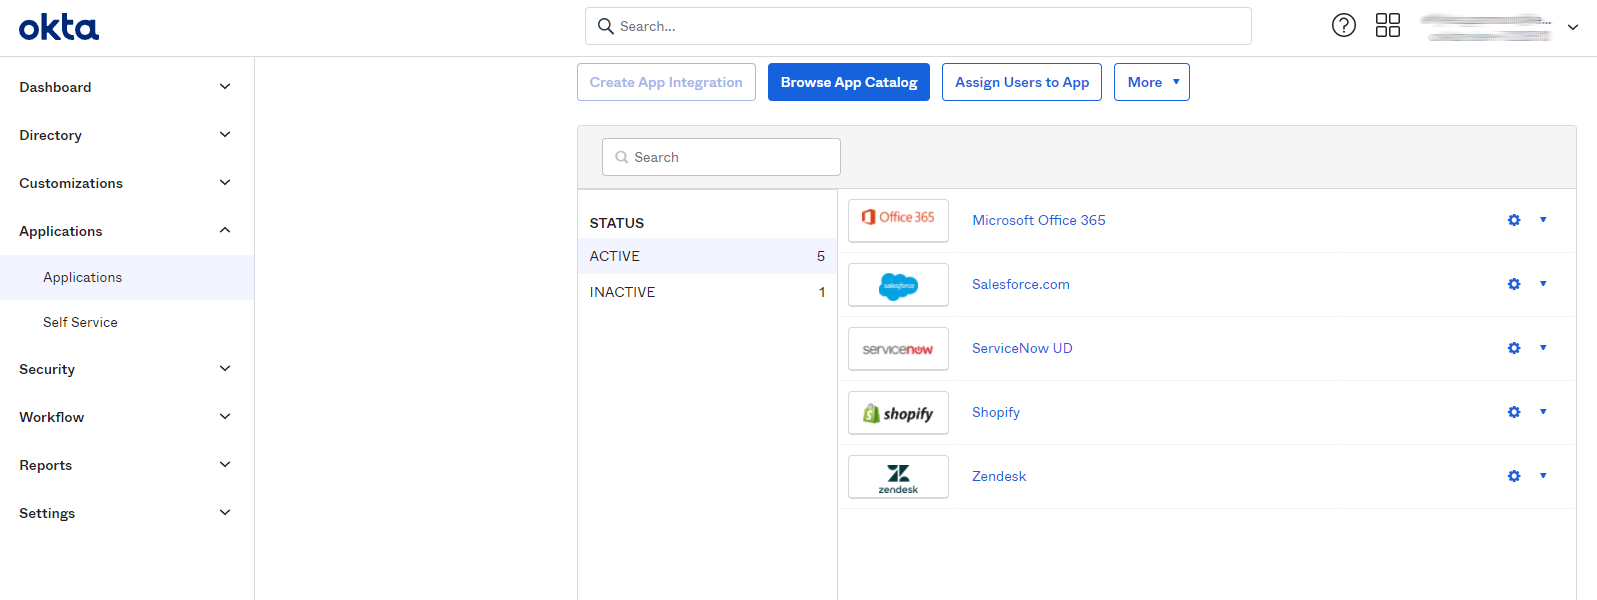
You have configured application integrations in Okta.
To give user access to these aforementioned applications, they need to be created in the People section of Okta (https://{oktaURL}.okta.com/admin/users)
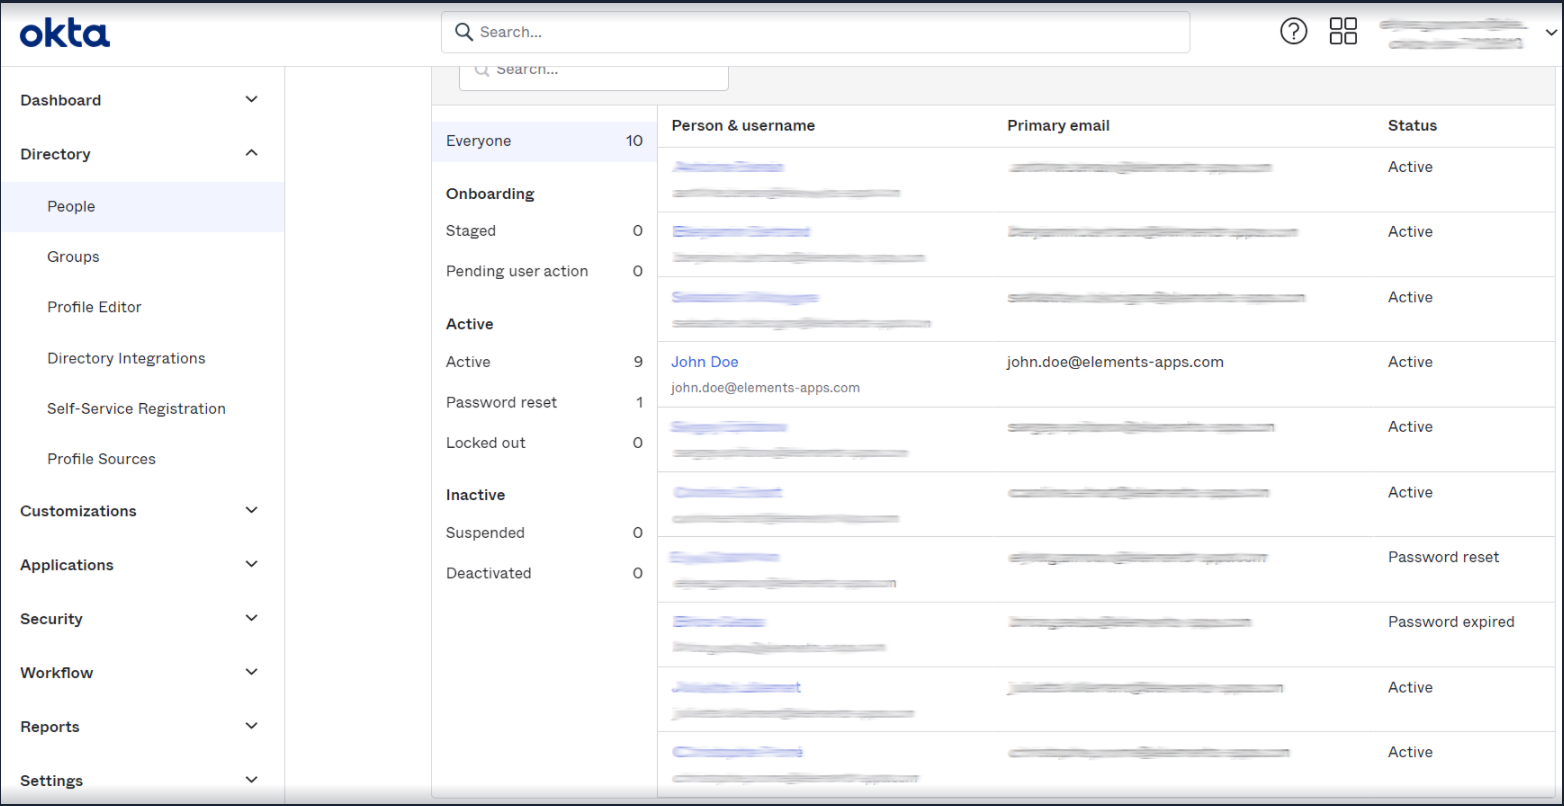
Each user has a profile listing different attributes such as:
-
First name
-
Last name
-
Title
-
Phone number
-
Manager
-
…
Steps
1 - Generating an API token in Okta
This tutorial uses the connection to Okta’s REST API using an API key that can be generated in the security section: https://{oktaURL}.okta.com/admin/access/api/tokens
Click on “Create Token” and follow the steps.
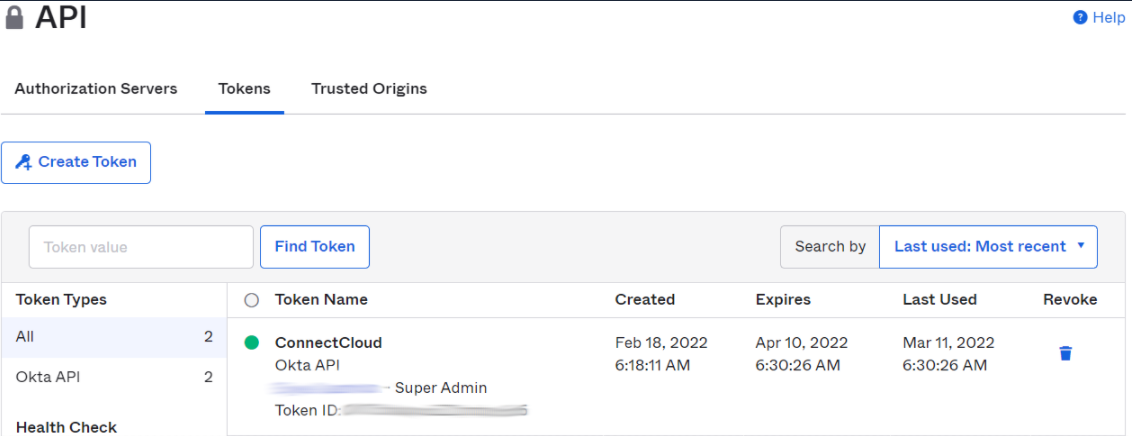
Don’t forget to copy the API token, you won’t be able to retrieve it after exiting the dialog
Elements Connect configuration
2 - Configuring the datasource
Make sure you have Elements Connect installed on your Jira instance.
→ Go to Elements Connect administration by clicking on “Apps”, then Elements Connect

The first step is to create a REST API datasource.
Click on “Create datasource” and select REST API.

Enter a name for your datasource, then configure the relevant fields:
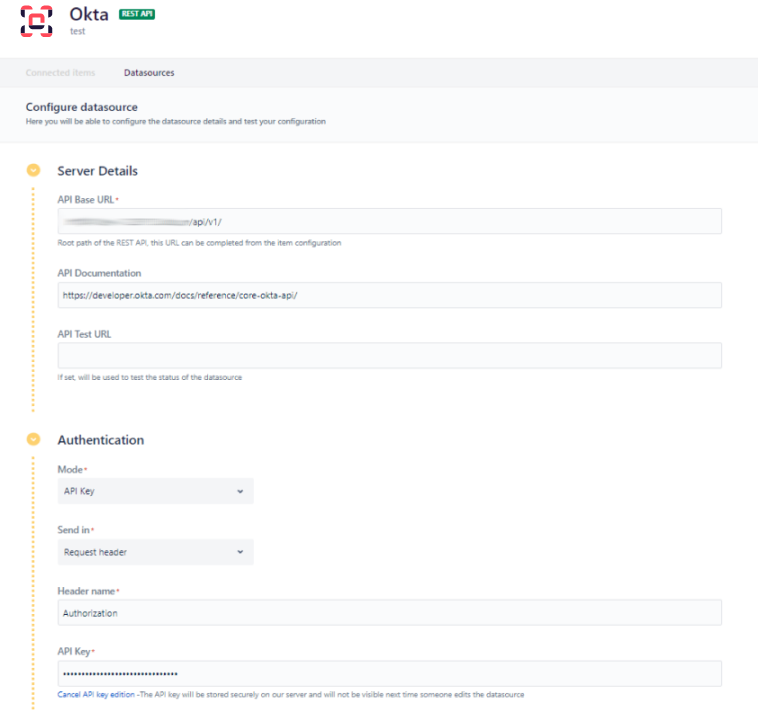
-
Base URL: https://{oktaURL}.okta.com/api/v1/
-
API Documentation:

-
Authentication mode: API Key
-
Send in: Request Header
-
Header name: Authorization
-
API Key: SSWS {API Token}
You can now save your datasource configuration.
3 - Configuring the connected items 'Application' & 'User information'
What is a Connected item? As our official documentation mentions, a Connected item can be seen as a kind of connected custom field.
In this tutorial, we are going to create 2 Connected items:
-
Application: A select list that retrieves all the active applications configured in Okta
-
User information: A read-only Connected item that displays useful user information such as their name, job title and phone number
Application
Create one Connected item called “Application” of type Select list. Set Okta (or the name you gave to the previously configured datasource) as the Connected item datasource.
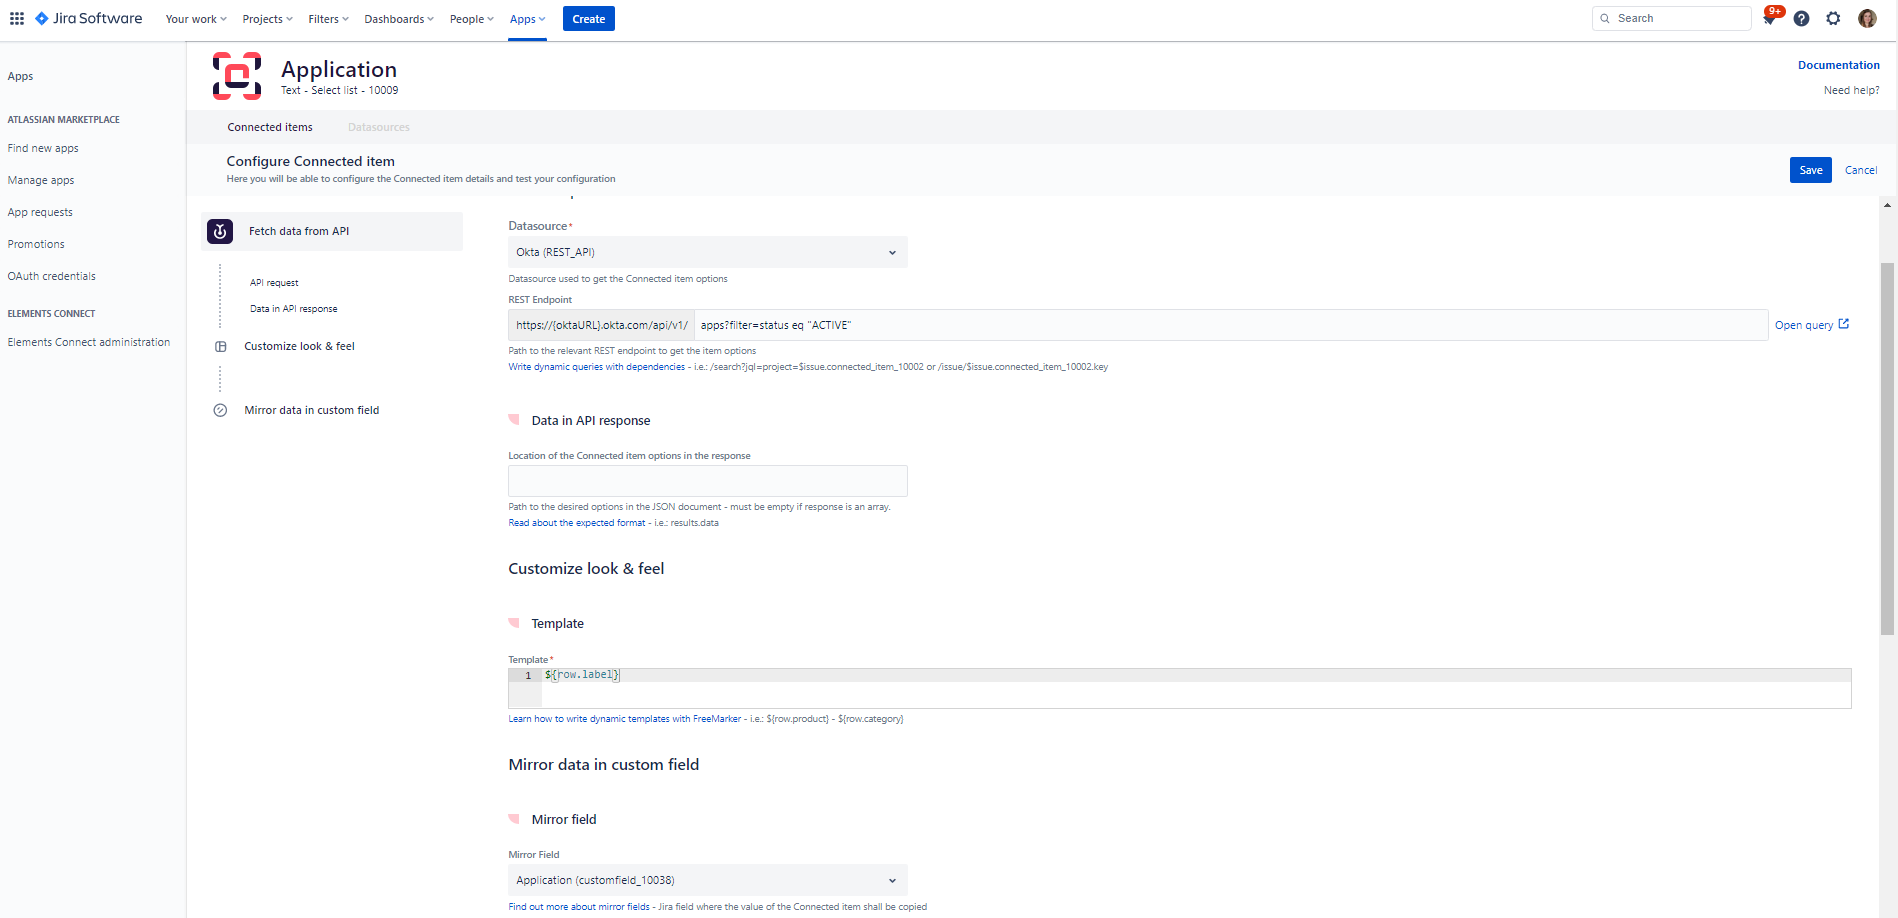
-
REST endpoint: apps?filter=status eq "ACTIVE" (retrieve only active applications)
-
Leave location of the Connected item options in the response empty
-
Display template: ${row.label}
User information
Create a second Connected item called “User information” of type Read Only. Set Okta (or the name you gave to the previously configured datasource) as the Connected item datasource.
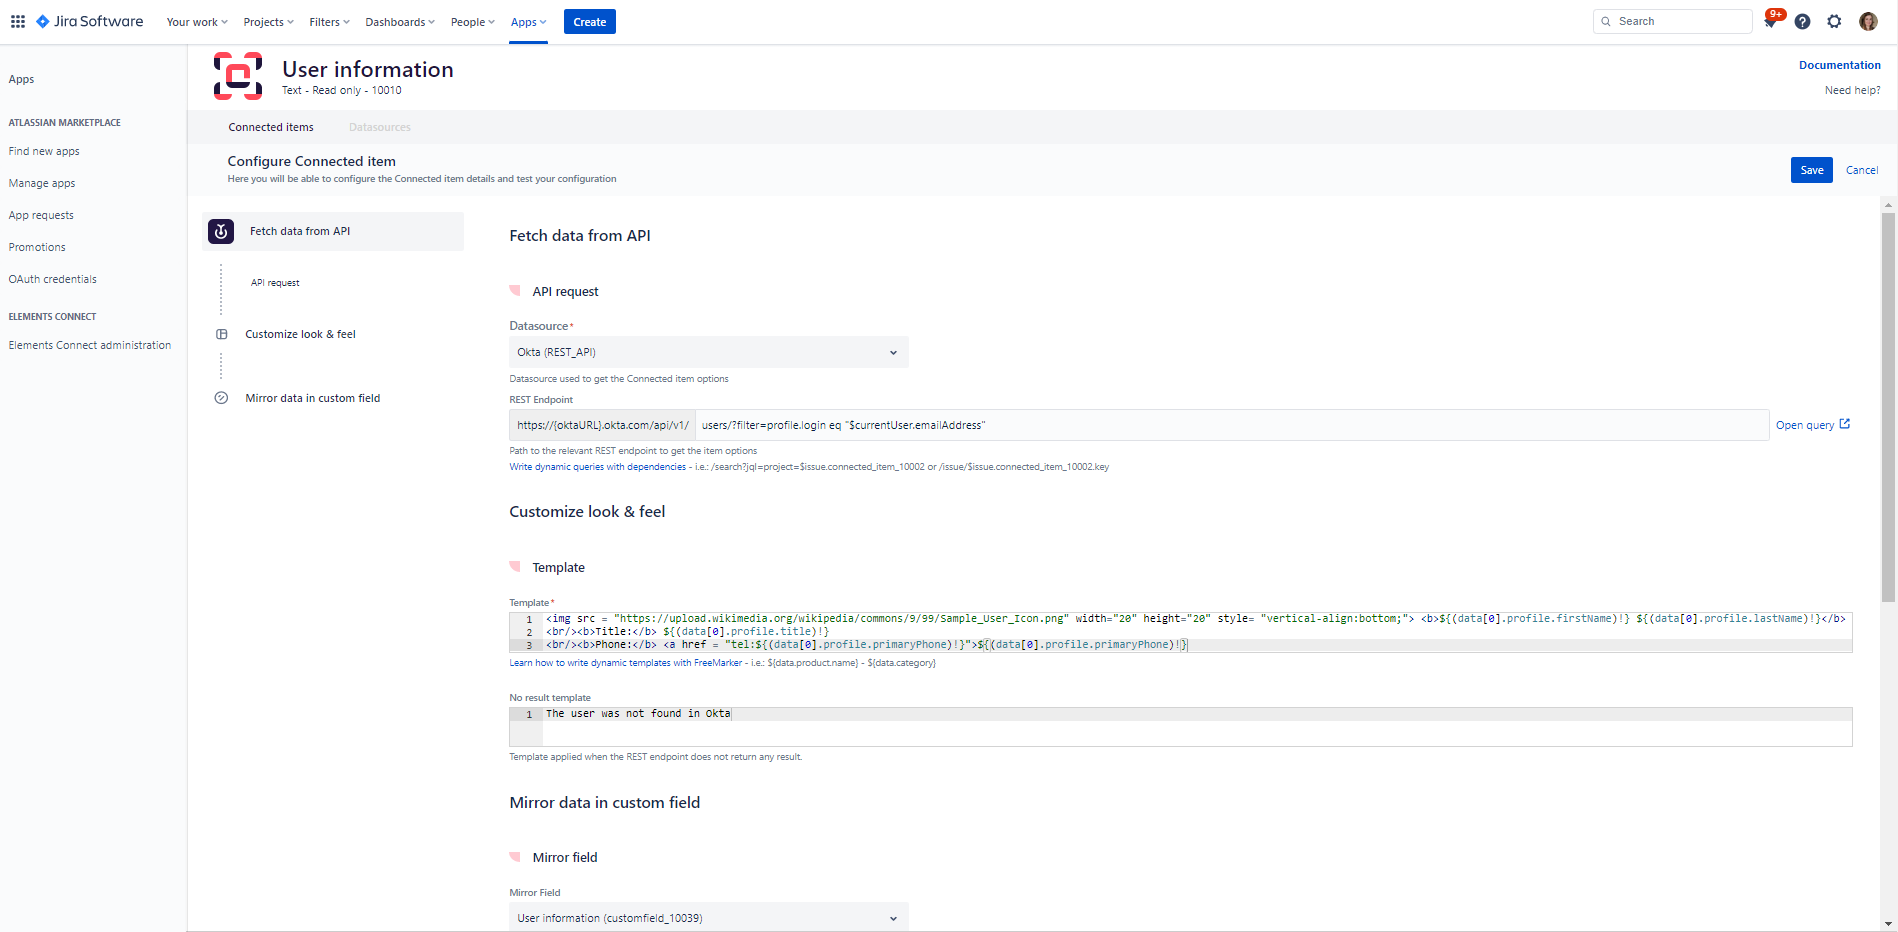
-
REST endpoint: users/?filter=profile.login eq "$currentUser.emailAddress" (get the Okta profile for the logged-in user)
-
Display template:
JavaScript<img src = "https://upload.wikimedia.org/wikipedia/commons/9/99/Sample_User_Icon.png" width="20" height="20" style= "vertical-align:bottom;"> <b>${(data[0].profile.firstName)!} ${(data[0].profile.lastName)!}</b> <br/><b>Title:</b> ${(data[0].profile.title)!} <br/><b>Phone:</b> <a href = "tel:${(data[0].profile.primaryPhone)!}">${(data[0].profile.primaryPhone)!}You may notice the following syntax in the display template: ${(data[0].profile.title)!}
In the case when data[0].profile.title has no value in Okta, the template may generate an error. The exclamation mark prevents the template from failing, replacing the no value by an empty string.
-
No result template: The user was not found in Okta
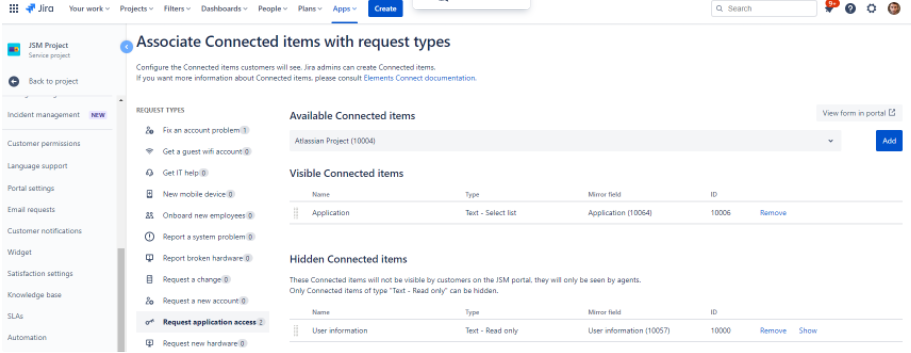
4 - Adding connected items to Jira Service Management project
Go to your Jira Service Management project administration, and find the Connected item section.
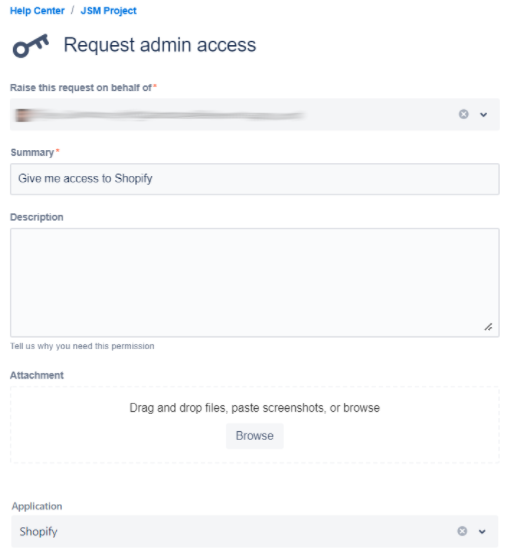
Add the two Connected items to the desired request type (for example: Request admin access)
Set the read-only Connected item to hidden. Why?
Setting a read only Connected item to hidden may be useful when agents need to see information that are irrelevant to customers on the portal. Therefore, the Connected item won’t be displayed on the portal, but shown in the issue Glance view, providing agents with more context.
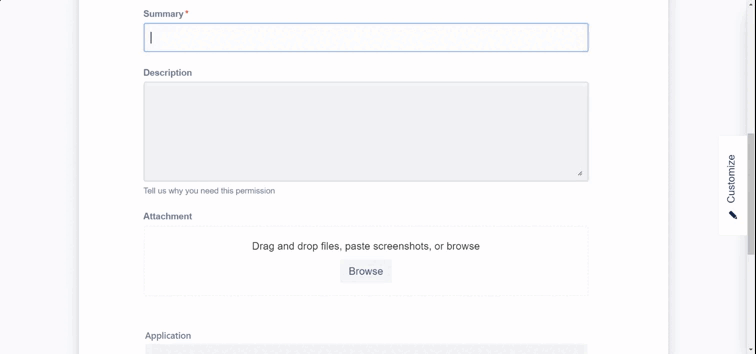
Open form in portal (you can use the button in the top right of your screen)
When you create the request, you can see that in the agent view, two Connected items have been calculated:
You can adapt this use case by fetching different data directly from Okta, and use our in-app custom dependencies. If you need any additional assistance, feel free to reach out to our support team or schedule a call with our Product Management team!