Get customer information and deals from Hubspot into Jira issues
The need: Get customer information and associated deals from HubSpot
In this context, we use a JSM portal to manage RFP (request for proposal) requests from sales representatives on behalf of leads tracked in HubSpot.
When creating a RFP request on the Jira Service Management portal, users must select which customer they are raising the request for. This means that Jira administrators must maintain customer records and associated deals up to date in order to keep it synchronized with what’s configured in HubSpot. Furthermore, agents in charge of processing these requests - typically pre-sales teams - want to know details about the customer or any existing associated deals without having to log in to HubSpot.
We would like to:
populate a select list with customer stored in the CRM tool, HubSpot, and keep it synchronized
provide pre-sales teams with customer information stored in HubSpot (contact details, associated deals, etc.)
Solution: Populate connected items with customer names and related information
We use Elements Connect to directly fetch customer names from HubSpot by configuring a direct connection between Jira and HubSpot. We also provide Pre-sales teams with customer information stored in HubSpot, such as the customer name, e-mail, job title, and deals associated to this customer.

How to configure a customer selector and fetch customer information and associated deals from HubSpot
Prerequisites
Have HubSpot as your Customer Relationship Management tool
Have Elements Connect installed on your instance
Configuration steps
The configuration is done in 4 steps:
Generate an API key in HubSpot to be able to connect Jira and HubSpot with Elements Connect
Create and configure the HubSpot datasource in Elements Connect
Create and configure the Connected items in Elements Connect to retrieve customers, contact details and deals from the HubSpot datasource
Associate the Connected items to a request type in your Jira Service Management project
Hubspot configuration overview
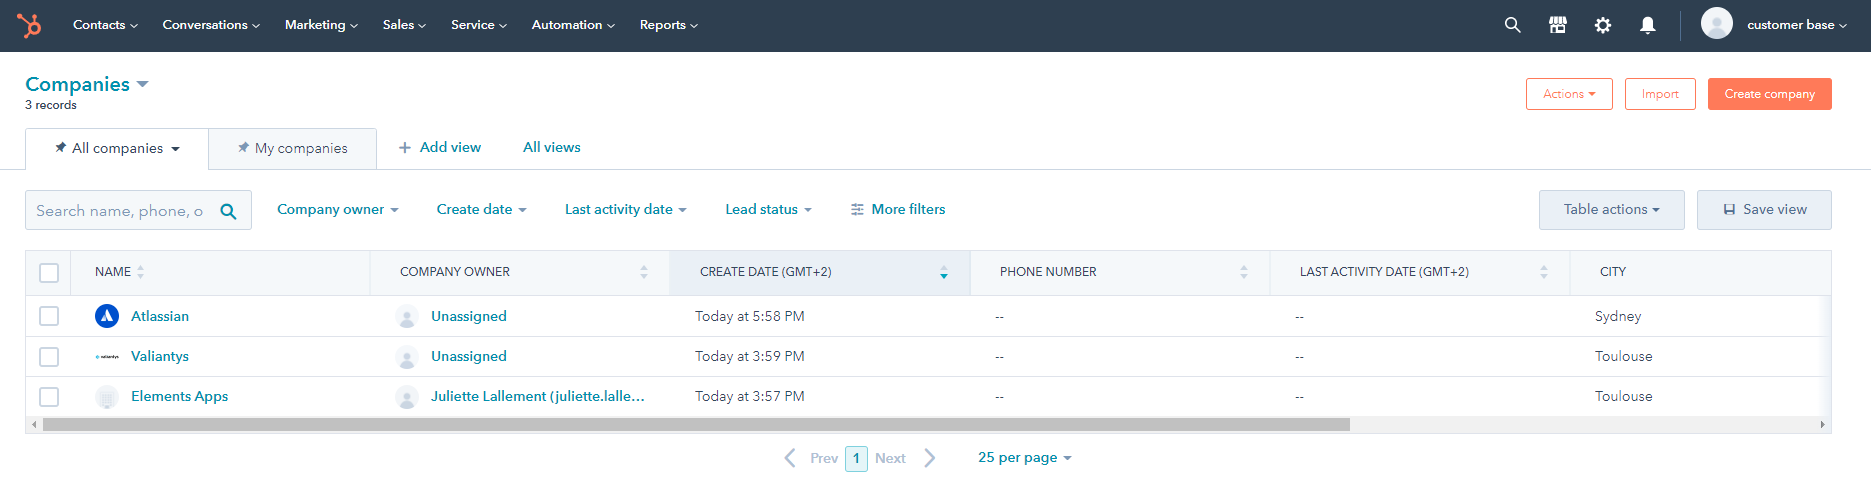
You have existing companies (customers) in HubSpot.
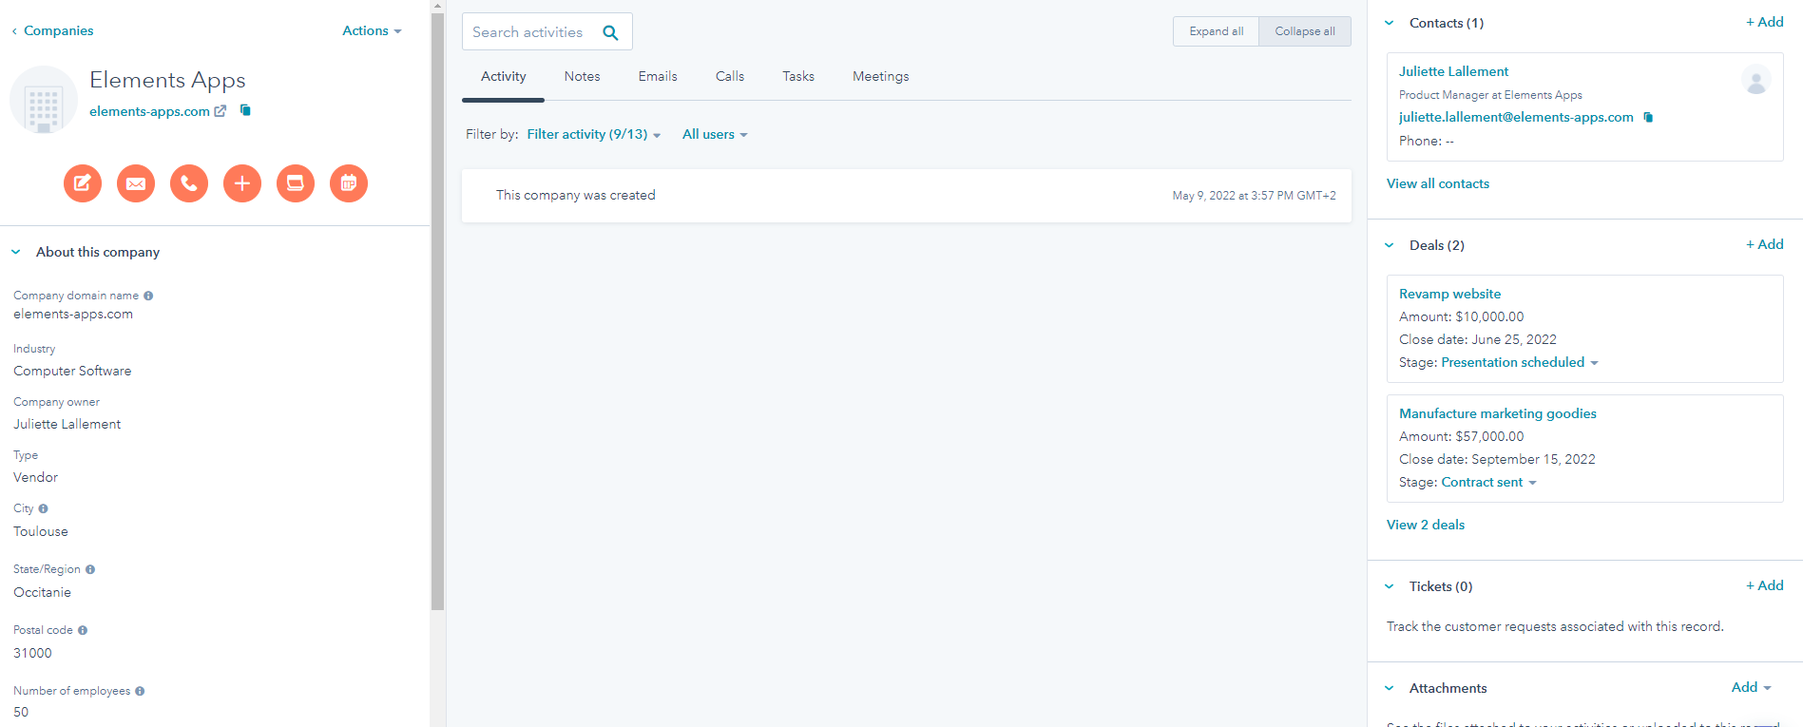
Each company contains various information:
Details (website, industry, company owner, address, number of employees, etc.)
Contact details (name, e-mail, job title, etc.)
Deals (name, amount, close date, stage, etc.)
Steps
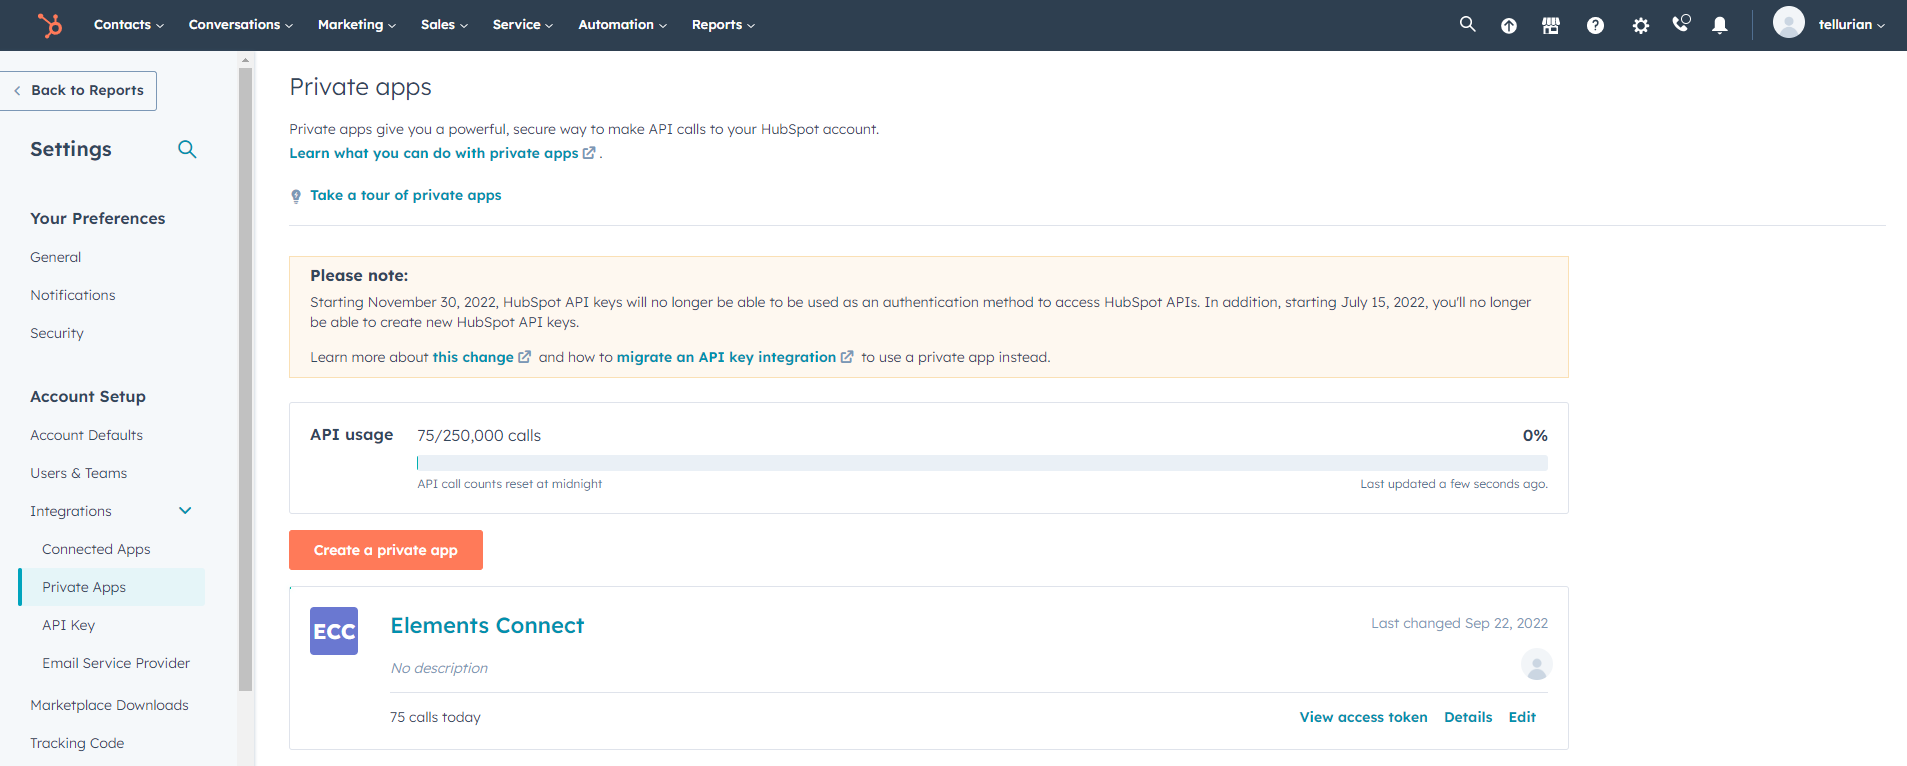
1- Generating an API token in HubSpot
This tutorial uses the connection to HubSpot REST API using an API key that can be generated from the Settings > Integrations > Private apps. You can find more information on how to generate a HubSpot API key here.
![]() Note that you need to have Super Admin permissions to access a HubSpot account’s private apps configuration.
Note that you need to have Super Admin permissions to access a HubSpot account’s private apps configuration.
2 - Configuring HubSpot datasource in Elements Connect
 Make sure you have Elements Connect installed on your Jira instance.
→ Go to Elements Connect administration by clicking on “Apps”, then Elements Connect

The first step is to create a REST API datasource.
→ Click on “Create datasource” and select REST API.

→ Enter a name for your datasource, then configure the relevant fields:

- Base URL: https://api.hubapi.com/
API Documentation: API Overview | HubSpot API
Authentication mode: API Key
Send in: Query parameter
Parameter name: hapikey
API Key: <your API key generated in step 1>
You can now save your datasource configuration.
3 - Configuring the connected items “Customer”, “Contact details” and “Deals”
What is a Connected item? As our documentation mentions, a Connected item can be seen as a kind of connected custom field.
In this tutorial, we are going to create 3 Connected items:
Customer: A select list that retrieves all customers configured in HubSpot
Contact details: A read-only that displays the contact first name, last name and e-mail
Deals: a select list that retrieves all deals associated to the customer selected
Customer
Create one Connected item called “Customer” of type Select list. Set HubSpot (or the name you gave to the datasource configured previously) as the Connected item datasource.

REST endpoint:
REST endpoint - Customer
paged?properties=name (retrieves only customer names)CODELocation of the Connected item options in the response: companies
Display template:
Display template - Customer
${row.properties.name.value}CODE
Contact details
Create a second Connected item called “Contact details” of type Read Only. Set HubSpot (or the name you gave to the datasource configured previously) as the datasource.

REST endpoint:
REST endpoint - Contact details
$issue.connected_item_10072.companyId/contacts?properties=nameCODE
Display template:
Display template - Contact details
<table class="aui">
    <thead>
      <tr>
        <th id="firstname">First Name</th>
        <th id="lastname">Last Name</th>
        <th id="e-mail">E-mail</th>
     </tr>
    </thead>
    <tbody>
      <#list data.contacts as contact>
        <#list contact.properties as details>
         <#if details.name =="firstname">
          <#assign firstname = details.value>
        <#elseif details.name =="lastname">
          <#assign lastname = details.value>
         </#if>
        </#list>

        <#list contact.identities as email>
          <#list email.identity as address>
            <#if address.type =="EMAIL">
              <#assign EMAIL = address.value>
            </#if>
          </#list>
        </#list>

      <tr>
        <td>${(firstname)!}</td>
        <td>${(lastname)!}</td>
        <td><a href="mailto:${(EMAIL)!}">${(EMAIL)!}</a></td>
      </tr>
      </#list>
    </tbody>
</table>Deals
Create a third Connected item called “Deals” of type Select list. Set HubSpot (or the name you gave to the datasource configured previously) as the datasource.

REST endpoint:
REST endpoint - Deals
deals/v1/deal/associated/company/$issue.connected_item_10072.companyId/paged?&properties=dealname&properties=amount&properties=dealstage Display template:
Display template - Deals
<table class="aui">
  <thead>
    <tr>
      <th>Name</th>
      <th>Amount</th>
      <th>Status</th>
    </tr>
  </thead>
  <tbody>
    <#list data.deals as deals>
      <tr>
        <td>${deals.properties.dealname.value}</td>
        <td>$${deals.properties.amount.value?number?string(",##0.00")}</td>
        <td>${deals.properties.dealstage.value}</td>
      </tr>
    </#list>
  </tbody>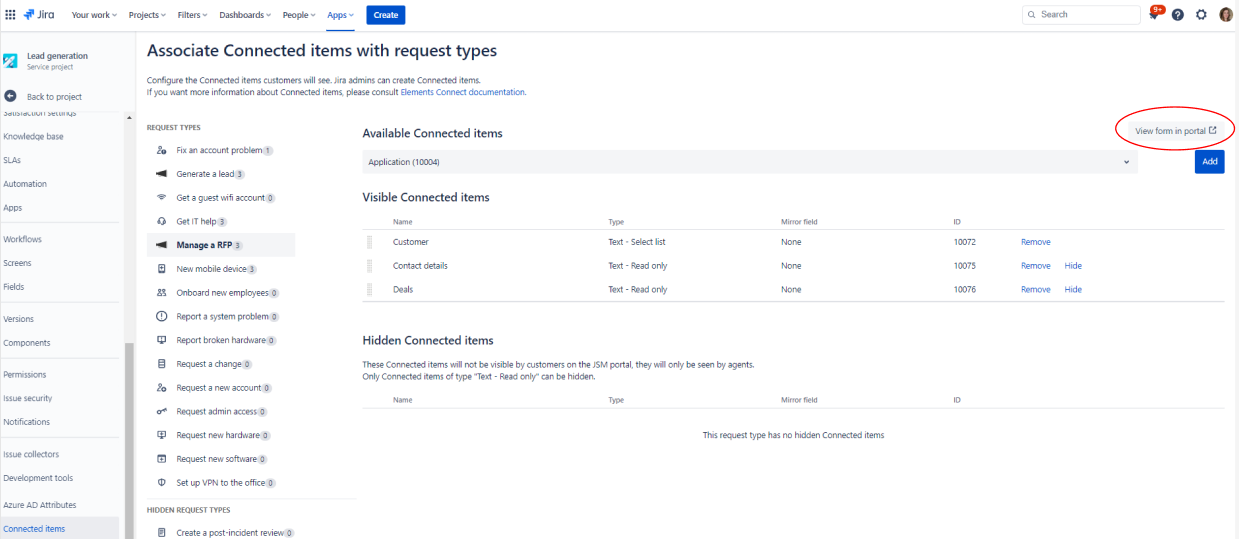
</table>4 - Associating the Connected items to a request type in your Jira Service Management project
Now that your connected items are configured properly, you can associated them to a request type in your Jira Service Management project.
Go to your Jira Service Management project administration, and find the Connected item section.
Add the three Connected items to the desired request type (for example: Initiate a RFP)
Open the request type in the customer portal (you can use the button in the top right of your screen)
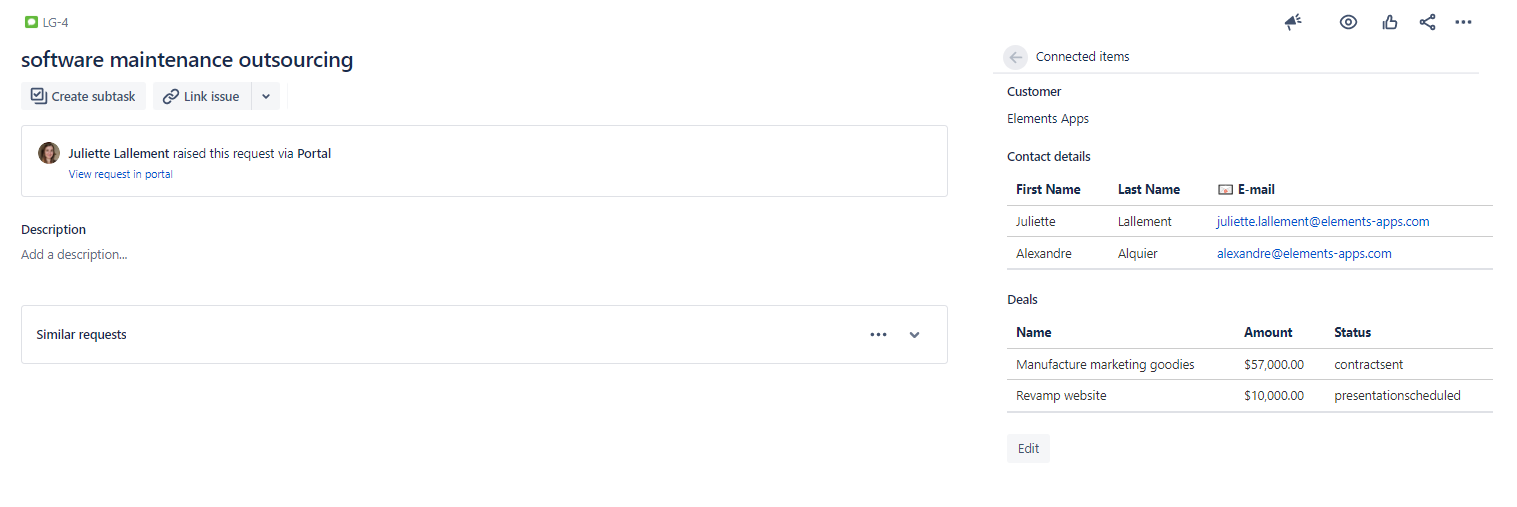
You can see your three connected items on the forms:
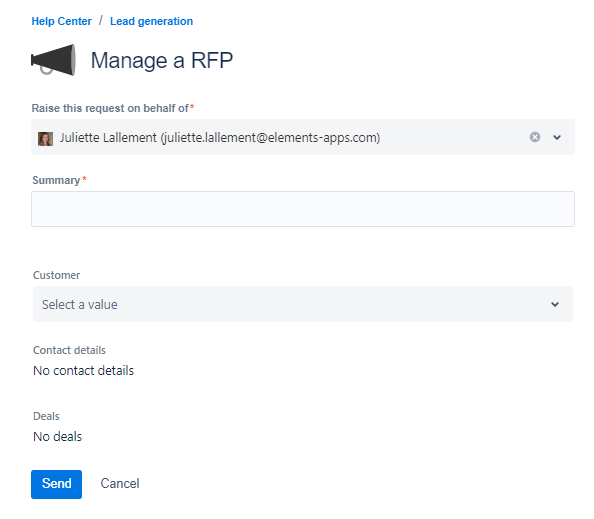
Select a customer, contact details and deals associated with this customer display automatically.
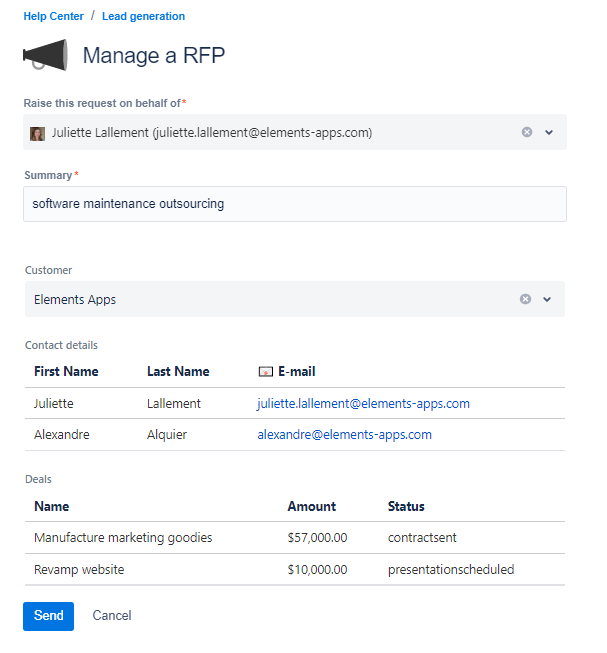
Once the request has been raised, pre-sales teams who will process the request will have the information they need: