
The need: Support teams need to have issues triaged into location-based queues
In Jira Service Management, queues help organize issues displayed for your team and represent a to-do list based on priority, pending service level agreements (SLAs), or anything else.
Some organizations may want to organize issues into queues that represent each office location. For example, an employee based in New York would get his request automatically triaged to the “New York” queue. Even more importantly, they want this triage to be done without having to ask employees to indicate their office location on the request. Instead, triage should be done automatically based on Azure Active Directory user profiles.
Solution: Use Elements Connect to fetch employees' office location and triage issues into location-based queues
Configure a connection to your Azure Active Directory using Elements Connect and fetch the reporter’s office location when a request is opened. Then leverage this value in your Jira Service Management project queues configuration to triage issues to the right place.
Prerequisites
-
Have Jira Service Management
-
Have Elements Connect installed on your instance
-
Use Azure Active Directory
Configuration steps
The configuration is done in 4 steps:
-
Configure a connection to Azure Active Directory in Elements Connect
-
Configure a Connected item to fetch the reporter's office location
-
Add a Connected item to Jira Service Management project
-
Configure location-based queues in your Jira Service Management project
Configure a connection to Azure Active Directory in Elements Connect
First off, you should create a datasource in Elements Connect to connect to Azure Active Directory.
Refer to this step-by-step tutorial to configure a datasource to Azure AD.
Configure a Connected item to fetch the reporter’s office location
The next step is to configure a read-only Connected item that fetches the reporter’s office location from the Azure AD datasource.
REST endpoint:
https://graph.microsoft.com/v1.0/users?$filter=mail eq '$currentUser.emailAddress'
This endpoint returns the following JSON:
{
    "@odata.context": "https://graph.microsoft.com/v1.0/$metadata#users",
    "value": [
        {
            "businessPhones": [],
            "displayName": "Juliette Lallement",
            "givenName": "Juliette",
            "jobTitle": null,
            "mail": "juliette.lallement@elements-apps.com",
            "mobilePhone": null,
            "officeLocation": "Toulouse",
            "preferredLanguage": null,
            "surname": "Lallement",
            "userPrincipalName": "juliette.lallement@elements-apps.com",
            "id": "cb0687f7-daf2-46bb-9572-5a540d6ec23c"
        }
    ]
}
In order to get the office location of the reporter, the following template is configured:
${(data.value[0].officeLocation)!}
Refer to this page Writing templates with Apache FreeMarker for details about template configuration.
Add Connected item to Jira Service Management project
Now that your connected item is configured properly, you can associate it to a request type in your Jira Service Management project.
-
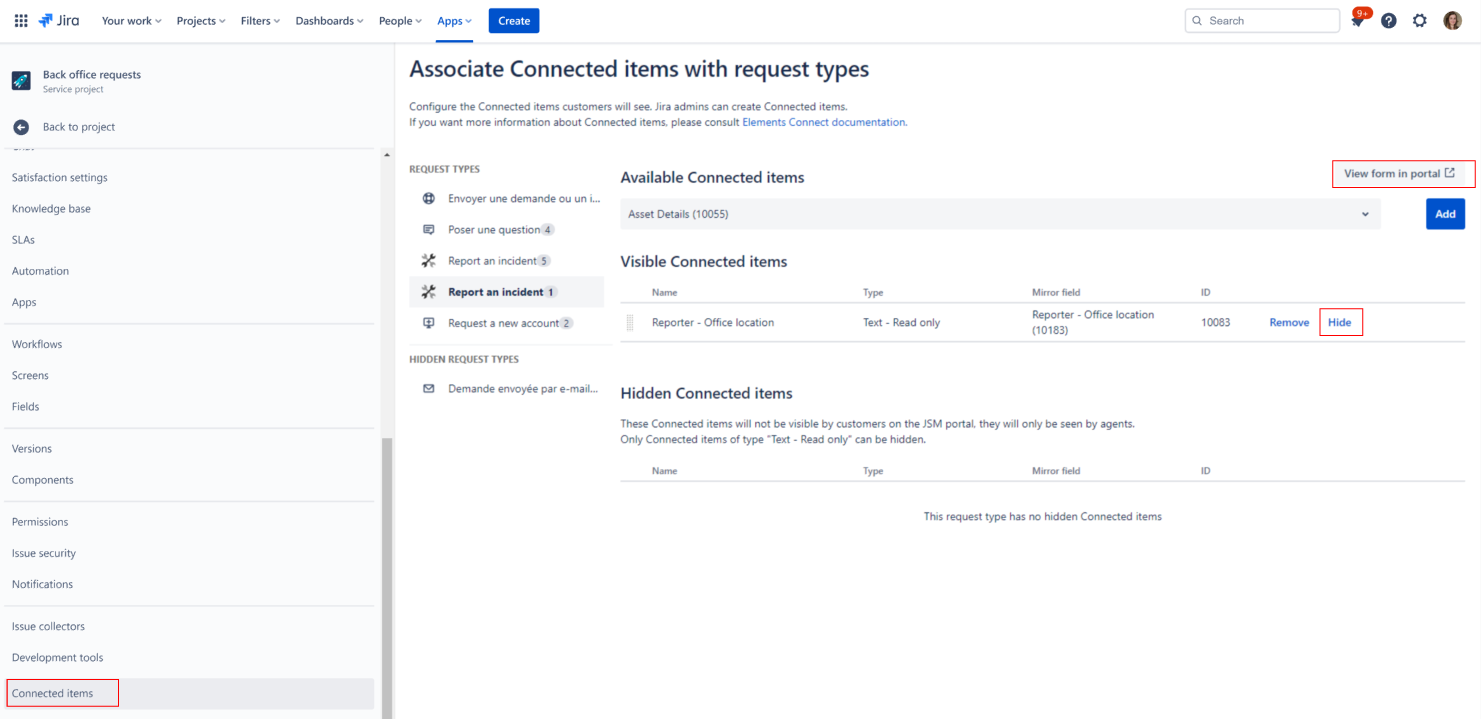
Go to your Jira Service Management project administration, and find the “Connected items” section.
-
Add the Connected item to the desired request type (for example: Request a new account)
-
Click the “Hide option”
-
Open the request type in the customer portal (you can use the button in the top right of your screen)
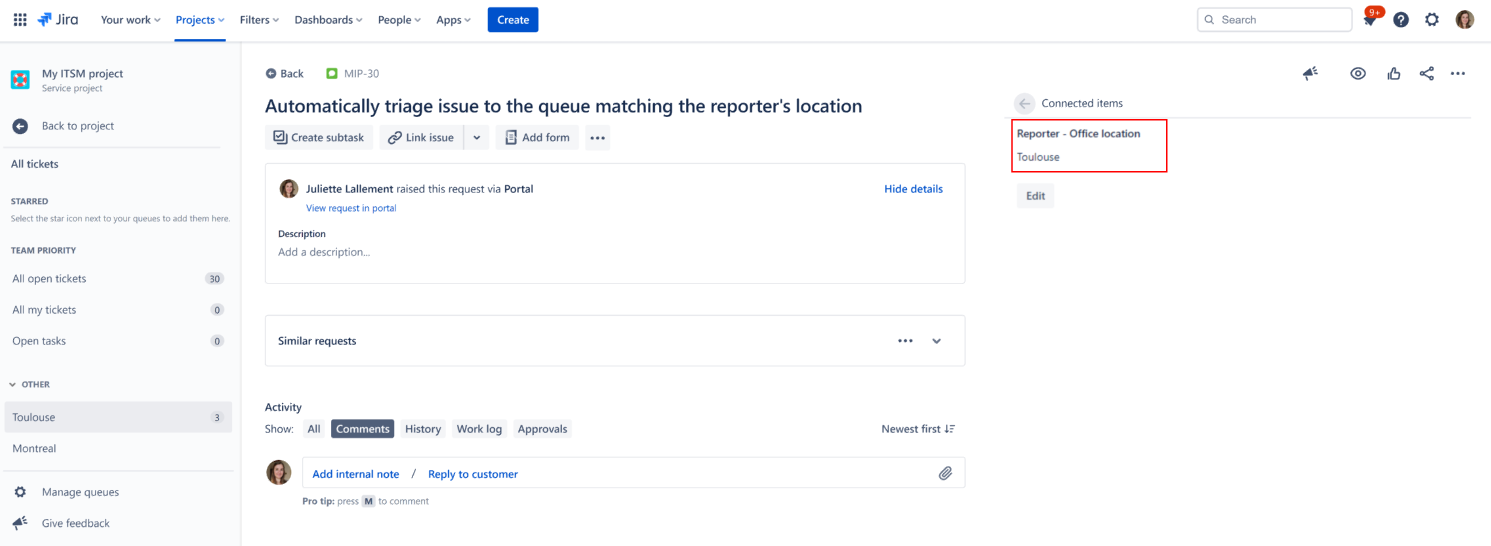
Once the request has been created, the read-only Connected item that fetches the reporter’s office location has been automatically set:
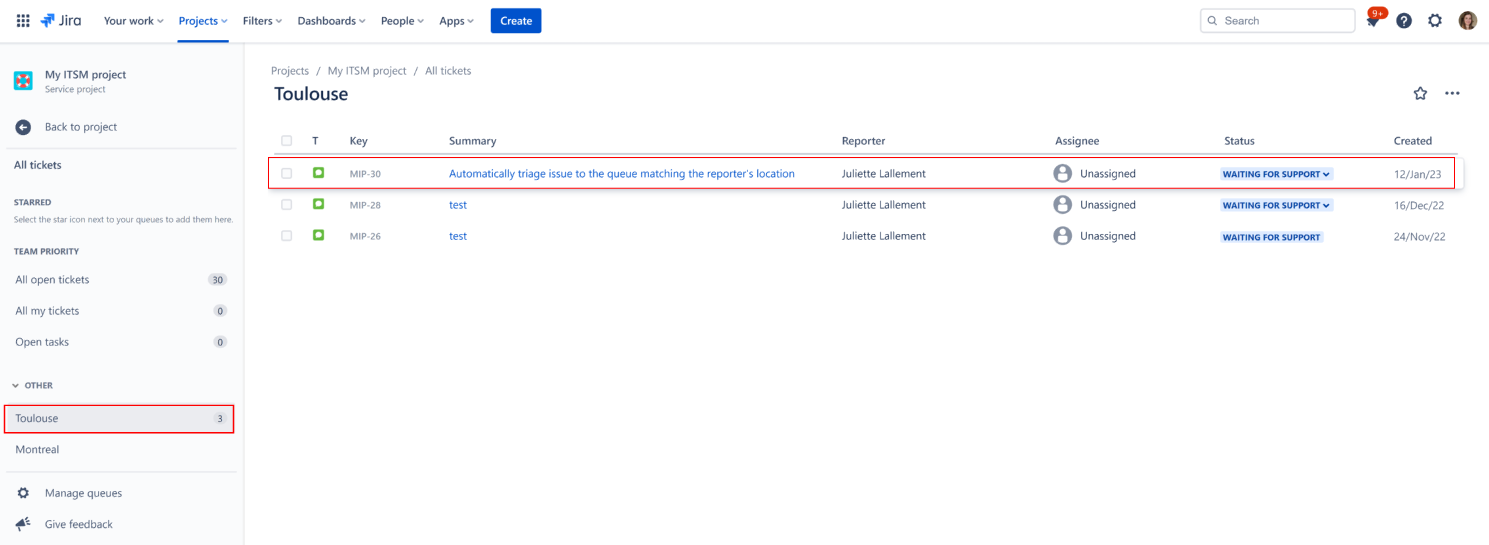
Configure location-based queues in your Jira Service Management project
In the Jira Service Management project, we want queues to be organized by office locations.
Now, we want to configure queues of the Jira Service Management project so that issues created by customers are automatically triaged based on the office location of the reporter.
-
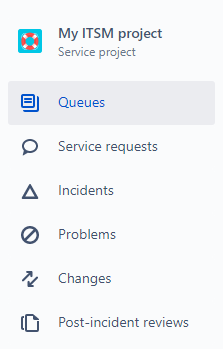
Go to your Jira Service Management project and click “Queues”.
-
Now click “Manage queues” and “Create new queue”.
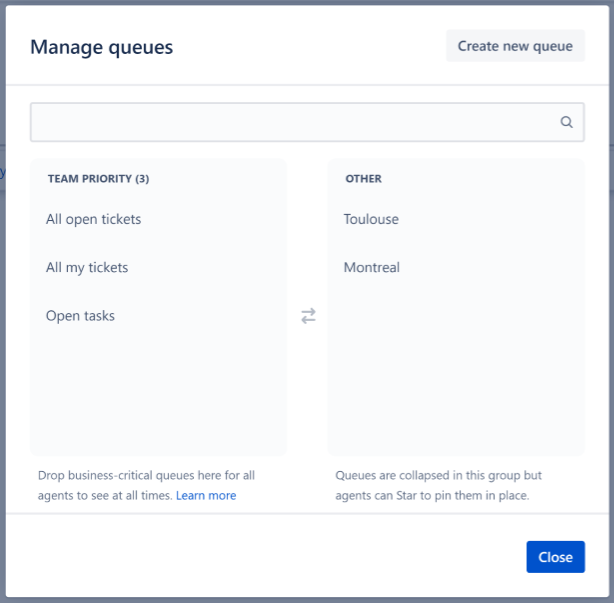
Name your queue after an office location and configure the filter as to use the “Office location” Connected item configured above. Create as many queues as needed and modify the JQL filter depending on how you want to group office locations.
%20(1).png?cb=e67861bfc4af2596186614f1d4991326)
Now, all requests raised in the Jira Service Management project where the Connected item fetching the reporter’s office location has been configured will be automatically triaged to the relevant queue based on the office location of the requester.
Connecting to an Azure Active Directory can streamline your support requests by providing more information about the reporter. For example,
-
fetch the reporter’s office location and affect the ticket to the relevant support group,
-
reroute approvals to a reporter's manager
-
or automatically triage request to location-based queues in a Jira Service Management project.