
Context
Using Elements Connect, you want to
-
build a Service catalog with Jira Service Management. Services are fetched from an external datasource and each service has its own Approver.
You'd like to auto-set an Approver field with Elements Connect -
connect an Asset Management System to Jira where every asset is associated to an owner.
You'd like to auto-assign a request to its owner on issue creation. -
connect a CRM to Jira where every Account is associated to an Account manager.
You'd like to auto-set the "Account manager" field in Jira to the relevant Account manager as indicated in the CRM.
All those needs can be implemented thanks an integration between Elements Connect and Jira Automation.
Jira Automation is a tool provided for free by Atlassian, available on any Jira Cloud instance.
See it in action!
Set the request assignee with the application owner
Tutorial
Prerequisites
Elements Connect /wiki/spaces/ECCDRAFT/pages/10954866845 on your Jira Cloud instance.
Configuration steps
The configuration is done in 4 steps:
-
Create and configure the datasource in Elements Connect
-
Create and configure the Connected items in Elements Connect
-
Associate the Connected items to a request type
-
Configure a Jira Automation rule
Step 1 - Configure the datasource
We will use the Service Catalog use case to illustrate this tutorial, but the configuration would be similar if your scenario is different.
We have a SQL Datasource configured in Elements Connect. All the services available in our organisation are listed in a "services" table, along with the approver in charge.
|
name |
approver |
|---|---|
|
Adobe Photoshop |
|
|
Adobe Lightroom |
|
|
Adobe illustrator |
|
|
Microsoft Office |
|
|
Microsoft Outlook |
|
|
Microsoft SharePoint |
NB: The email address stored in the database must be the same address used for an Atlassian account in order to set a Jira user field
Step 2 - Configure the Connected items
Create and configure 2 Connected items.
Application:
Application owner:
You can have a look at /wiki/spaces/ECCDRAFT/pages/10954867004 to learn more.
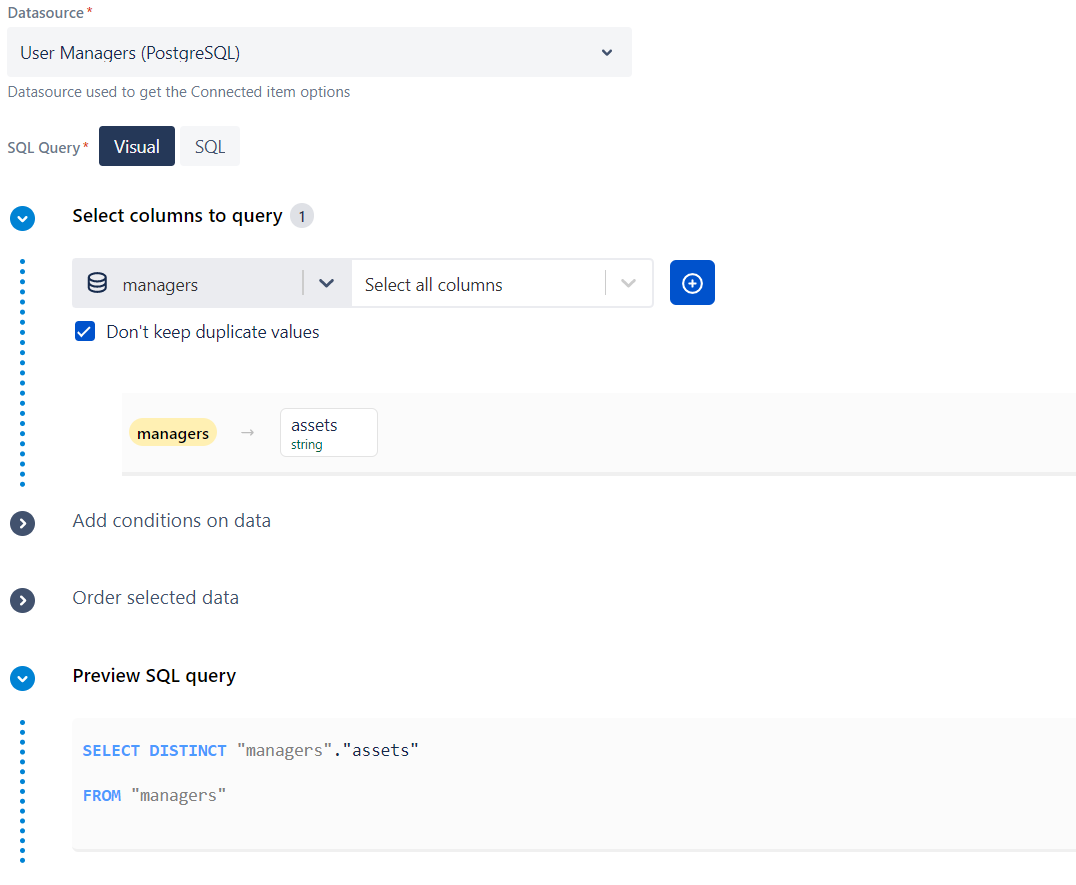
Service
Of type "Text - Select list", shall list all the services available in your organization.
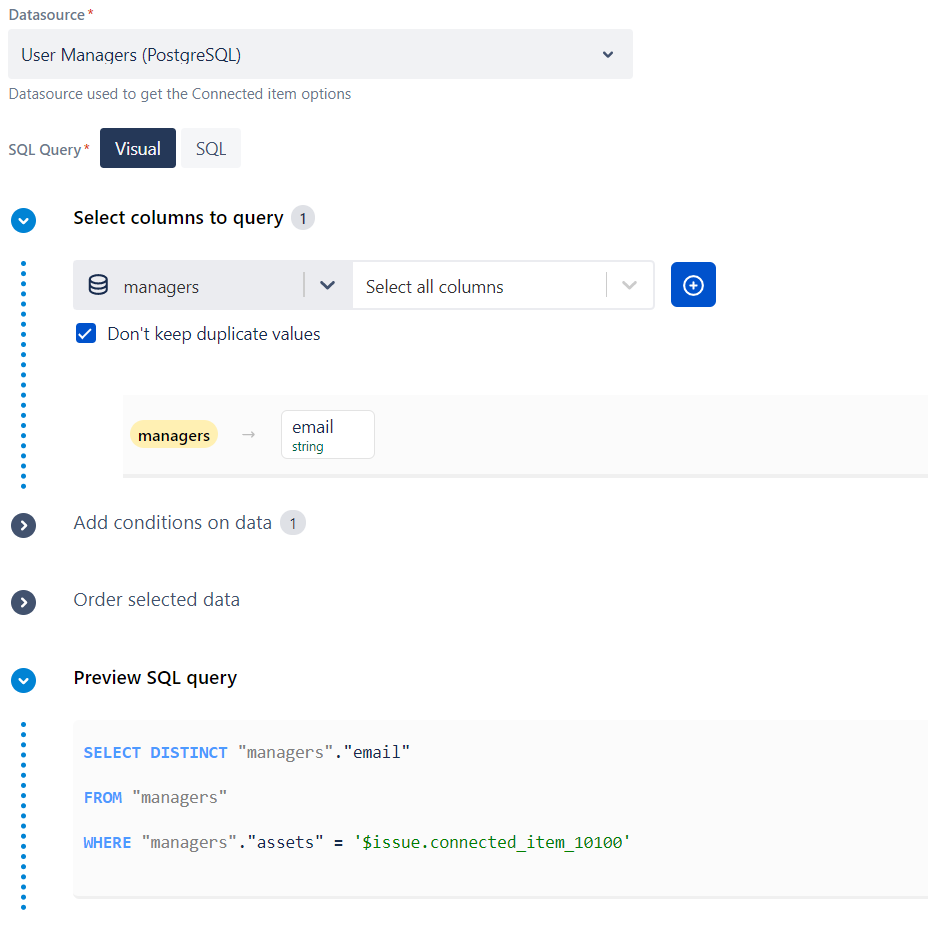
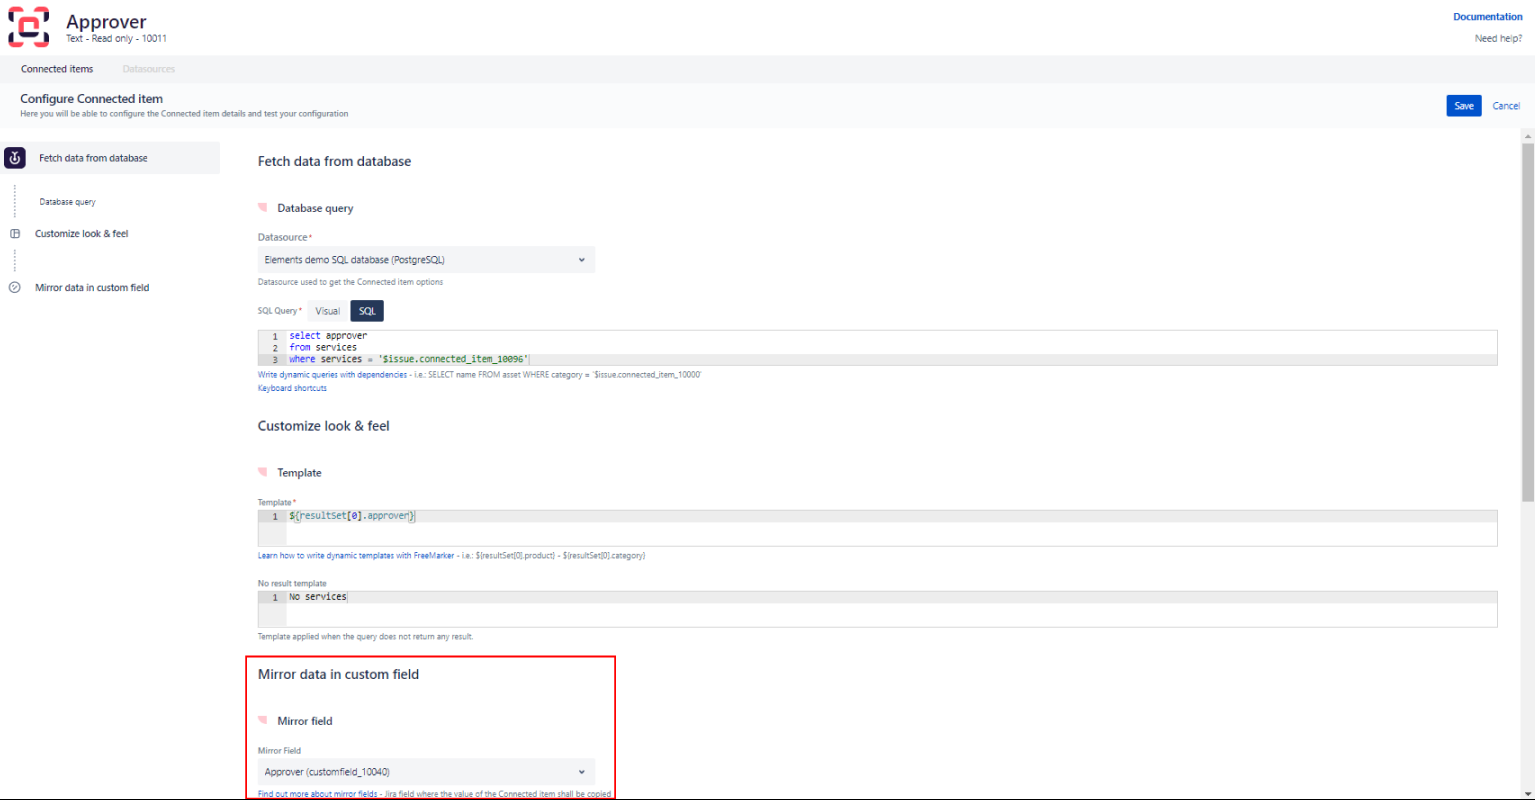
Approver
Of type "Text - Read Only", this item will be automatically set to the email address of the approver in charge of the selected service.
When creating this item, keep the "Create the associated mirror field" checkbox checked.
Step 3 - Associate the Connected items to a request / issue type
Associate the 2 connected items to a request type (if you're using a Jira Service Management project) or an issue type if you're working with a Jira Software or Jira Work Management project.
See /wiki/spaces/ECCDRAFT/pages/10954872160 or /wiki/spaces/ECCDRAFT/pages/10954866896.
Step 4 - Configure the Jira Automation rule
Final step is to configure a rule in Jira Automation that copy the value of the "Approver" mirror field in the "Assignee" Jira user field every time the "Approver" mirror field is updated.
-
Note the ID of the mirror field (it's displayed in the configuration screen of the Connected item
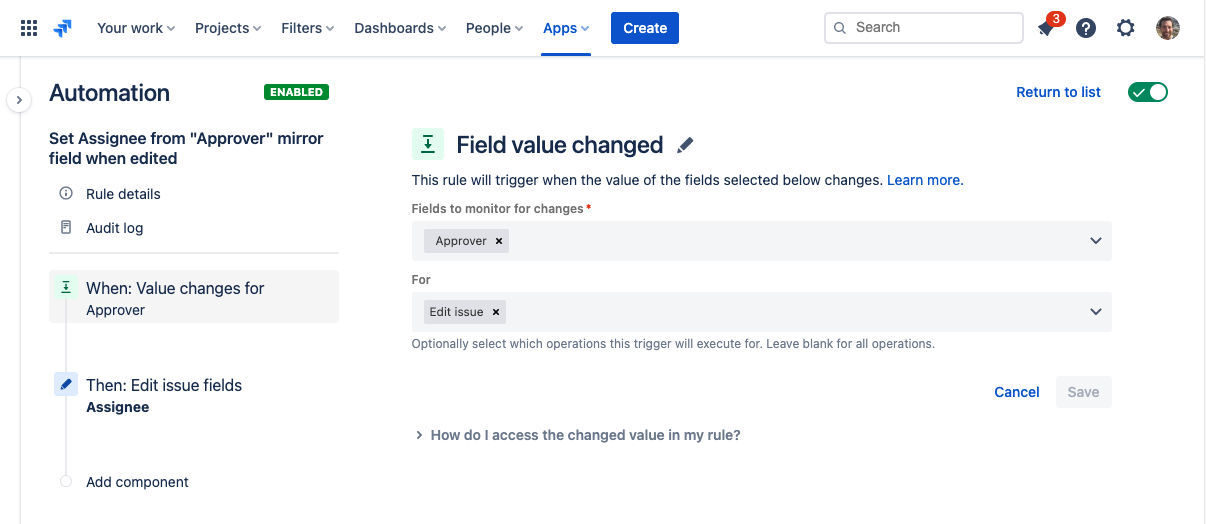
2. From Jira Automation, create a new rule with the trigger "Field value changed".
In the "Fields to monitor for changes", select the "Approver" mirror field:
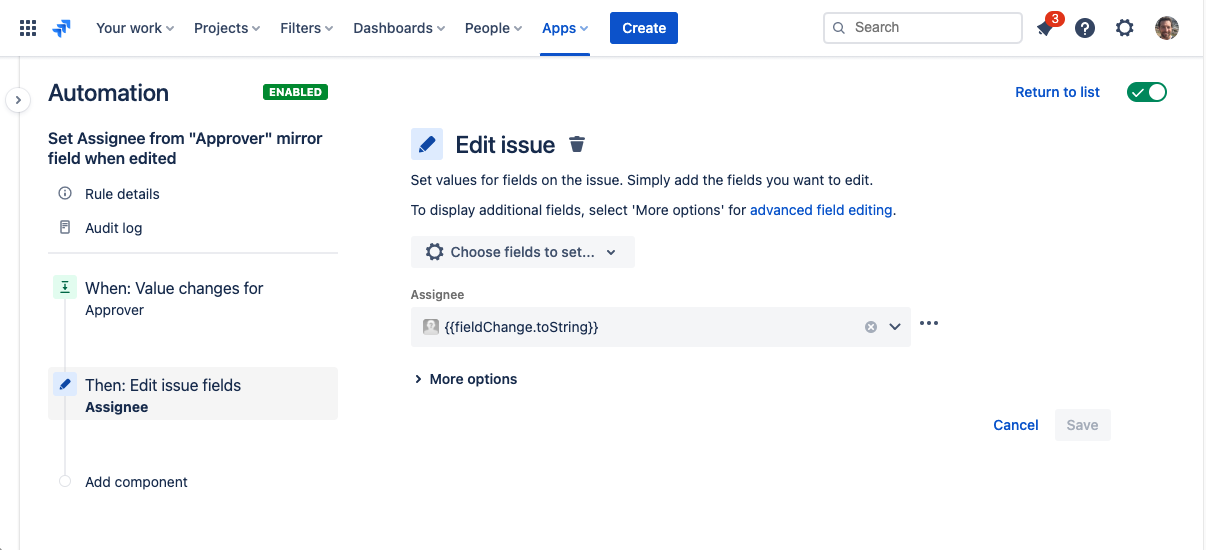
3. Add an action "Edit issue fields".
In the "Choose fields to set" dropdown select the User field to set (i.e.: Assignee).
In the other dropdown, type the smart value {{fieldChange.toString}} .
4. Save and publish the Automation and that's it!