
The need
Some organizations manage their users outside of Jira, typically in user directories such as Okta, Azure AD, Google Workspace, etc. These user directories are used to manage user records which hold useful information, including:
-
First name and last name
-
Job title
-
E-mail address
-
Phone number
-
Staff ID
-
Organization
-
Department
-
Manager
Those organizations use Jira as the main tool for their business processes and operations. In order for those processes and operations to be efficient and effective, users need to be tightly integrated.
A common use case for many Jira Service Management customers is to route approvals to a requestor's manager.
Solution
Elements Connect and Jira Automation can help automate this, as long as the manager's Jira account ID is stored as a profile attribute in Okta.
Use the power of Elements Connect to fetch the reporter's manager email and Jira account ID combined with the strength of Automation to use that information to set the approver of a request.
How to configure a read-only Connected item displaying the reporter's manager’s e-mail
Prerequisites
-
Have Jira Service Management
-
Have an external user directory (in this example, we use Okta) or an external datasource that holds user records
-
Have Elements Connect installed on your instance
Configuration steps
-
(Optional) Configure a custom attribute “Manager account ID” for your users in Okta
-
Configure the connection between Elements Connect and Okta
-
Configure the read-only connected custom field that fetches the reporter’s manager’s account ID.
-
Add the read-only Connected custom field to the Service Management project
-
Create a Post Function in your project to automatically update your connected custom field
-
Configure an Automation rule to set the Approver on created issues in Automation
Steps
1. Configure a custom attribute “Manager account ID l” for your users in Okta (Optional)
You can skip this step if the manager account ID attribute is already configured on user profiles of your Okta account.
We used an ID and not an email because a Jira user picker only accepts an Atlassian accountID (therefore your users need to have an account ID in Jira).
Okta allows you to add custom attributes to Okta user profiles to define additional attributes that are not available in the base attributes. In this use case, we need to be able to fetch a reporter’s manager e-mail ID attribute so we will add it to Okta.
From Okta’s Profile Editor, a custom attribute named “Manager account ID” was added to user profiles:
%20(20).png?cb=ccb6cd7380ae009658bdbd2effcbcab4)
You can refer to this article in order to add a custom attribute to Okta user profiles.
Once your attribute is created, don’t forget to filled your users profiles in Okta with the Jira account ID of their manager.
%20(21).png?cb=c132768fc0e3b757840e0e558984df3a)
2. Configure the connection between Elements Connect and Okta
We are back in Jira. The first step is to configure the connection to the datasource where your user records are held. In this example, an Okta account is used. This connection is done in Elements Connect.
-
Go to Elements Connect administration by clicking on “Apps”, then Elements Connect
-
Now you need to create a datasource for the Okta account.
Refer to this step-by-step tutorial to configure a datasource to Okta.
After following this tutorial, your Okta datasource should be up and running.
3. Configure a read-only Connected custom field that fetches the reporter’s manager’s account ID
The next step is to configure a read-only Connected custom field that fetches the reporter’s manager’s account ID from the Okta datasource.
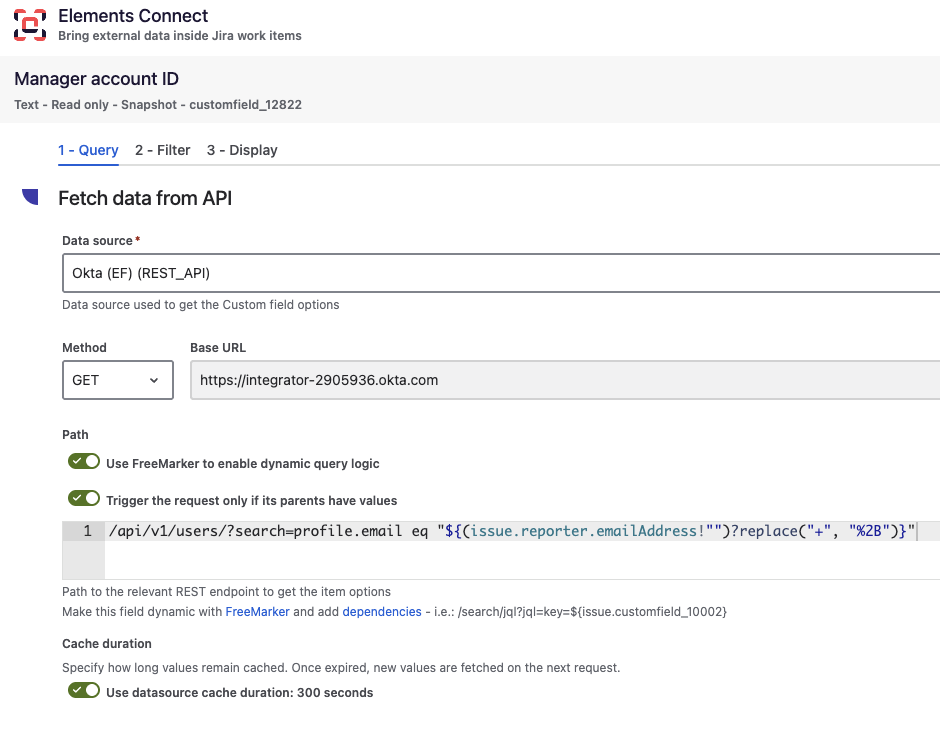
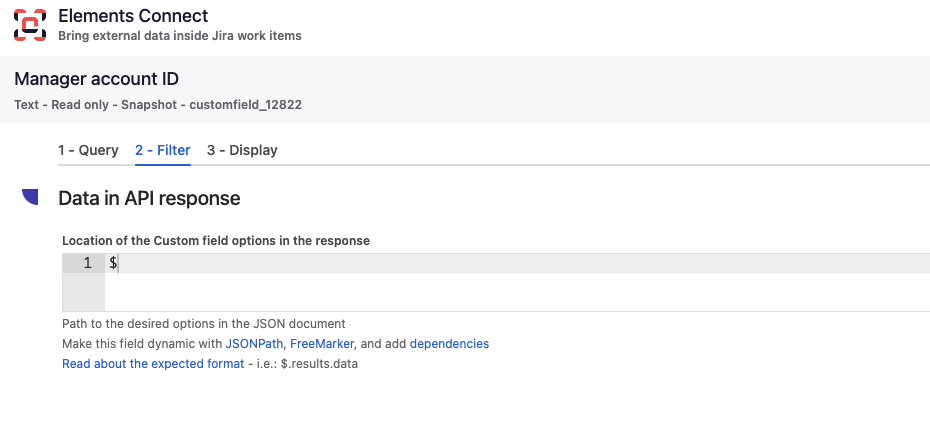
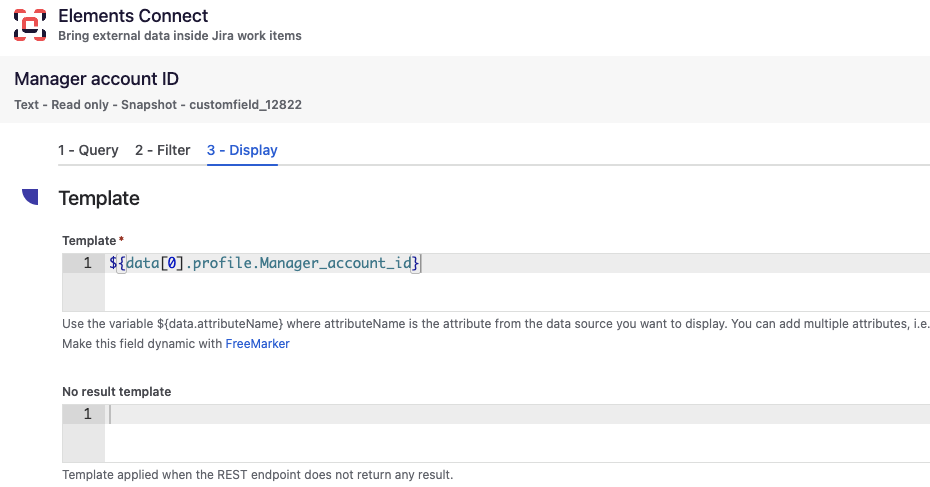
Refer to this page Writing templates with Apache FreeMarker for details about template configuration.
4. Add the read-only Connected custom field to the Application request project
Now that your connected item is configured properly, you can associate it to a request type in your Jira Service Management project.
-
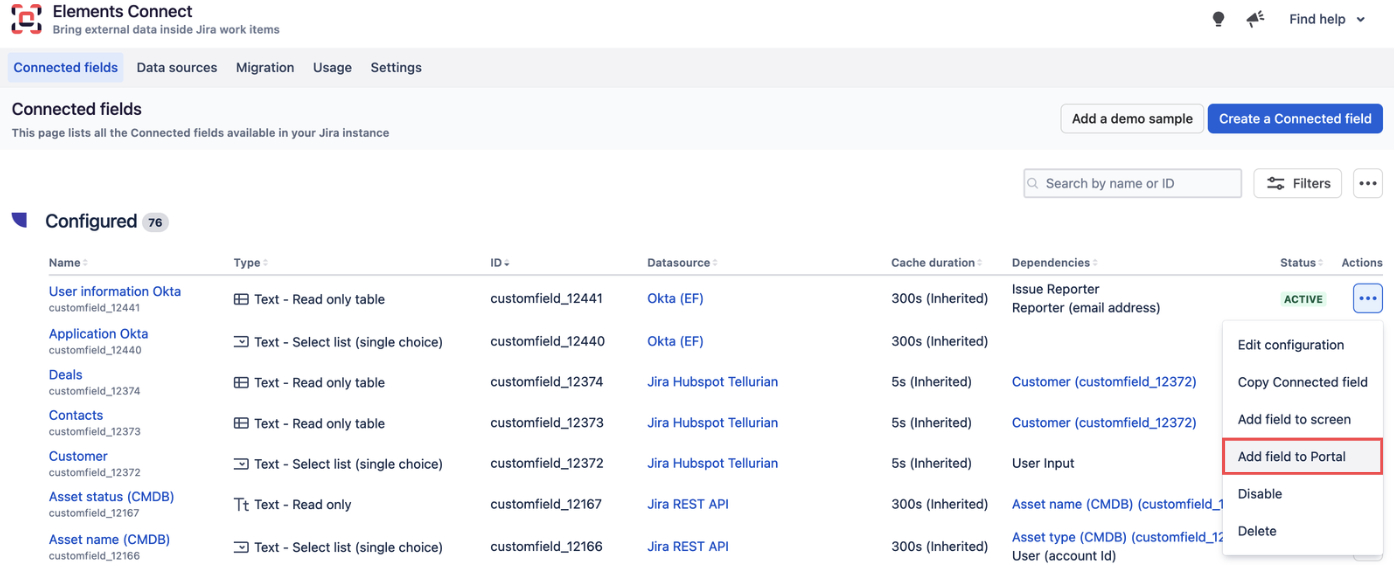
Directly after saving a custom fields configuration, click on “Add field to portal”

-
Or go to Elements Connect admin section and find “Add field to portal” in the “Actions” button.
-
Select the targeted project and Request type.
-
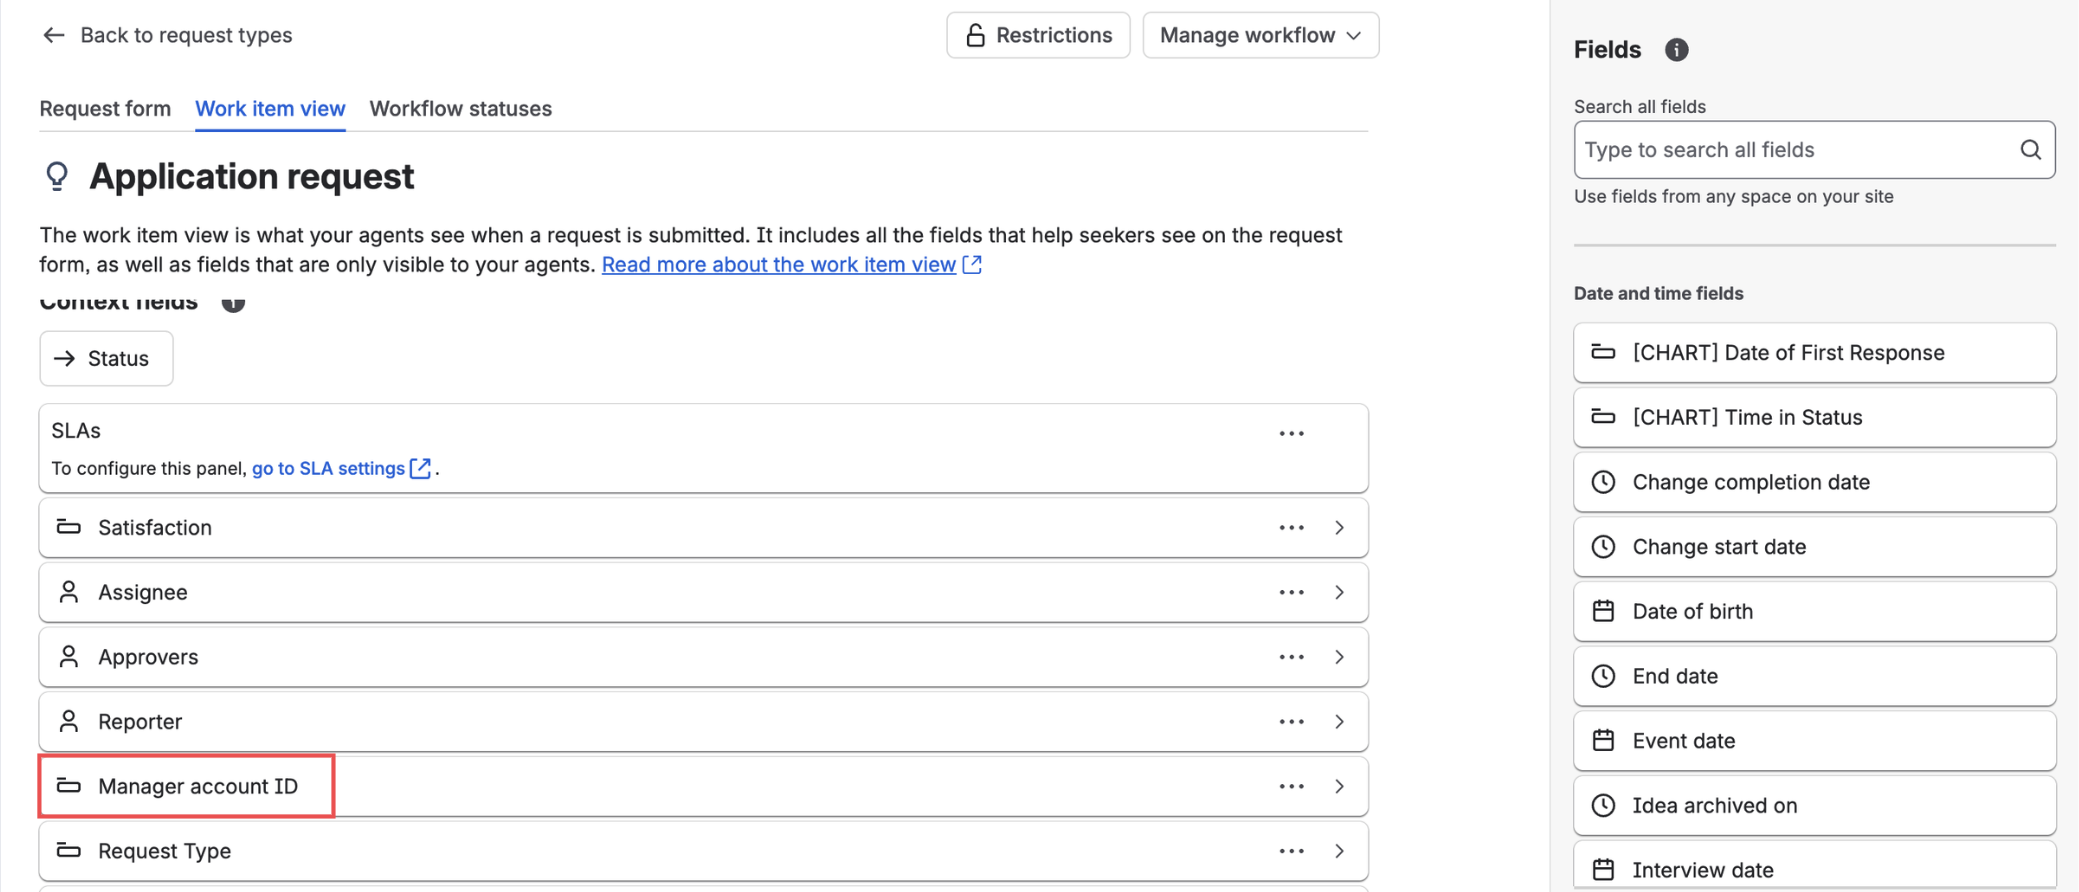
Add the Connected custom fields with a drag & drop action in the Work item view, as below:
5 - Create a Post Function in your project to automatically update your connected custom field
Then, we need to automatically filled our connected custom field Manager Account ID when the ticket is created, to be used after in our Automation. So we create a Post Function:
Enter the Workflow configuration
Go to your Jira workflow configuration
-
Either through Space settings > Request management > Workflow
-
Or on one of your issue, clicking on the status drop down and selecting View Workflow
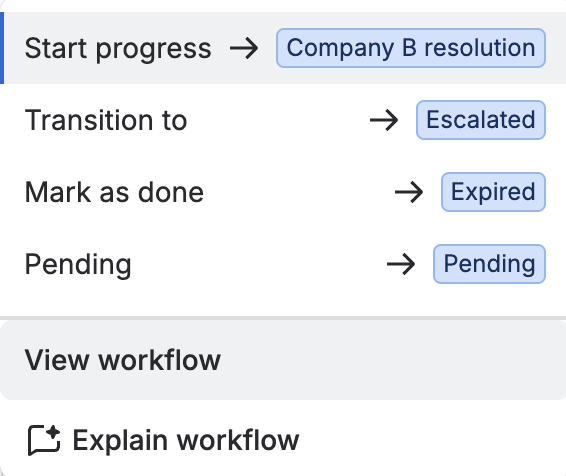
Then click on Edit workflow.
Identify the transition
Identify the transition during which you want the custom field to be updated.
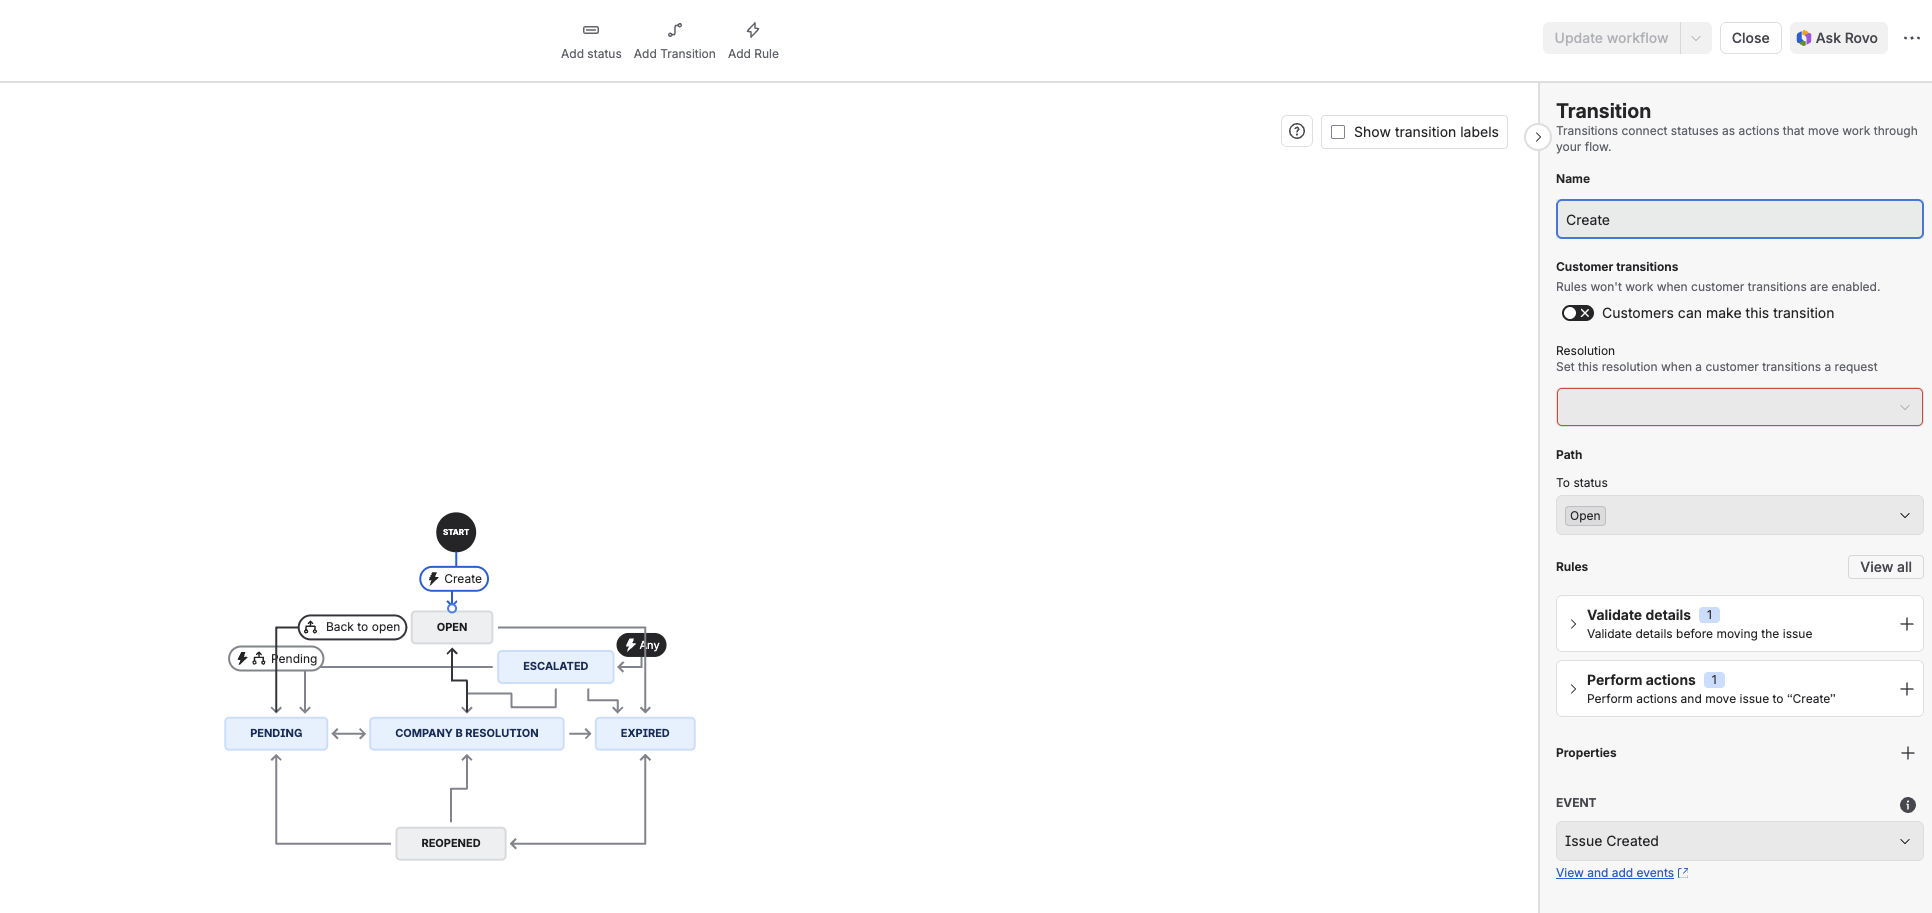
Add the Post Function
Under Rules, in the Perform Actions box, click on add Perform Actions rule and select the Update Elements Connect custom field value action.
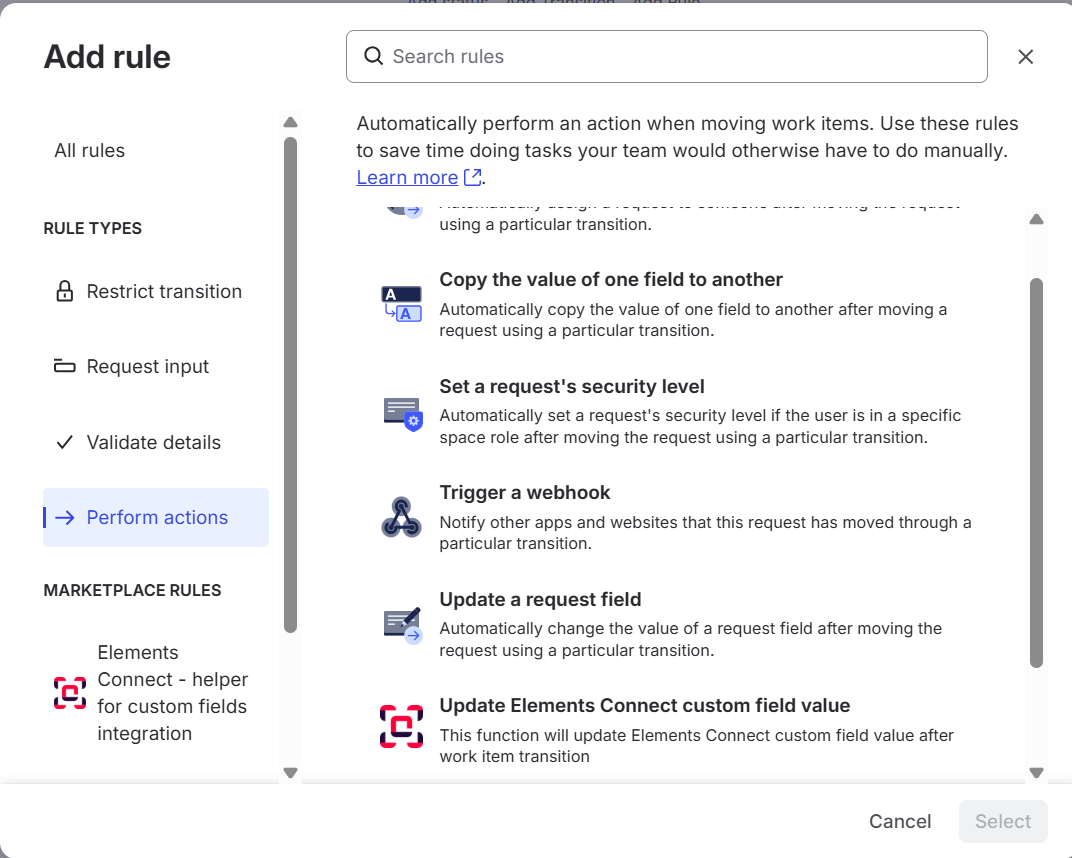
Set up the Post Function
In that frame, you are providing with a recap of all eligible and non eligible fields.
Select custom fields to update on transitions among the eligible ones and click on Add to set up the rule.
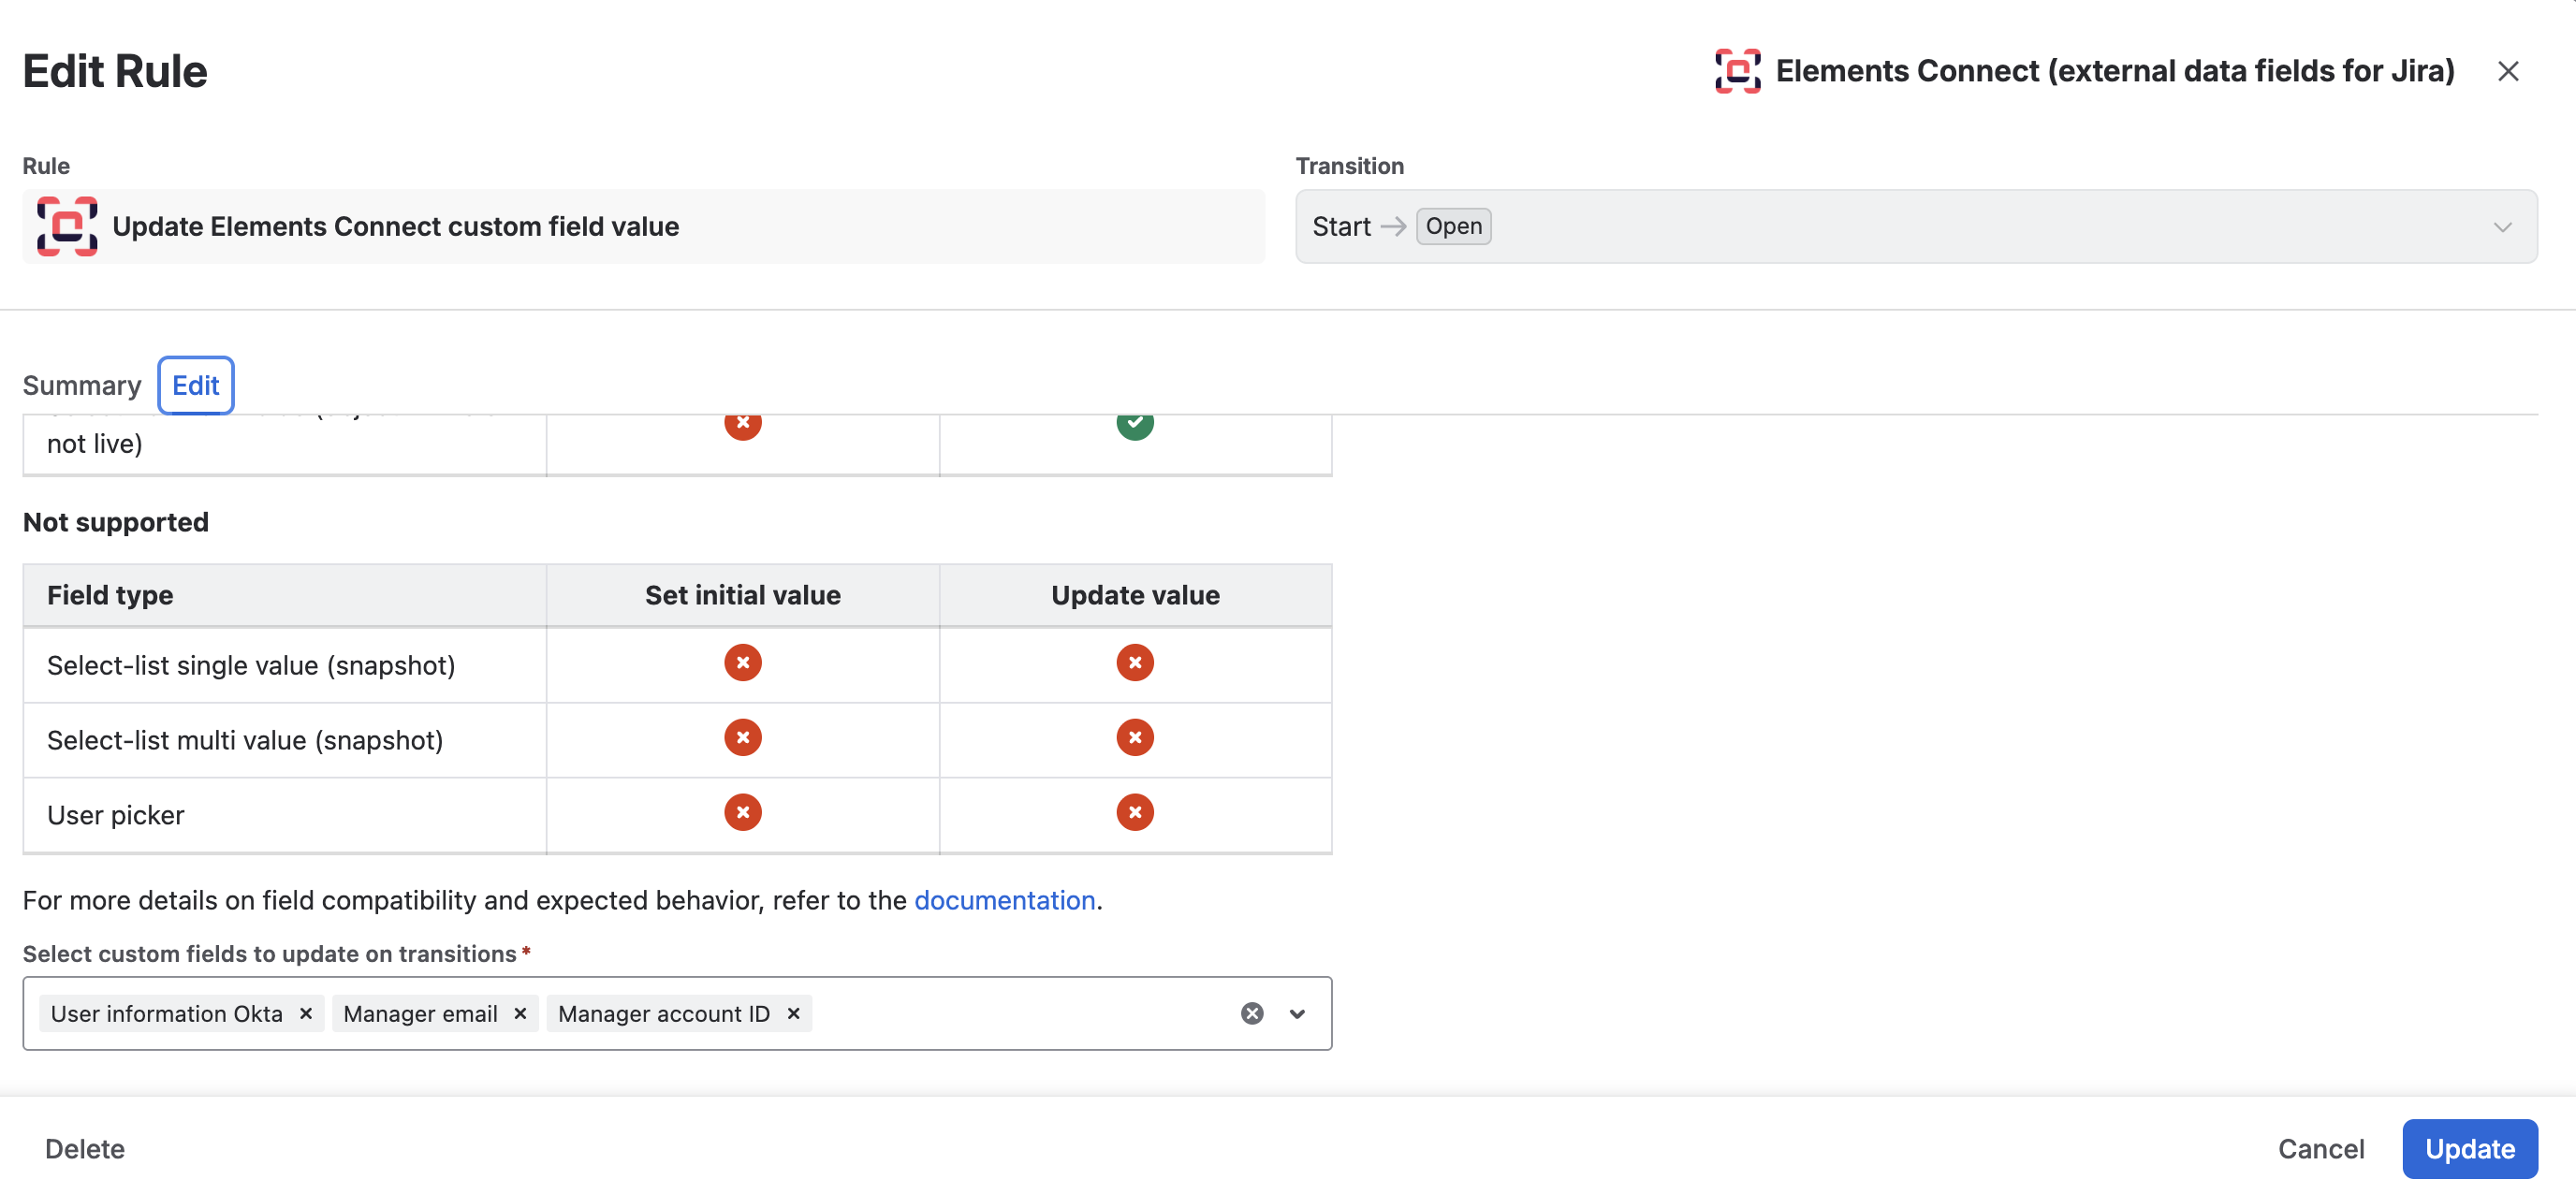
Don’t forget to update your workflow.
6. Configure an Automation rule to set the automatically set the Approver based on the manager account ID
Go to the project administration of your Jira Service Management project and find the “Automation” section.
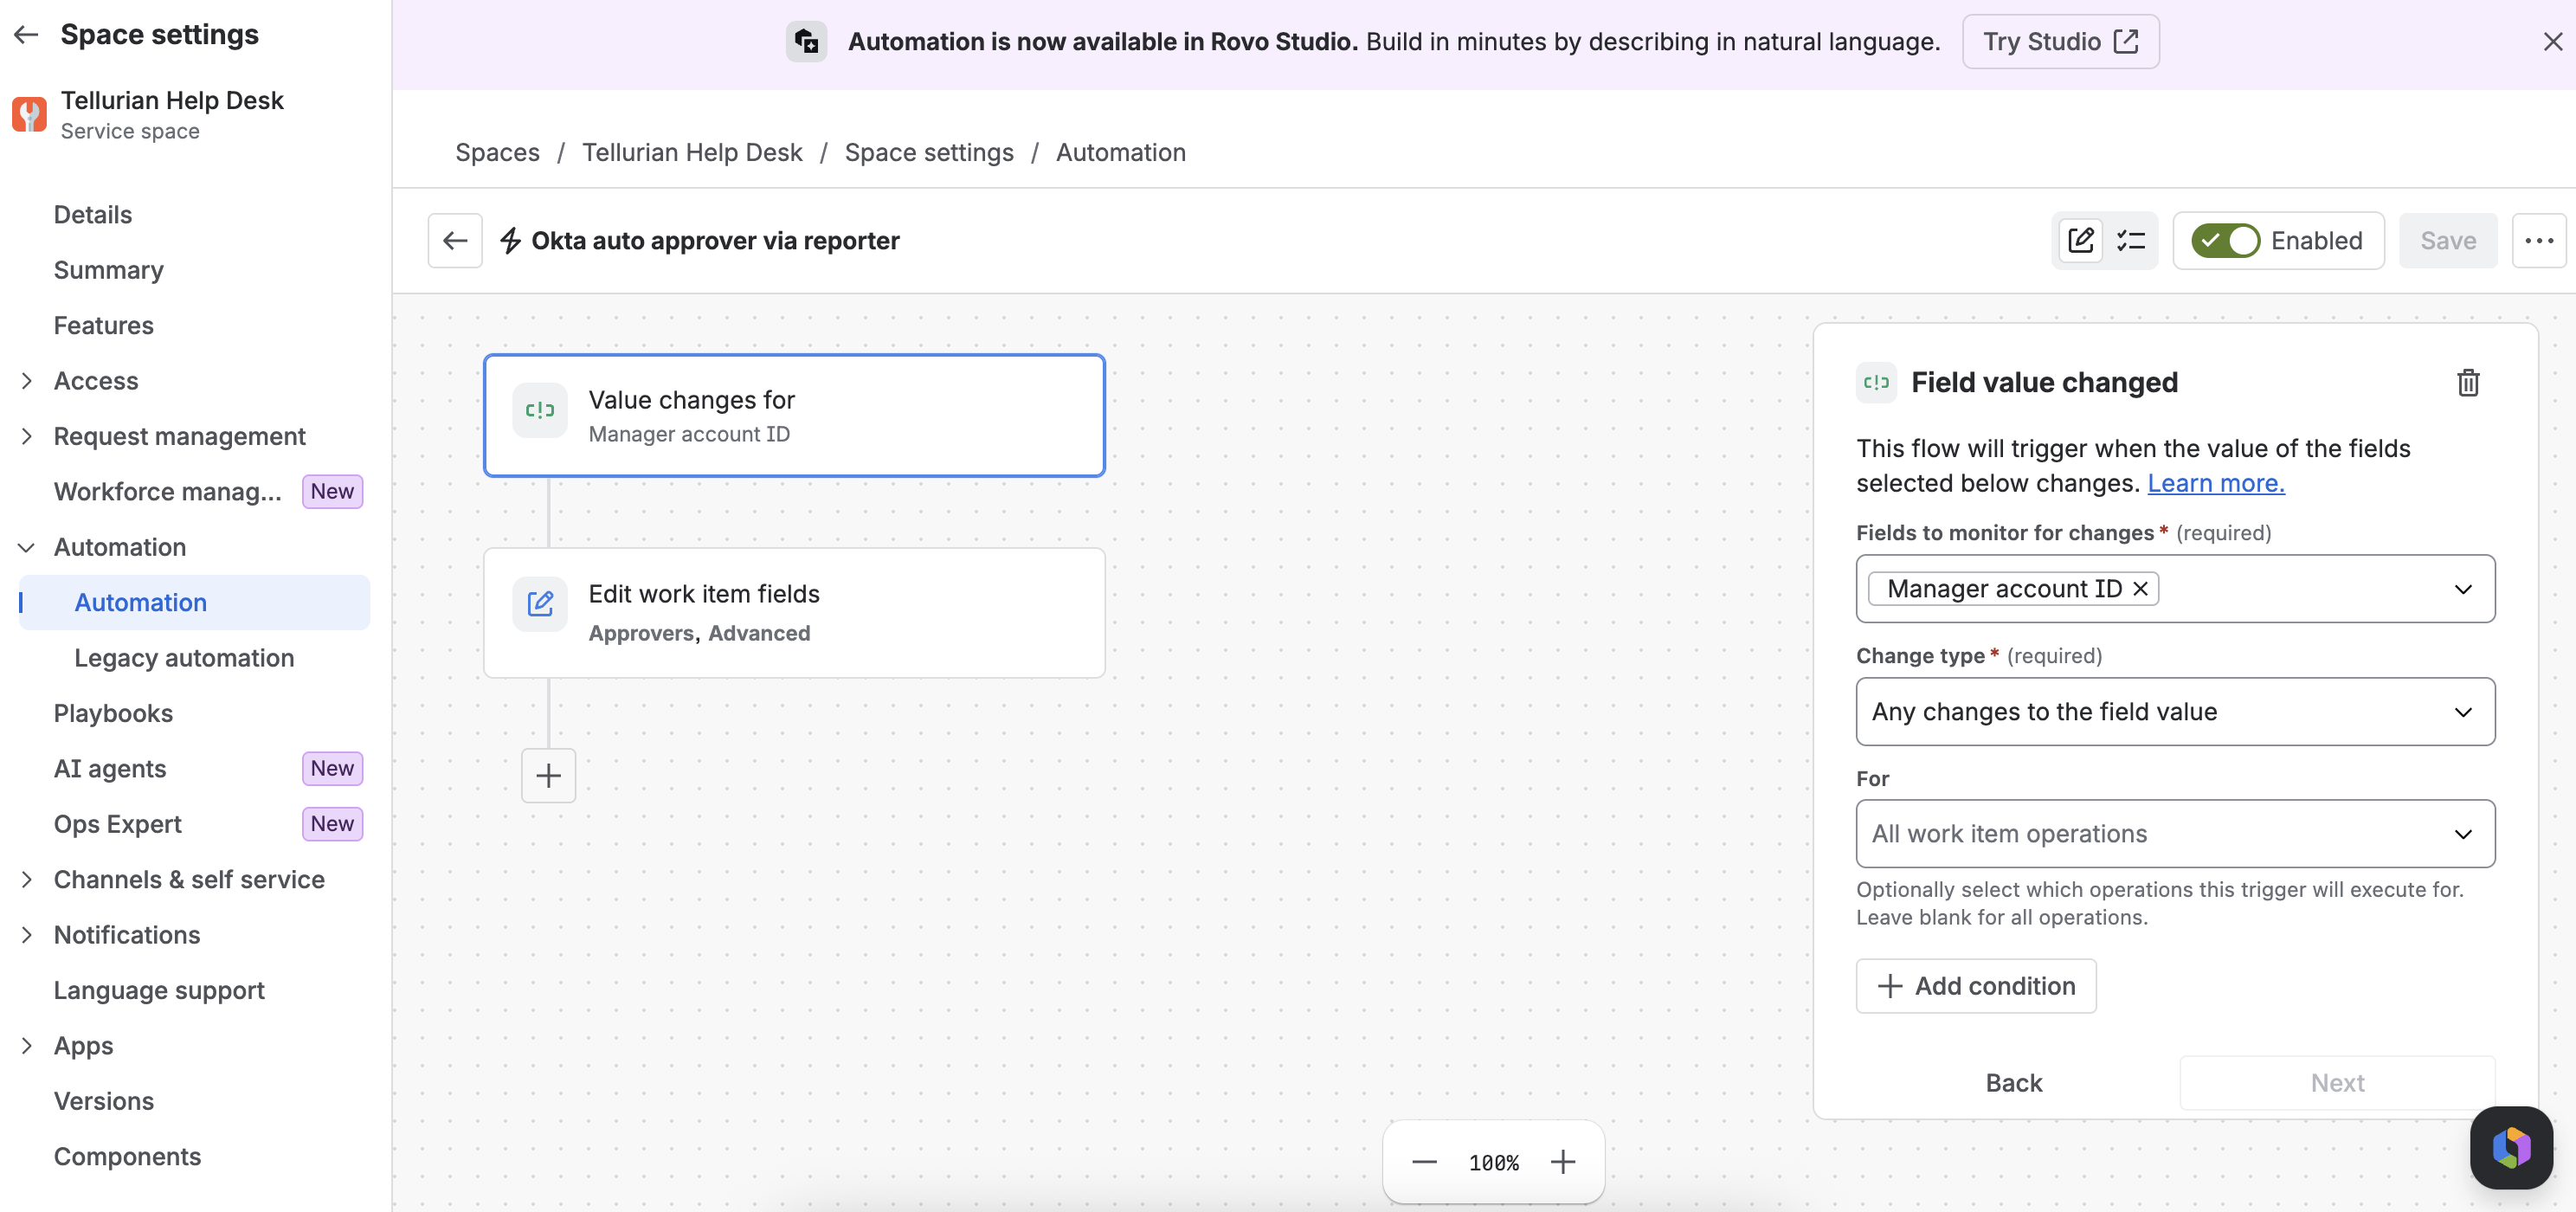
Configure a rule that will set the Approver field when the value changes for the “Manager account ID” (automatically changed when ticket is created thanks to the Post Function).
Trigger
When the value of the “Manager account ID” changes for all work item operations
Action
Edit the work item fields “Approvers”
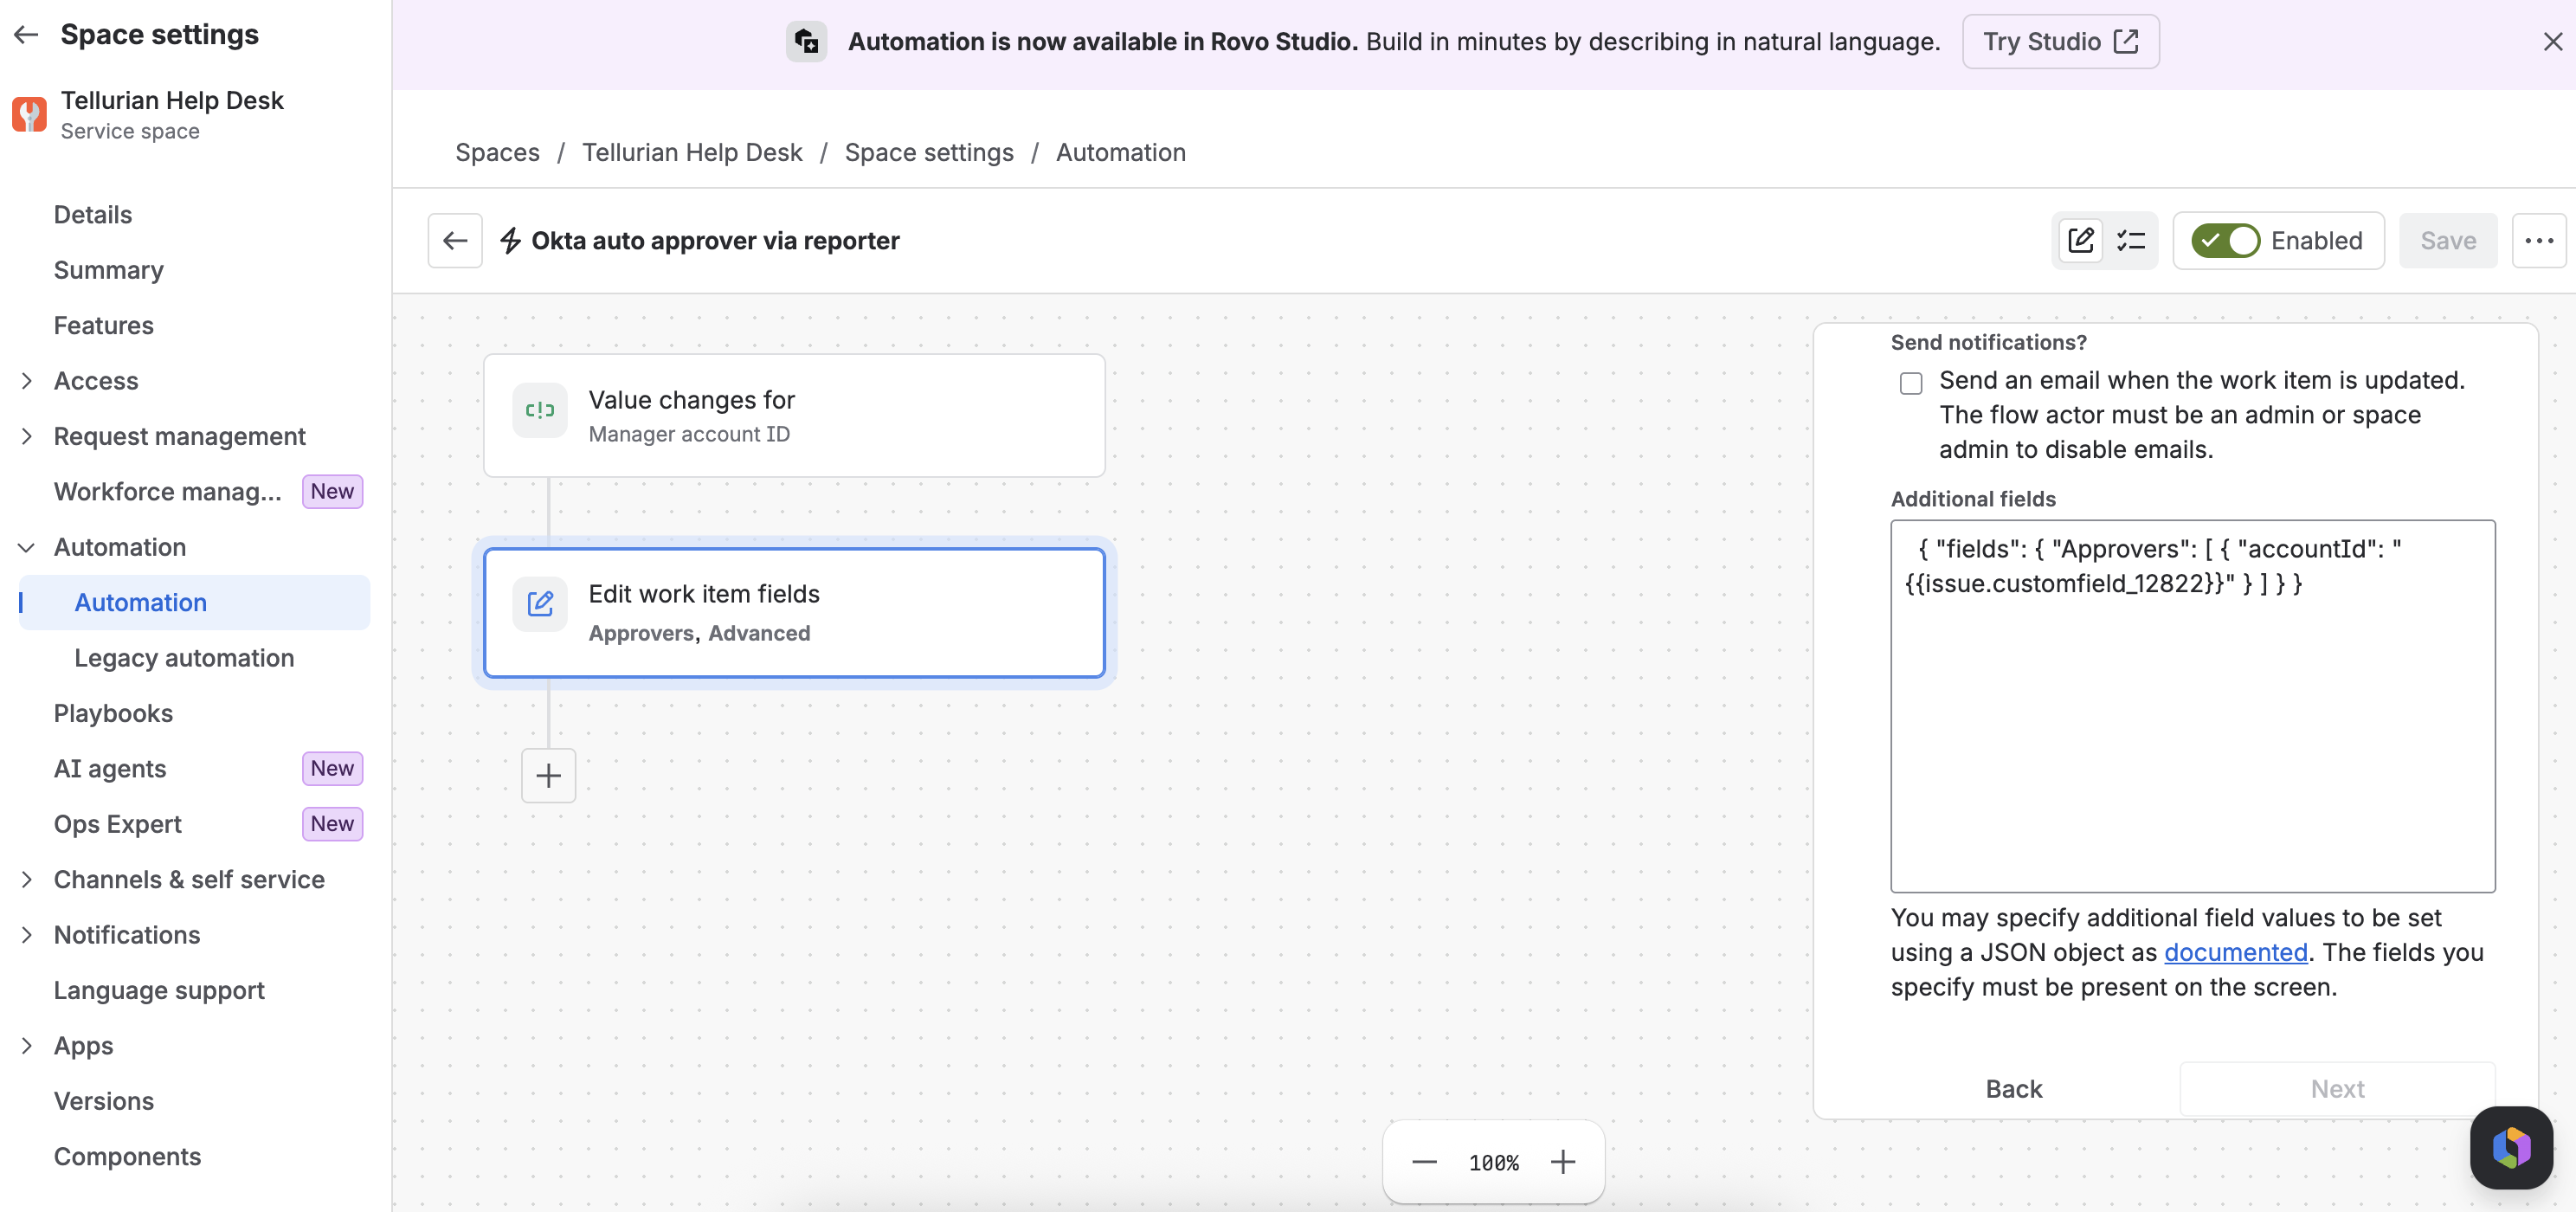
Here we configure our Action in the “Additional fields” for Approvers to be set according to Elements Connect’s connected custom fields Manager account ID.
Configuration
{ "fields": { "Approvers": [ { "accountId": "{{issue.customfield_XXXXX}}" } ] } }
-
Publish the rule
For this rule to work, make sure the reporter’s Manager has the appropriate permissions to approve requests in the current project.
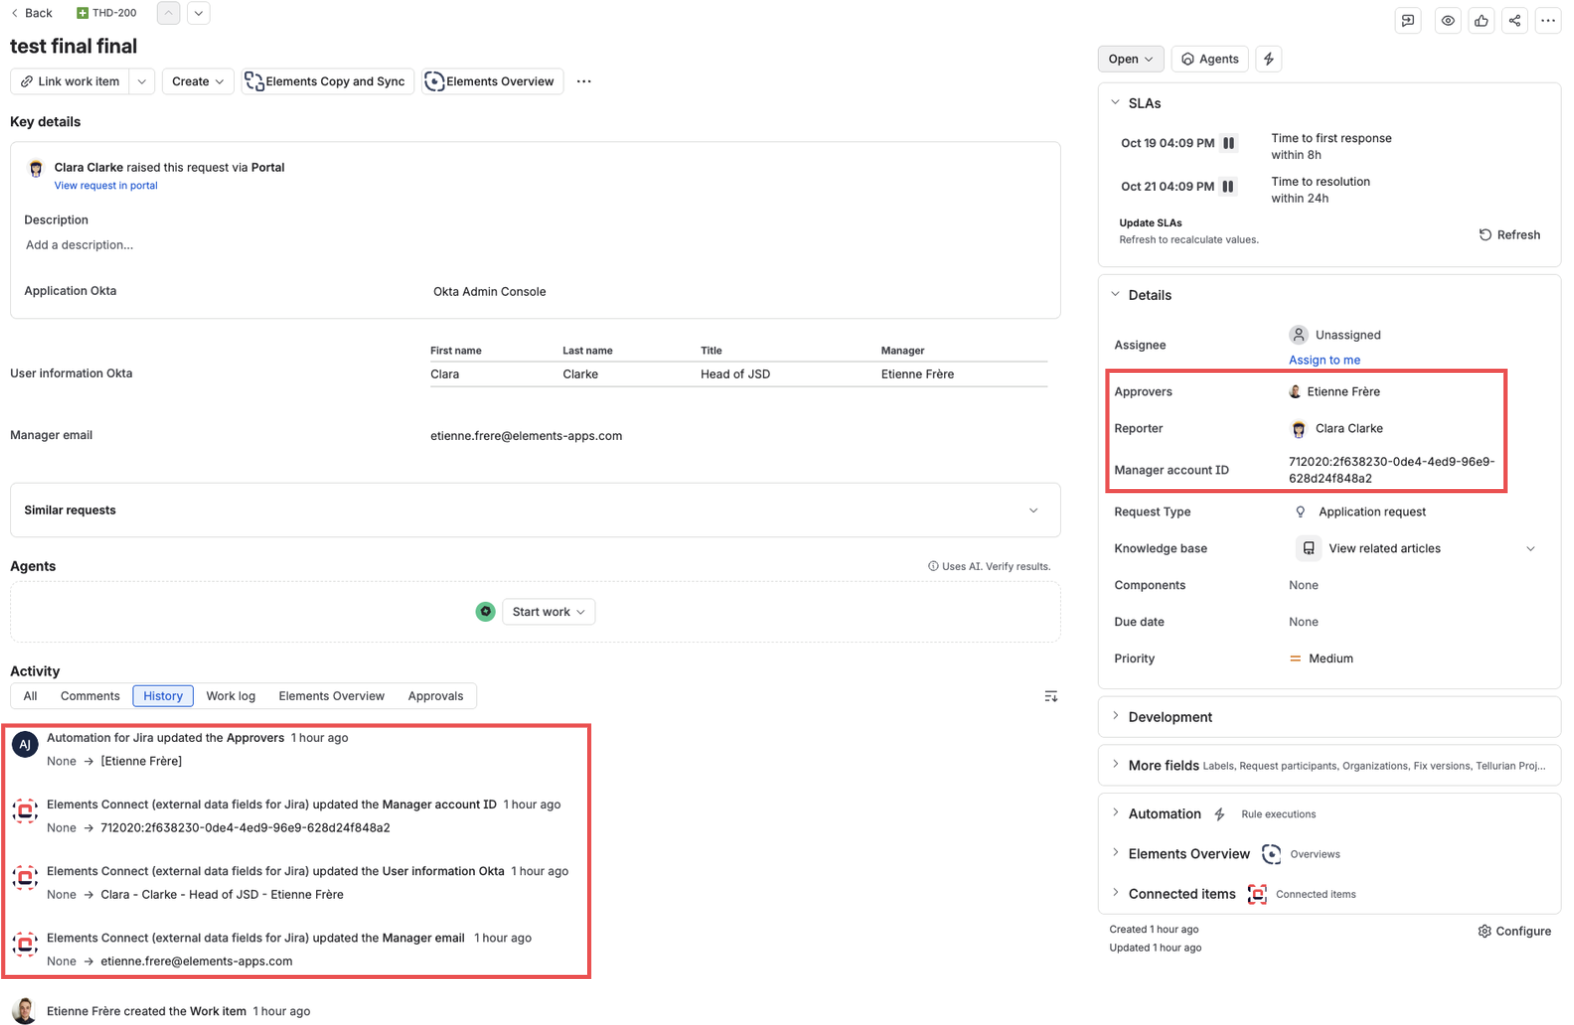
Next time you submit a request, you now will see that the reporter’s manager has been automatically set as the Approver of the request:
New to Elements Connect?
If this tutorial has stirred your imagination, why not give it a try?