Field configuration screen
Table of contents
Field configuration screen
Main sections
Field configuration screen contains four main sections:
- Edit view
- Display view
- Search view
- Advanced
Edit / Display / Search sections are basically the same, this is where we configure how the field should behave in different location of Jira.
The advanced section is used to set debugging and cache configuration.
You'll find more information about the query configuration in the different views page.
Sub sections
The sections are divided into three sub-sections:
- Query configuration
- Editor configuration
- Configuration tester
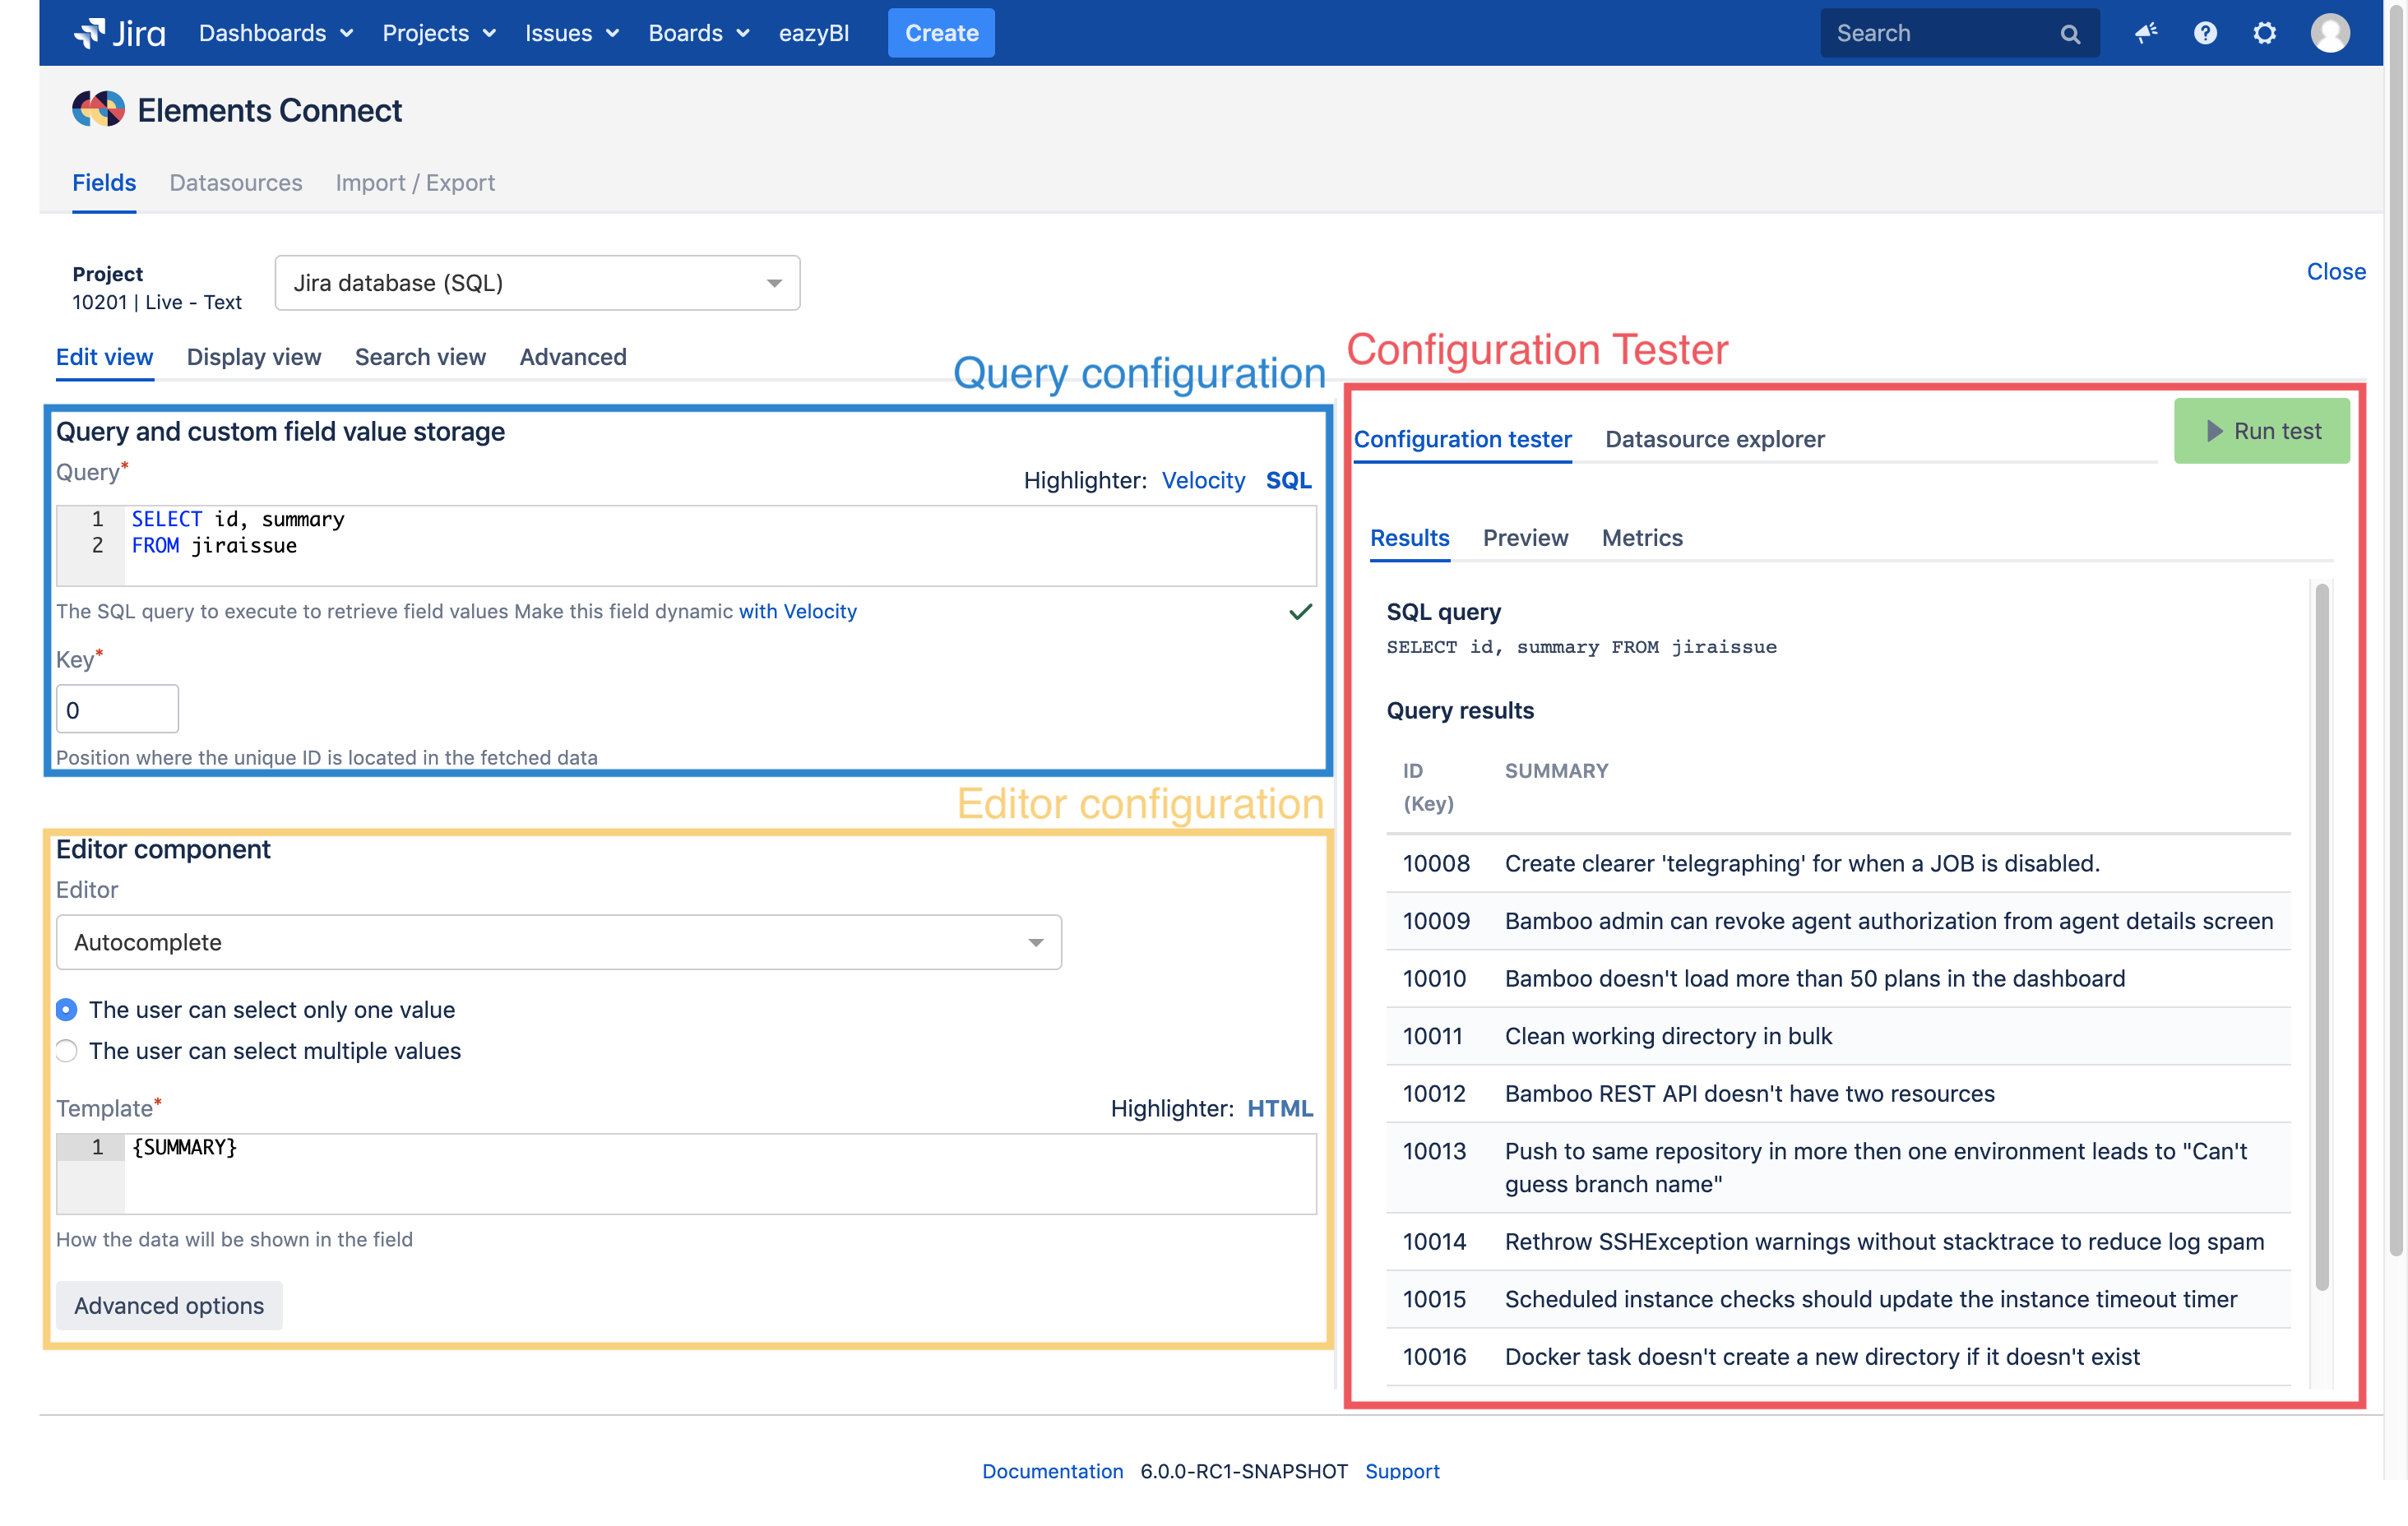
Query configuration
To tell Elements Connect how it shall get values from the datasource, you first have to configure the query.
Depending on your datasource, you'll have to use different query language.
For example, SQL to get data from a database or LDAP query to get data from a User Directory.
Whatever the datasource type is, the result of the query is a table that is then used to generate the template.
An example of table result:
| CustomerID | CustomerName | CustomerCountry |
|---|---|---|
| CUS-1 | Globex | USA |
| CUS-2 | World company | UK |
| CUS-3 | AQME | Japan |
You'll find more information about the query configuration in the field query configuration page.
Editor configuration
Then, once Elements knows how to get data from the datasource in a table structure, we have to tell him how to display the values in the field editor.
This configuration is done in the "Edit component" section.
You'll find more information about the template configuration in the field editor configuration page.
Configuration tester
In order to help you debug your configuration, you can use the Configuration tester.
With this tool you can see:
- the query as it is evaluated by Connect
- the result of the query execution
- the options formatted as they will be displayed to the user.
You'll find more information about the template configuration in the configuration tester page.