How to set a Connect field in Automation for Jira
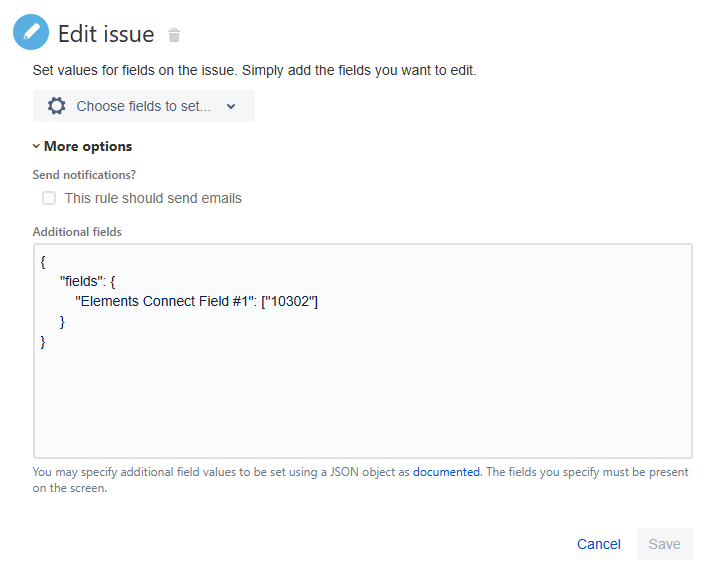
To set a value in a Connect field using Automation for Jira, you need to use the “Edit Issue” action and set the field via the “More options” → “Additional fields” section:

The way the field is populated depends on:
Its category; Live or Snapshot.
Its type; Live Text, Live User or Snapshot Text.
Live Text
Single-value
{
     "fields": {
         "customfield_XXXXX": ["YYYYY"]
     }
}
Multi-values
{
     "fields": {
         "customfield_XXXXX": ["YYYYY","ZZZZZ"]
     }
}
You need to replace:
customfield_XXXXXwith the Connect field name or ID.YYYYYandZZZZZwith valid Keys.
Live User
Single-value
{
     "fields": {
         "customfield_XXXXX": [{ "name": "username" }]
     }
}
Multi-values
{
     "fields": {
         "customfield_XXXXX": [{ "name": "username1" }, { "name": "username2" }]
     }
}
You need to replace:
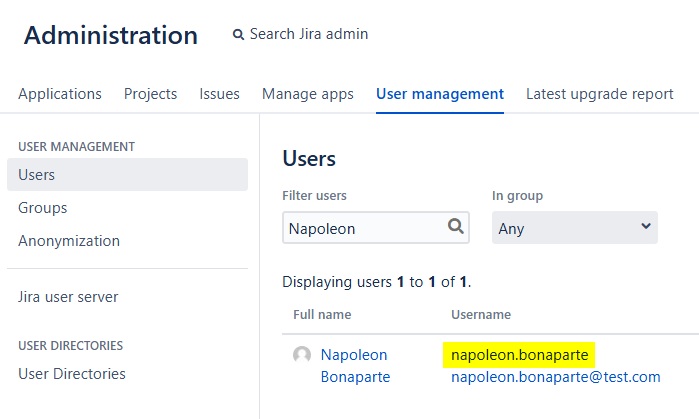
customfield_XXXXXwith the Connect field name or ID.usernamewith a valid username.
All usernames are listed in the User management section of Jira:

Snapshot Text
{
    "fields": {
        "customfield_XXXXX": "YYYYY"
    }
}
You need to replace:
customfield_XXXXXwith the Connect field name or ID.YYYYYwith a valid value.
Specific cases
Populate a Live Text field based on another field
{
    "fields": {
        "customfield_XXXXX": {{issue.customfield_YYYYY.asJsonStringArray}}
    }
}
You need to replace:
customfield_XXXXXwith the ID of the target Connect field.customfield_YYYYYwith the ID of the source Connect field.
Concatenate a new value with existing values for a Live Text field
{
    "fields": {
        "customfield_XXXXX": {{issue.customfield_XXXXX.asJsonStringArray.replace("[","").replace("]",",\"YYYYY\"").split(",").asJsonArray}}
    }
}
You need to replace:
customfield_XXXXXwith the Connect field ID.YYYYYwith the new Connect field key to be added.
Clear a Live Text field
{
    "fields": {
        "customfield_XXXXX": {}
    }
}
You need to replace customfield_XXXXX with the ID of the Connect field to be cleared.
