
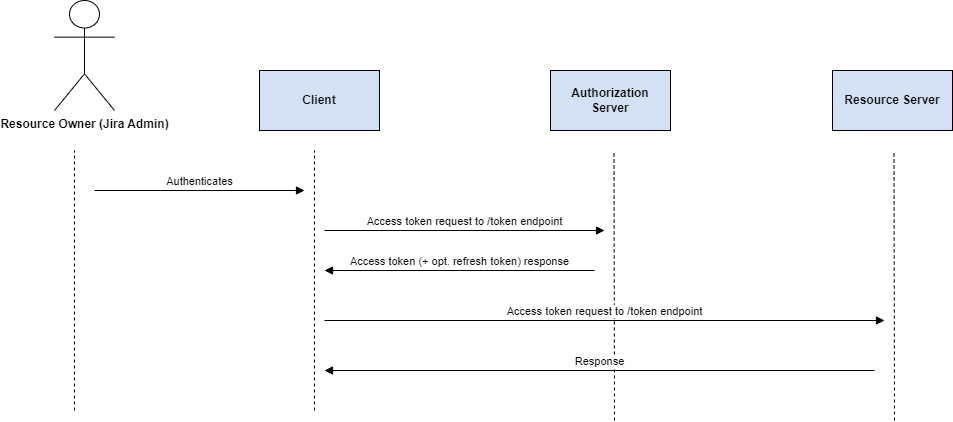
The Resource Owner Password flow is intended for use cases where you control both the client application and the resource that it interacts with.
It requires that the client can store a client secret and can be trusted with the resource owner's credentials, and so is most commonly found in clients made for online services, such as the Facebook client applications that interact with the Facebook service.
Unlike the authorization code or Implicit flows, it does not require redirects and involves a single authenticated call to the /token endpoint.
A typical request to the authorization server looks like this:
curl --request POST \
  --url https://${yourDomain}/oauth2/default/v1/token \
  --header 'accept: application/json' \
  --header 'authorization: Basic MG9hYn...' \
  --header 'content-type: application/x-www-form-urlencoded' \
  --data 'grant_type=password&username=testuser1%40example.com&password=%7CmCovrlnU9oZU4qWGrhQSM%3Dyd&scope=openid'
The following parameters are passed:
-
grant_type=password
-
username for the username of the user
-
password for the password of a user
-
scope for the resource access level requested (optional)
Because the Resource Owner Password Flow involves the application handling the user's password, it must not be used by third-party clients. Even if this condition is met, the Resource Owner Password Flow should only be used when redirect-based flows (like the Authorization code flow) cannot be used.
Configuration steps
1. App registration
Before using OAuth2 with Elements Connect, the first step is to register Elements Connect as an Application with the service.
This is done through a registration form, where the following information shall be provided:
-
Application Name: to identify the Application, i.e.: Elements Connect
-
Grant types: password
-
Granted scopes: to set the access level of Elements Connect
2. Datasource configuration
-
From Elements Connect administration page, create a new Datasource of type "URL".
-
From the datasource configuration page, select OAuth2 - Password from Authentication
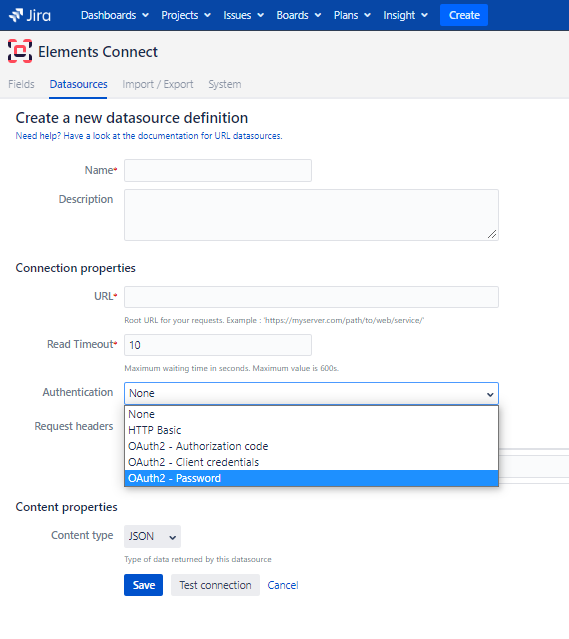
This will display the following fields:
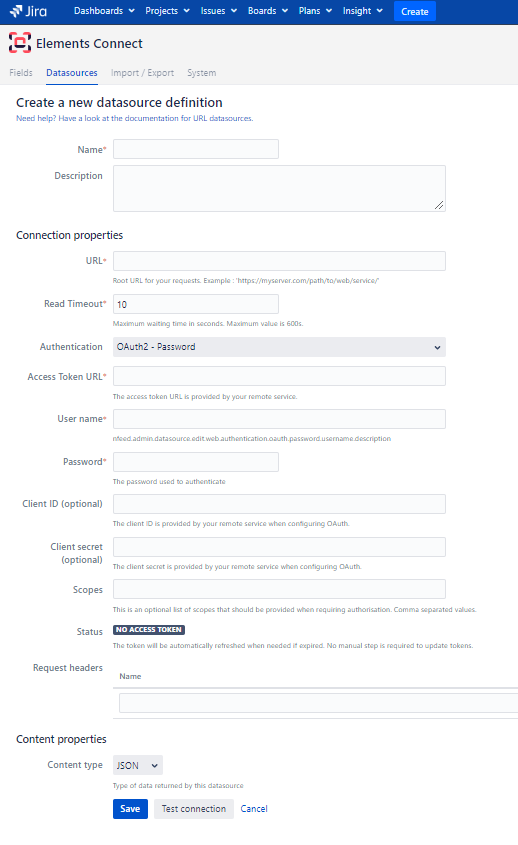
3. Access token retrieval
The next step is to request an access token in order to be authorized to access the resources of the resource server.
-
When all fields have correctly been filled, click "Test connection"
A "Valid access token" status will display if the access token was successfully retrieved. In the event where the access token has an expiry date, this date will be displayed alongside the status.
In the event where the access token has an expiry date, a new access token will be automatically requested without user's interaction.
-
Click "Save". The fetched token will be stored next to the datasource configuration in the database.