
Definition
The Zendesk Sale Datasource allows you to create a bridge between your Zendesk Sell accounts and the Elements Connect add-on. It will allows you to add, for example, leads contact in Jira tickets. You can check Zendesk Sell API definition for more information.
Prerequisites:
-
Have a Zendesk Sell account with administrative privileges: required to create the OAuth credentials from Zendesk Sell and to get the credentials from Elements Connect datasource configuration
-
Have a Jira account with administrative privileges: required to configure Elements Connect
OAuth2
Unlike an URL datasource, which is very similar, Zendesk Sell datasource uses exclusively OAuth2 for authentication.
Zendesk Sell configuration
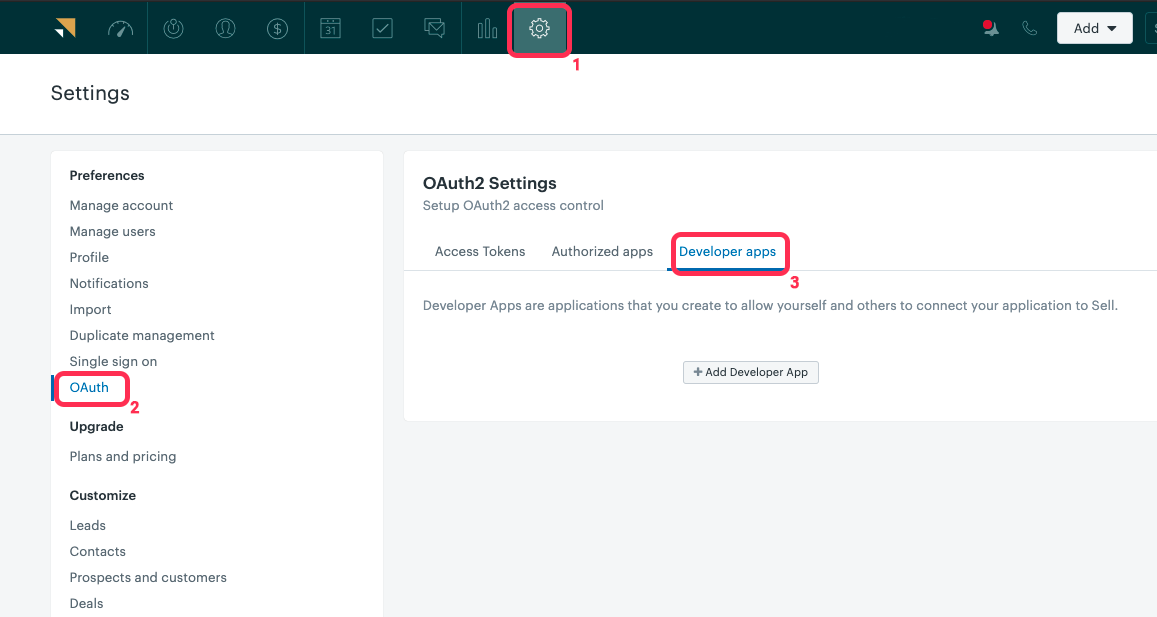
The first thing that you need is to setup an OAuth2 access to Zendesk Sell. From your Zendesk Sell dashboard, open the Settings. This item can be found in your user menu in the top section of your dashboard page. You need to have administrator permissions.
In the left menu, go to Preferences → OAuth and then select Developer apps page.
Create a OAuth Client
In the right section of this page, there should be a '+ Add Developer App' button. Click this button to create a new application.
Now, you should have this :
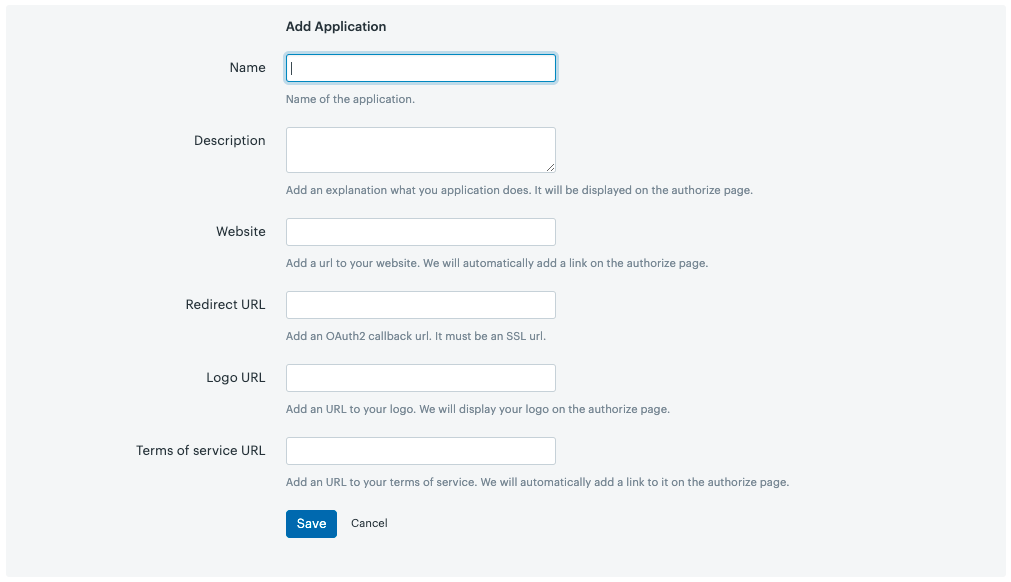
You need to set the following parameters:
Name
Input a name of your choice, Connect for example. This is not used by Elements Connect.
Description
A short description of your client for users when they're considering granting access to your application. This is not used by Elements Connect.
Website
https://my_jira_server/secure/Dashboard.jspa
Redirect URL
You need to input the callback URL to Elements Connect on your platform.
In short, if your dashboard URL is https://MY_JIRA_SERVER/secure/Dashboard.jspa then the value here will be:
https://MY_JIRA_SERVER/rest/nfeedzds/1.0/datasources/oauth/_callback
HTTPS ONLY Your Jira instance must be reachable through the HTTPS protocol.
Zendesk Sell REST API does not accept callback urls serving with the HTTP protocol (not secured).
Important note about the base URL
The base URL in your system information is the reference. For the authentication to work properly, this base URL must be visible and accessible from the internet.
Logo URL
You can add the following logo for display :

Term of service URL
Legal Notice: Data security and privacy statement
Now click the 'Save' button at the bottom of this window.
Now Zendesk Sell will give you a Secret ID and a Secret token.
Copy that value, it will be needed when setting up the OAuth on Elements Connect side. It will be your Client Secret when configuring the connection in Elements Connect.
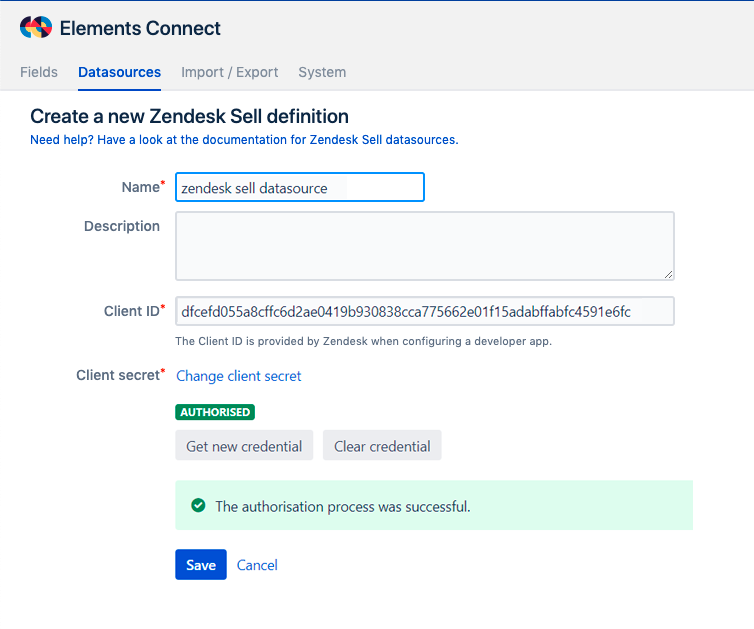
Datasource configuration
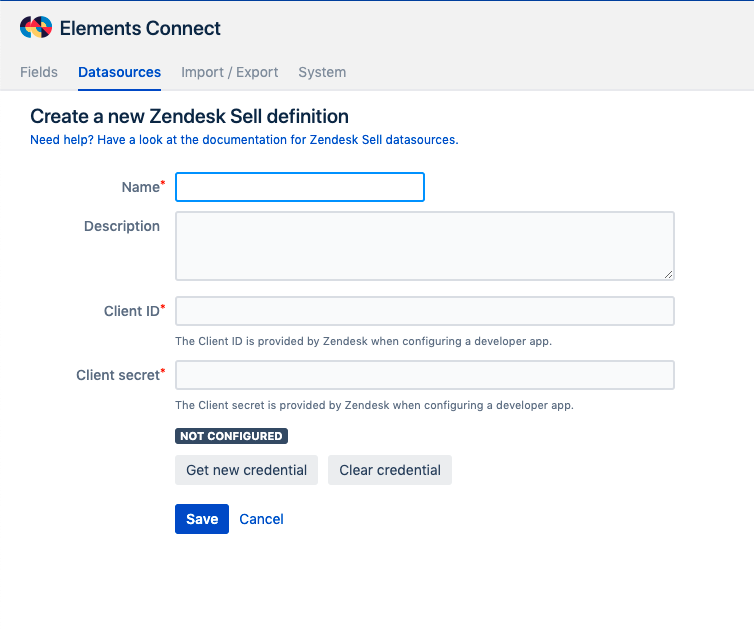
The Zendesk Sell datasource requires to obtain a credential token before it can be used by fields:
-
Define the datasource Name. The name will be used later to reference the datasource connector to use in the configuration of Elements Connect custom fields.
-
Write a small Description to qualify this datasource. This is a reminder of why you are using this connector.
-
Specify the Client ID and Client Secret. Here you should paste the credentials created previously in Zendesk Sell.
-
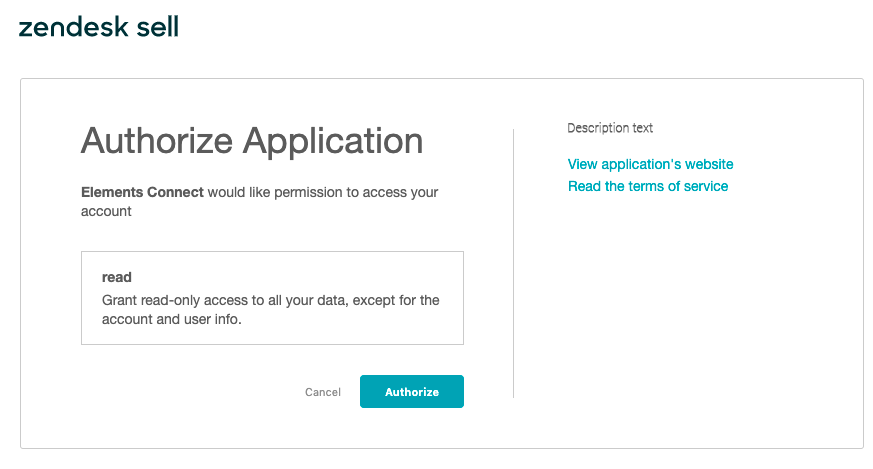
Click on Get new credential to authorise Elements Connect to use the OAuth2 credentials created previously in Zendesk Sell.
-
Click on Authorize
-
Click on Save.
Now you can connect a field to Zendesk Sell API, you can find an example here: Create a Zendesk Sell Leads picker in Jira issues