
The need: Set user's manager as approver with a LDAP datasource
When a new ticket is created in your internal Help Desk portal, you may need to define its manager as approver. You are using an LDAP datasource in which is stored all the info about the employee and his manager, and you need to retrieve these information in Jira. To do this, we will retrieve the manager's data (DN) from your LDAP datasource using Elements Connect.
Solution: Create Elements Connect custom field and set the manager as approver of the ticket on the issue creation
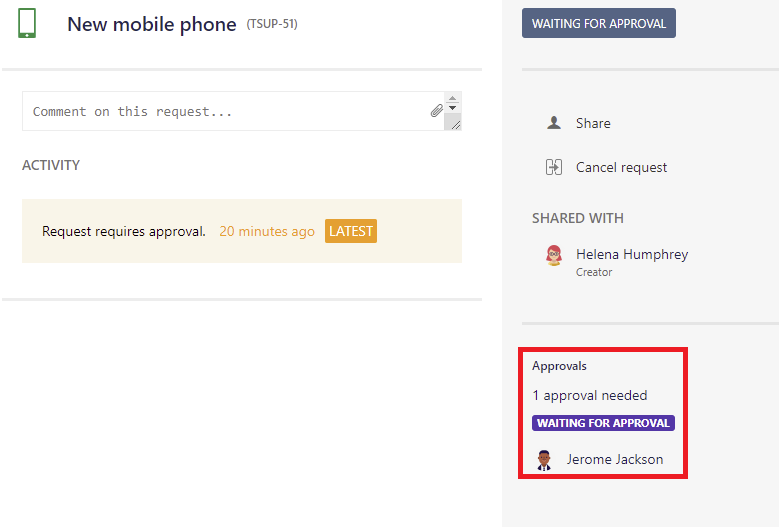
As displayed here, one of the employees, Helena, has a problem with her cell phone. She decides to raise a ticket and we can see Jerome (his manager) being automatically designated as approver.
To obtain this result we are using Elements Connect to populate Jira custom fields with information coming from LDAP, by executing LDAP queries inside Elements Connect to fetch the right data. Then we use post-functions to set the manager as an approver of the ticket on the issue creation.
Configuration guide: how to set a manager as approver with a LDAP datasource
Step 1: Connect to the LDAP datasource
For this demo, the fields are connected to a LDAP datasource. Learn how to configure the connection to a LDAP datasource.
Step 2: Create Elements Connect fields
In order to create the 3 Elements Connect fields required for this use case, we are providing you with preset example. You can download them and import them within your Elements Connect administration page and adapt them as much as you want to fit your use case.
Our aim is to set an approver in our Customer portal like that:
We are going to create 3 Elements Connect fields:
-
Reporter info field displays all the reporter's information from the LDAP datasource, in our preset example we are providing a template in HTML to display theses information within a table.
-
Reporter manager DN field is a buffer field used to retrieve the DN of the manager and then from this field and thanks to a dependency with the Manager field we extract the email that corresponds to the username of the manager.
-
Reporter's manager field displays the data fetched from the reporter manager DN field (the email address and then the username stored in Jira) and it'll be used in our workflow.
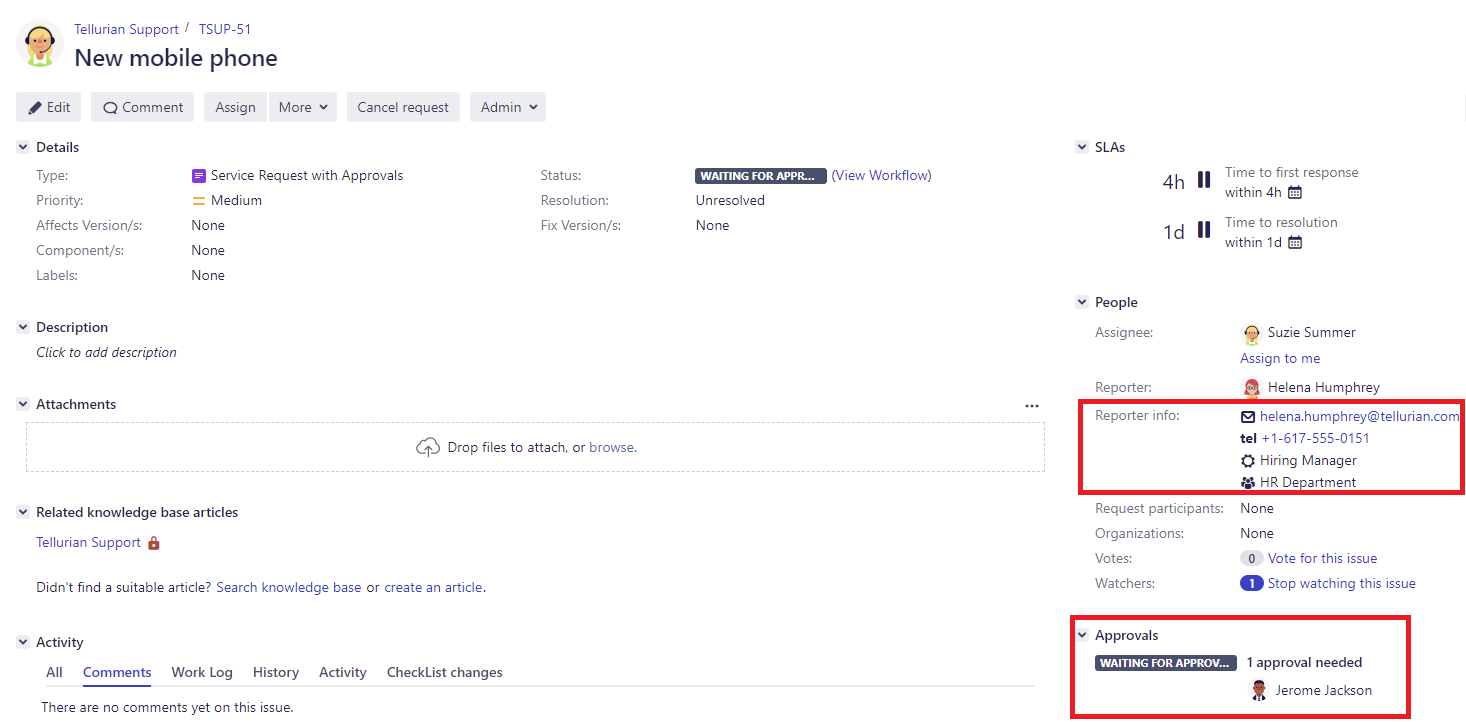
And there is the ticket agent view with the data fetched by Elements Connect:
The Reporter manager DN field is not displayed on the ticket
The preset example:
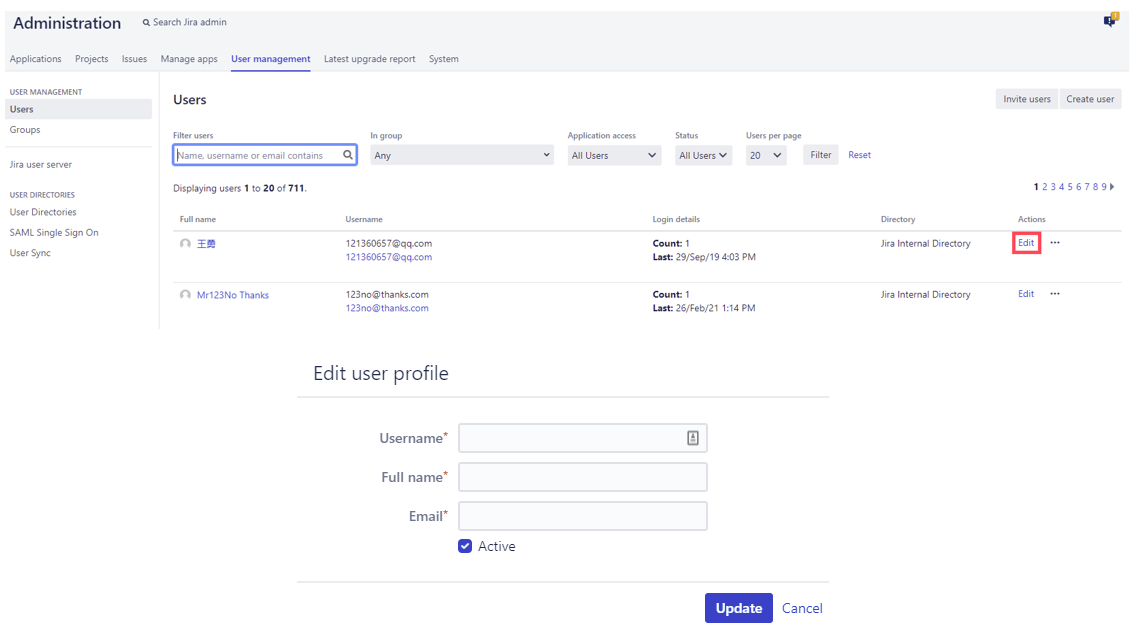
Our preset example will only work if the email address of the report is used as the username in the Jira instance, if you need to change that you have to go to your user management panel within your admin and change your users e-mail:
Import them in your Elements Connect administration following the step-by-step guide: How to import Elements Connect field configuration files
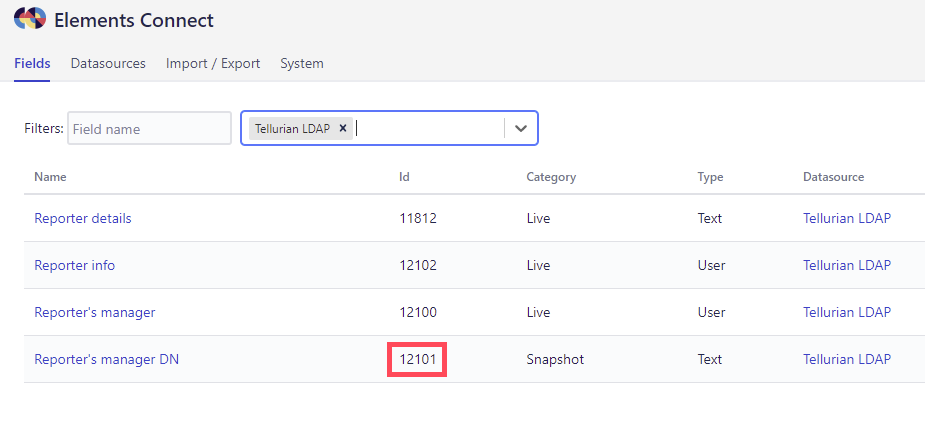
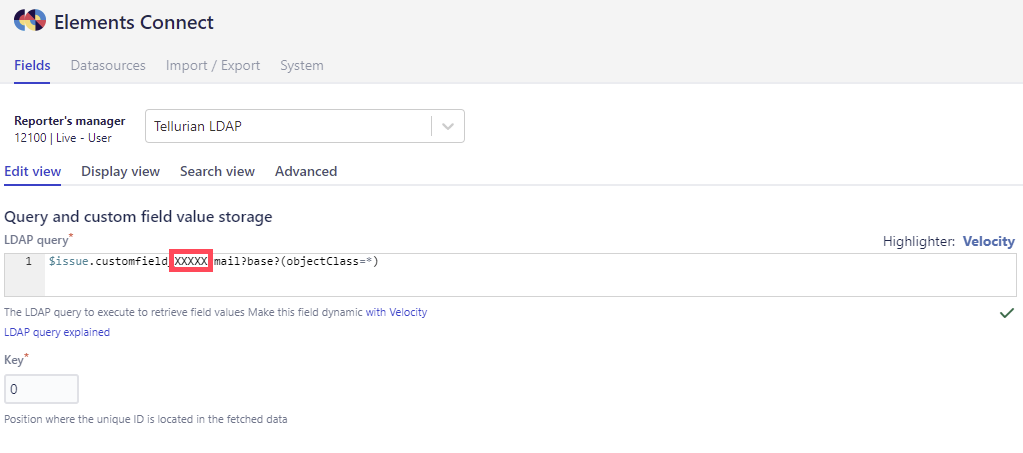
Once you imported the Elements Connect field, you will need to update the custom field ID of "Reporter's Manager". In order to do so, you will need to retrieve the ID from the fields panel of Elements Connect admin and paste into into the Reporter"s manager query:
Step 3: Add the fields to your issue screens
Next step is to add this field to the aimed issue screens. In our case, we would like to display the Reporter info field in the Agent view. The Reporter manager DN is only used to fetch the data for the Reporter's manager field, we don't need to display this info.
>> Learn how to add Elements Connect fields to Jira issue screens
Step 4: Add post-functions on the workflow
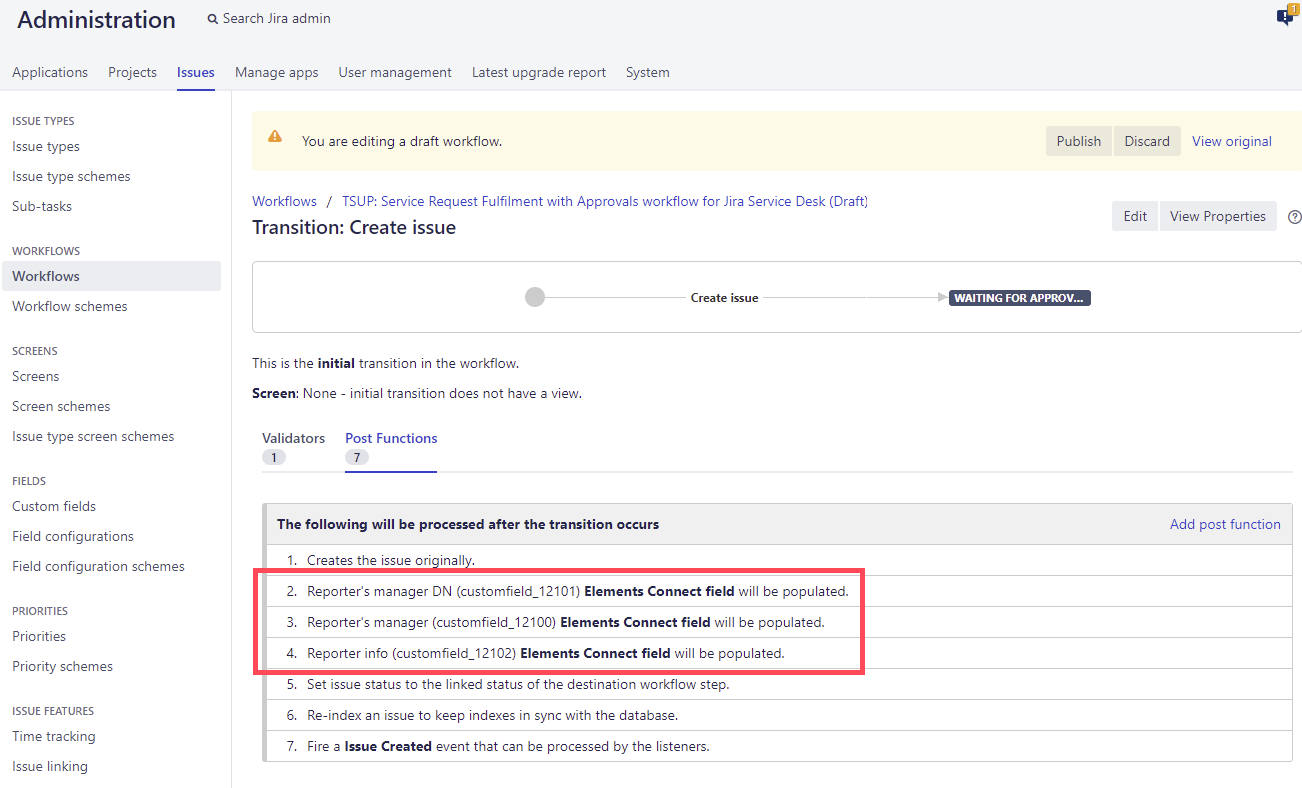
We need to set 3 post-functions upon the Create issue transition to populate Elements Connect fields automatically when a ticket is created:
-
First the reporter manager DN
-
Then the reporter's manager
-
Finally, the reporter info
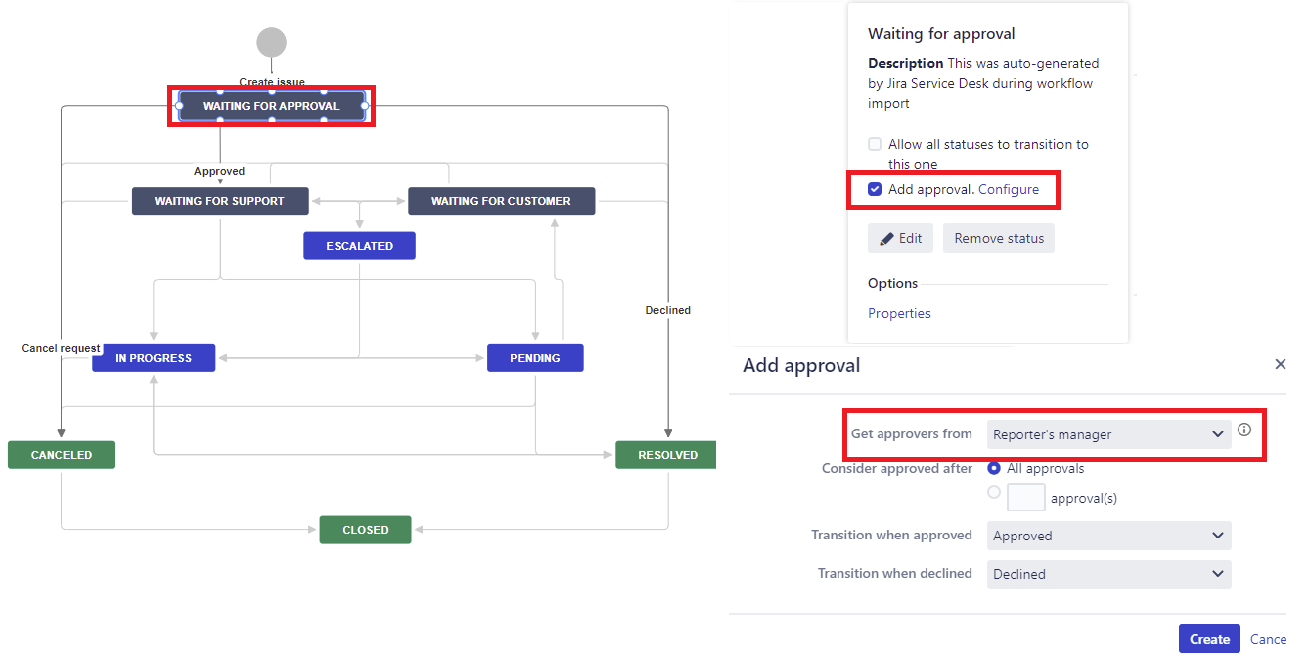
The last step will be to add the custom field "Reporter's manager" as approval within our workflow, more precisely inside the waiting for approval status. In order to do so we will edit this status and check the option "Add approval." and configure it to get approvers from the custom field "Reporter's manager" as described here :
There is some tutorials if you want further indication on the use of Elements Connect with a LDAP datasource:
-
You can get user information from a LDAP datasource by following this tutorial.
-
You can display LDAP user's Manager information by following this tutorial.