
Context
If your team is already using Confluence templates which meet their needs, there is no reason why that should change. But what if you could improve your Confluence and Jira integration?
With Elements Publish to Confluence, you can make your team's processes even more efficient by inserting Jira data into their Confluence templates, without any additional actions on their part.
Tutorial
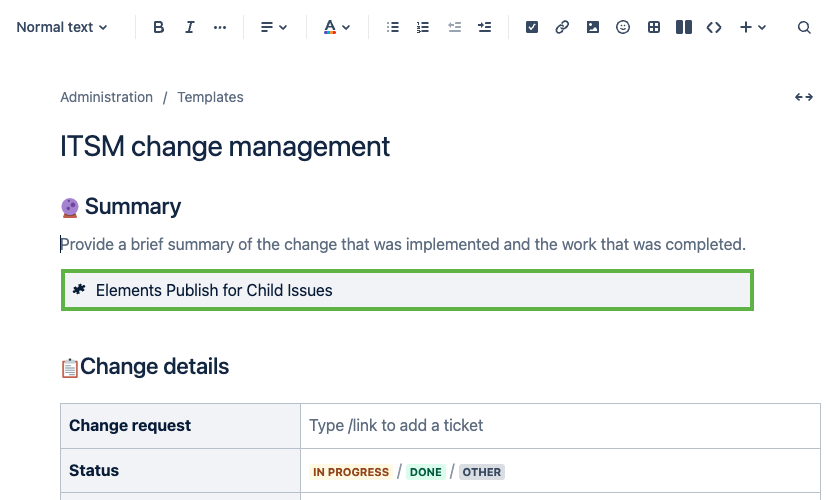
In this example, we want to use a specific Confluence template called "ITSM change management" to create pages from an issue with the key SUP-1.
This guide explains how to insert Jira data into this Confluence template so that every time the recipe is used, values from the Jira issues are automatically injected into the Confluence page.
Prerequisites
-
A recipe called "Add to Knowledge Base" has been created and activated.
-
This recipe is configured to create pages in a specific Confluence space, with a specific parent page.
-
This recipe has been configured to use the "ITSM change management" Confluence template.
Configuration steps
1 - As a Jira admin, go to the "Elements Publish to Confluence" administration and click on Recipes in the navigation bar.
2 - In the Recipes listing page, select "Add to Knowledge Base" in the Active Recipes list.
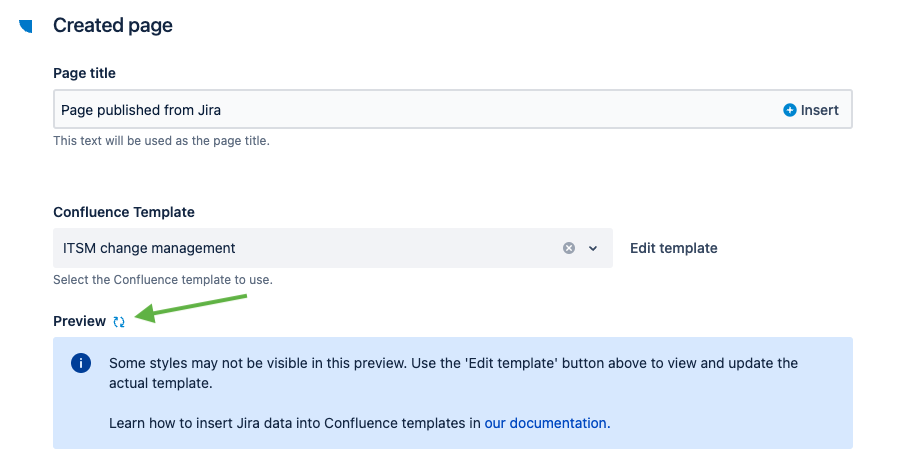
3 - In the Recipe configuration page, click on the Content tab.
4 - In the "Created page" section, use the link in the preview panel to open the template editor in Confluence.
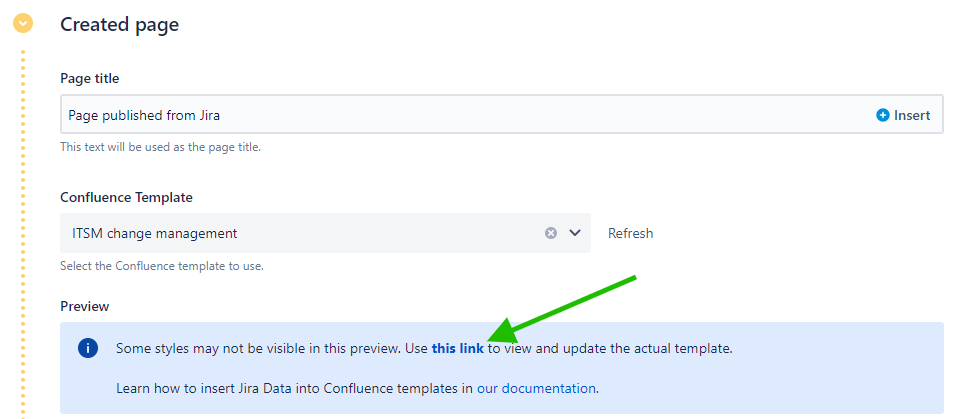
The template editor is opened in another tab.
Elements Publish to Confluence uses the same permission scheme defined in Confluence and Jira: in order to open the template editor, the user needs to have the appropriate permissions on the template in Confluence.
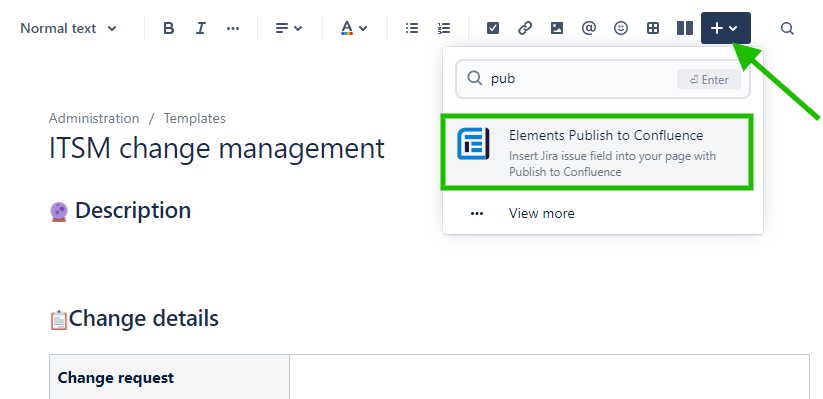
5 - In the template editor, select where you want your field value to be injected in the page. Then, use the "+" option to select the "Elements Publish to Confluence" macro.
6 - In the dialog, select the field you want to insert in the template.
In our example, we will insert the Description value of the Jira issue.
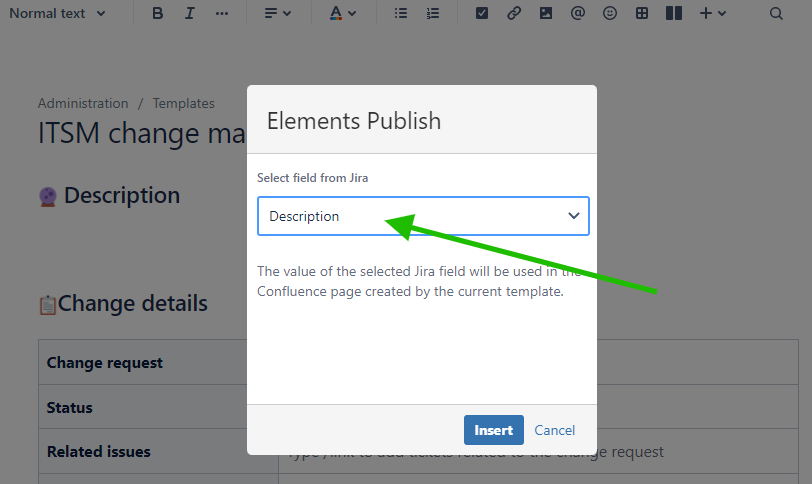
7 - Click on the Insert button to add the field to the template.
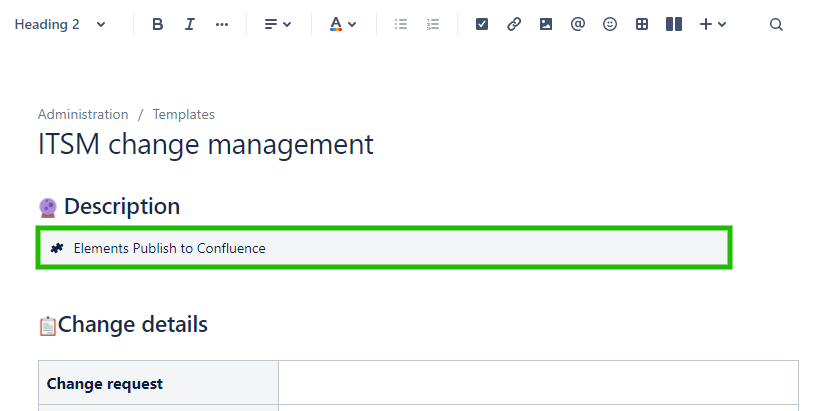
You can add several fields to the same template. Here, we are going to add the issue key, issue status, reporter, and "Keywords" custom field as well.
8 - Save the template once all the fields you need have been inserted (for this example, we will not take into account the fields of the child issues above).
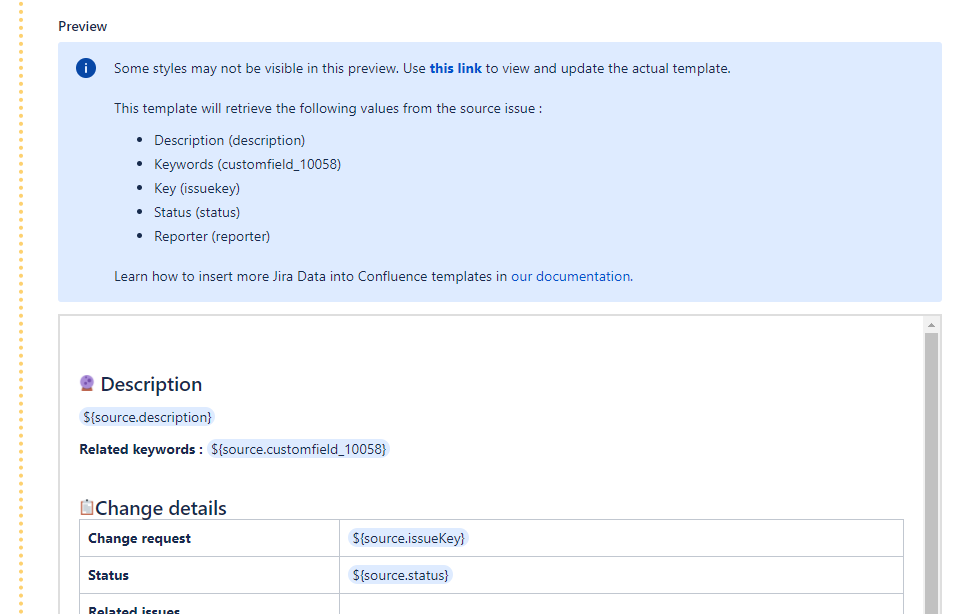
9 - Go back to the recipe configuration tab of you browser, and click on the Refresh preview button in order to reload the preview.
The preview is reloaded, and the Jira fields inserted in the Confluence template are listed in the preview information panel.
10 - Use the Save button to save the changes in the recipe.
Result
With these settings, every time the "Add to Knowledge Base" recipe is triggered from SUP-1, a page will be created from the Confluence template defined in the recipe.
This page will exactly look like the "ITSM change management" template and contain the values from the fields Description, Keywords, and Reporter, as well as the key and status of the issue from which the recipe was triggered.
Retrieving content from child issues
You can also insert fields from the child issues of the source issue using a dedicated macro. Here is how to do it:
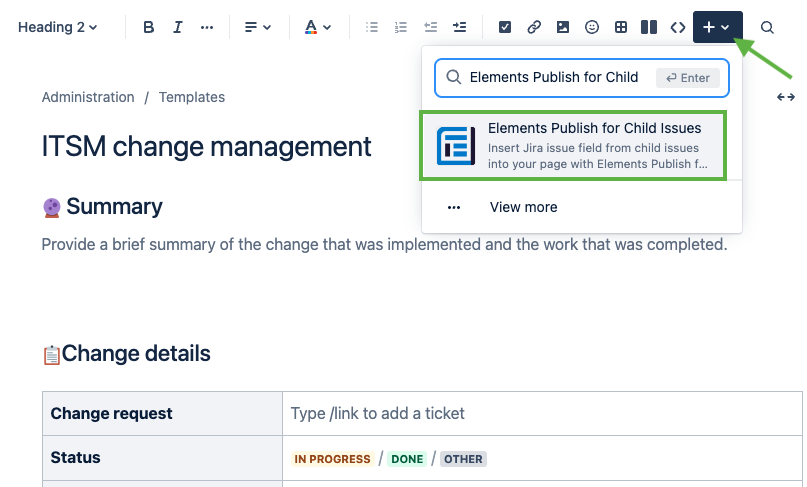
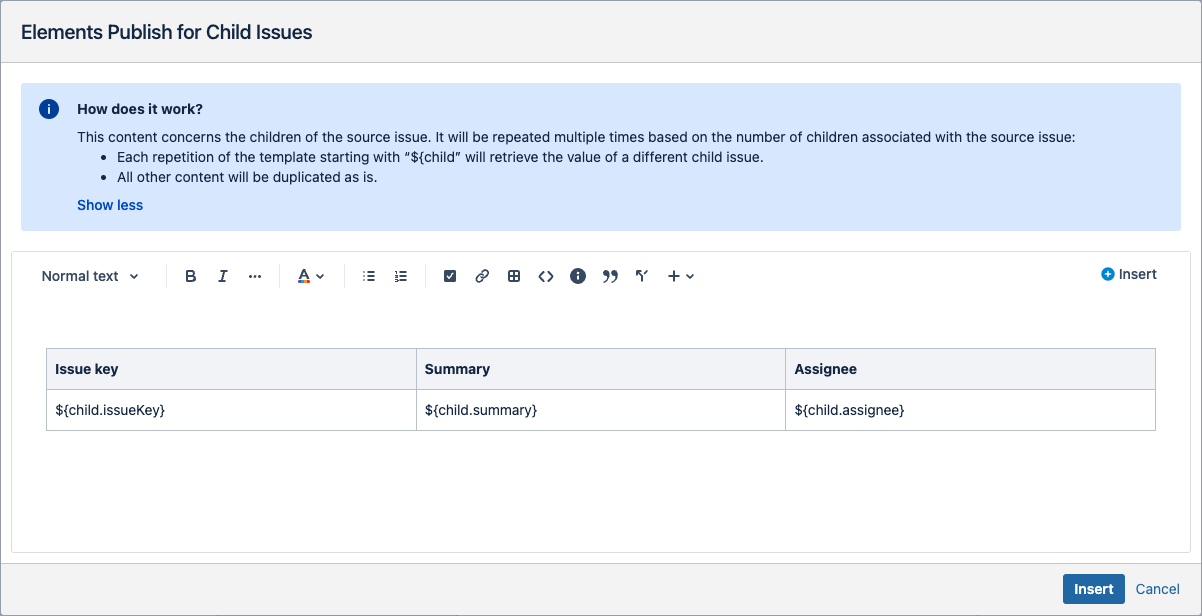
1 - In the template editor, select where you want your field value to be injected in the page. Then, use the "+" option to select the "Elements Publish for Child Issues" macro.
2 - In the dialog, select the field you want to insert in the template. In our example, we will insert the Issue Key, the Summary and the Assignee value of the child Jira issue.
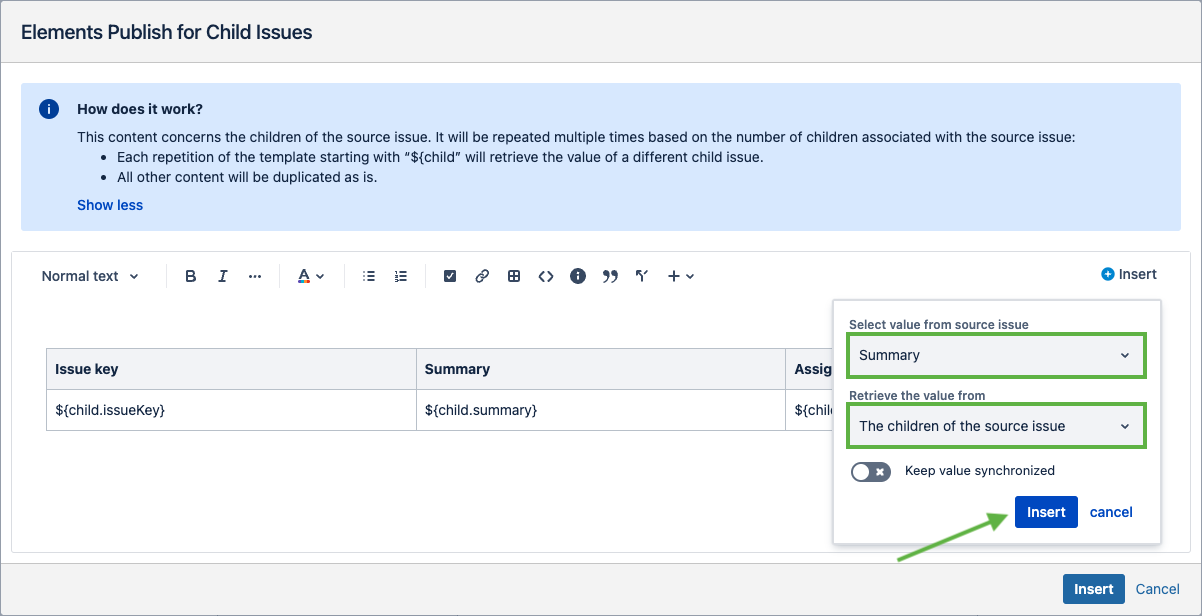
Everything that will be added here will behave as a loop, and the loop will repeat multiple times based on the number of children associated with the source issue (if the source issue has three child issues, the macro will be repeated three times). For each repetition, the values of a child issue will be displayed in place of the placeholders. You can add any content (including values from parent or source issue), just know that it will be repeated as is for each child issue.
If you want to start a new loop, just add a new macro.
3 - Click on the Insert button to add the field to the template.
You can add several fields to the same template. Here, we are going to add the issue key, summary, and assignee from the child issues of the source issue.
4 - Save the template once all the fields you need have been inserted.
5 - Go back to the recipe configuration tab of you browser, and click on the Refresh preview button in order to reload the preview.
The preview is reloaded, and the Jira fields inserted in the Confluence template are listed in the preview information panel. You will see that two tags are displayed before (CHILD LOOP START) and after (CHILD LOOP END) the inserted macro, that way you can see where the loops containing child issues content are.
10 - Use the Save button to save the changes in the recipe.
•••
New to Elements Publish?
If this tutorial has stirred your imagination, why not give it a try?
• Try Elements Publish for free •