With conditional coloring, you can apply coloring to cells or rows based on your defined criteria to visually emphasize or differentiate among the data on your board. This article will cover the basics of how conditional coloring works.
You will find the conditional coloring feature at the top of your data table by clicking on the paint tin icon as shown below. Clicking on it will open the following menu where you can begin to choose your colors and define your conditions.
.gif?cb=c03c246aa6493e4b0455e3193fc51ba3)
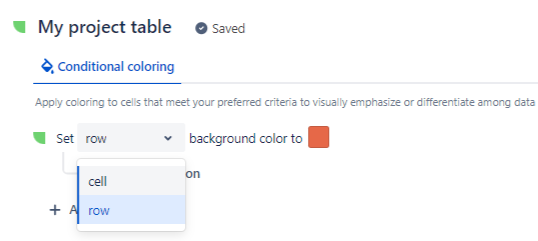
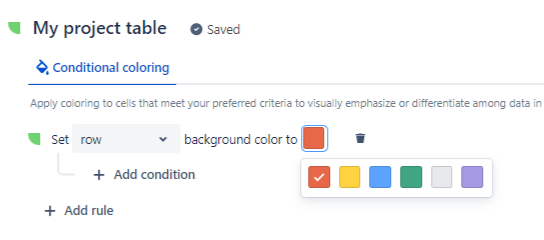
Choose a color and what to color
The first step is to choose what to color (cell or row)
and in what color.
Define conditions
Now the second step is to define the conditions to meet for that coloring to be applied. A conditional coloring rule can consist of up to 10 conditions.
Conditions are cumulative, they can be considered as AND conditions.
A typical condition is designed as follows:
When <column name> is compared as <comparison operator> against <either a column or a value> that equals to <column name or value>

Once you're done configuring the conditions defining your conditional coloring rule, you can test your rule is working as expected and then enable it by toggling it on.
.gif?cb=f90d16c9a8c4393f972963924ef41025)
Overlapping Rules
If you enable multiple rules, all rules will apply. However, you can toggle a rule off in case you don't want it to be applied.
If you configure two or more rules that encompass data that overlaps, the last rule you apply will supersede the first.
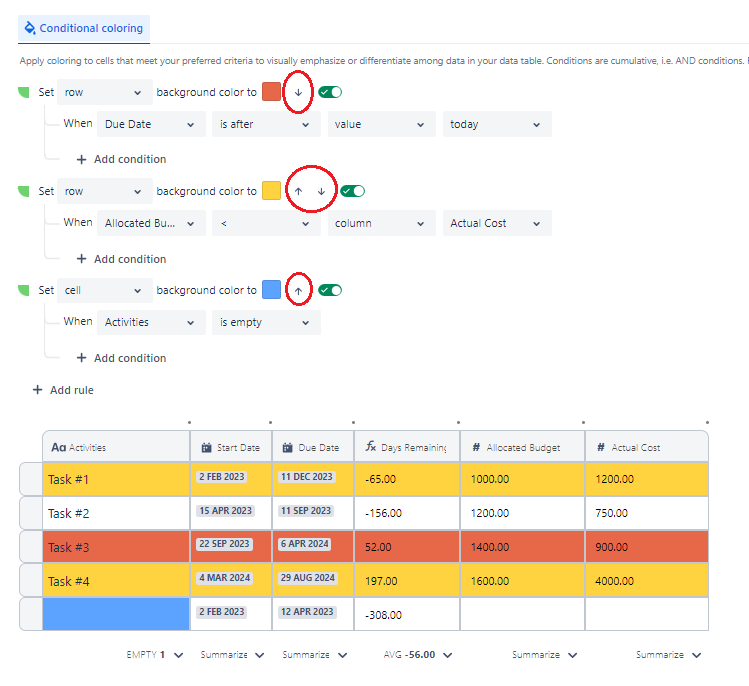
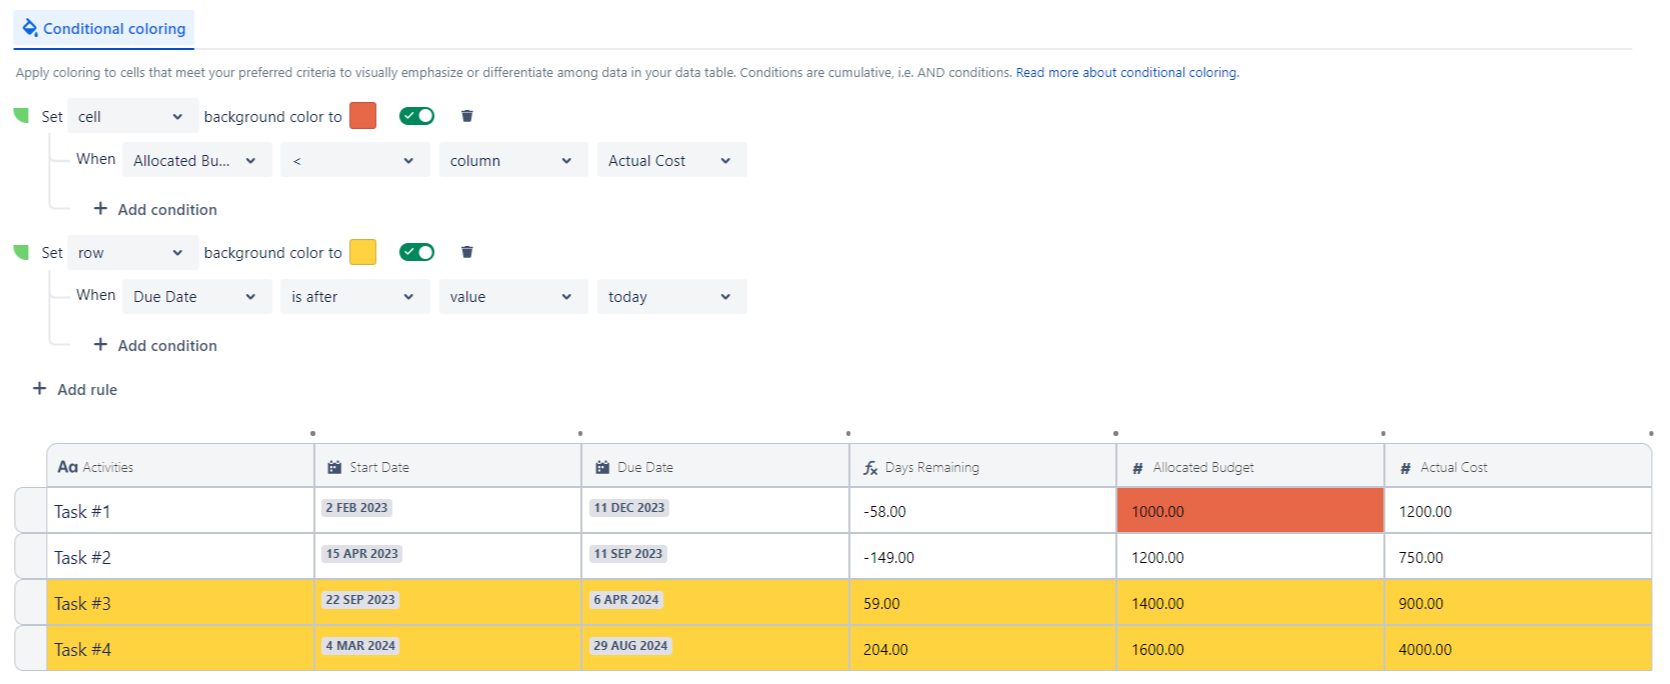
Let's see how this works through a practical example.
Let's consider the two following rules:
-
The first rule highlights rows in red where Due Date is after today
-
The second rule highlights cells in yellow where Allocated Budget is smaller than Actual Cost
We can notice these two rules overlap on the last row, in the Allocated Budget cell.
This overlap area is colored in yellow because the last rule highlighting cells where Allocated Budget < Actual Cost supersedes the first one highlighting rows where Due Date is after today in red.
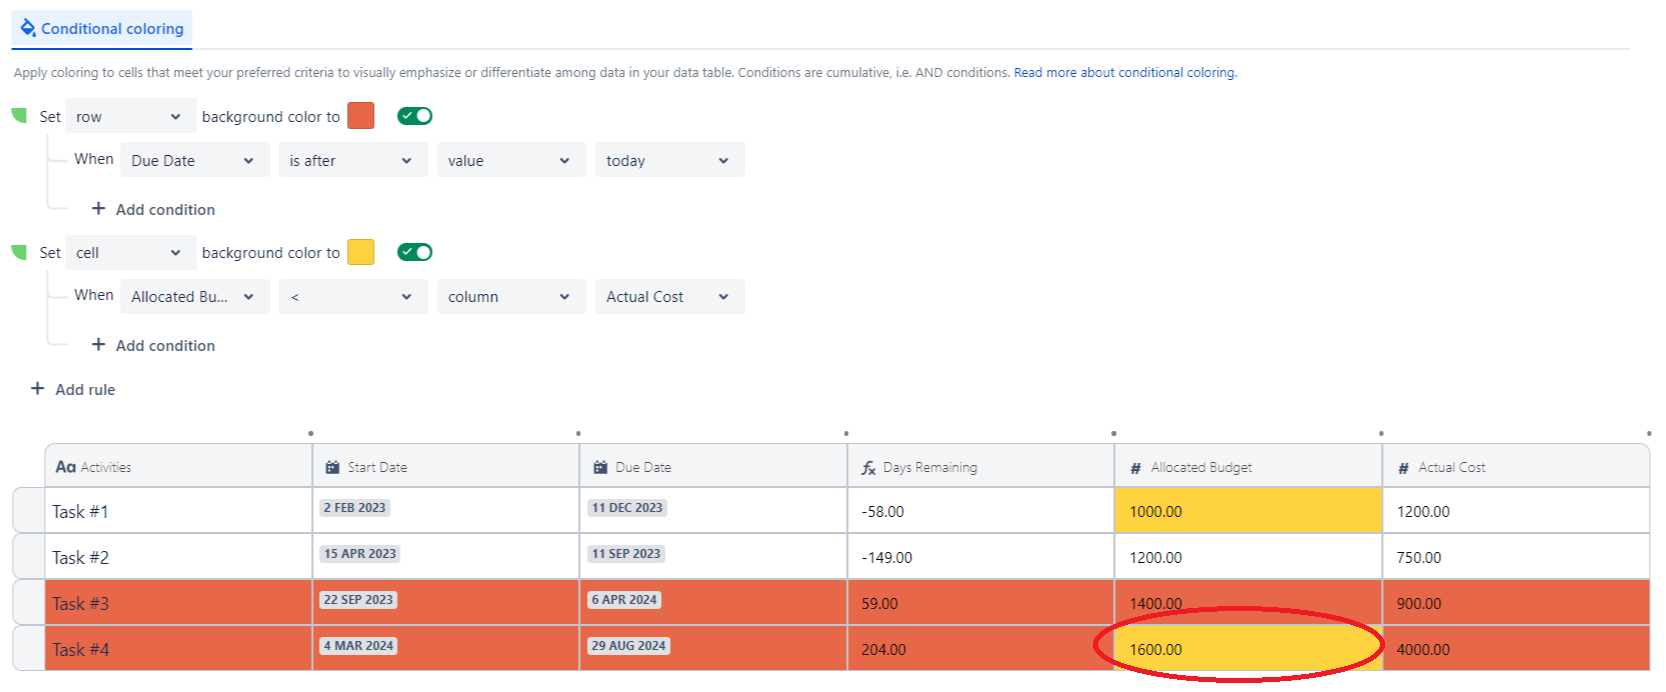
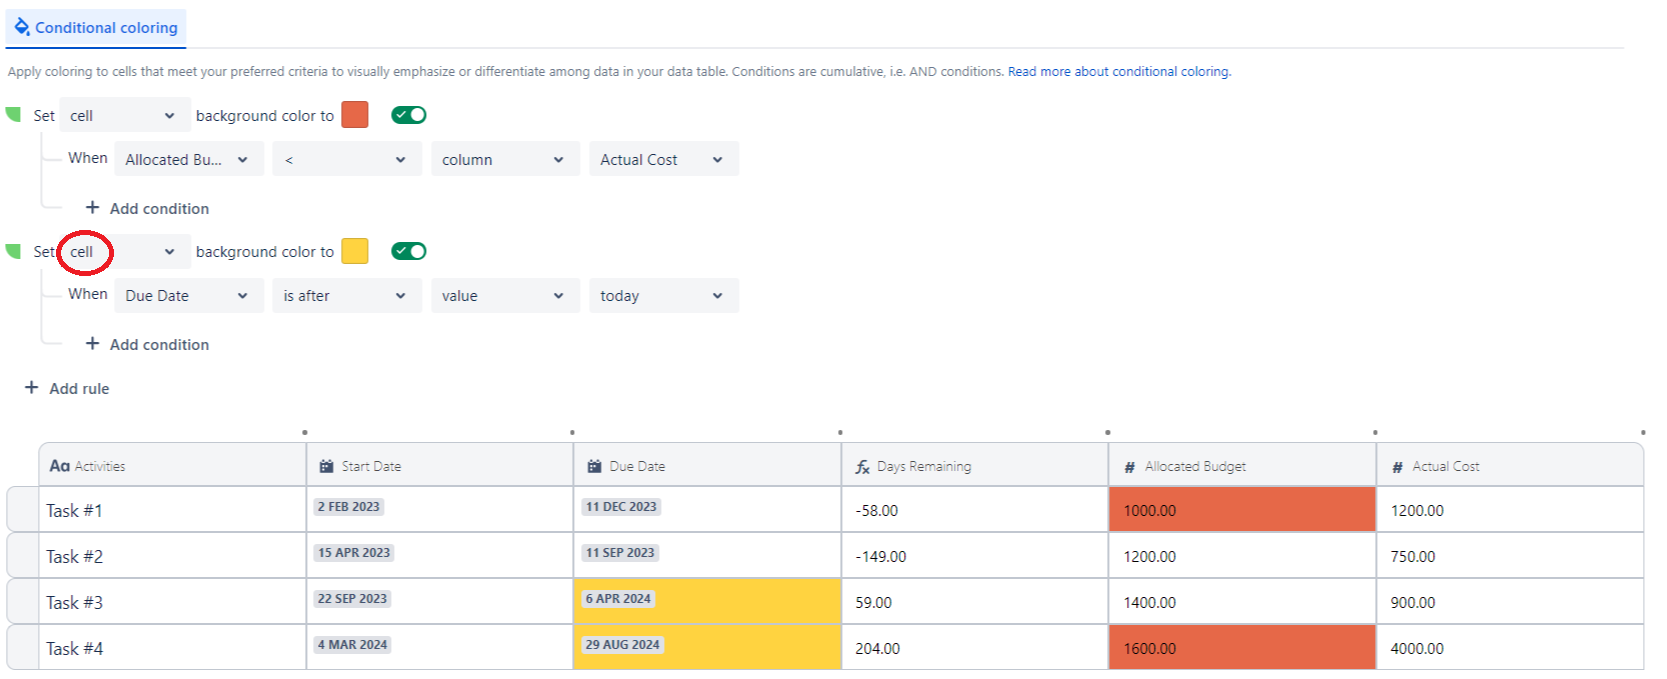
This is what happens if you swap the order of rules:
You will no longer be able to see the overlap area on the last row, in the Allocated Budget cell because the second rule highlights the entire row.
A solution to this is to change the second conditional coloring rule to highlight cells instead of rows:
Reorder Rules
In order to help you manage overlapping rules, i.e. if you want a certain rule to supersede another one, you can easily reorder rules: