How to easily pull data from Excel to Confluence
Importing your Excel files in Confluence can bring many benefits to your team:
Centralizing information. No more searching in different drives or mailboxes to find the latest version of the file you want. No more wondering if someone worked on the document on their personal desktop and you are not informed. With a single Confluence sheet the data you look at will always be up-to-date.
Fostering team collaboration. You and your team can work on the same document, inside the collaborative environment of Confluence. Thus reducing the risk of errors and the time and effort necessary to maintain multiple file versions and send them internally.
Contextualizing data. By embedding your spreadsheets in Confluence, you can surround the tables with descriptions and comments to help colleagues understand the data and what insights they can get from it.
As you can see the advantages are numerous, but when looking at how to take the leap and integrate Excel tables in your Confluence page there are plenty of options to choose from. Let’s have explore the alternatives available and discuss which ones are best suited to collaborate on data in Confluence.
Pull data from Excel to Confluence: your 3 options
The recent versions of Confluence allow you to pull data from Excel to Confluences in various ways. To help you determine which one is right for you, we’ll briefly explore the different solutions to add spreadsheets in Confluence in the section below.
Using the Atlassian companion app
The plugin adds an edit button that allows you to open your files in Excel, then save the modifications directly on your Confluence page.

However, this method moves away from the collaborative spirit of Confluence as you open an external app. On top of that the file rendered on the page is a miniature version of the table that lacks any form of display option.
Note: On Cloud, you won’t be able to edit files using the Companion app after 31 March 2022 as Atlassian will remove the app from its Cloud platform.
Choosing the Confluence Office connector
If you do not use the companion app, you have the option of using a browser depending on your office version (see Office connector documentation) to edit an Office document attached to a Confluence page.
Simply go into the page attachments list, and you should see an Edit in Office button beside the attachment you want to edit.
The file will automatically open with Excel and the modifications will be saved directly on your Confluence page.

This is an other simple option but again lacks any kind of collaborative spirit or display properties to make your table enjoyable to use and read by your team.
Using an external plugin like Elements Spreadsheet
At Elements we found those options were too limited and curbed our productivity. That is why we created Elements Spreadsheet, a simple Confluence plugin that allows you to transfer your data from Excel to Confluence in a few clicks.
The plugin allows you to display dynamic tables seamlessly in Confluence. It uses native Confluence features like user mentions and dates, support formulas, data filtering, dropdown lists and is fully compatible with your Excel files.
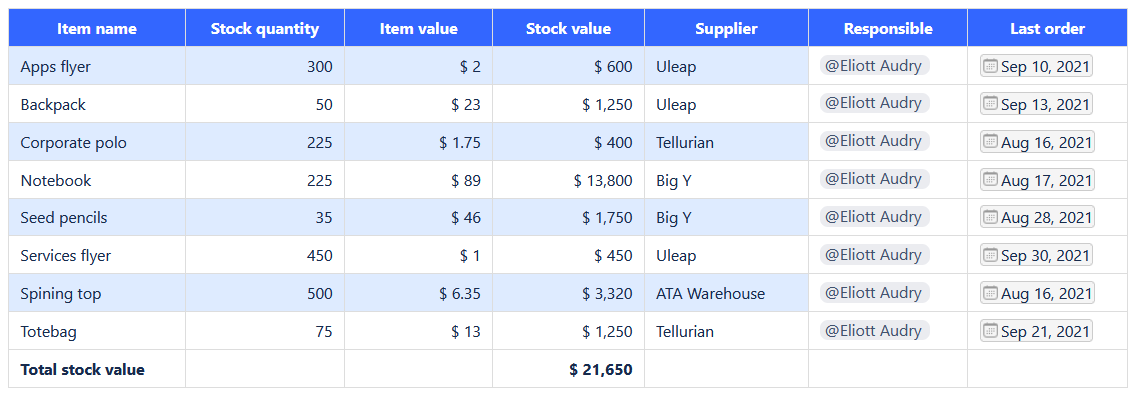
To have a glance at how well the app can integrate with your team processes, you can check some of our detailed use-cases:
Import an Excel file into Confluence using Elements Spreadsheet
How your Excel sheets are rendered is often just as important as the content. Here are our top tips and best practices in order to make the import process smooth and ensure your data is presented in a clear way.
Best practices for preparing your Excel document before importing it in Confluence
These general guidelines will help ensure that your table will be as close to the original as possible when importing it to Elements Spreadsheet for Confluence.
Apply the correct data format: For instance be sure your dates cells are in the date format. This way they will match the native Confluence dates aspect after the import.
Format your data as a table in Excel if you want your rows to display alternating row colors. The app will detect it automatically and apply alternating row colors to the corresponding area.
Make sure to not have an empty first row, and that the first row is your header row with names for the data in the corresponding column.
Importing your Excel spreadsheet in Confluence
Now that your data is prepared, let’s look at how to import it in a few simple steps using Elements Spreadsheet:
Go to your Confluence page where you want to import your Excel file and insert the Spreadsheet macro.
Select “Import file” and click on the “Browse” button to select your Excel document on your computer.
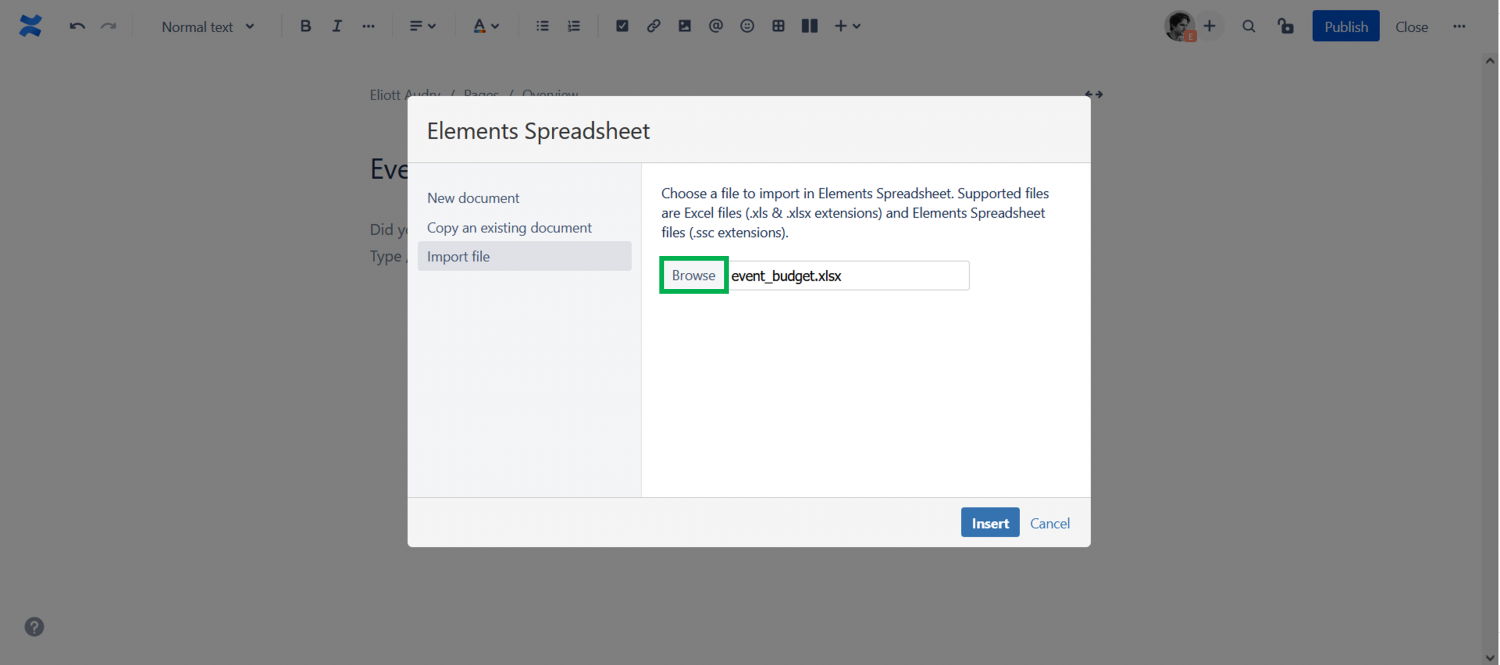
Note: To be available on your Confluence page, you have to save your imported document in the editor (even if you don’t edit it).
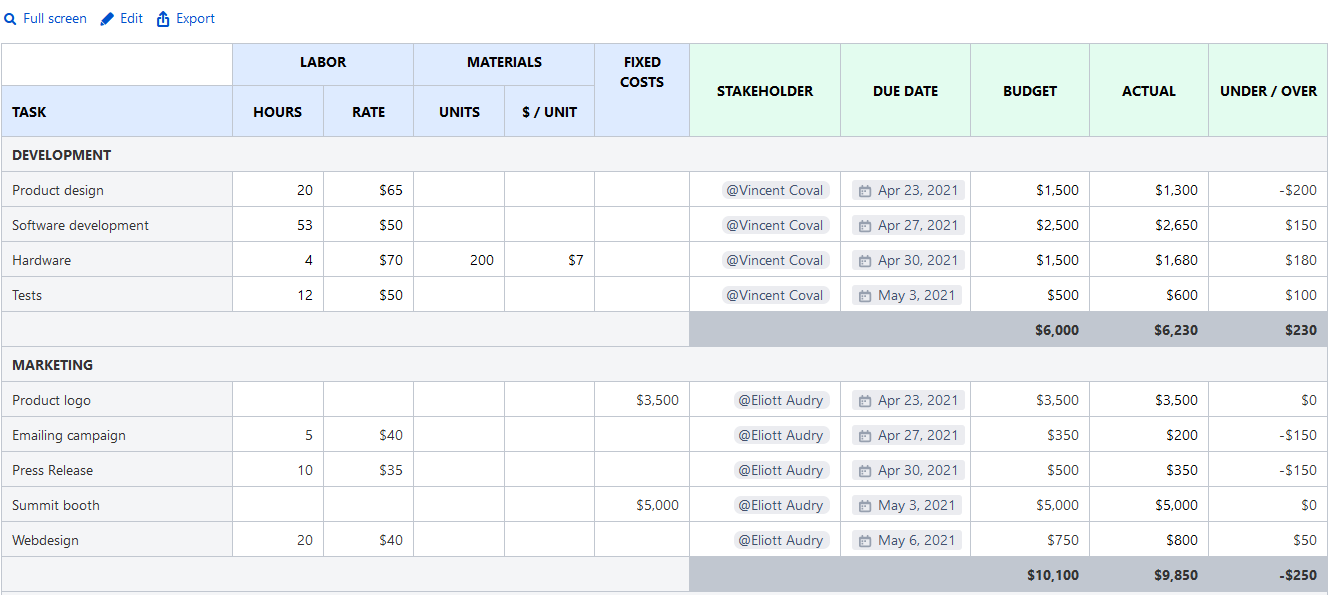
That’s it, you’ve pulled your Excel spreadsheet into Confluence. Let’s now see how to optimize the way it’s rendered.
Display options for your Elements Spreadsheet documents
When the page is in edit mode, simply click on the Spreadsheet macro. You have 3 sets of buttons popping-up at the bottom:
Edit to configure the advanced rendering options.
Shortcuts to adjust the width of your table in display mode: Centered, Wide or Full Width.
Delete to remove the table from the page.
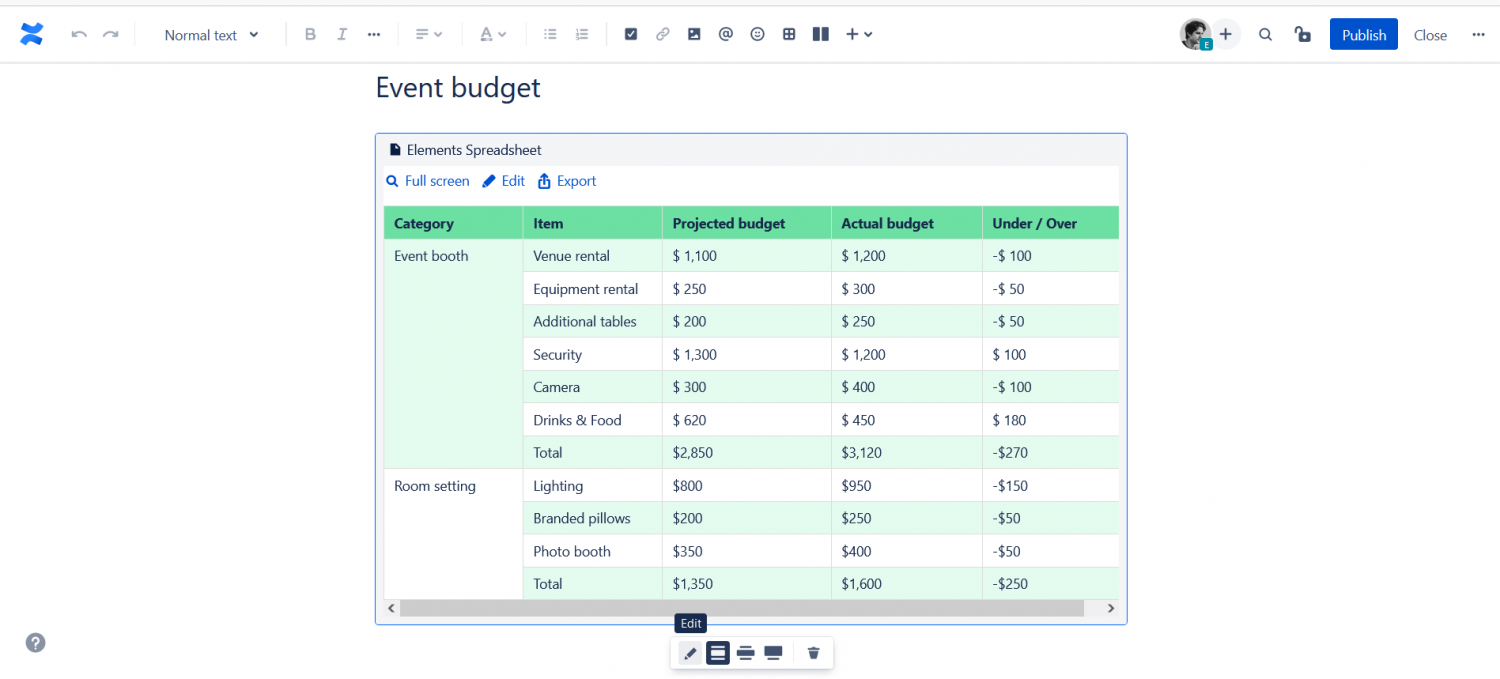
If you click on Edit, a pop-up window will appear with multiple options to configure the sheet rendering mode.
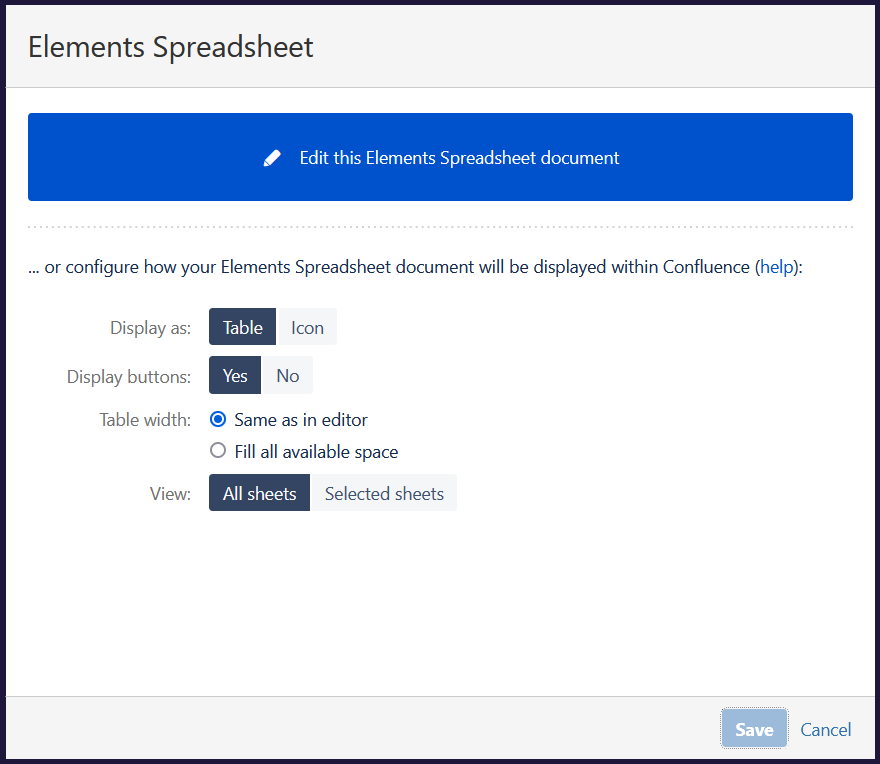
First, your Spreadsheet can be rendered in your Confluence page as a Table, in that case it will be rendered as a standard spreadsheet inside you Confluence page.
The alternative is to render it as an Icon, in which case only a Spreadsheet App icon is displayed with the document name. This can be useful in case you have very long or large tables that you don’t want to fill your page space with. It will only display a placeholder icon and clicking on it will open the document in full-screen.
If you chose the Table mode, you can now pick if you want to:
Display the Full Screen / Edit / Export buttons when the Confluence page is in display mode.
Have the table width to match the edit mode width, or always fill all the section available space.
View all the sheets and navigate between them by clicking on the different tabs, or display some selected tabs only. This allows you to hide tabs with less useful information relative to the context of the page and control what you want your team to get out of the table.
An embedded spreadsheet fully integrated in your Confluence page
Spreadsheets are an integral part of today’s project work and they shouldn’t be isolated from the wiki information. By pulling Excel data inside Confluence with Elements Spreadsheet, you’re able to offer a seamless experience with all the information centralized in Confluence.
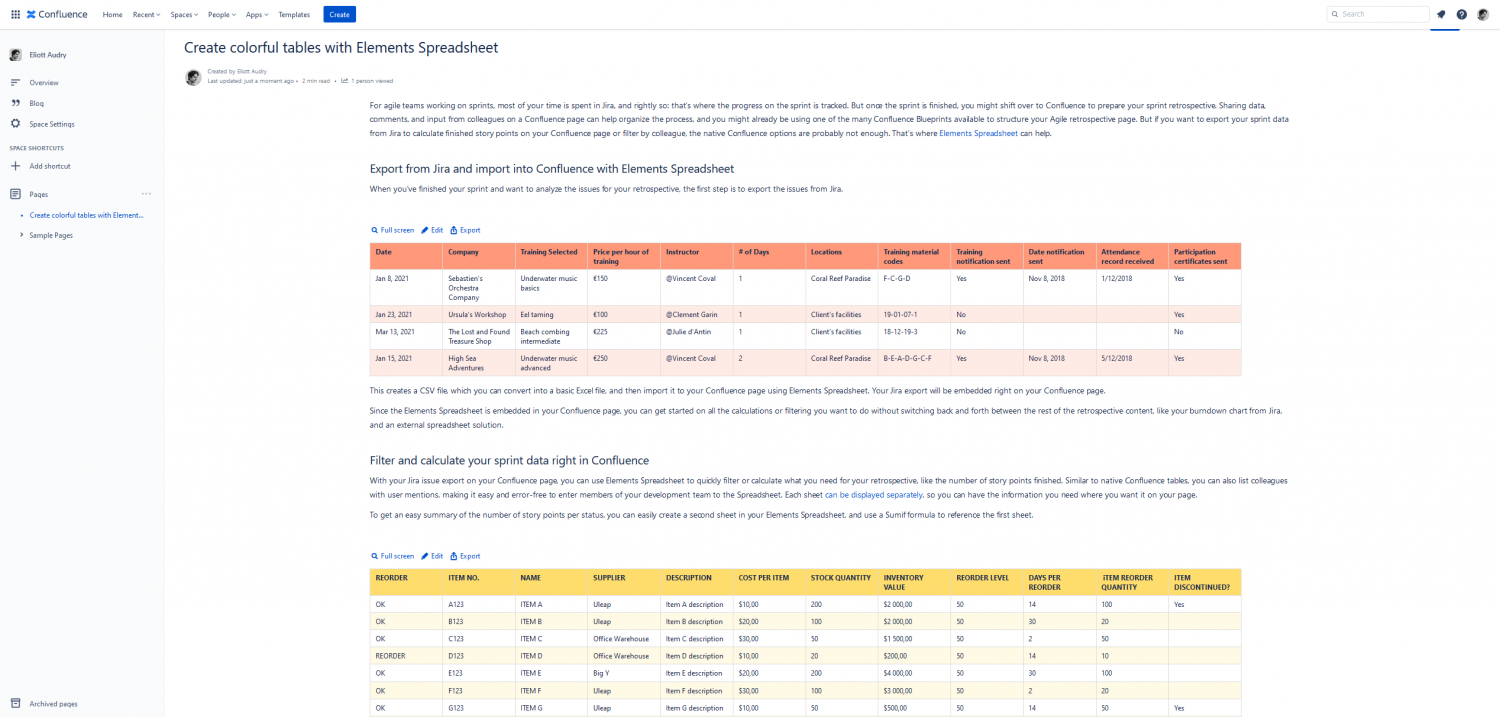
If you want to see what else you can do with Elements Spreadsheet, be sure to check out our documentation.
Interested in trying the app?
Start your trial from our product page
