Synchronize new fields added to Field Mapping
The need: force tickets already created with a recipe to sync new fields added to fields mapping
As a Jira administrator, you probably have some recipes running and hundreds if not thousands of issues synchronized. But recipes are not necessarily meant to remain unchanged; your needs may evolve and so may your recipes. When, for instance, you add a new field to synchronize in a recipe, the synchronization will occur only once this field is updated. But if you have several issues synchronized, you'll need to update the new field manually in each issue to trigger the synchronization. Yes, it can be very time consuming.
The solution: manually run the synchronization of all issues created with a recipe
You can synchronize all fields at once after you updated or added a field to your Fields Mapping, saving you a lot of time.
Important
This synchronization option only works with the Fields Mapping.
Tutorial
This guide explains how to synchronize issues after you made a change in the synchronization of the fields in a recipe.
Prerequisites
A recipe called "Escalate ticket" has been created, activated, and has been used on at least on issue.
The recipe has the "Summary" and "Description" fields synchronized.
Configuration steps
1 - As a Jira administrator, go to the "Elements Copy & Sync Cloud" administration and click on Recipes in the navigation bar.
2 - In the Recipes listing page, select "Escalate ticket" in the Active Recipes list.
3 - In the Recipe configuration page, click on the Content tab.
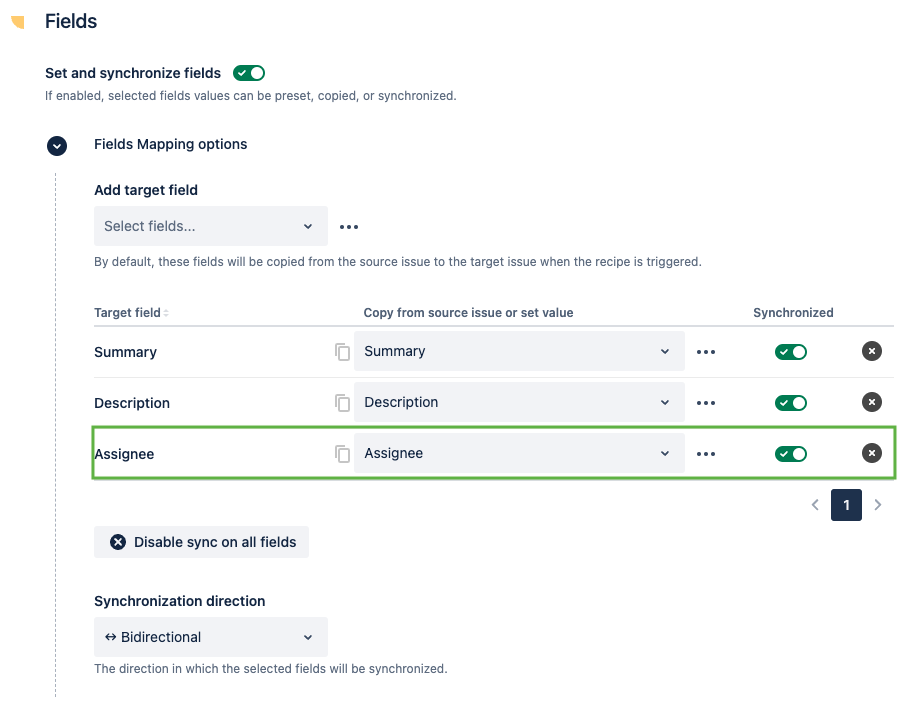
4 - In the "Fields" section, add an additional "Assignee" field and save your recipe.
5 - Close your recipe and go to your Recipes listing page.
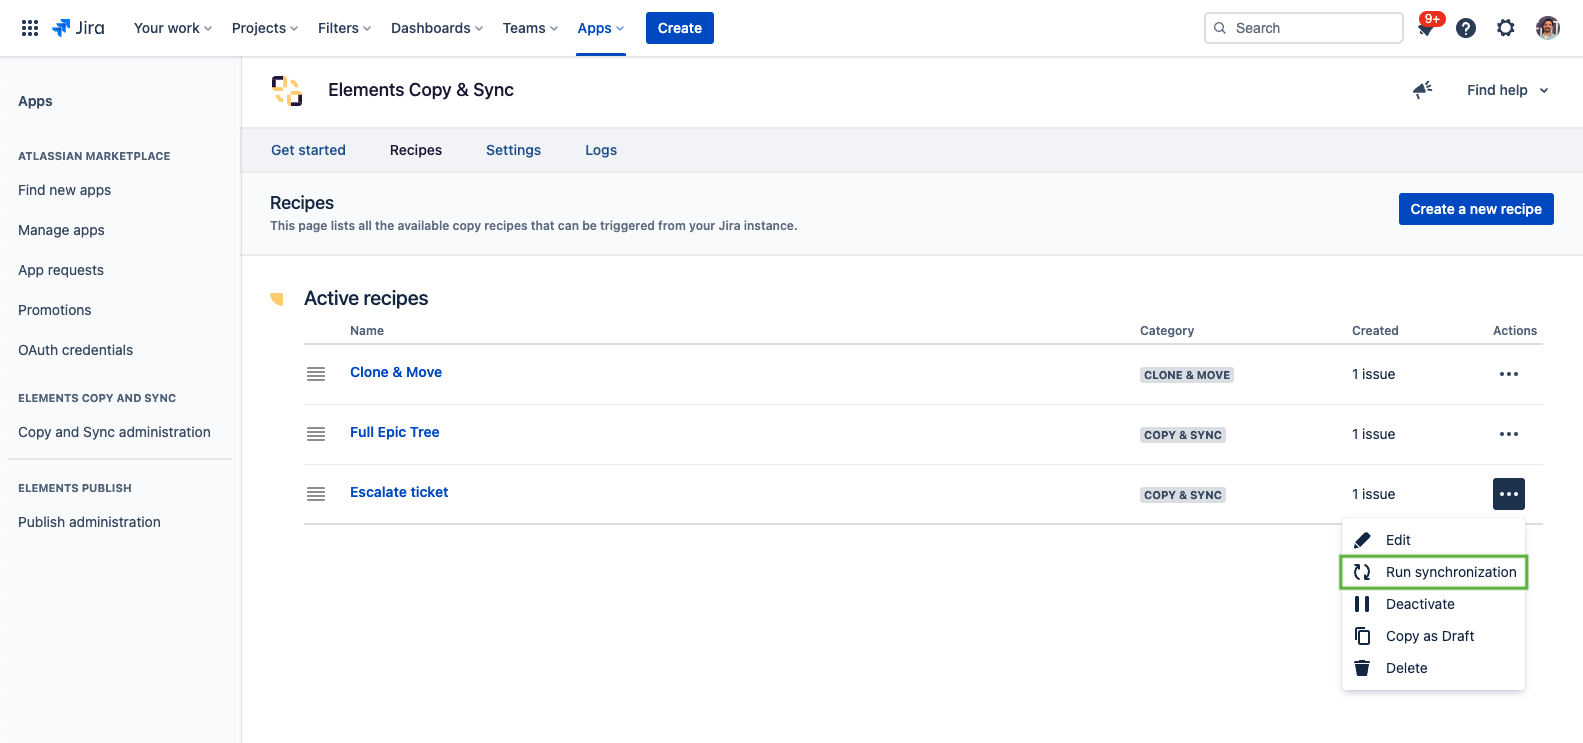
6 - Click on the three dots in the "Action" column and select "Run synchronization".
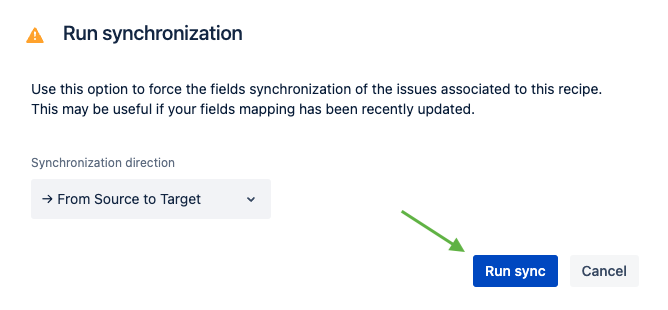
7 - You now have to choose the synchronization direction to force the fields synchronization of the issues associated to the recipe. Then, you click on "Run sync" to launch the synchronization.
8 - Once the synchronization has begun, you can close the modal, the synchronization will continue in the background. If you want to reopen the modal to see the synchronization status, click again on three dots on the right of the recipe in the Recipes listing page and click on "Run synchronization".
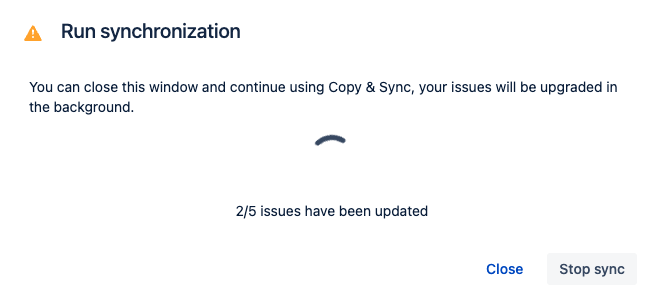
9 - If you want to stop the synchronization, click on the "Stop sync" button.
Even if you stop the synchronization, all issues already synchronized will stay that way. You cannot go back.
10 - Once the synchronization is done, a message will tell you how many issues have been updated.
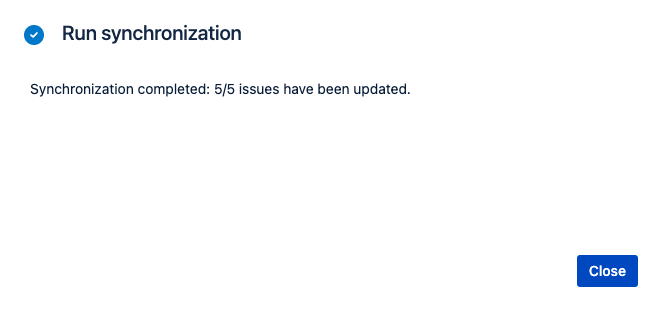
Result
With these steps, all target issues are updated with the new field "Assignee" from the source issue.
•••
New to Elements Copy & Sync?
If this tutorial has stirred your imagination, why not give it a try?
• Try Elements Copy & Sync for free •
