Customer portal
Printer, Office, and Printer details are Connected items
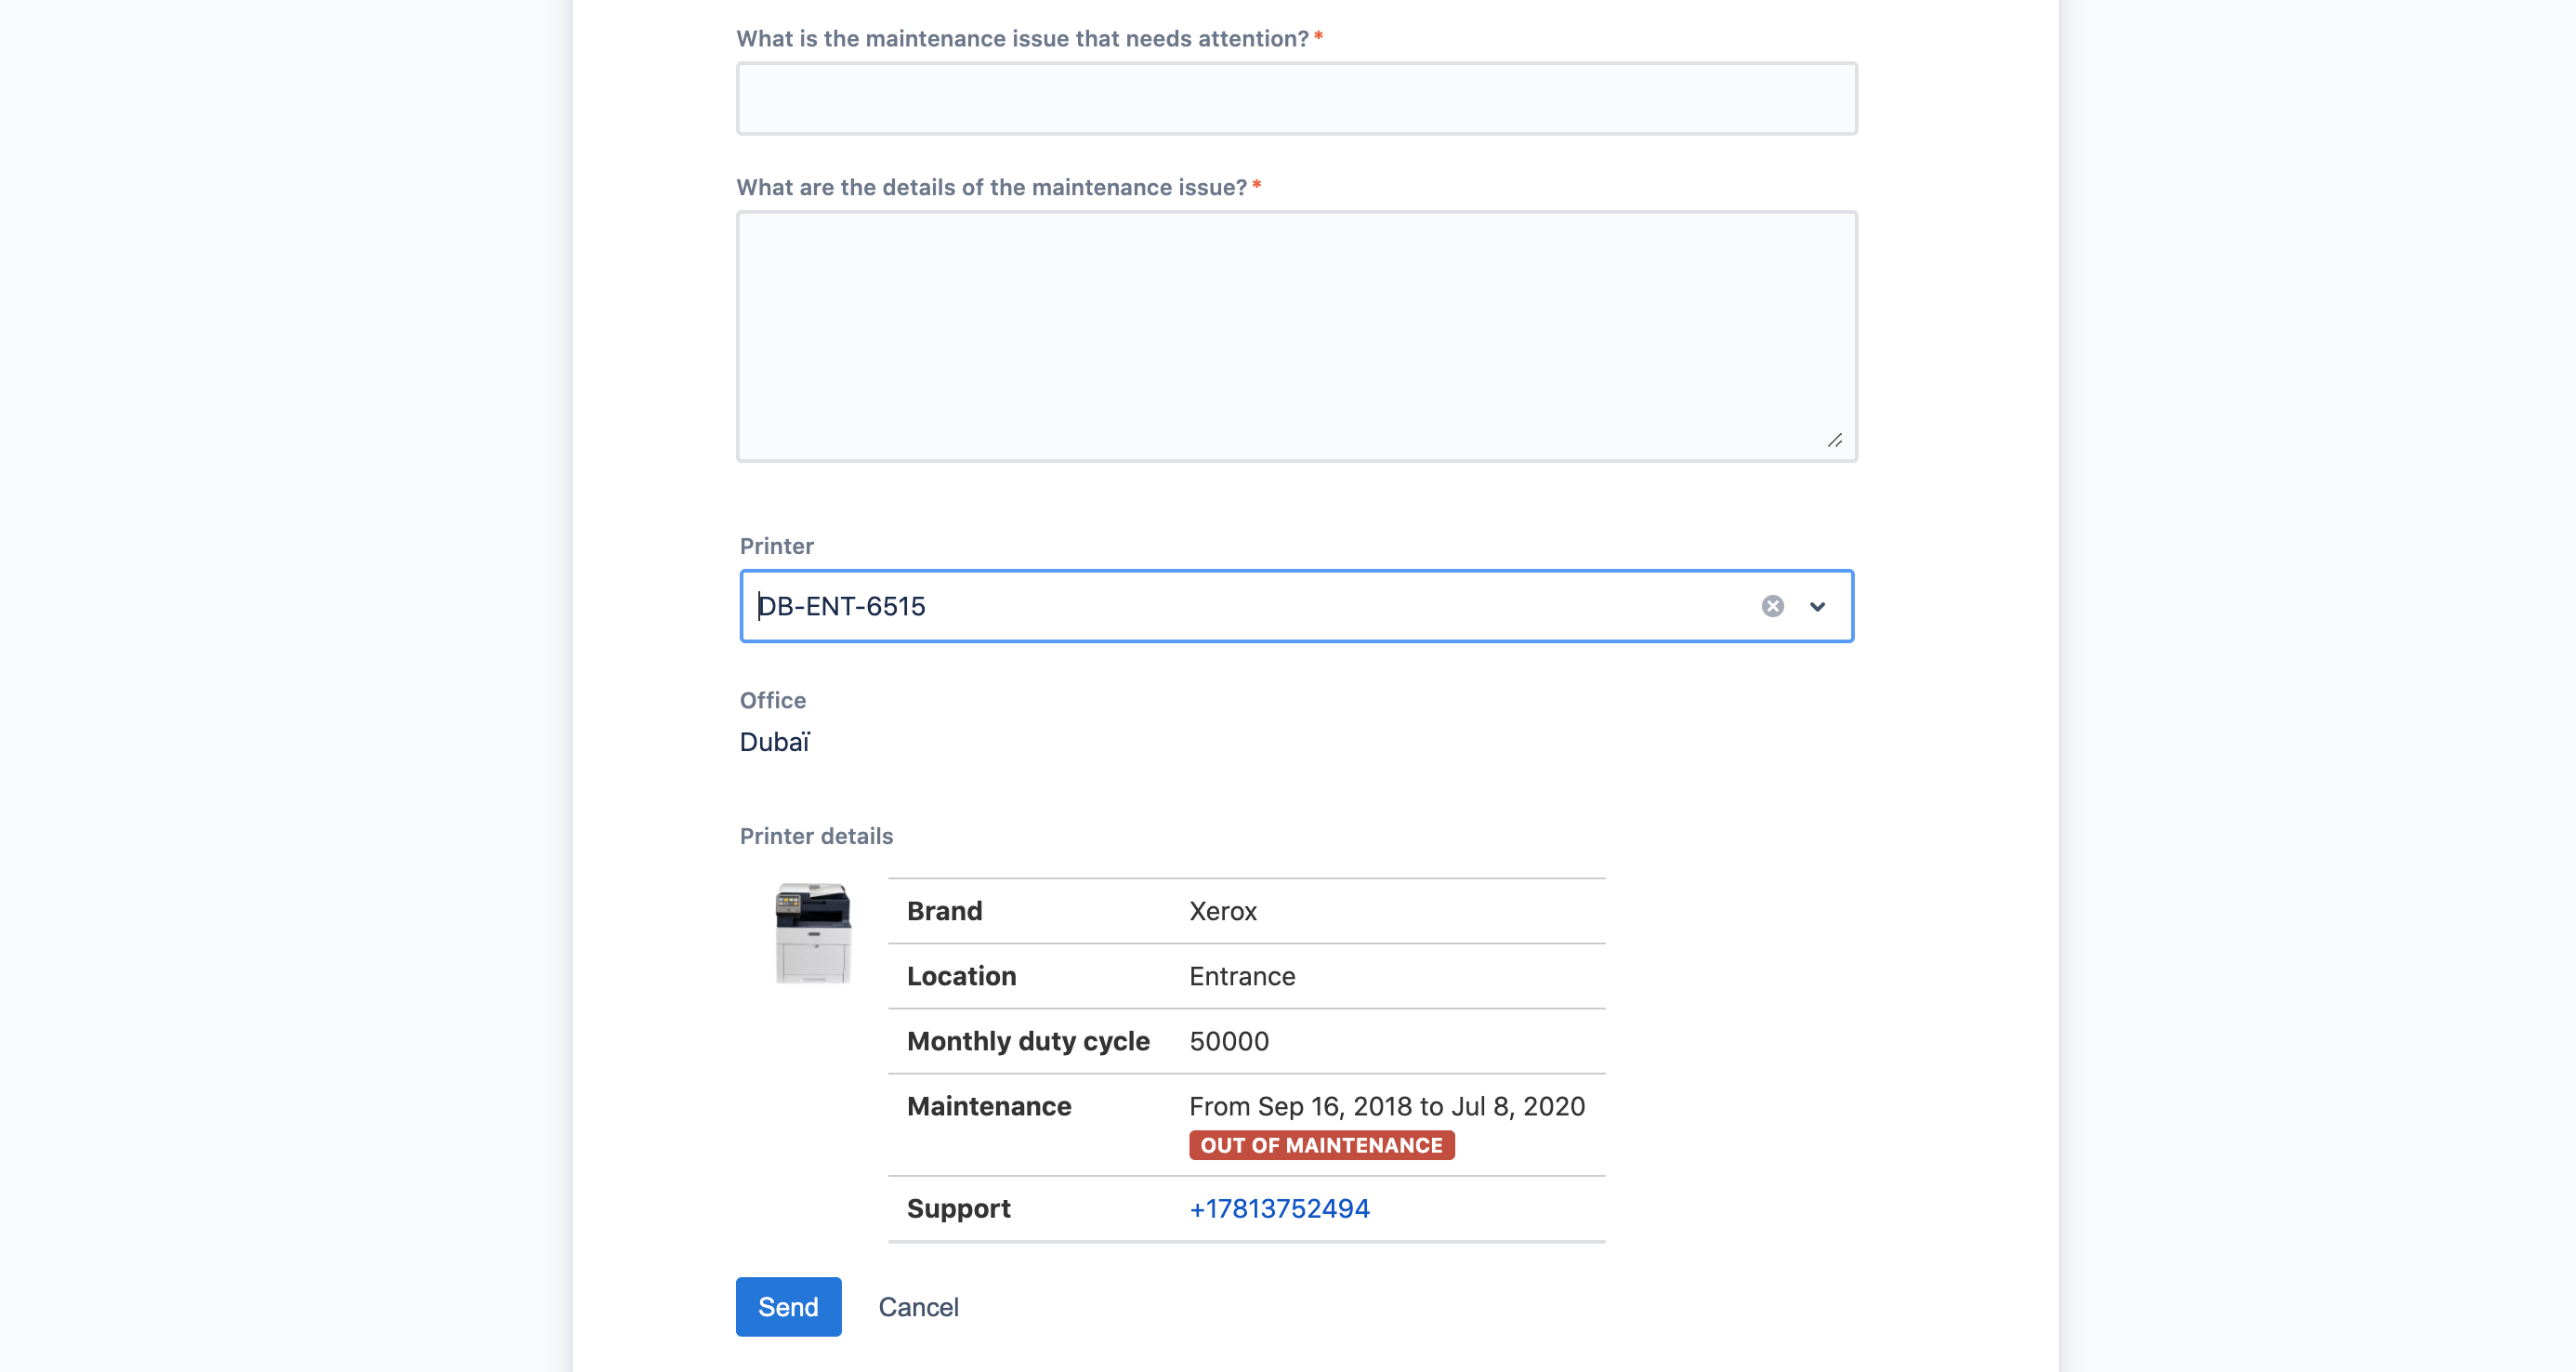
From Jira Service Management portal, Connected items behave like regular Jira fields.
Customers can select values using the dropdown list, and dependencies are automatically computed.
Connected items are displayed below Jira fields.
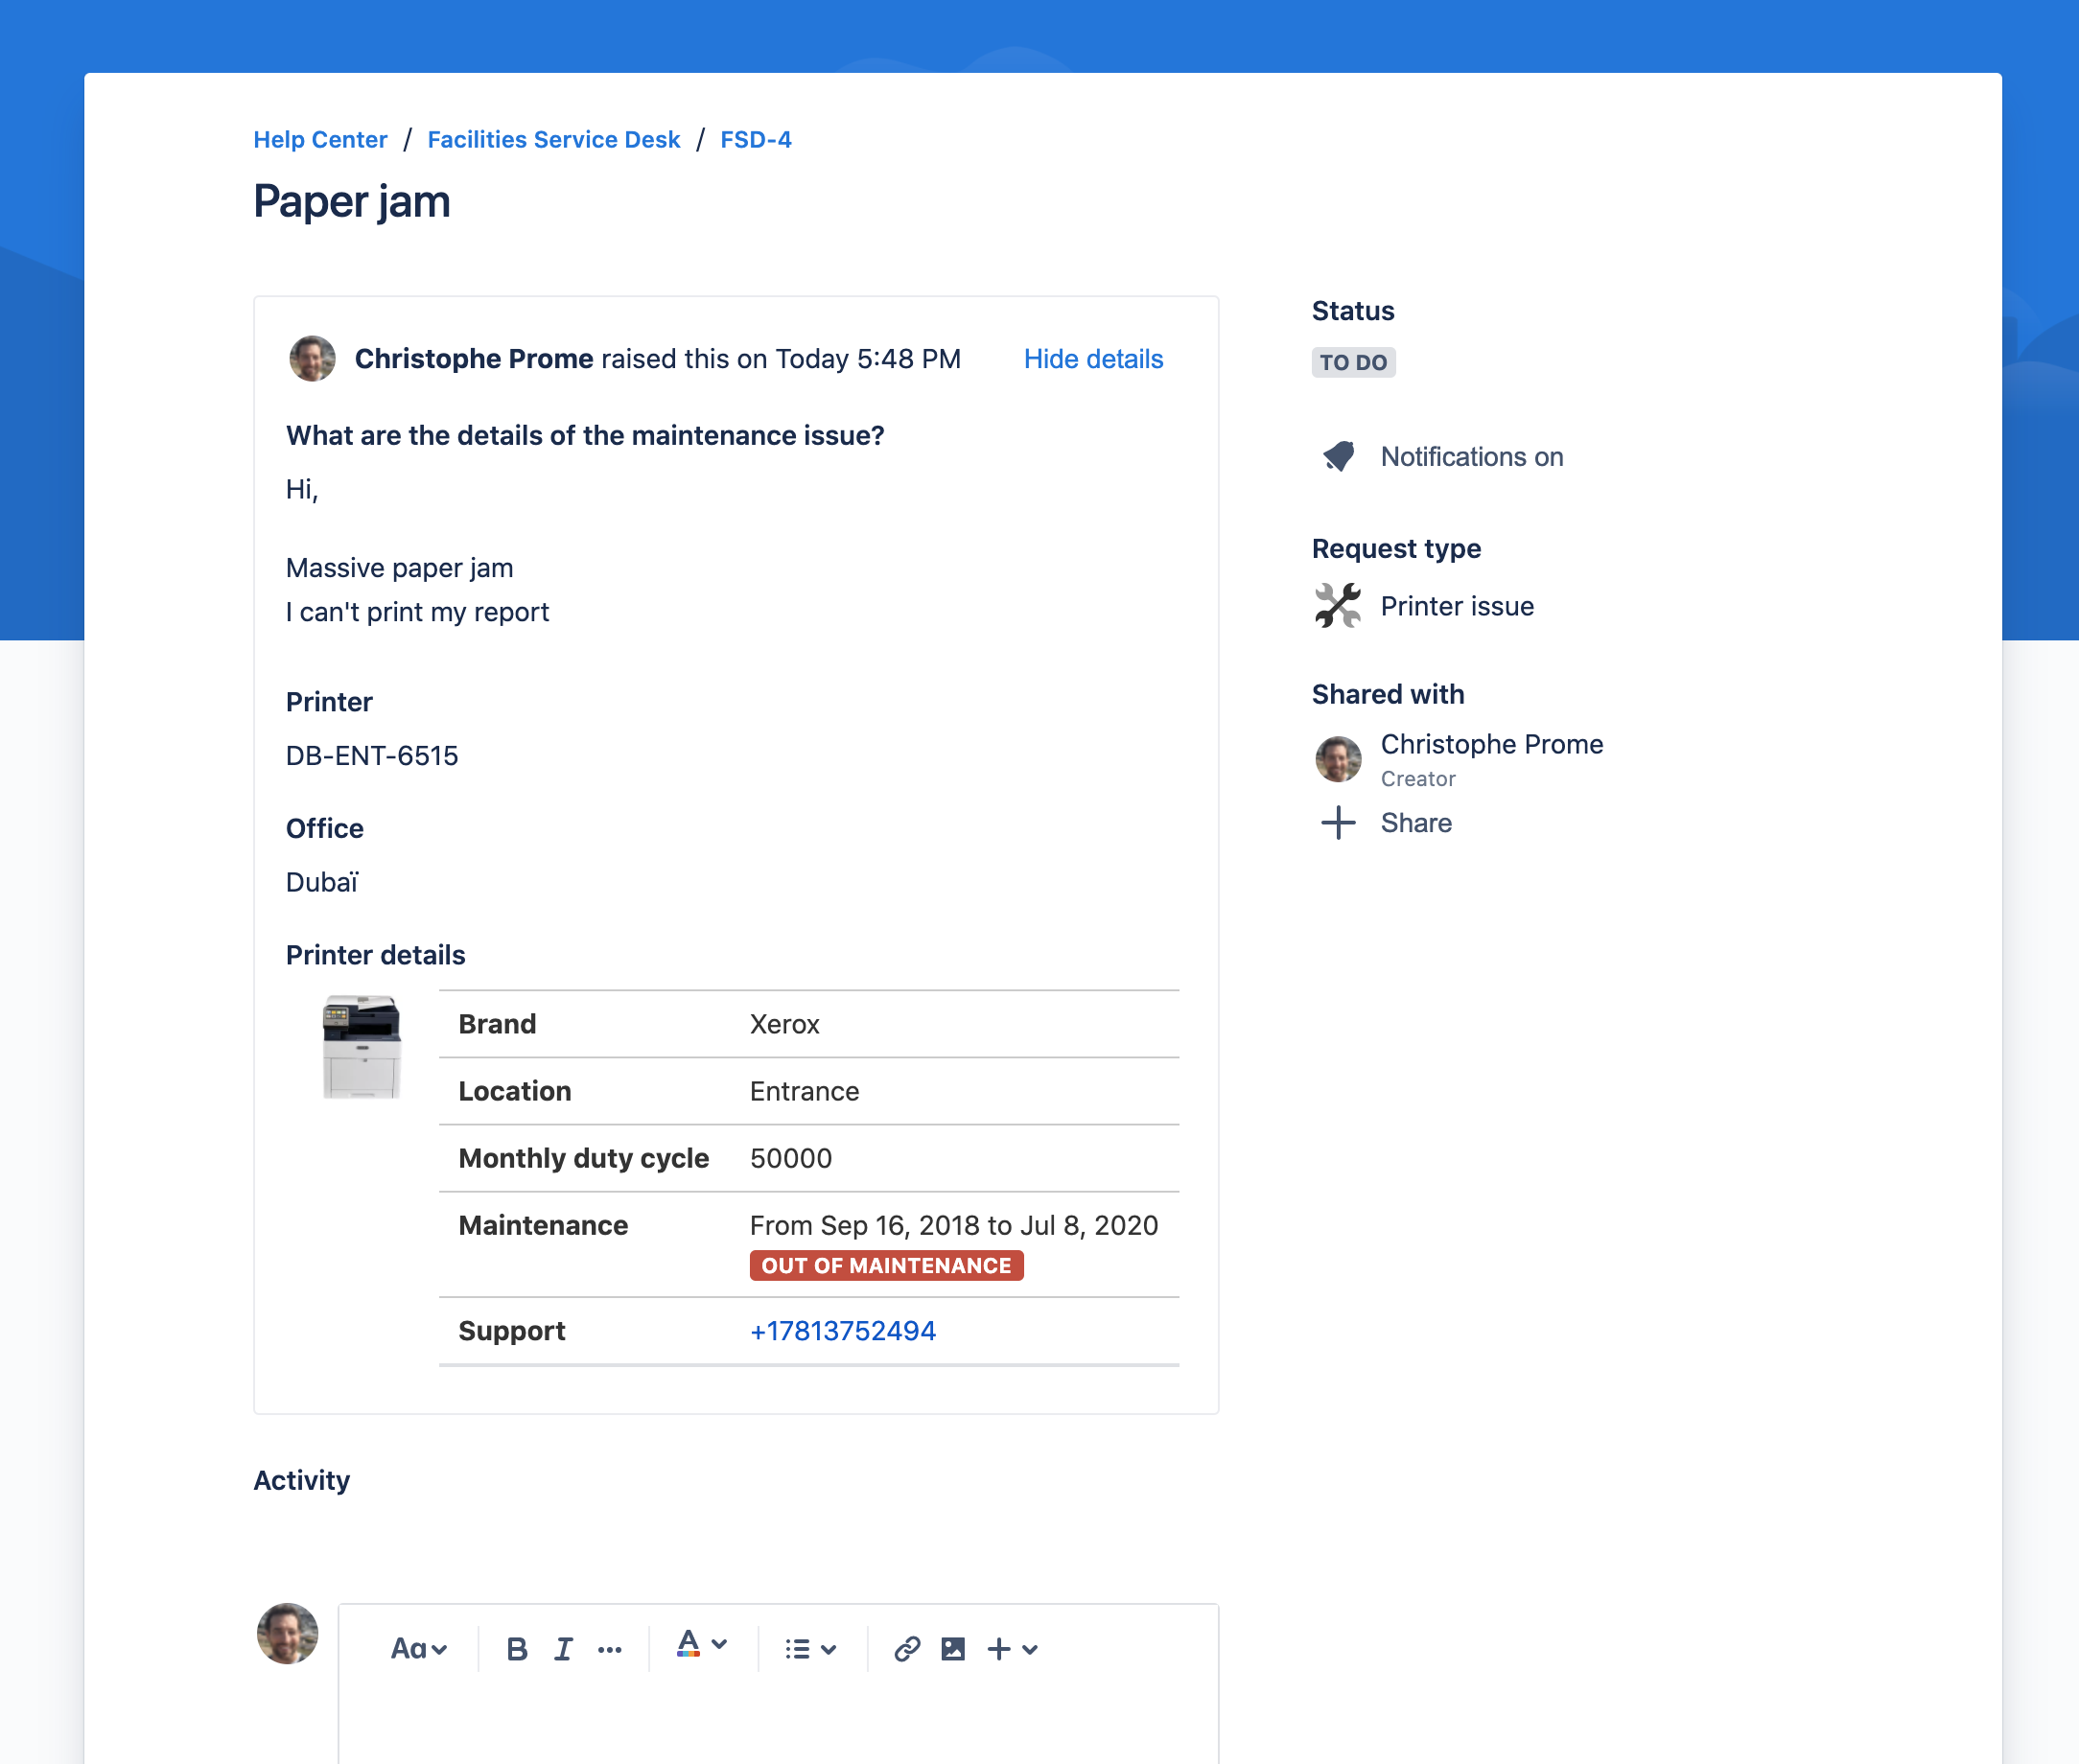
. It is not possible to edit a Connected item from the portal, only agents can edit them from the Issue view (see below).
Agent view
From the Agent view, the location of the Connected items depends on the view mode.
New issue view
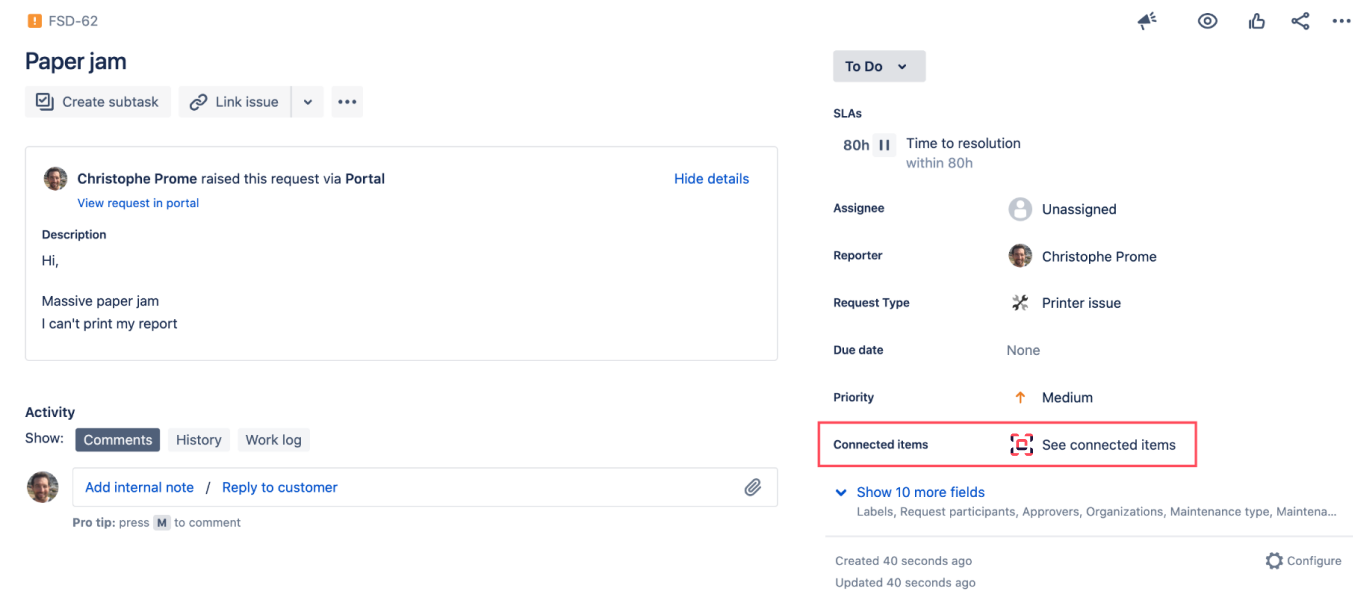 Connected items are displayed in a "Glance view", in the right sidebar of the issue view

Clicking on the glance preview will reveal the full view and the value of the items.
Edit mode
A Jira user can edit Connected items only if he has the edit permission on the issue.
He can enter the edit mode by clicking on "Edit".
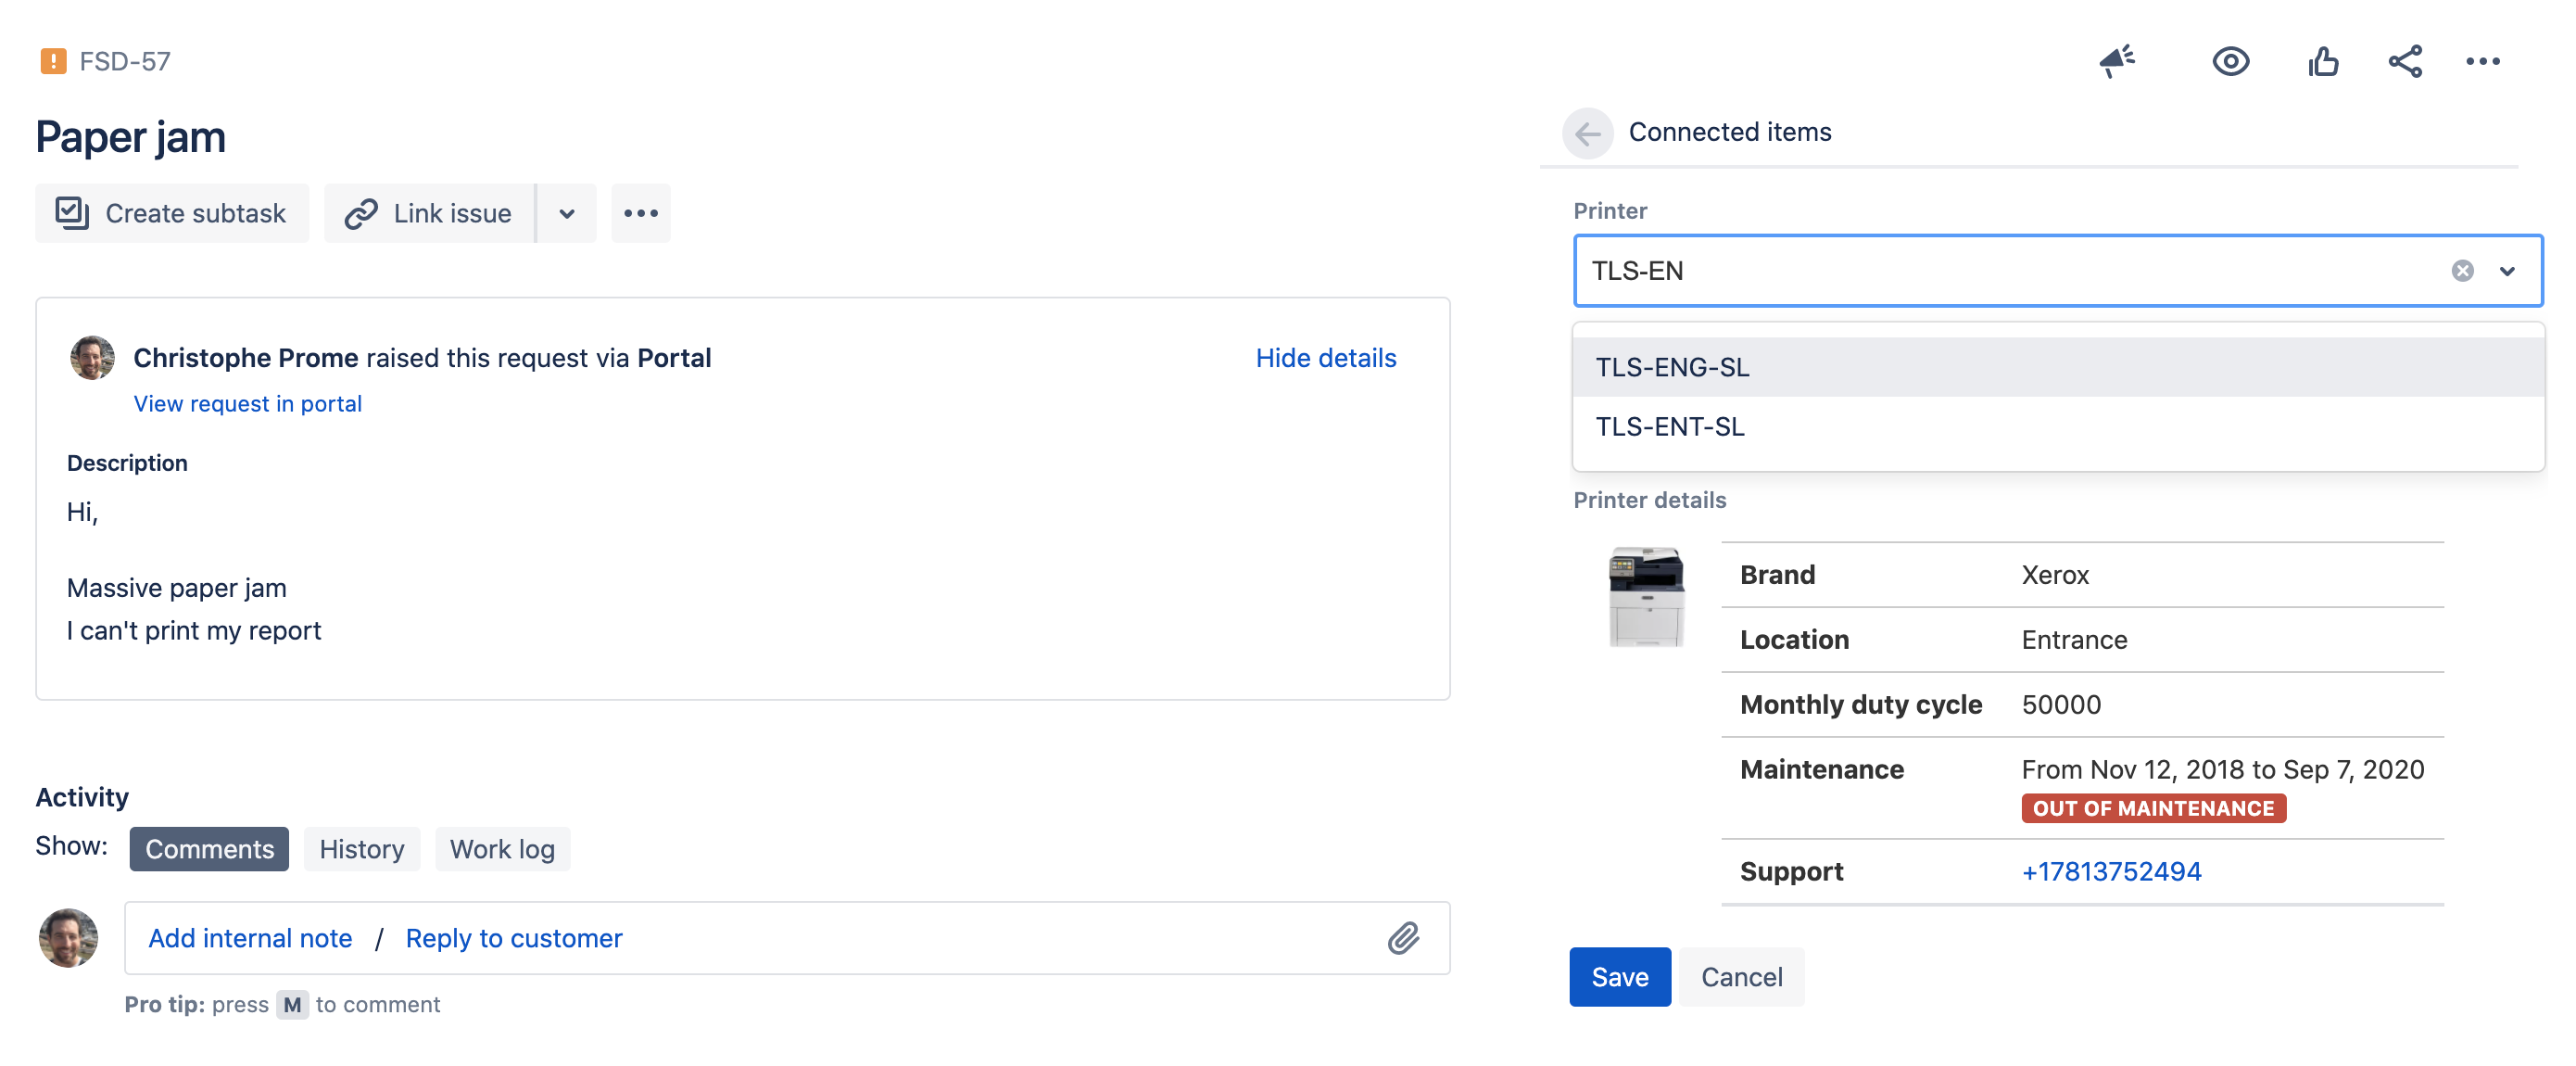
Clicking on "Save" saves the changes, exits the edit mode and updates the related mirror fields (if any).
The new values will be visible by the customer from the portal.
Old issue view
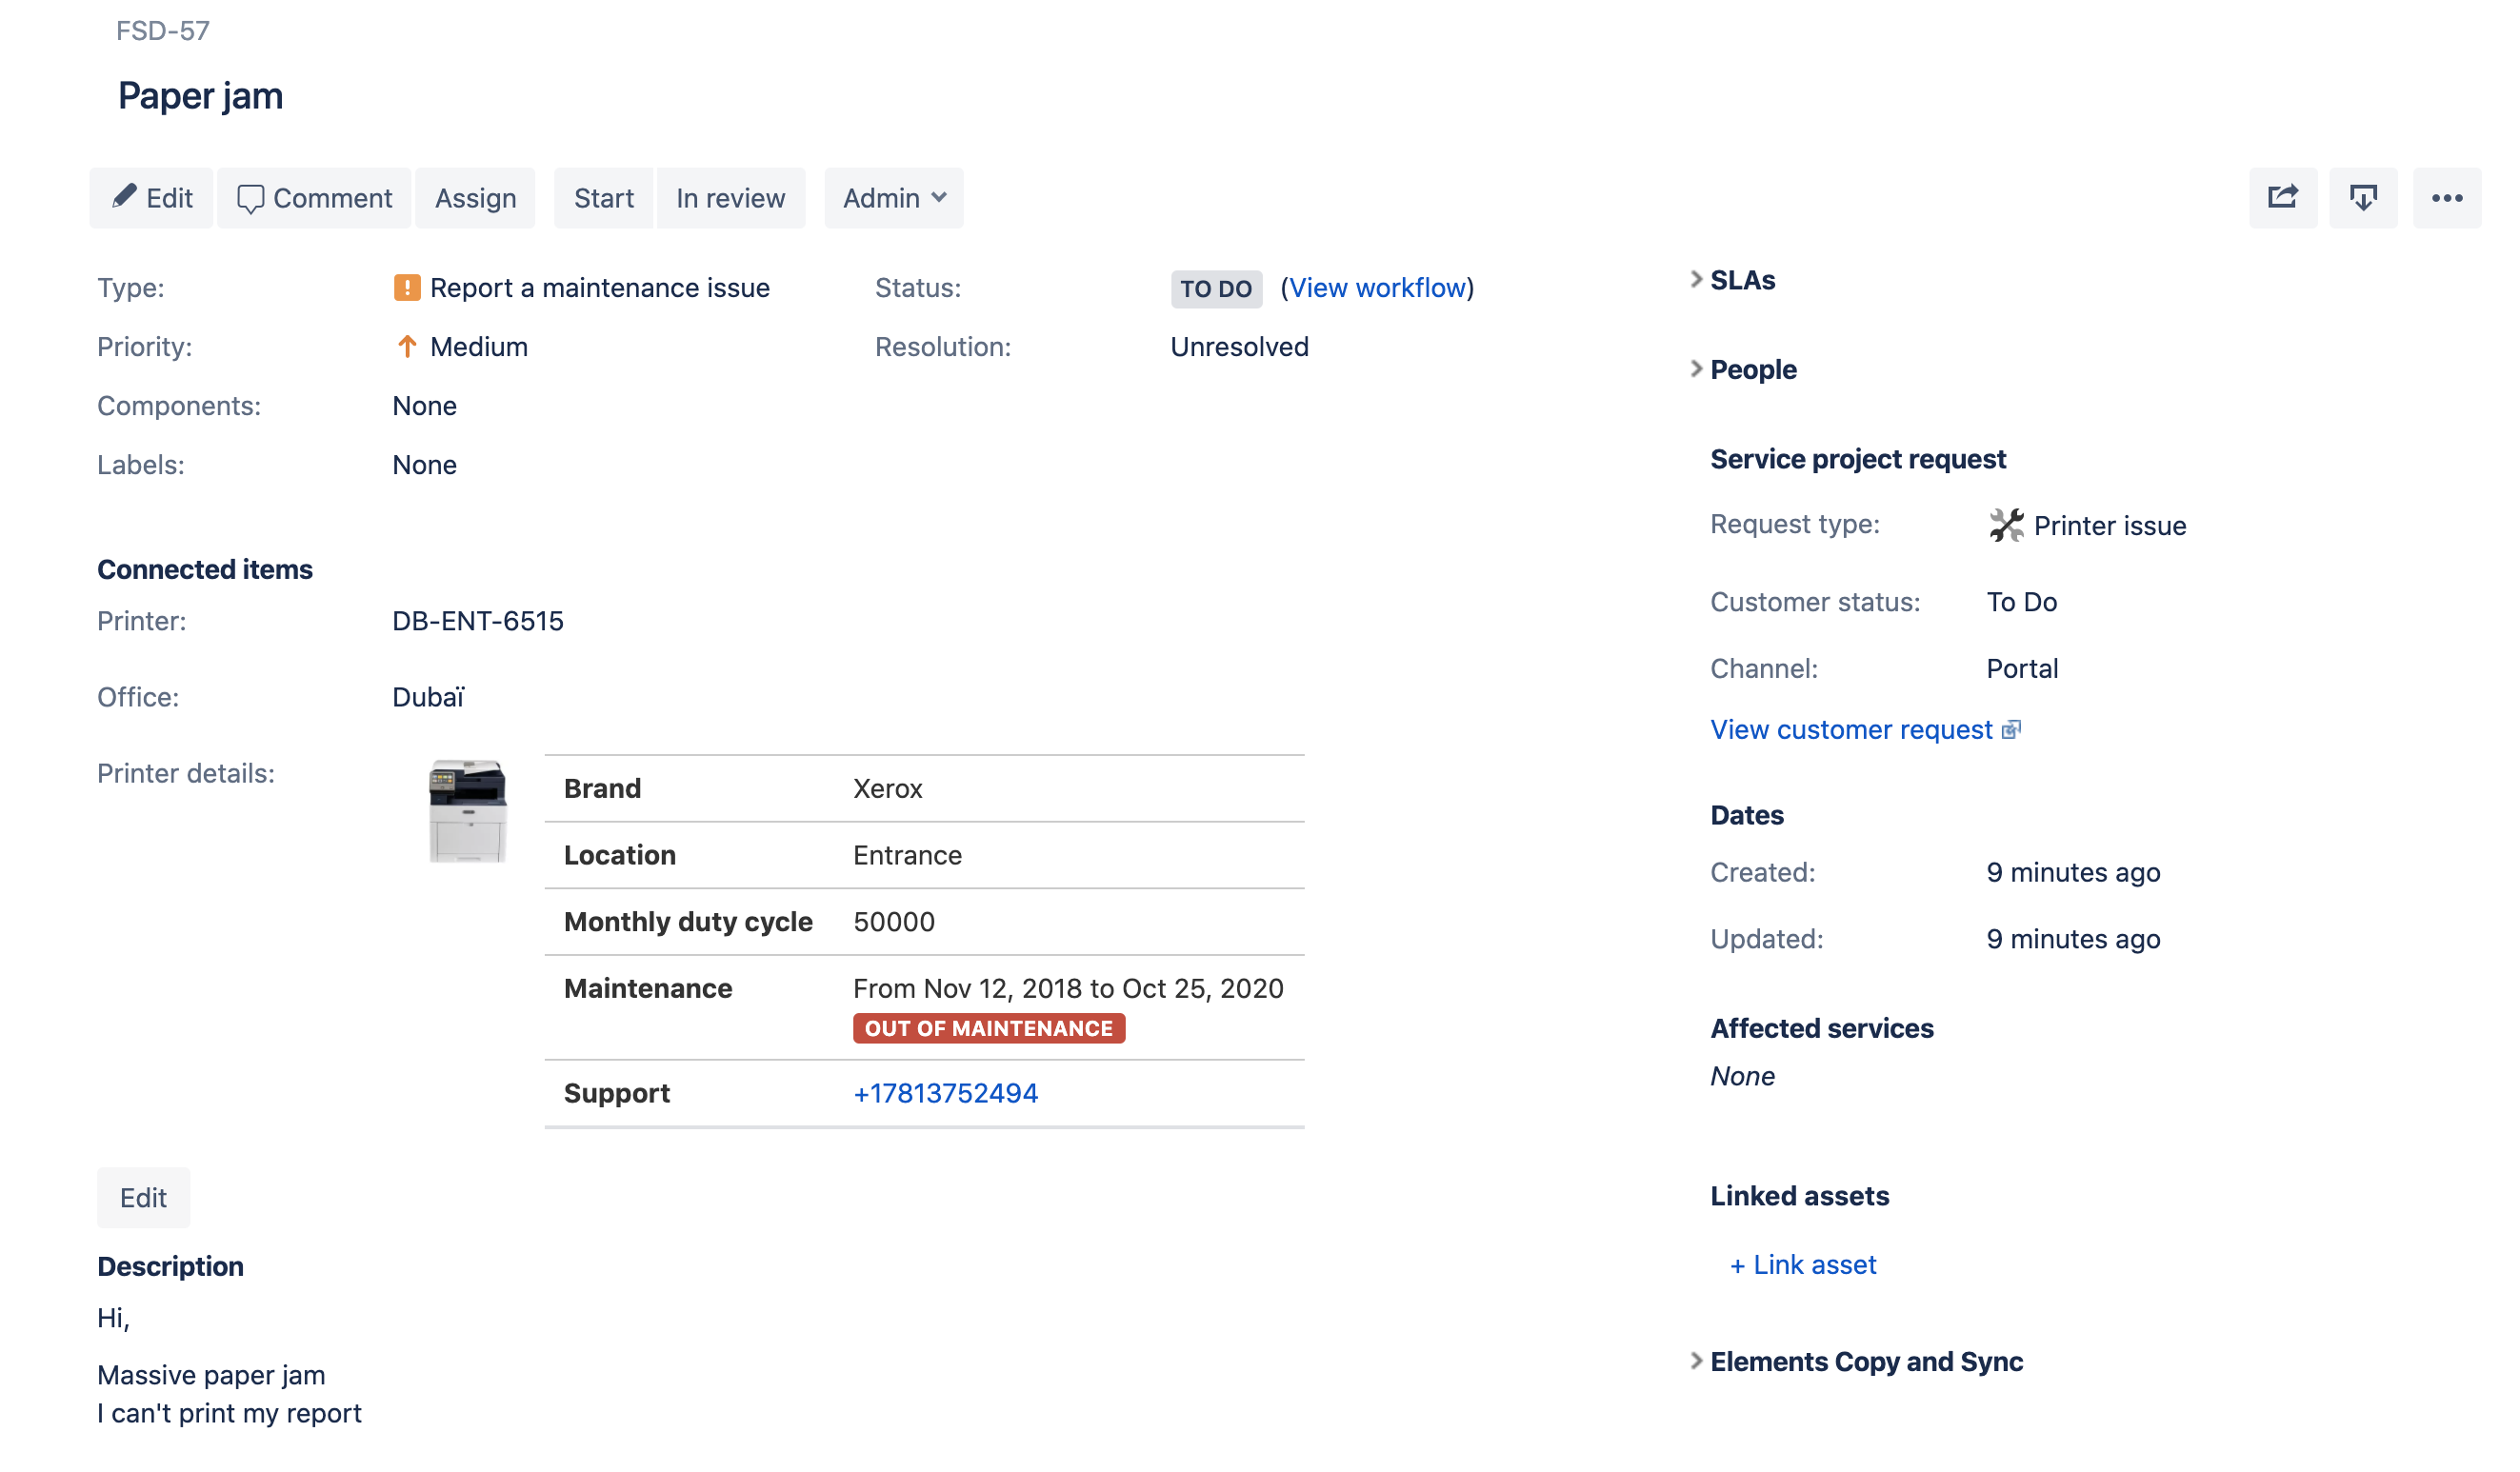 In the old issue view the Connected items are displayed in a dedicated panel named "Connected items" located between the "Details" and the "Description" panel.
Apart from this display difference, the behavior is identical to the one described in the "New issue view" section.
Where to go next?
- If you want to use Connected items in an iOs, Android or Mac app, read iOs, Android and Mac apps integration page
- If you want to learn how to associate Connected items to Jira Service Management project, read the Associate a Connected Item with a request type document
- If you want to create queues based on the value of a Connected item, head over the Using Connected items in Queues configuration
- If you are looking to create Connected items, read the Global level Administration section