Display user directory details from Okta inside Jira issues
The need: Provide support Agents with additional information about the Reporter
When customers raise requests through a Jira Service Management portal, support agents need to have additional information about the reporter in order to be able to process them, such as:
First name and last name
Job title
E-mail address
Phone number
Staff ID
Organization
Department
Manager
This information should be readily available to support agents in Jira, avoiding them the pain to keep looking up missing information in external systems and maximising process efficiency.
Customers should not have to manually provide this information as this is time-consuming and prone to error. Such information should be dynamically retrieved from an external user directory and displayed to support agents only to ease up ticket processing.
Solution: Display context information in a read-only Connected item that is visible to Agents only
Use Elements Connect to fetch reporter information from an external user directory and display it to support agents only.

How to configure a read-only Connected item displaying reporter information
Prerequisites
Have Jira Service Management
Have an external user directory (in this example, we use Okta) or an external datasource that holds user records
Have Elements Connect installed on your instance
Configuration steps
Configure the connection to your user directory
Configure the read-only Connected item
Add the read-only Connected item to the Service Management project
Steps
1. Configure the connection to your user directory
The first step is to configure the connection to the datasource where your user records are held. In this example, an Okta account is used. This is done in Elements Connect.
Go to Elements Connect administration by clicking on “Apps”, then Elements Connect
.png?inst-v=5f3d5498-c9ef-4c74-b69e-065f8276eeba)
Now you need to create a datasource for the Okta account.
Refer to this step-by-step tutorial to configure a datasource to Okta.
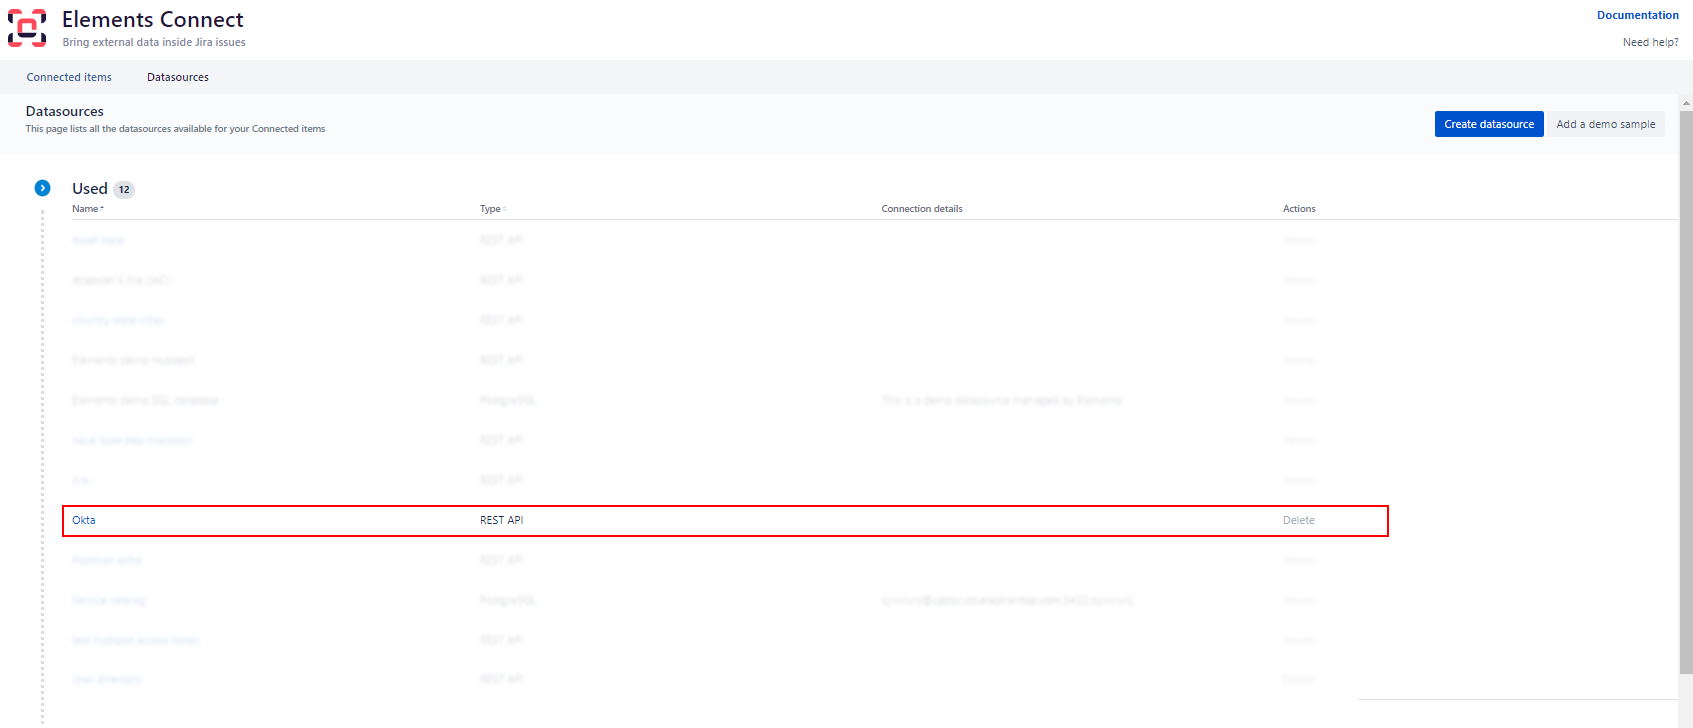
After following this tutorial, your Okta datasource should be up and running:

2. Configure the read-only Connected item
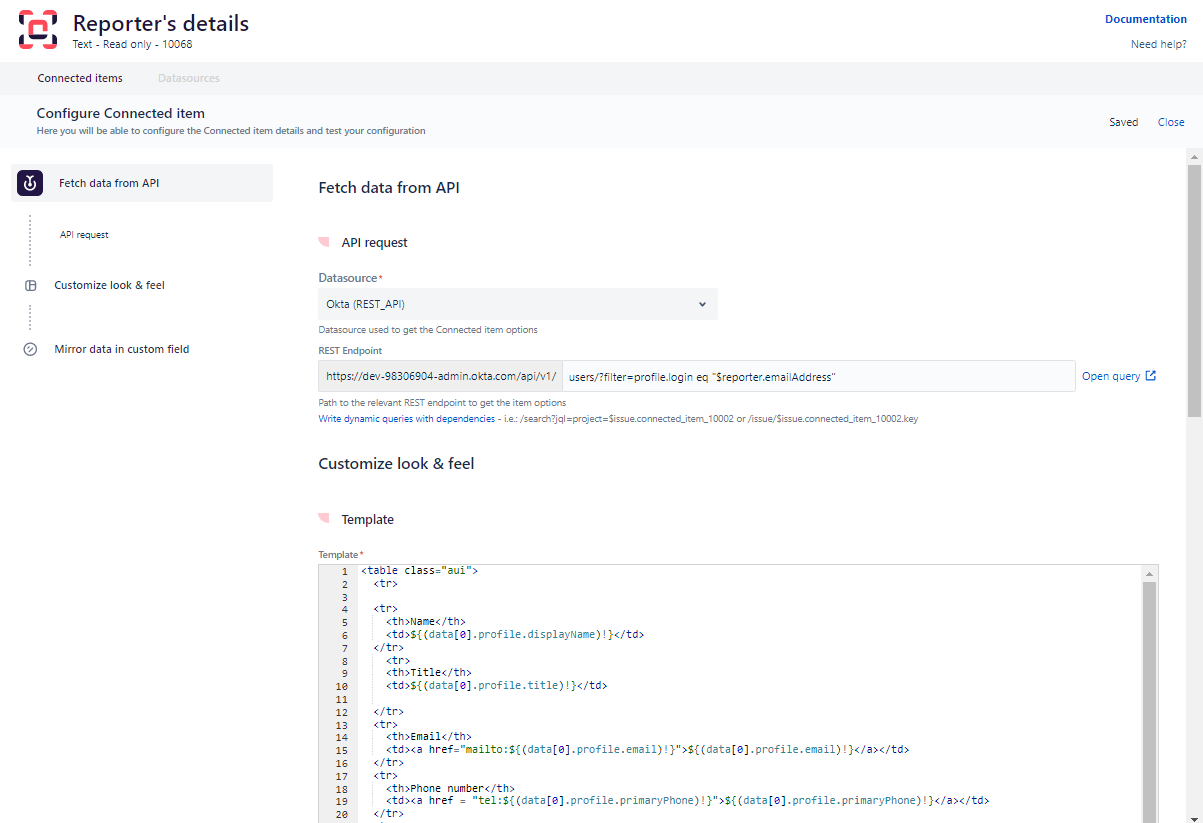
The next step is to configure a read-only Connected item using the Okta datasource to display information about the reporter.

REST endpoint:
users/?filter=profile.login eq "$reporter.emailAddress"$reporter.emailAddress is a placeholder which will be dynamically substituted by the reporter's email address.
Template:
<table class="aui">
  <tr>
    <th>Name</th>
    <td>${(data[0].profile.displayName)!}</td>
  </tr>
    <tr>
    <th>Title</th>
    <td>${(data[0].profile.title)!}</td>

  </tr>
  <tr>
    <th>Email</th>
    <td><a href="mailto:${(data[0].profile.email)!}">${(data[0].profile.email)!}</a></td>
  </tr>
  <tr>
    <th>Phone number</th>
    <td><a href = "tel:${(data[0].profile.primaryPhone)!}">${(data[0].profile.primaryPhone)!}</a></td>
  </tr>
  <tr>
    <th>Staff ID</th>
    <td>${(data[0].profile.employeeNumber)!}</td>

  </tr>
      <tr>
    <th>Organization</th>
    <td>${(data[0].profile.organization)!}</td>

  </tr>
        <tr>
    <th>Department</th>
    <td>${(data[0].profile.department)!}</td>

  </tr>
    <tr>
    <th>Manager</th>
    <td>${(data[0].profile.manager)!}</td>

  </tr>

  </tr>
</table>
The template displays in the form of a horizontal table the following information about the reporter:
First name and last name
Job title
E-mail address
Phone number
Staff ID
Organization
Department
Manager
3. Add the read-only Connected item to the Service Management project
Now that your connected item is configured properly, you can associated it to a request type in your Jira Service Management project.
Go to your Jira Service Management project administration, and find the Connected item section.
Add the Connected item to the desired request type (for example: Request a new account)
Click the “Hide option”
.gif?inst-v=5f3d5498-c9ef-4c74-b69e-065f8276eeba)
Open the request type in the customer portal (you can use the button in the top right of your screen)
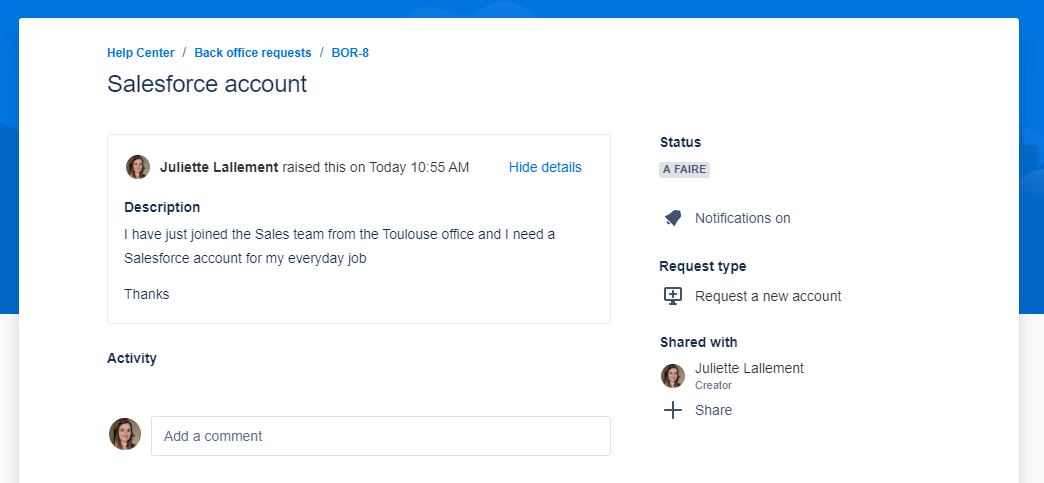
From the Service Management Portal, the customer will not see the read-only Connected item, which is normal since we hid it from the portal view. The reporter’s information is kept private at all times and can only be viewed by support agents processing the request.

From the Service Management project, support agents however can see it and all the required information about the reporter.

New to Elements Connect?
If this tutorial has stirred your imagination, why not give it a try?
