Need: Set the value of an Insight field from a JSM request
In this context, IT operations engineers use a Jira Service Management portal to raise change requests on given assets. Such assets are managed in Jira Insight.
When raising a change request, IT engineers need to select the asset they are raising a change request for. Once the change request has been created, IT operations managers receive them and can process them. From an asset object in Insight, they need to be able to check if there are other conflicting requests impacting the asset in order to easily approve or reject change requests.
Solution: Push the value from a Connected item (asset name) to an Insight field to keep it in sync
Elements Connect fields can be used in the Jira Service Management portal so that IT operations engineers can select the following in their change request:
-
The asset type: laptops, printers, network switches, firewalls, etc.
-
The asset name based on the asset type selected
When the change request is created, the Elements Connect mirror field for the “Asset name” field is then pushed to the Insight field “Affected asset”, setting its value to the selected asset. Configuring a simple Automation rule enables to keep the Insight field value in sync with the asset name selected in the change request in the event it is later changed to a different value.
When the change request is raised with the above fields selected, IT operations managers can process it easily without having to manually change the Insight field “Affected asset”. Moreover, the change request issue is directly linked to the Insight object, helping them to keep track of all requests related to the asset in question.
.gif?cb=f058bf2be7c593caee0e17c2ef0e7eb2)
How to push connected item values to Insight fields and keep them in sync
Prerequisites:
-
Have Jira Insight and have Insight objects created in an object schema
-
Have an Insight field configured - in this example, it is called “Affected asset”
-
Have Automation
-
Have Elements Connect installed on your instance
Configuration steps
The configuration is done in 4 steps:
-
Create and configure the Jira Insight REST API datasource in Elements Connect
-
Create and configure Connected items in Elements Connect to retrieve asset types and asset names from the Jira Insight datasource
-
Associate the Connected items to a request type in your Jira Service Management project
-
Configure the Automation rule to update the Insight field “Affected asset”
Steps
1- Create and configure the Jira Insight REST API datasource in Elements Connect
-
Go to Elements Connect administration by clicking on “Apps”, then Elements Connect
.png?cb=67f9c549bf2c0c045ef3564acfb88abe)
The first step is to create a REST API datasource.
-
Click “Create datasource” and select REST API.
.png?cb=2513befaeb388edb84b6e932e78f2128)
-
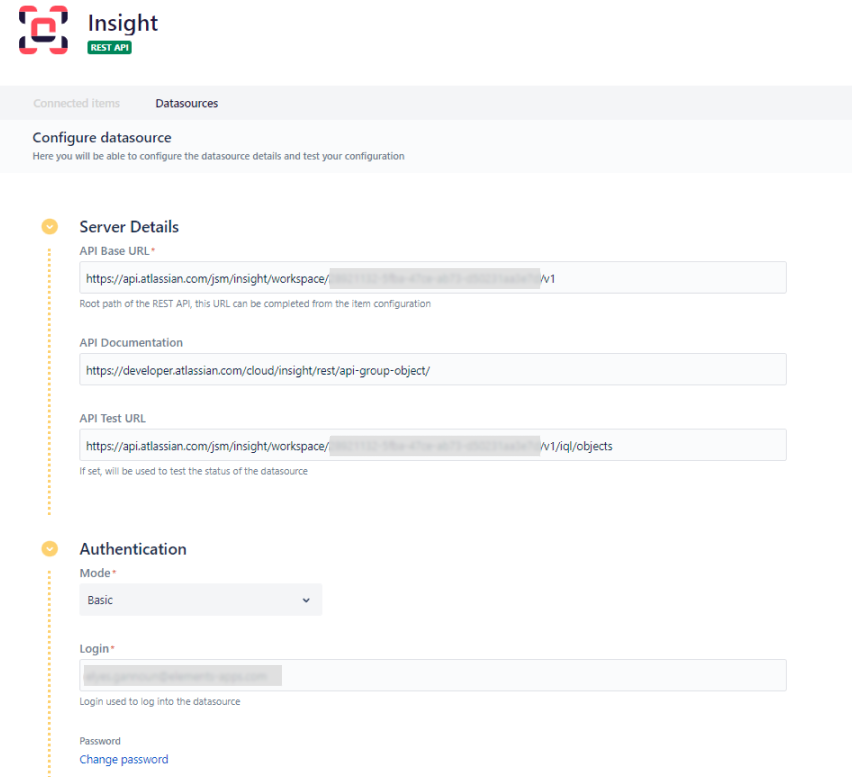
Enter a name for your datasource, then configure the relevant fields:
-
Base URL: https://api.atlassian.com/jsm/insight/workspace/{workspace ID}
-
API Documentation: https://developer.atlassian.com/cloud/insight/rest/api-group-object/
-
Test URL: https://api.atlassian.com/jsm/insight/workspace/{workspace ID}/v1/iql/objects (this is a working endpoint that will work against the connection tester)
-
Authentication mode: Basic
-
Login: user login used to connect to the current Jira site
-
Password: enter a token that can be generated here: https://id.atlassian.com/manage-profile/security/api-tokens
-
Click “Create API token”
-
.png?cb=fcf0309aa839d120c3d813b76c163bde)
-
-
Click the “Test connection” button
-
.png?cb=c5b4afb6d16bc9a7b19e7767519f4420)
-
Save your datasource configuration.
2- Configure Connected items in Elements Connect to retrieve asset types and asset names from the Jira Insight datasource
What is a Connected item? As our documentation mentions, a Connected item can be seen as a sort of connected custom field.
In this tutorial, we are going to create 2 Connected items:
-
Asset type
-
Asset name
First Connected item - Asset type
Create one Connected item called “Asset type” of type Select list. Set Insight (or the name you gave to the datasource configured previously) as the Connected item datasource.
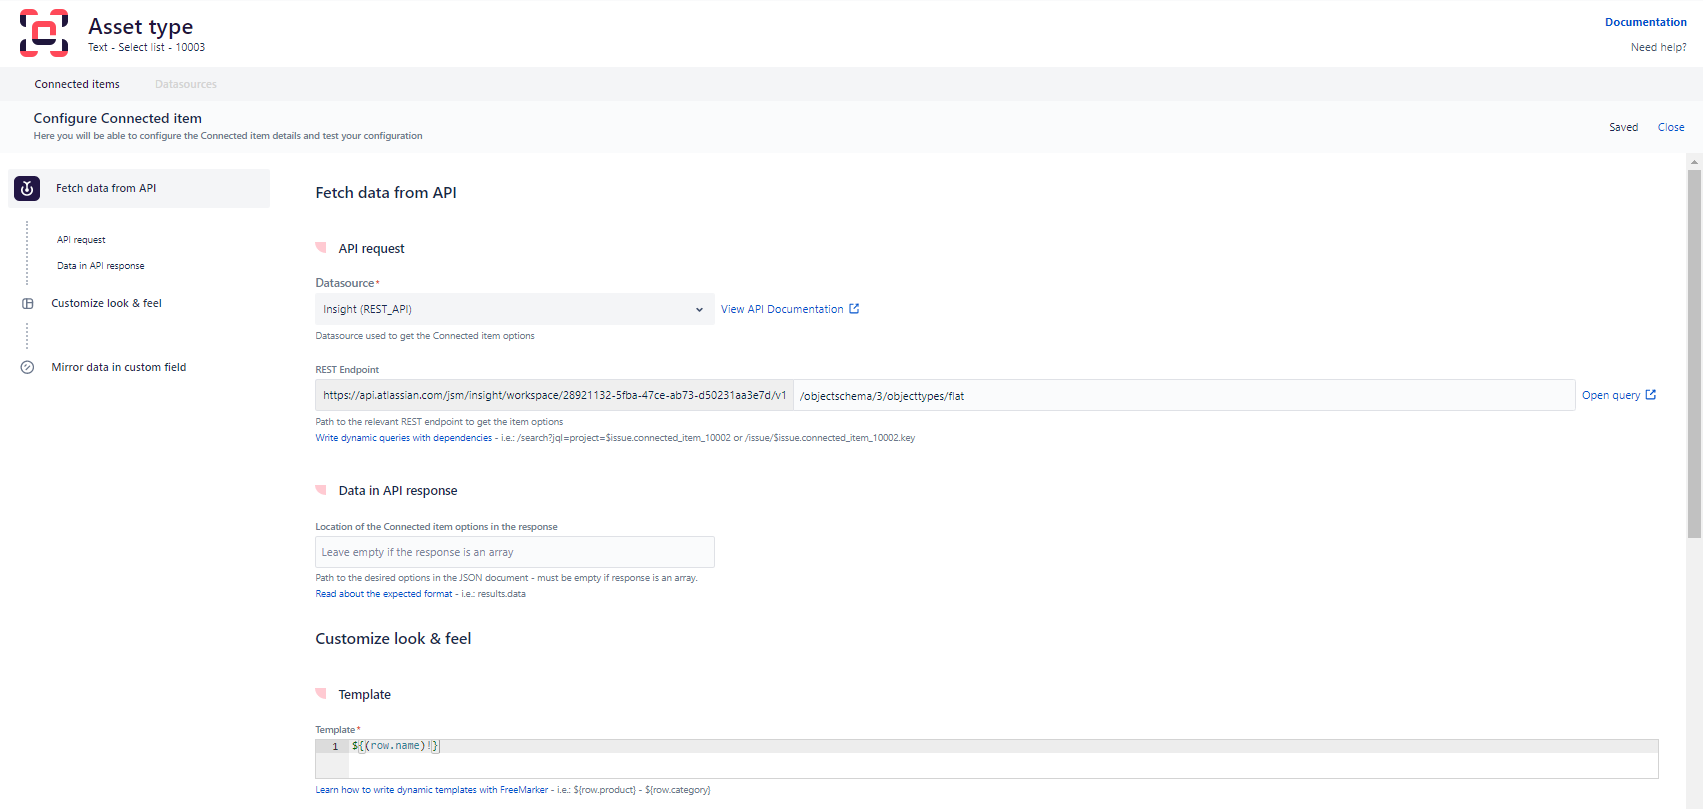
REST endpoint: empty
Asset type - REST endpoint
/objectschema/3/objecttypes/flat
Location of the Connected item options in the response: leave empty
Display template:
Asset type - Template
${(row.name)!}
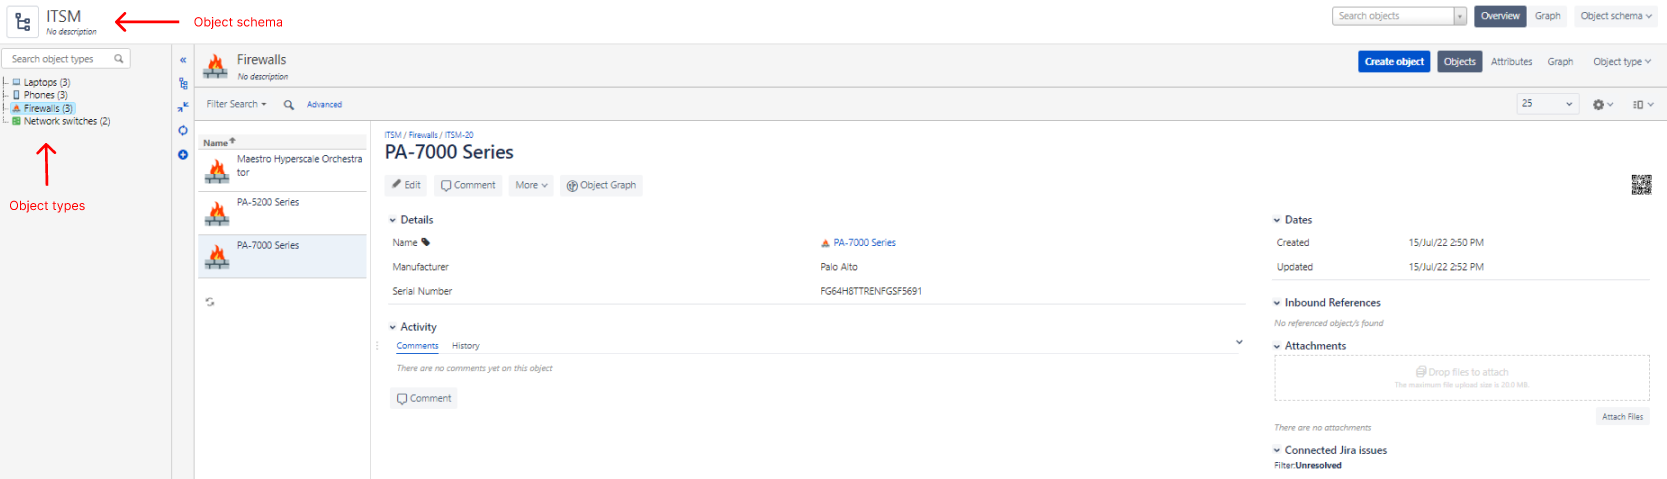
The REST endpoint queries all the object types of the object schema whose ID is 3. To illustrate this more clearly, the Insight object schema looks like this:
Second Connected item - Asset name
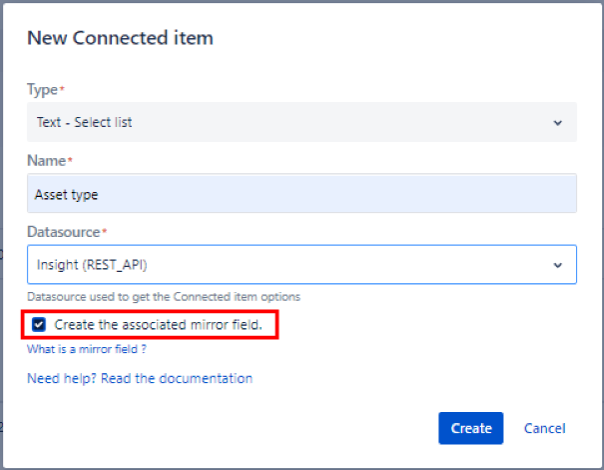
Now create a second Connected item called “Asset name” of type Select list using the exact same datasource that will display the asset names matching the selected “Asset type”. In other words, this Connected item is dependent on the value of the first Connected item “Asset type” (referenced as $issue.connected_item_10003 in the query below).
Make sure you tick the “Create the associated mirror field” option when creating your Connected item (see screenshot below).
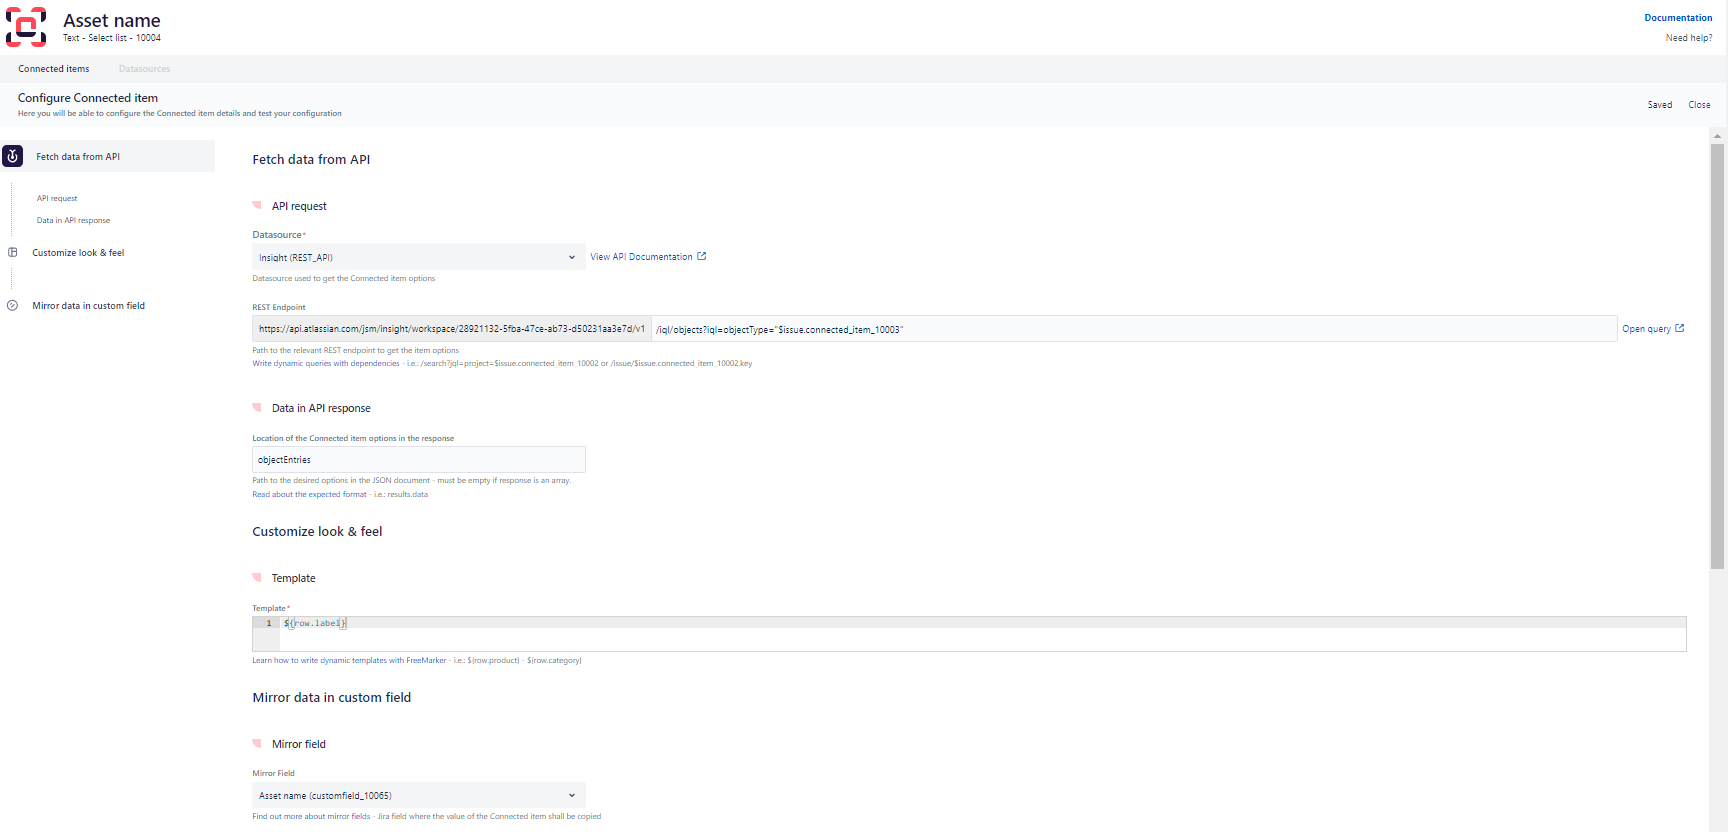
REST endpoint:
Asset name - REST endpoint
/iql/objects?iql=objectType="$issue.connected_item_10003"
Location of the Connected item options in the response:
Asset name - Location of item options in the response
objectEntries
Display template:
Asset name - Display template
${row.label}
Your Connected items are now up and running. The next step is to add them to your Service Management project.
3- Associate the Connected items to a request type in your Jira Service Management project
-
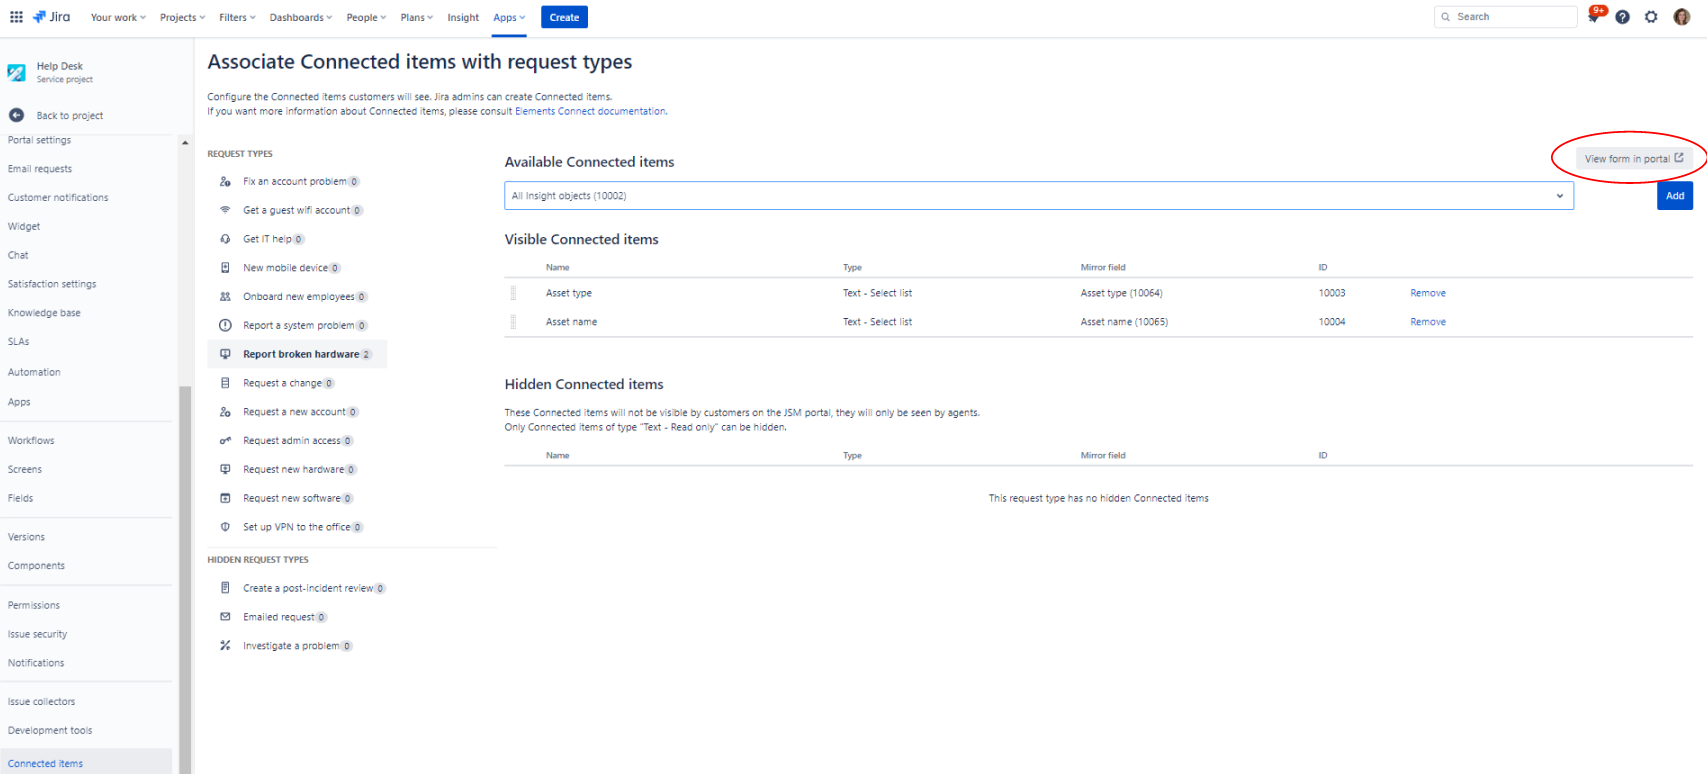
Go to your Jira Service Management project administration, and find the Connected item section.
-
Add both Connected items to the desired request type (for example: Report broken hardware)
-
Open the request type in the customer portal (you can use the button in the top right of your screen)
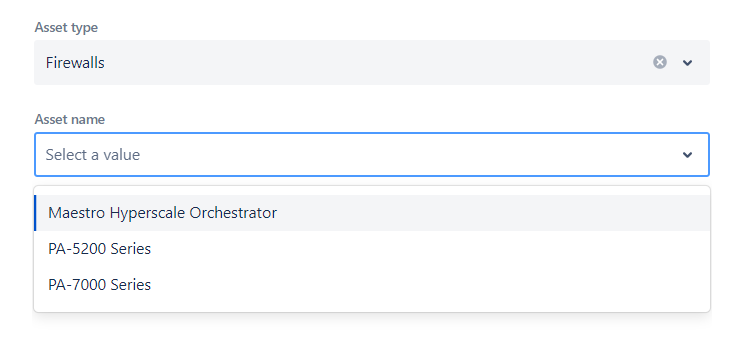
You can see both connected items on the form:
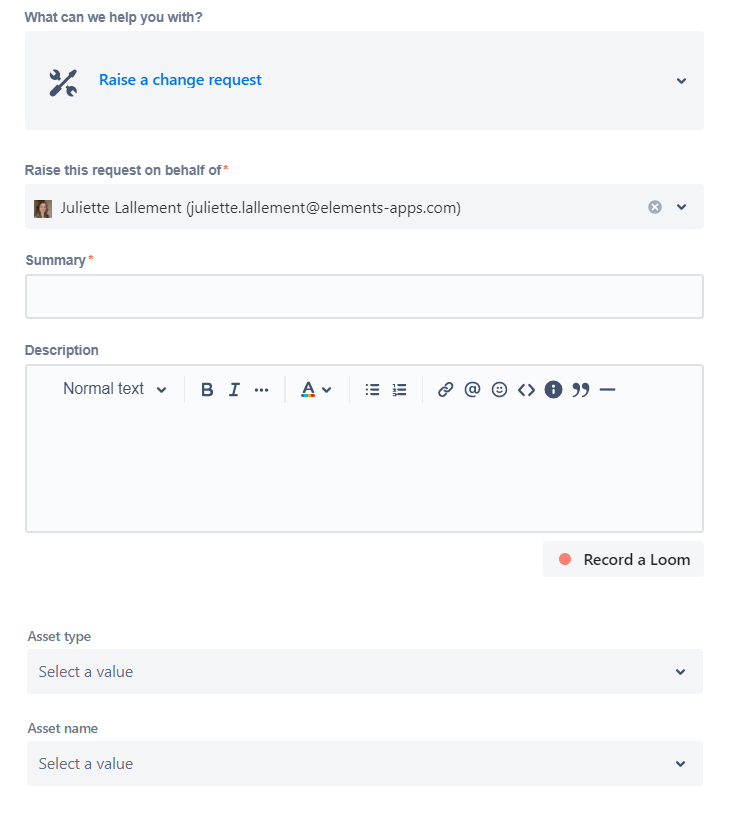
-
Select an asset type, asset names corresponding to this asset type will display automatically.
4- Configure the Automation rule to update the Insight field “Affected asset”
At this stage, you’ve added your Connected items to your Jira Service Management request form. So customers will be able to select values for the Connected items directly from the request.
Now, we want to push any value selected for the Connected item “Asset name” to the Insight field “Affected asset” that you previously configured on your Jira Service Management project (refer to Set Insight fields using Elements Connect and Automation#prerequisites). By doing that, the “Affected asset” Insight field value will be in sync with the Elements Connect “Asset name” Connected item.
This can be done easily by creating a project rule in Automation.
-
Go to the Project settings of your Jira Service Management project
-
Click “Automation”
-
Create the following rule:
Trigger:
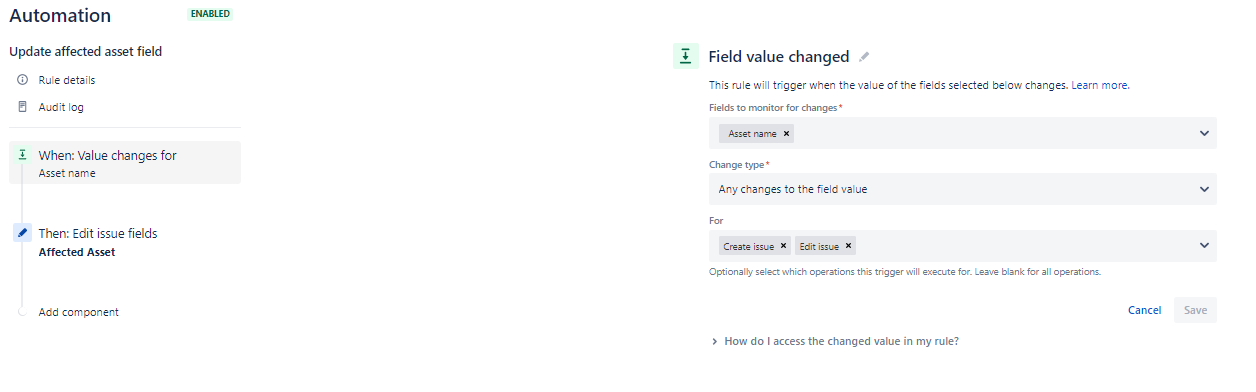
Action:
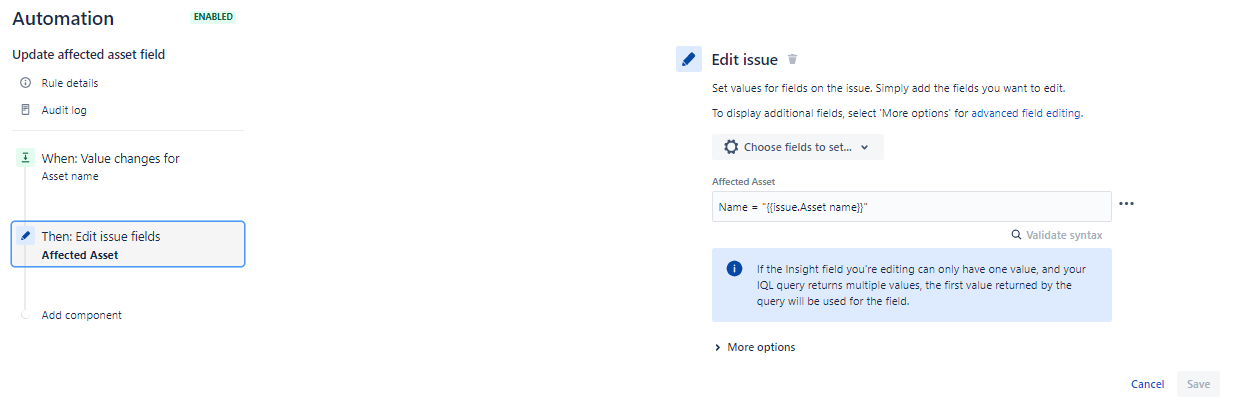
This what this rule means: When the value changes for the mirror field “Asset name” (Connected item mirror field), then edit the Insight field “Affected asset”.
-
Enable the rule
-
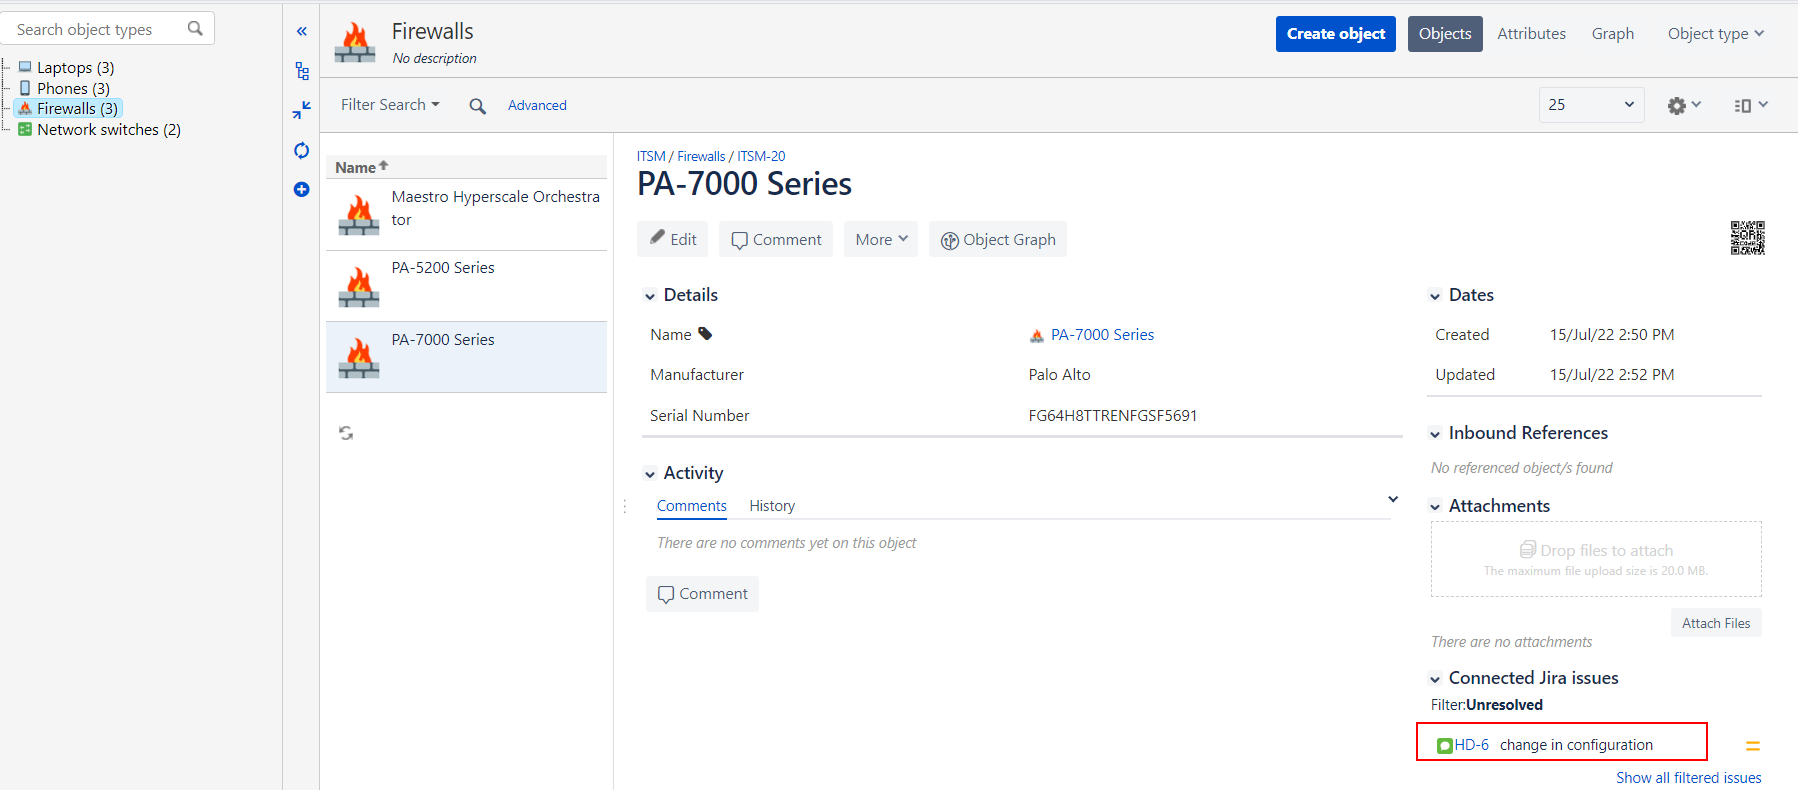
When you go back to the created change request, the Insight field has been set based on the mirror field of the Connected item “Asset name”
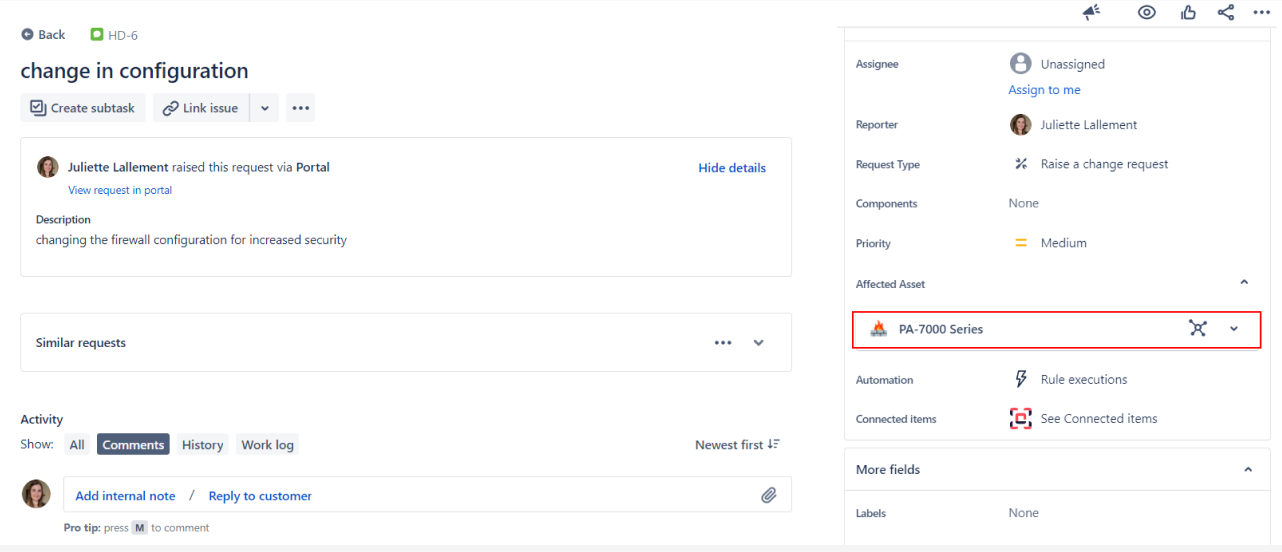
Issue view - Insight field set
-
From Insight, the change request ticket displays in the “Connected Jira issues” section in the right-hand corner of the Insight object: