
This guide explains how to recalculate the display value of an Elements Connect custom field during a transition defined in a Jira workflow.
This feature is designed to update the value of specific custom fields during a workflow transition. It ensures that the displayed data is recalculated based on the latest information from an external datasource.
Prerequisites
The post-function currently supports only a limited number of field types. Refer to the table below:
✅ Fully supported in post-function
|
Field type |
Set initial value |
Update value |
|---|---|---|
|
Read-only date |
✅ |
✅ |
|
Read-only user |
✅ |
✅ |
|
Read-only text single value
|
✅ |
✅ |
|
Read-only text table
|
✅ |
✅ |
|
Read-only text single value (snapshot) |
✅ |
✅ |
|
Read-only text multi value (snapshot) |
✅ |
✅ |
🟡 Partially supported (update only)
|
Field type |
Set initial value |
Update value |
|---|---|---|
|
Select-list text single value
|
❌ |
✅ |
|
Select-list text multi value
|
❌ |
✅ |
❌ Not supported
|
Field type |
Set initial value |
Update value |
|---|---|---|
|
Select-list single value (snapshot) |
❌ |
❌ |
|
Select-list multi value (snapshot) |
❌ |
❌ |
|
User picker |
❌ |
❌ |
Limitations:
-
Connected items are not supported.
-
All fields in the post-function must be available on the Issue View screen of the work item where the post-function is performed
-
If one or more field is missing from the Issue View, the full post-function will be ignored, including for the fields available in the Issue View
-
Post function does not support fields with dependency to
-
$userInput, as there is no way for a user to input anything when post-function is running -
$currentUser, as it’s Elements Connect app which would be identified as user when running post-function
-
For LIVE FIELDS
-
If value is not set, post-function relies on the query to update the value.
-
If value is already set, post-function relies on the live query to udpate the value.
Configuration steps
1. Enter the Workflow configuration
Go to your Jira workflow configuration
-
Either through Space settings > Request management > Workflow
-
Or on one of your issue, clicking on the status drop down and selecting View Workflow
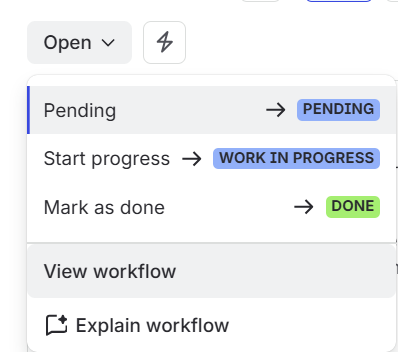
Then click on Edit workflow.
2. Identify the transition
Identify the transition during which you want the custom field to be updated.
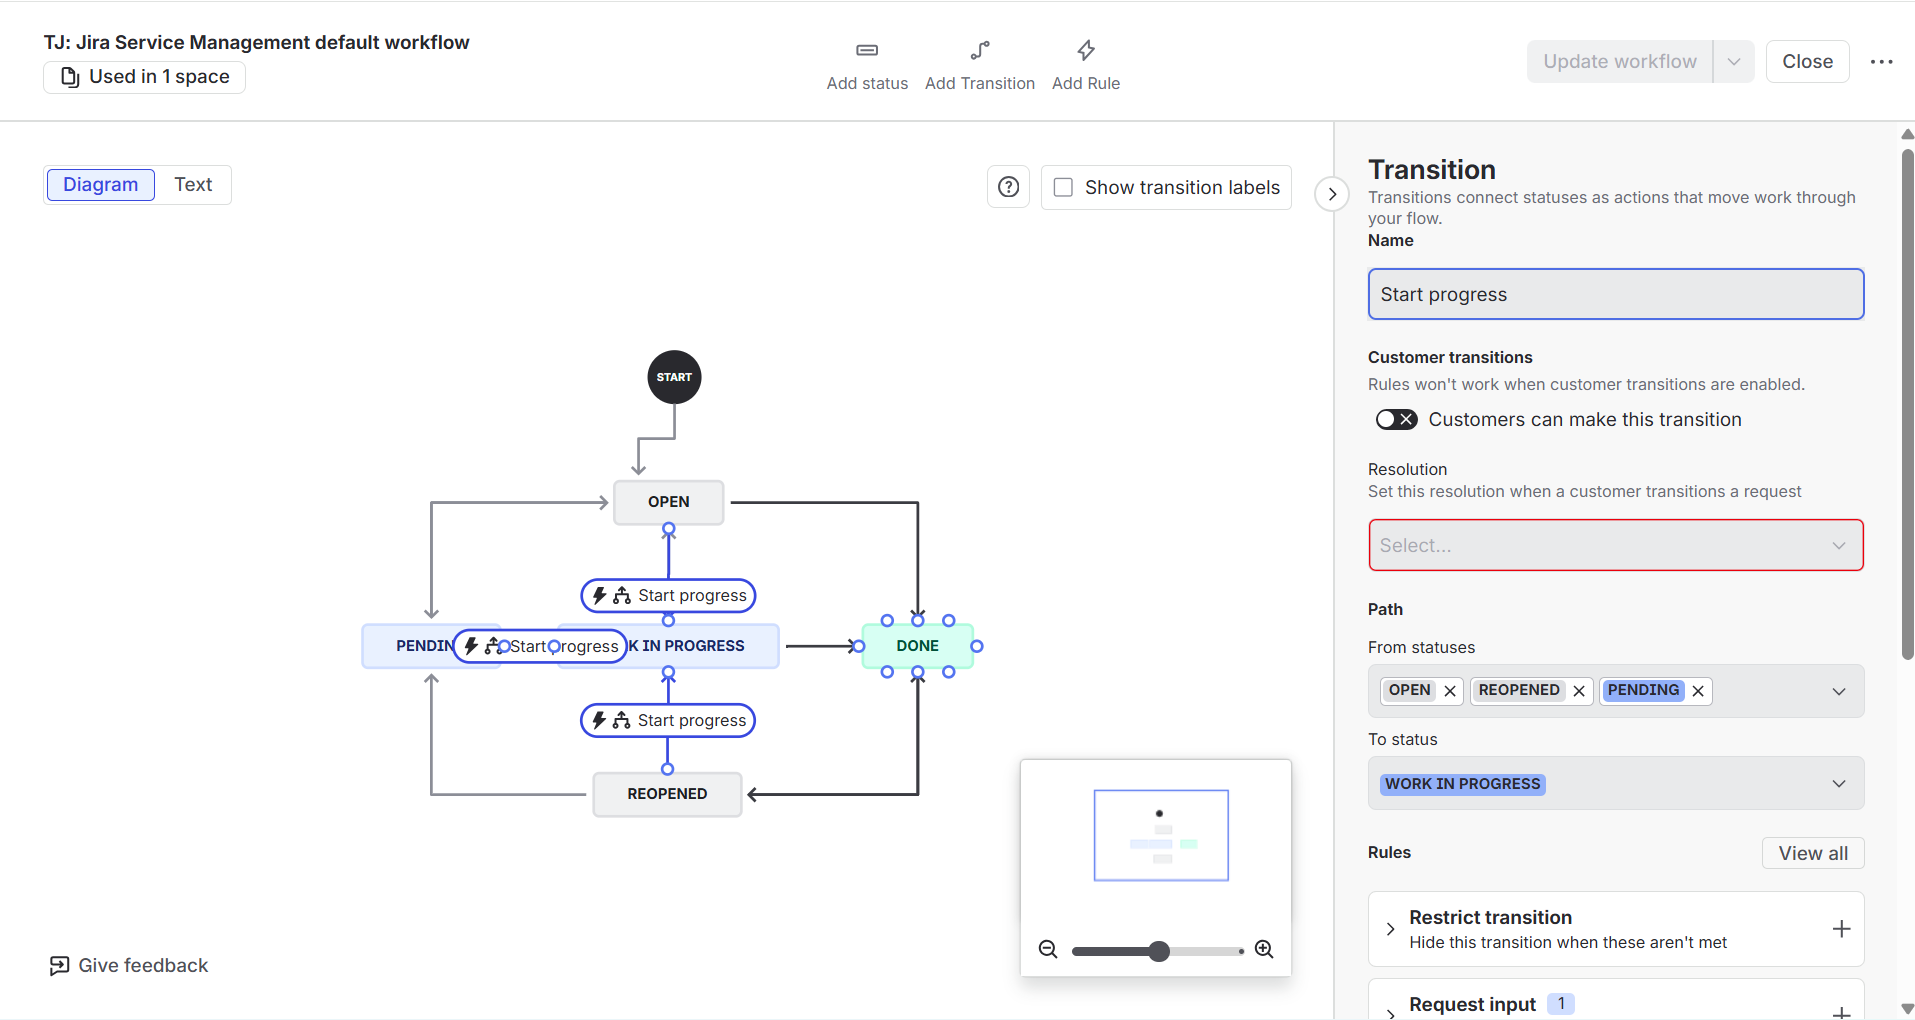
3. Add the Post Function
Under Rules, in the Perform Actions box, click on add Perform Actions rule and select the Update Elements Connect custom field value action.
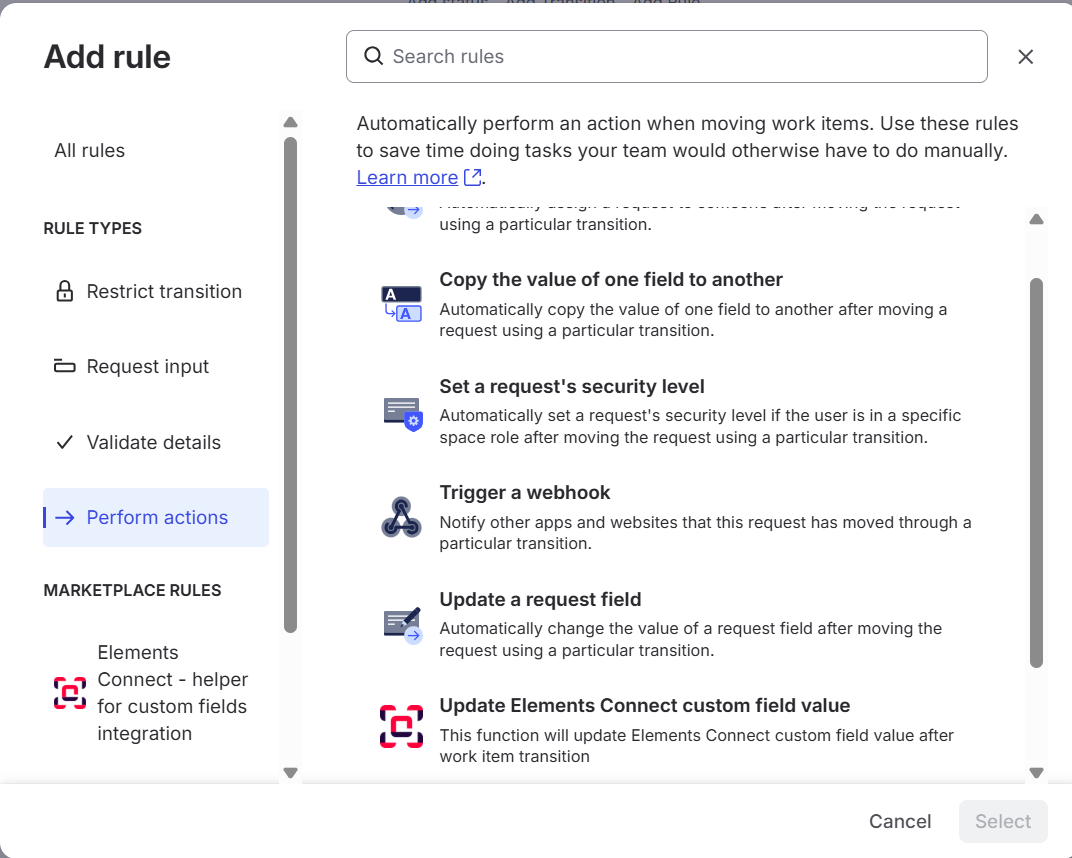
At that stage you may see two different Elements Connect actions.
This is something new since Elements Connect 7.0.0.
Actually, for users who have been using the app before Elements Connect 7.0.0, you may now have 2 kind of custom fields:
-
A - Custom field created after the update to Connect 7.0.0
-
B - Custom field created before the update to Connect 7.0.0
(helper’s legacy)

Although there are no actual differences between how the fields are configured or behaving in your Jira issues, you are not able to handle A and B fields with the same post-function.
4. Set up the post-function
In that frame, you are providing with a recap of all elligible and non elligible fields.
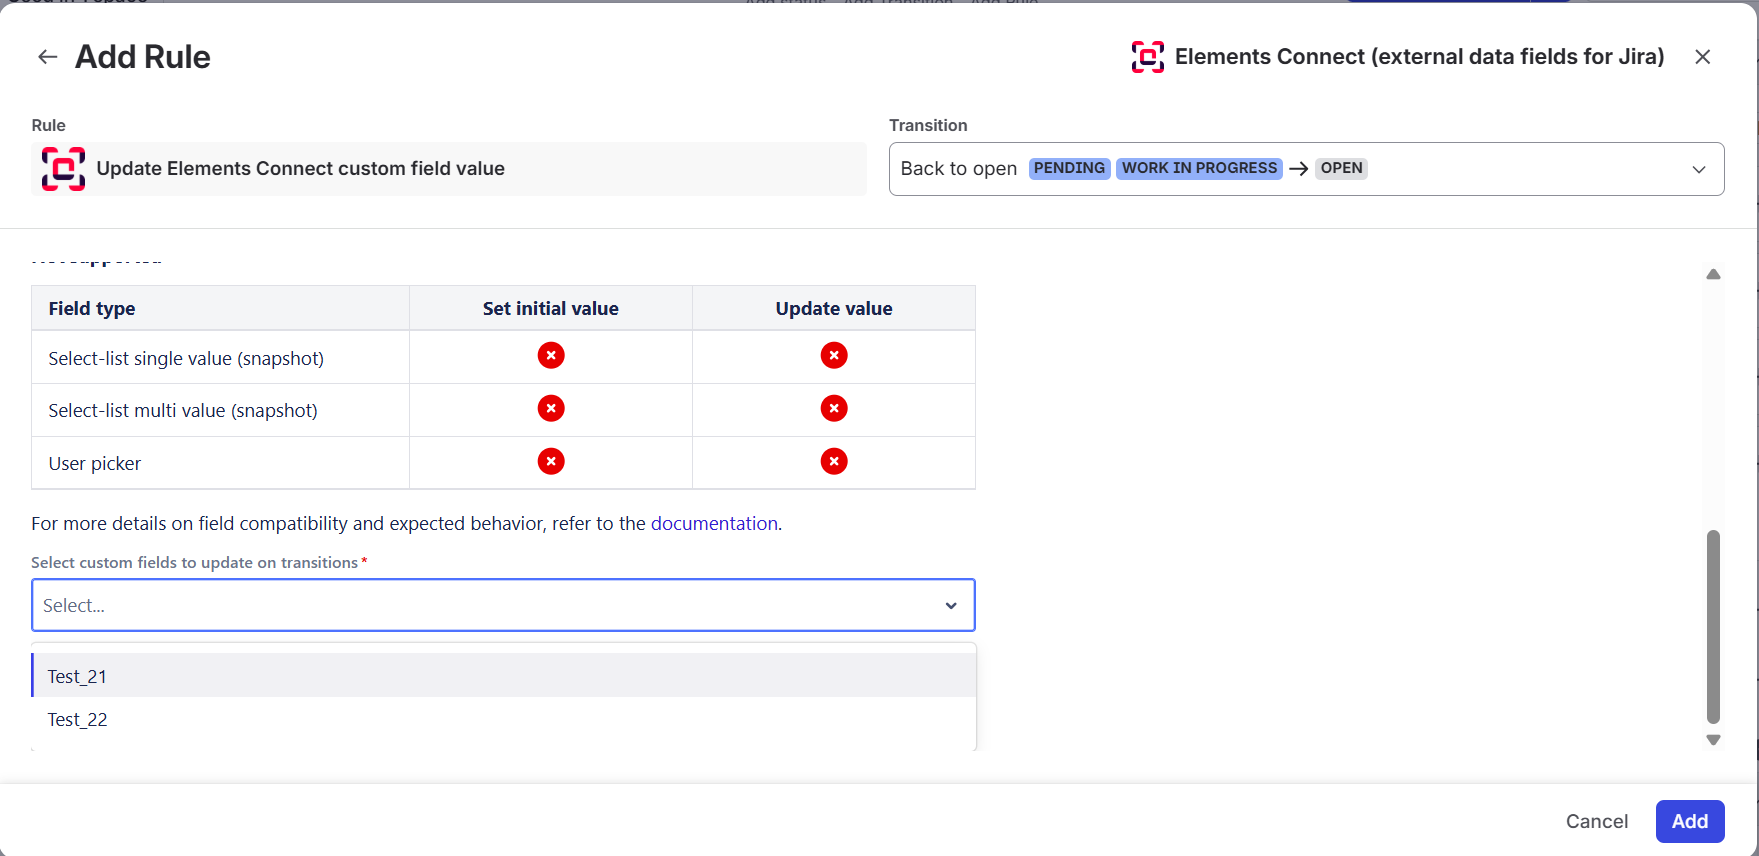
Select custom fields to update on transitions among the elligible ones and click on Add to set up the rule.
5. Update the workflow
Don’t forget to Update the Workflow.
And now, you are good to go.
By following these steps, you can ensure that your custom field values are accurately recalculated during specific transitions in your Jira workflow, providing up-to-date information for better decision-making and data management.
For more detailed instructions on configuring Jira post functions, refer to the Jira post function documentation.