
Use a Jira project as a light-weight CMDB in Jira Service Management. Build cascading connected custom fields (asset type → asset name → status) that let JSM customers select their assets when raising incidents - using Elements Connect with a Jira-to-Jira data source pointing to your same Jira Cloud instance or another one.
The need: let JSM customers select their assets when raising an incident
This tutorial shows how to use a local Jira project as a light-weight CMDB (Configuration Management Database) to store asset records, and how to expose those assets to customers raising incidents from the Jira Service Management portal. Each asset is represented as a Jira issue with its own attributes (custom fields). Elements Connect connects Jira to itself through a Jira-to-Jira data source, pointing either to a project in your same Jira Cloud instance, or to another Jira Cloud instance entirely, to populate the JSM request form with cascading asset selectors.
Solution: three cascading connected custom fields fed by a Jira-to-Jira data source
Use Elements Connect to fetch asset types and asset names from a Jira project, whether that project lives in your same Jira instance or in another Jira instance you have access to. This Jira-to-Jira data source uses the Jira REST API to read your asset records. The same setup also lets you display contextual asset information such as the asset's current status.
For this use case, the following cascading connected custom fields can be configured on a JSM portal :
-
Asset type, a select list that shows all the asset types available in the Jira asset inventory project
-
Asset name, a select list that shows all the assets assigned to the logged-in user which match the asset type selected
-
Asset status, a read only custom field that displays the status of the selected asset
.gif?cb=e5d943026d6be1ab5ac20ee793799b6a)
How to configure an asset type picker, asset picker and display the status on the asset selected
Prerequisites:
-
Have a Jira project configured in a Jira instance to hold your assets - in this tutorial, we will call the project “CMDB”
-
Have Elements Connect installed on your instance
Configuration steps
The configuration is done in 4 steps:
-
Configure your project to hold your assets
-
Create and configure the Jira datasource in Elements Connect
-
Create and configure the connected custom fields in Elements Connect to retrieve asset types, asset names and asset statuses from the “asset inventory” project
-
Associate the Connected custom fields to a request type in the JSM portal
Steps
1 - Configure the “CMDB” project to hold your asset types and your assets
The first step is to configure the asset inventory project (in this use case, it is named “CMDB”) to hold asset types and asset records (issues). In order to do that, we will create new issue types called “ Asset type” and “Assets”. The issue type “Asset type” will be used to represent our asset types and the issue type “Asset” will represent our assets in the project.
Create issue types “Asset type” and “Asset”
-
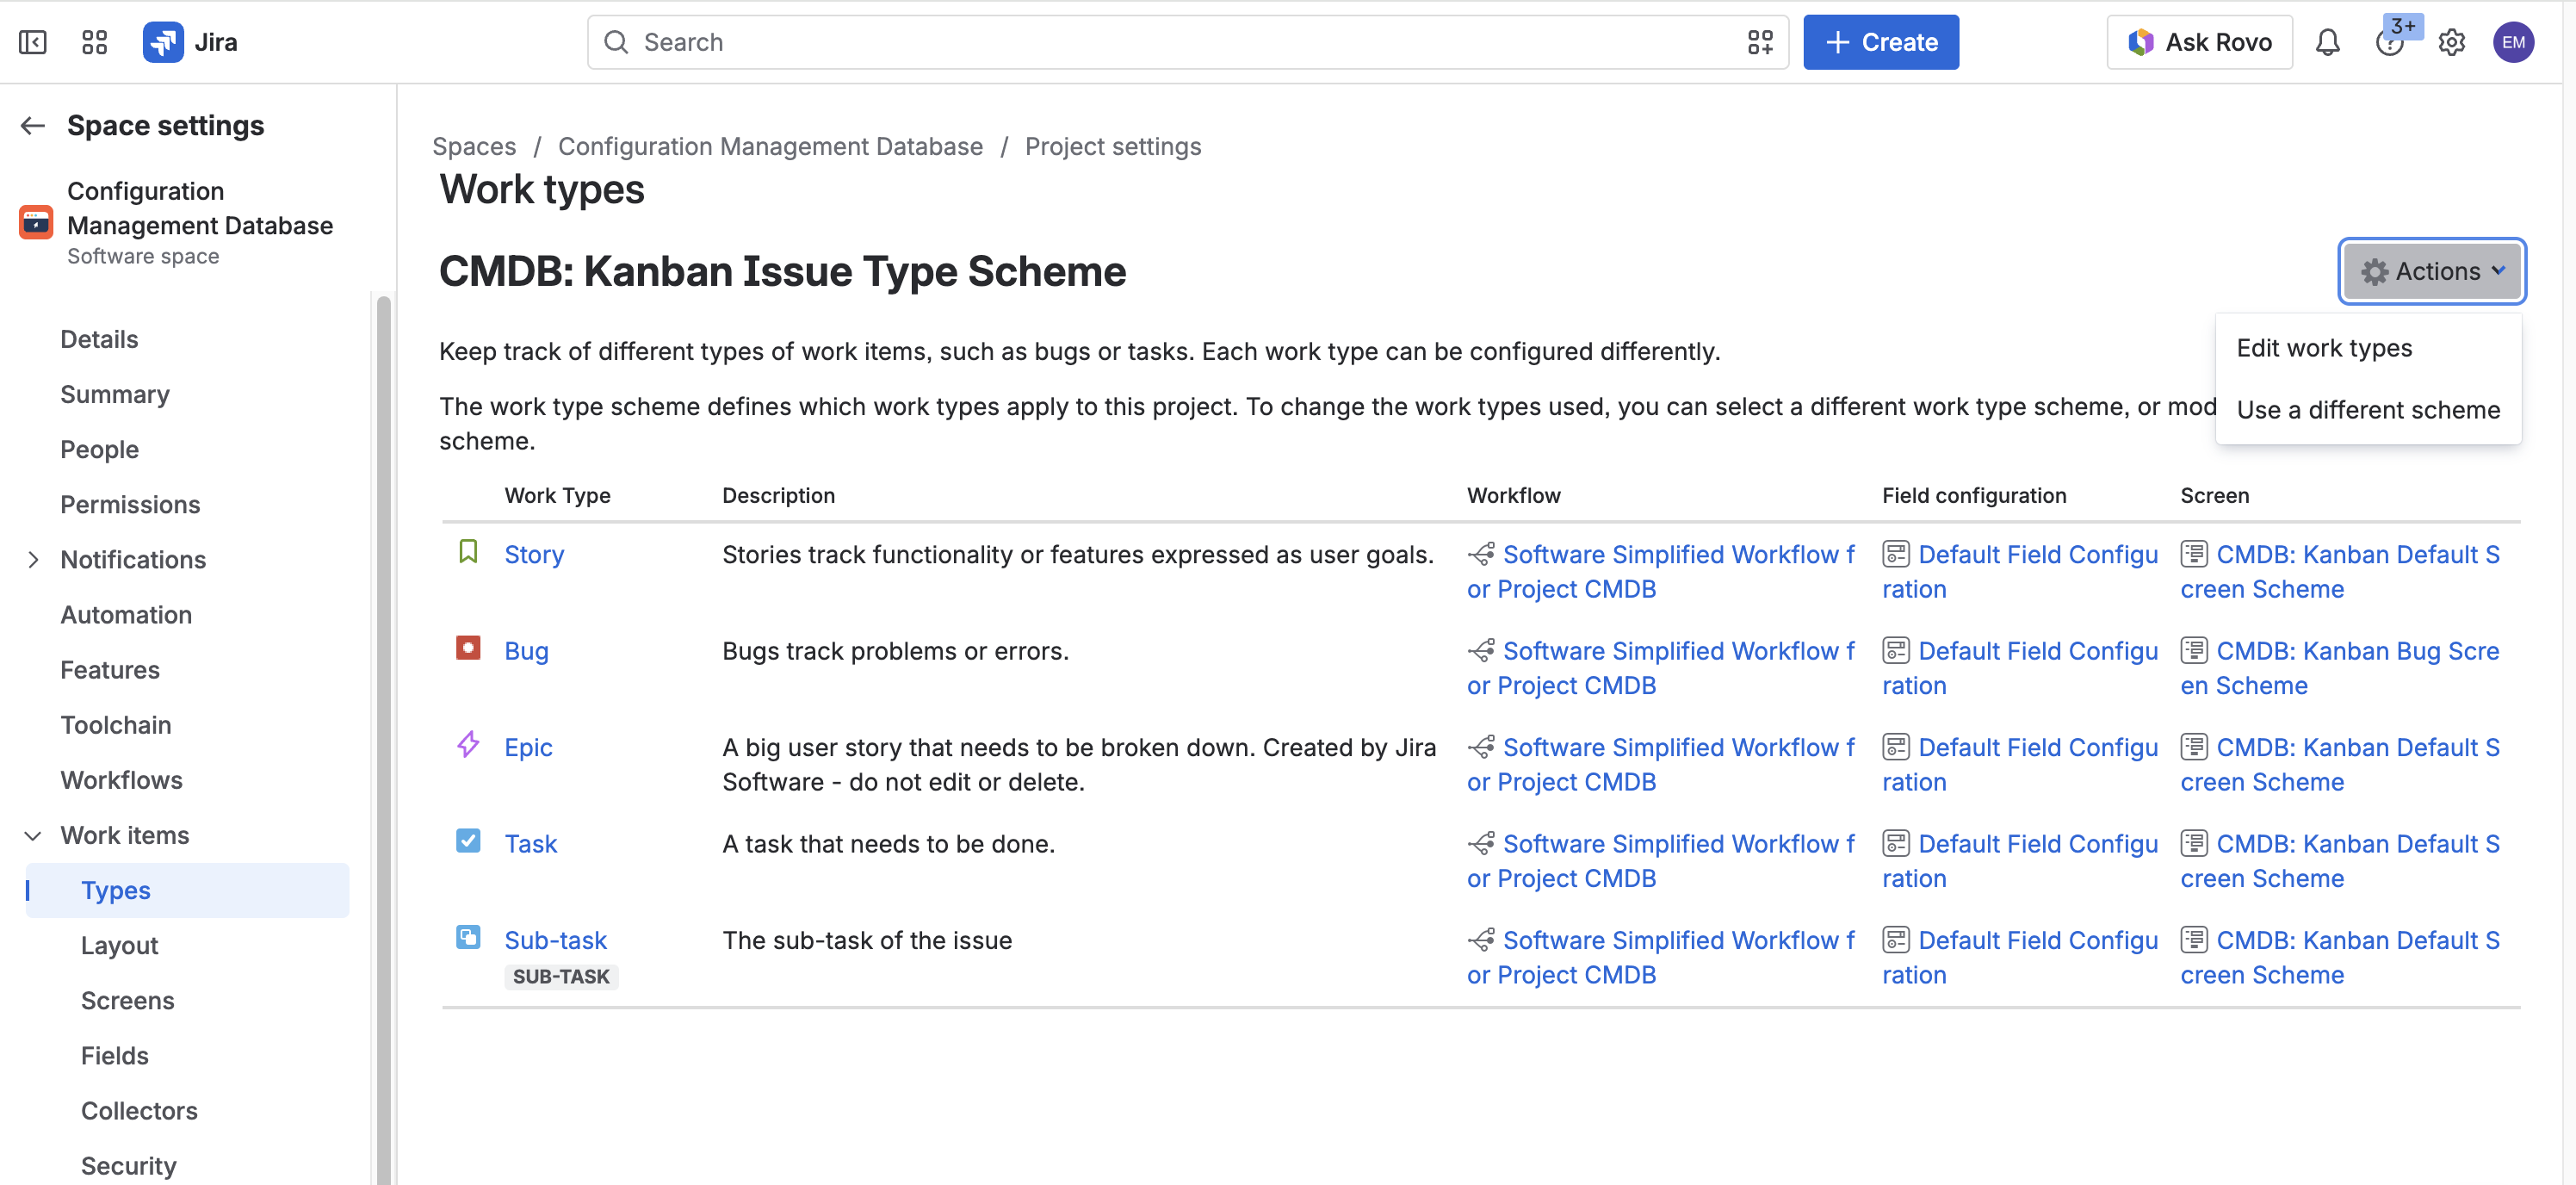
From the CMDB project, go to the Project settings
-
Go to Work items and click “Types”
-
Under the Actions button, select “Edit work types”
-
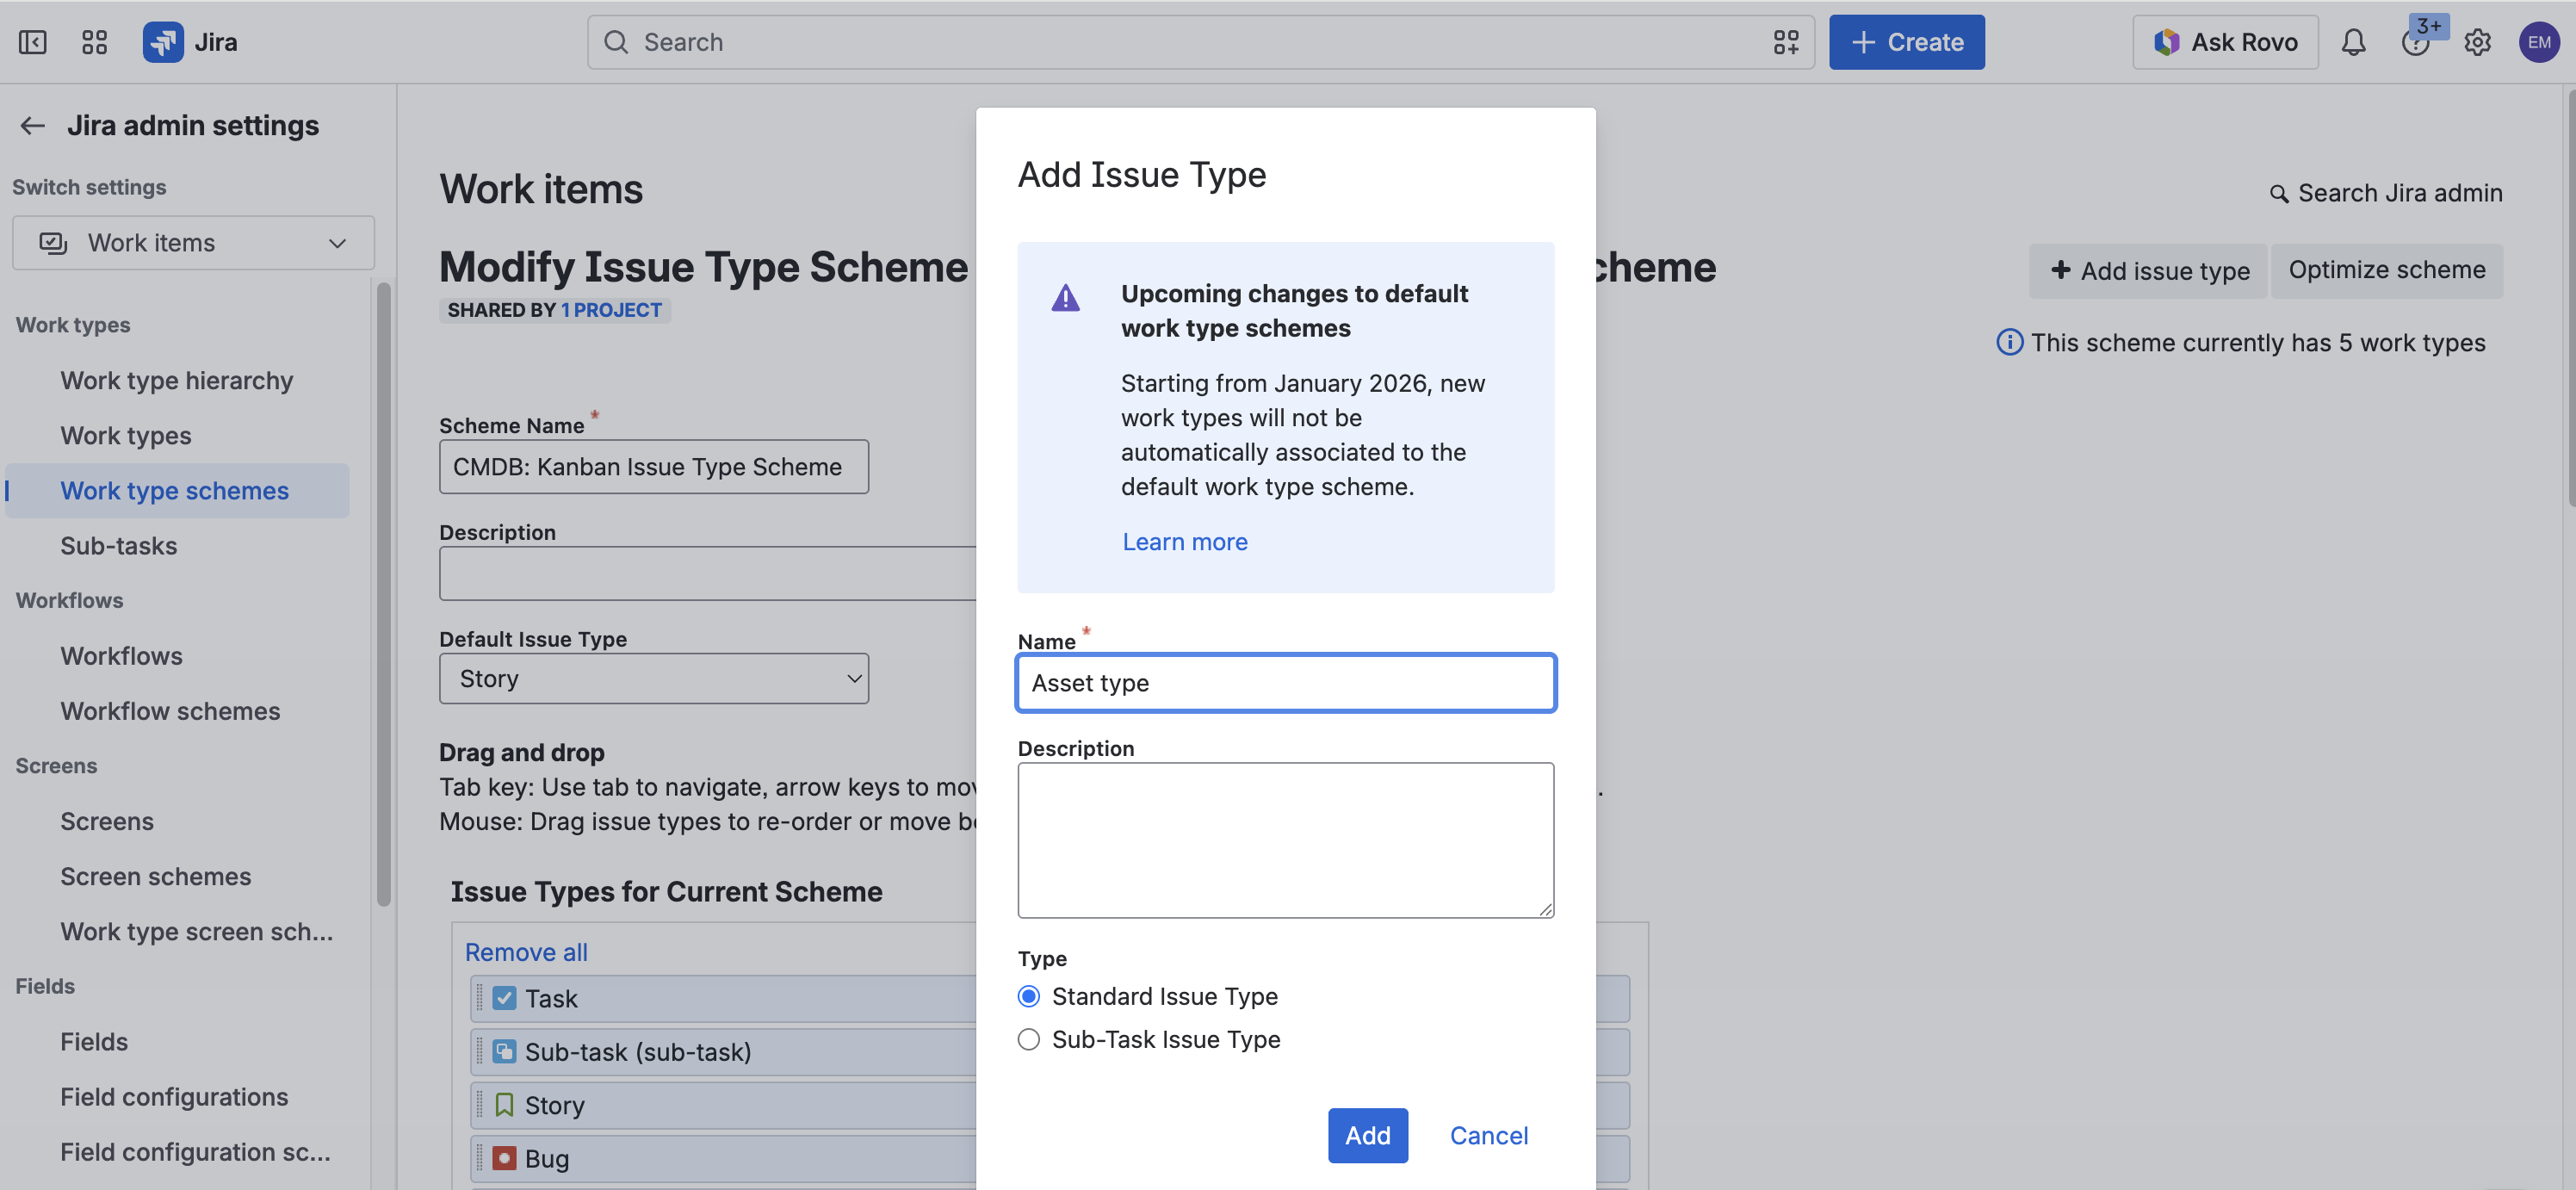
Click “Add issue type”, create your Asset issue type and click “Add”
-
Add the “Asset type” issue type to the current scheme and click “Save”
-
Repeat the same operation for the issue type “Asset”.
-
Go back to your project
Create your work items
-
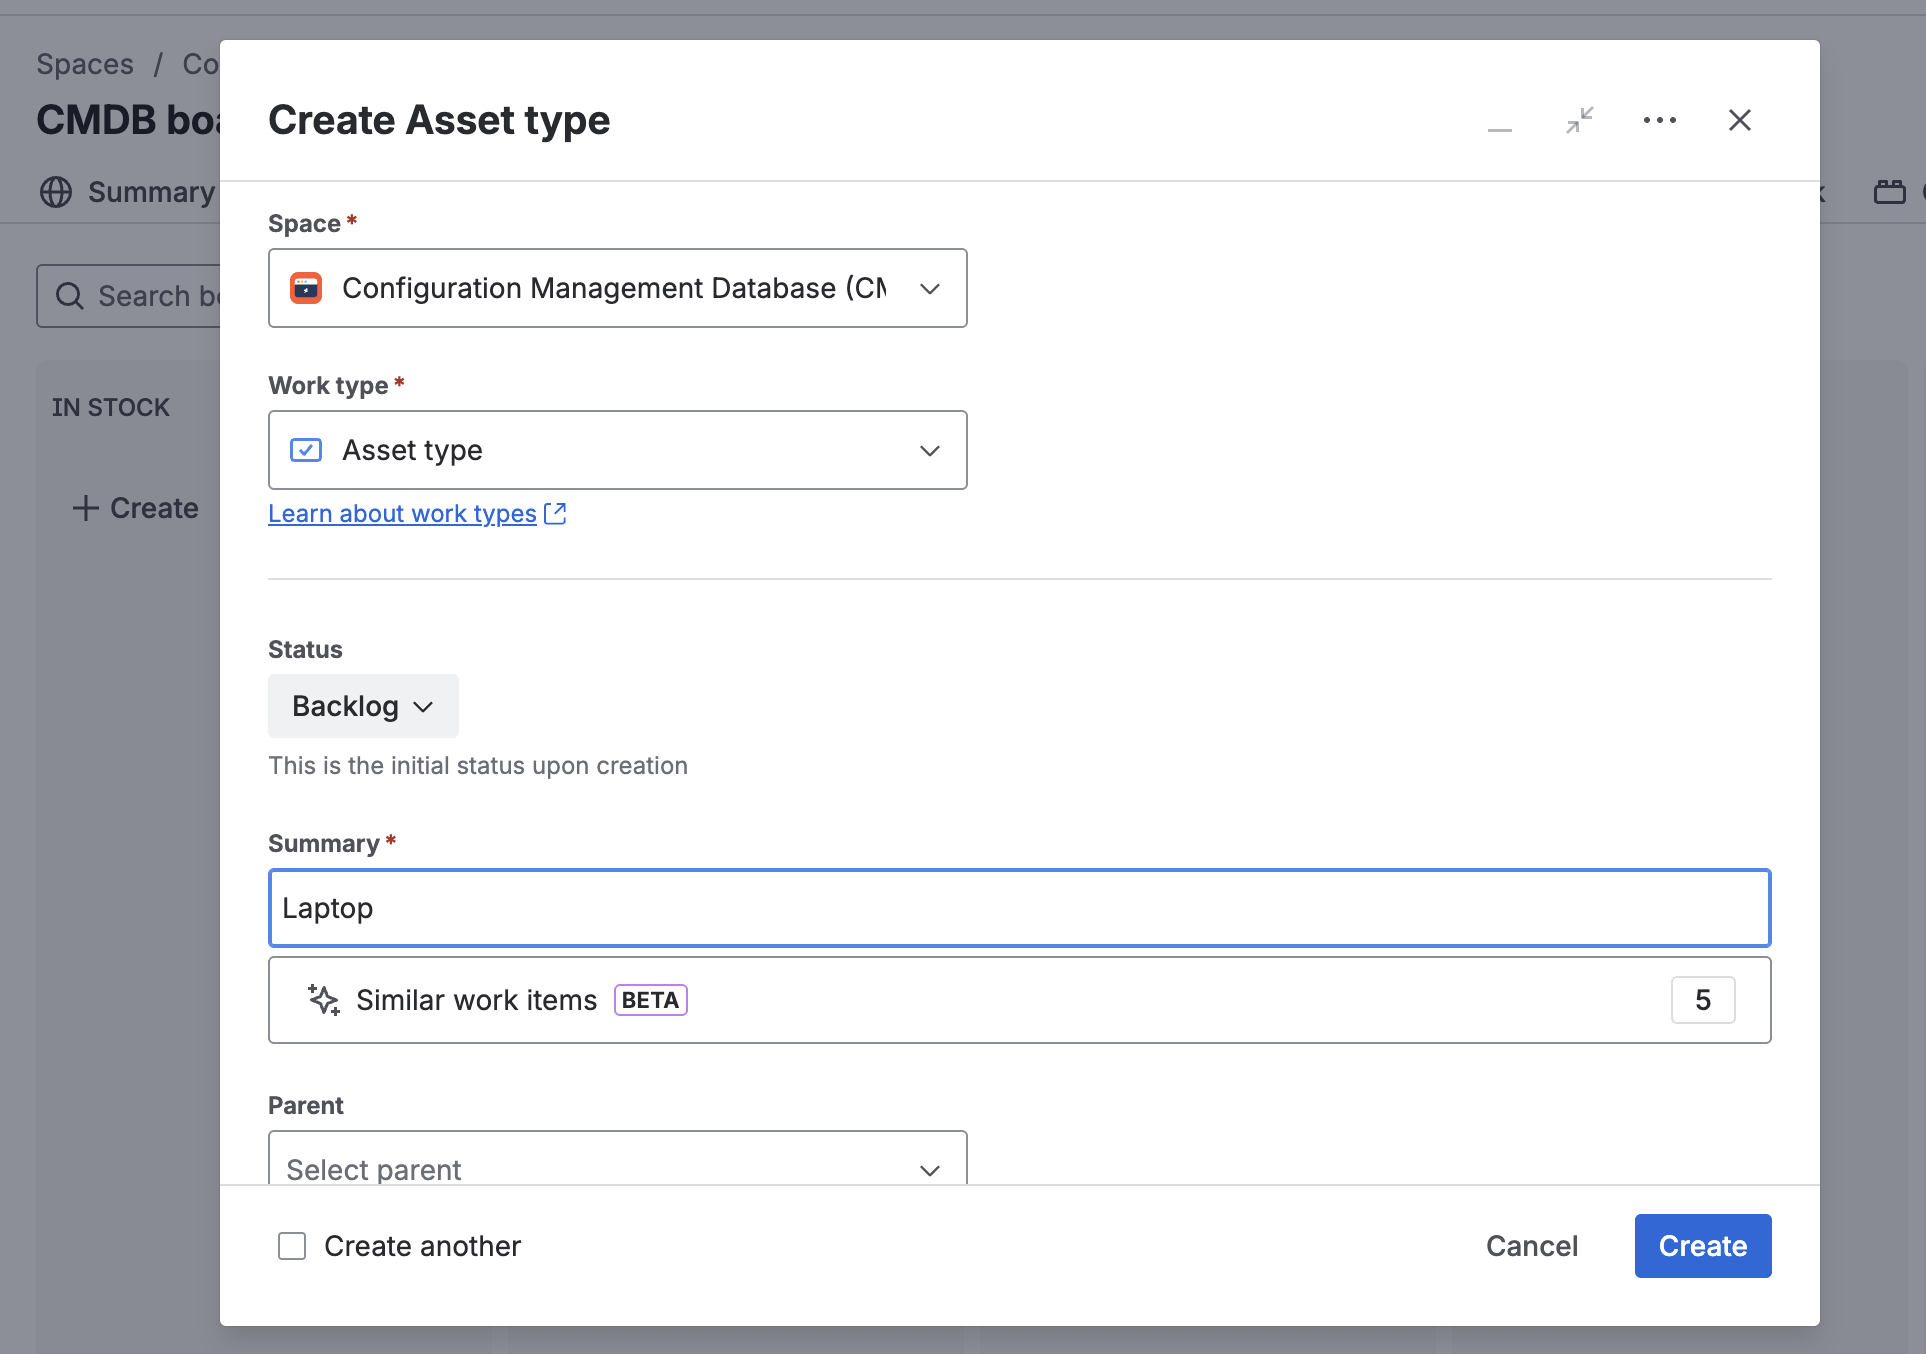
Create work items to represent your asset types by selecting the work type “Asset type” as follows
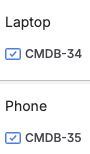
For the purpose of this tutorial, the following asset types are used:
-
Now create issues to represent your assets by selecting the issue type “Asset” as follows
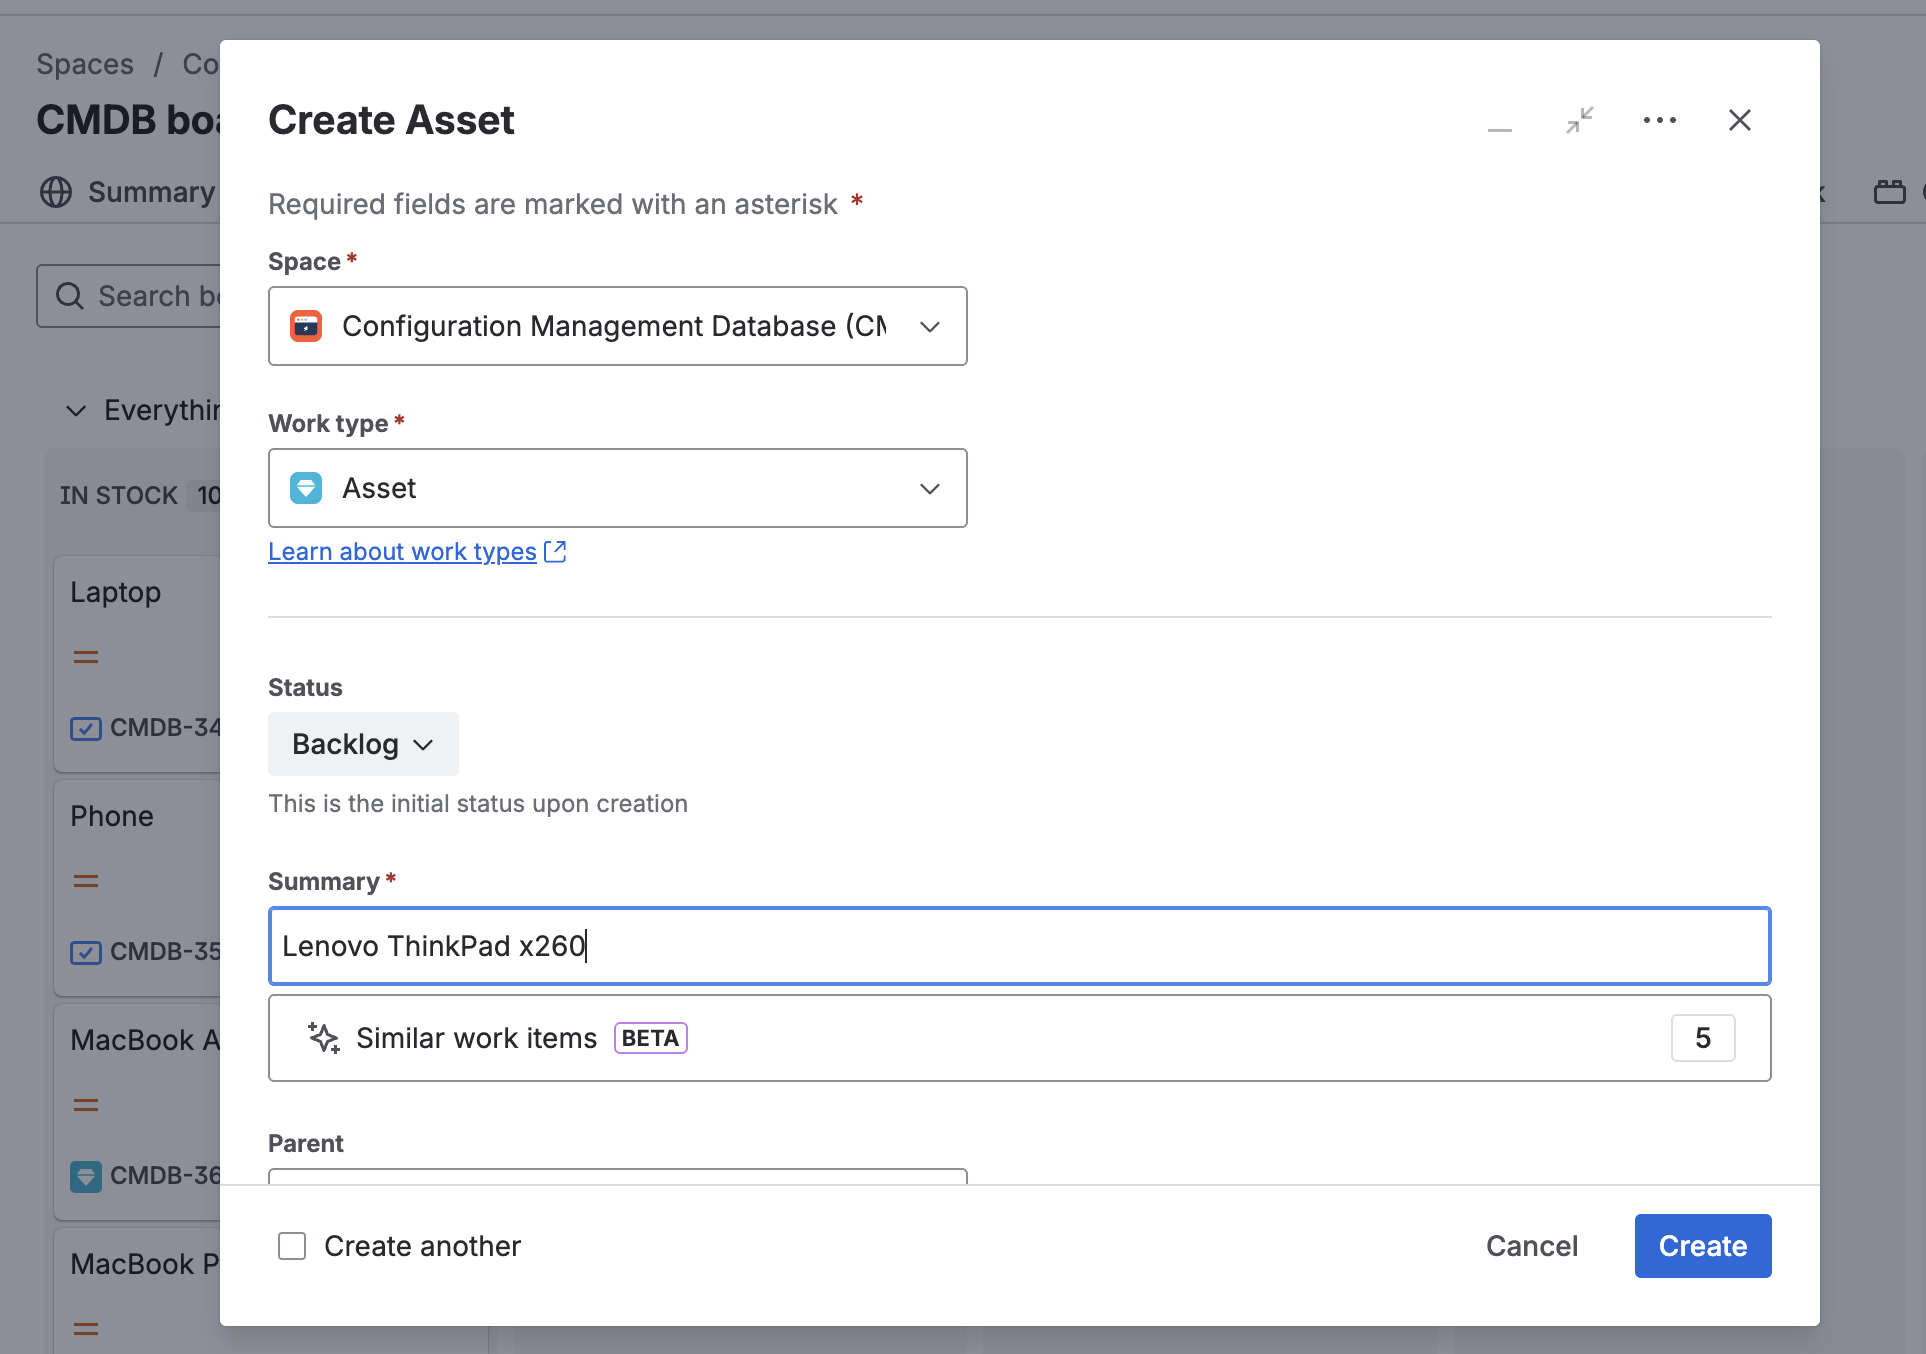
Repeat the operation as many times as necessary for each asset type you created.
Link your assets to their asset type
At this stage, you created your asset types (Laptop and Phone in this example) and your assets. The next step is to link your assets to their relevant asset type in order to create a parent-child relationship between them where the asset type is the parent and the asset is the child.
-
Open your “Asset type” work items and click the “Link issue” button
%20(15).png?cb=7570d6b86a174405ae27f1656bb3ef2c)
Your CMDB project is now correctly configured and should roughly look like this:
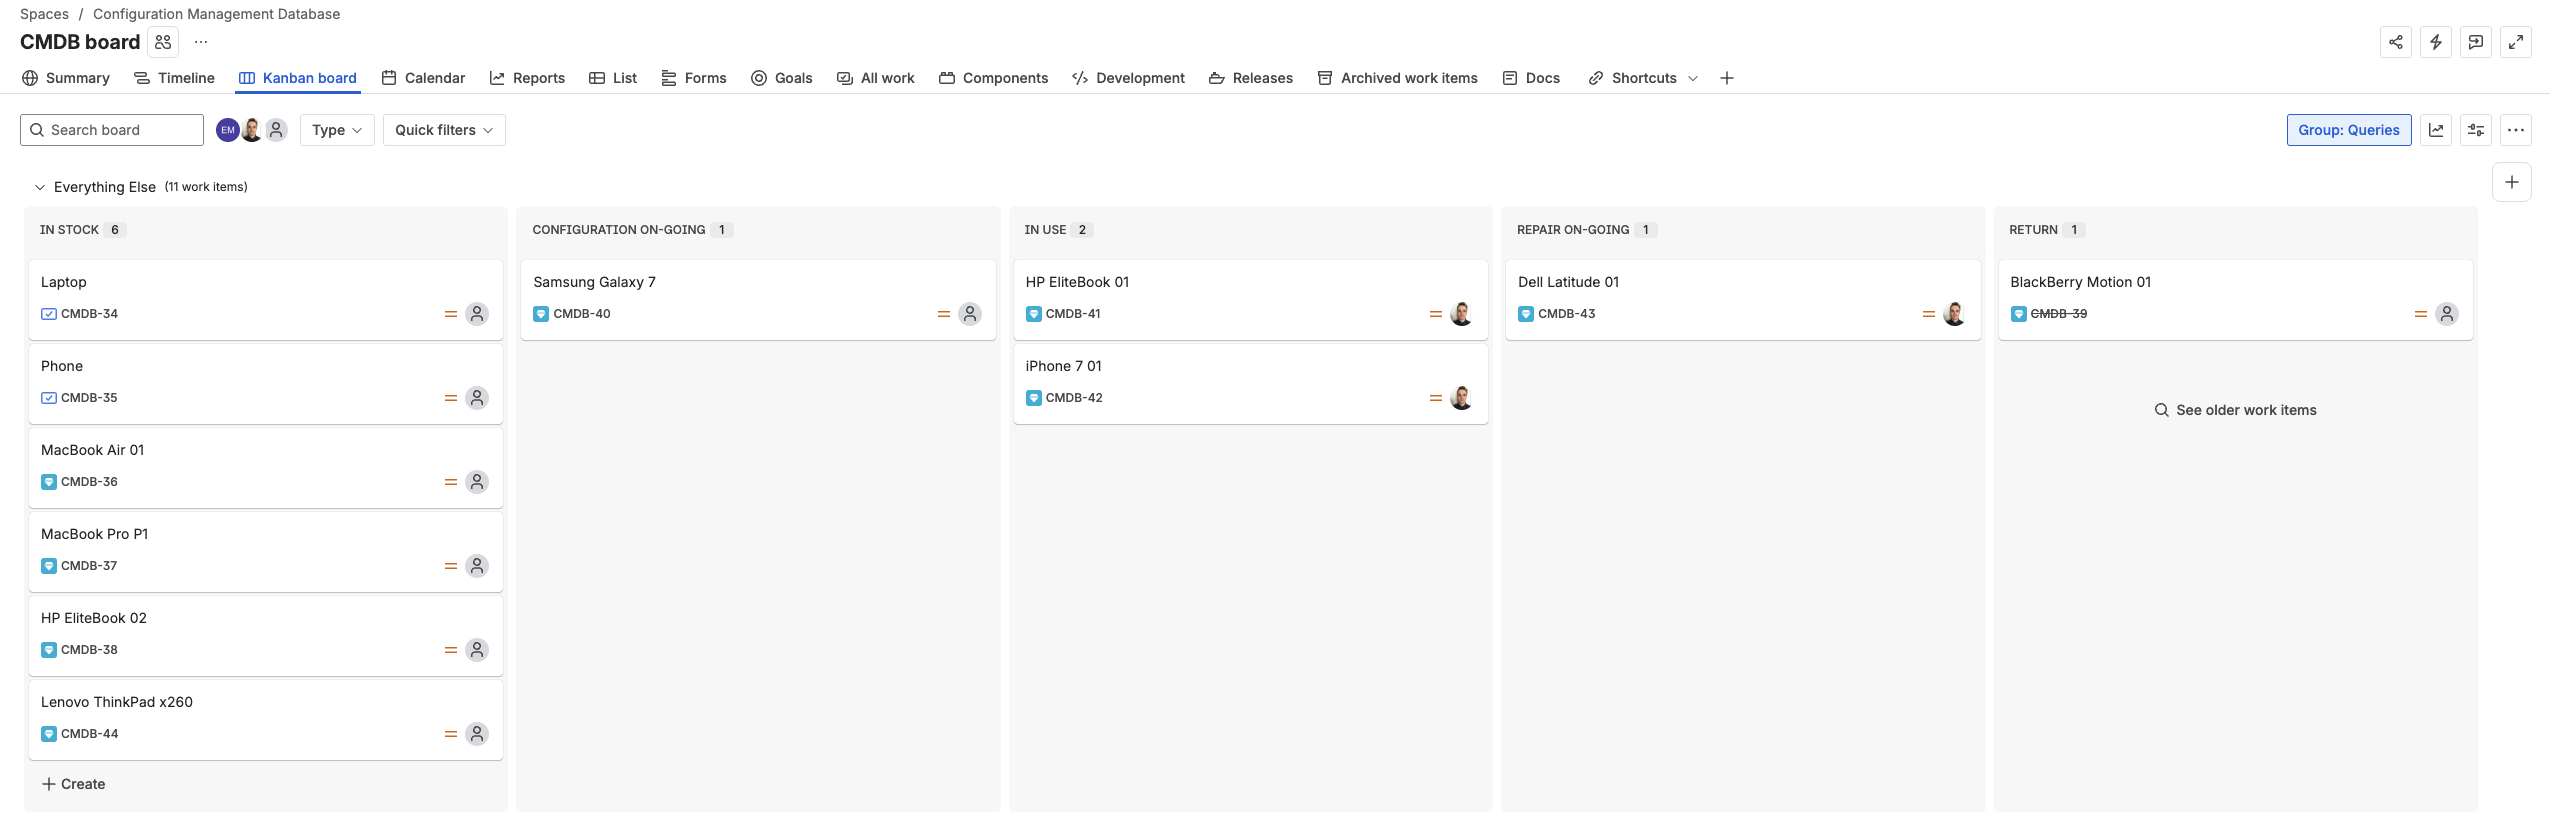
The next steps are to configure the connection to the Jira project in order to fetch asset types and assets and display them in Elements Connect connected items.
2 - Create the Jira datasource in Elements Connect
This tutorial uses the connection to the Jira REST API using basic authentication in order to fetch the asset types and assets of the CMDB project. Let’s see how to do this.
-
Go to Elements Connect administration by clicking on “Apps”, then Elements Connect

The first step is to create a REST API datasource.
Refer to this tutorial to configure Jira as a datasource.
3 - Configuring the connected custom fields: 'Asset type', 'Asset name” & 'Status'
In this tutorial, you'll create three connected custom fields in Elements Connect, each fetching data from your CMDB project via the Jira REST API data source you just configured:
-
Asset type, a select list that shows all the asset types available in the Jira asset inventory project
-
Asset name, a select list that shows all the assets matching the asset type selected
-
Status, a read only custom field that displays the status of the selected asset
Asset type (12165)
Create one connected custom field called “Asset type” of type Select list (single choice) and Object. Set Jira (or the name you gave to the previously configured datasource) as the connected custom field datasource.
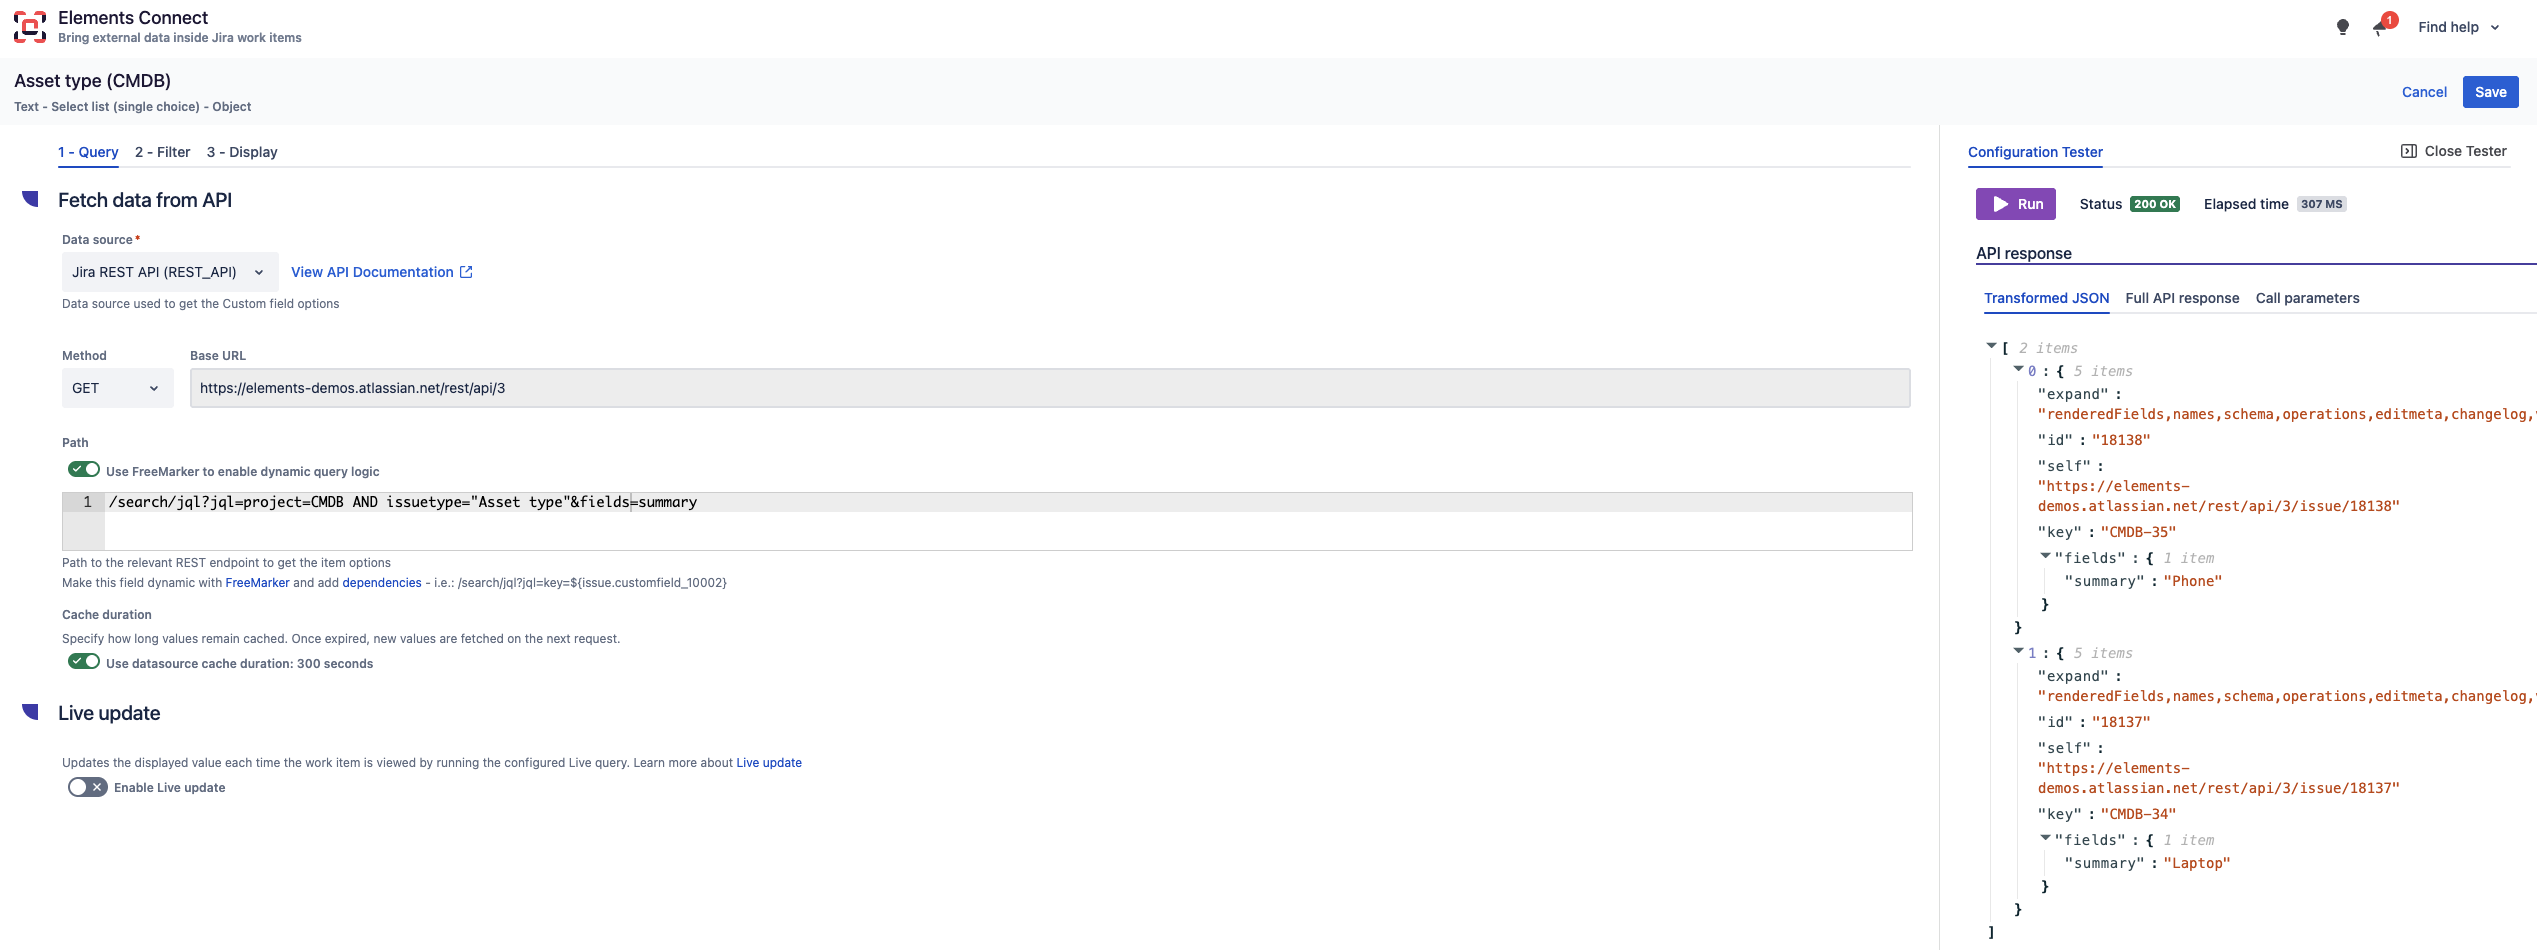
1 - Query
/search/jql?jql=project=CMDB AND issueType = Asset AND issue in linkedIssues ("$issue.connected_item_10044.key") AND assignee = "$currentUser.accountId"&fields=*all
2 - Filter
$.issues
Display
 Id : ${row.fields.summary}
 Template: ${row.fields.summary}
Asset name (12166)
Create one connected custom field called “Asset name” of type Select list (single choice) and Object. This connected custom field will display the assets linked to the issue type selected in the “Asset type” connected custom field where the Assignee is the logged-in user.
Set Jira (or the name you gave to the previously configured datasource) as the connected custom field datasource.
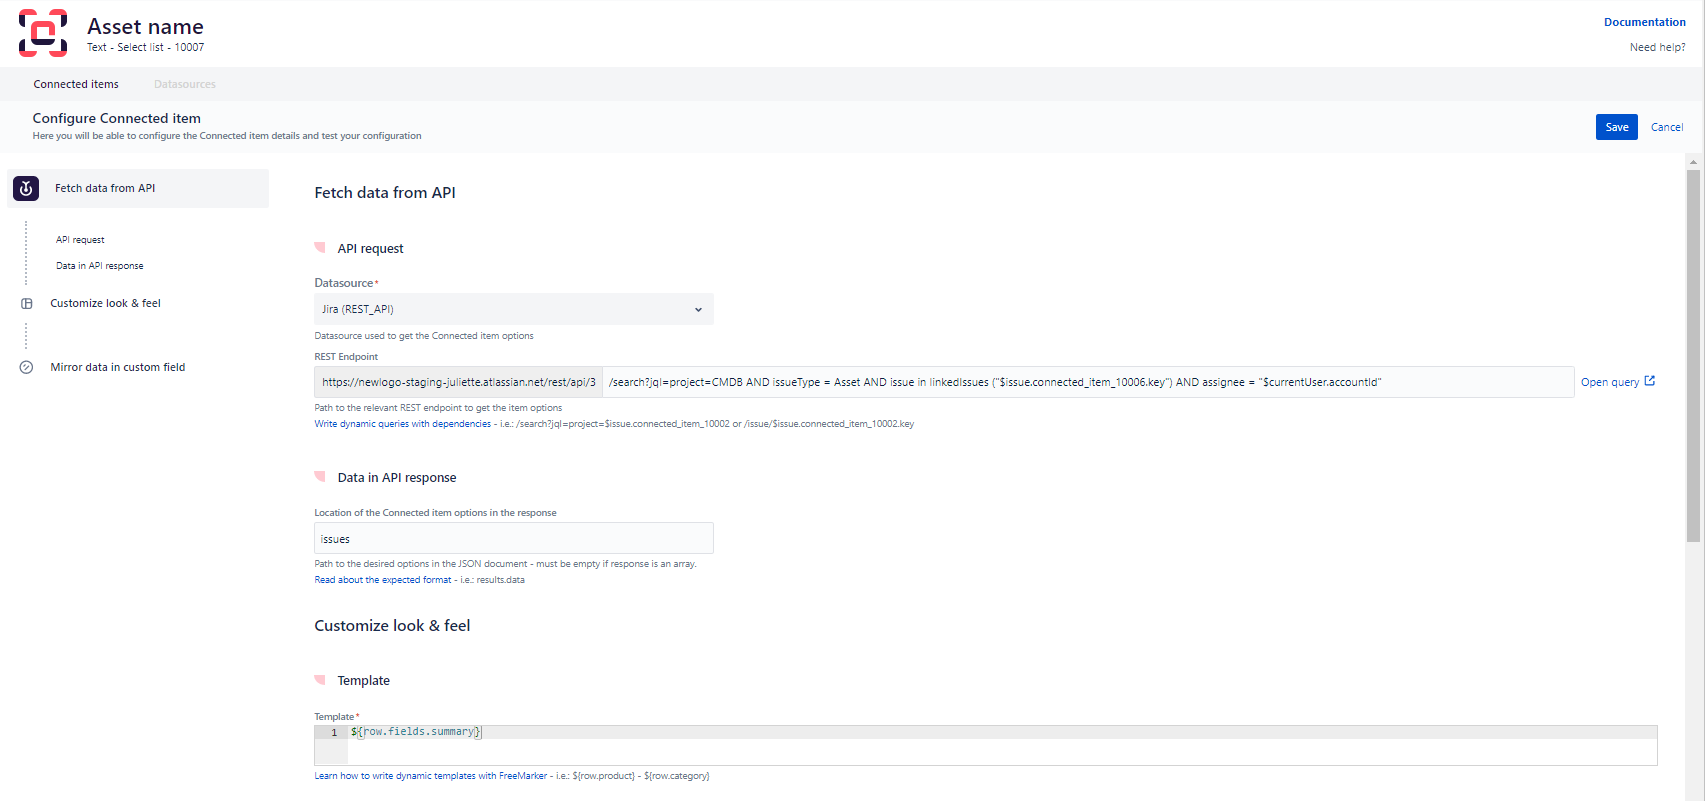
1 - Query
/search/jql?jql=project=CMDB AND issuetype=Asset AND issue in linkedIssues("$issue.customfield_12165.id") AND assignee="$currentUser.accountId"&fields=summary, assignee
2 - Filter
$.issues
3 - Display
Id: ${row.id}
Template: ${row.fields.summary}
Asset Status (12167)
At last, create one connected custom field called “Status” of type Read-only and Snapshot. This connected custom field will display the status of the asset selected in the “Asset name” connected custom field.
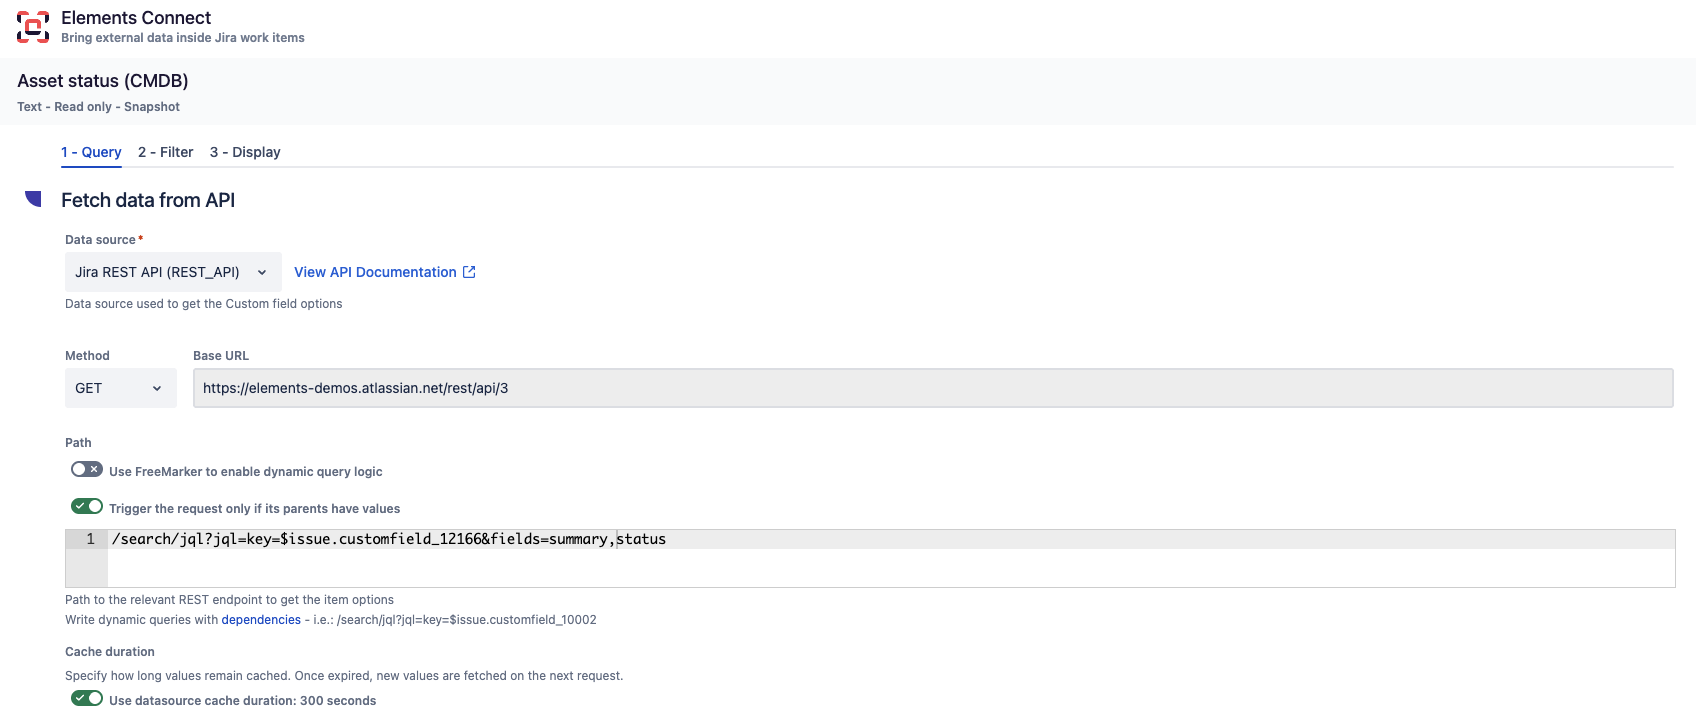
1 - Query
/search/jql?jql=key=$issue.customfield_12166&fields=summary,status
2 - Filter
$.issues
3 - Display
${data[0].fields.status.name}
4 - Associate the connected custom fields to a request type in the JSM portal
Now that your connected custom fields are configured properly, you can associated them to a request type in your Jira Service Management project.
-
Go to your Elements Connect administration in the “Connected fields” section.
-
Click on the three dot button “Actions” and on “add field to Portal”
%20(4).png?cb=cfba861620ae54fd8595a8d86f2cd7d3)
-
Choose the JSM project and your request type
-
Drag & drop the 3 connected custom field you just created
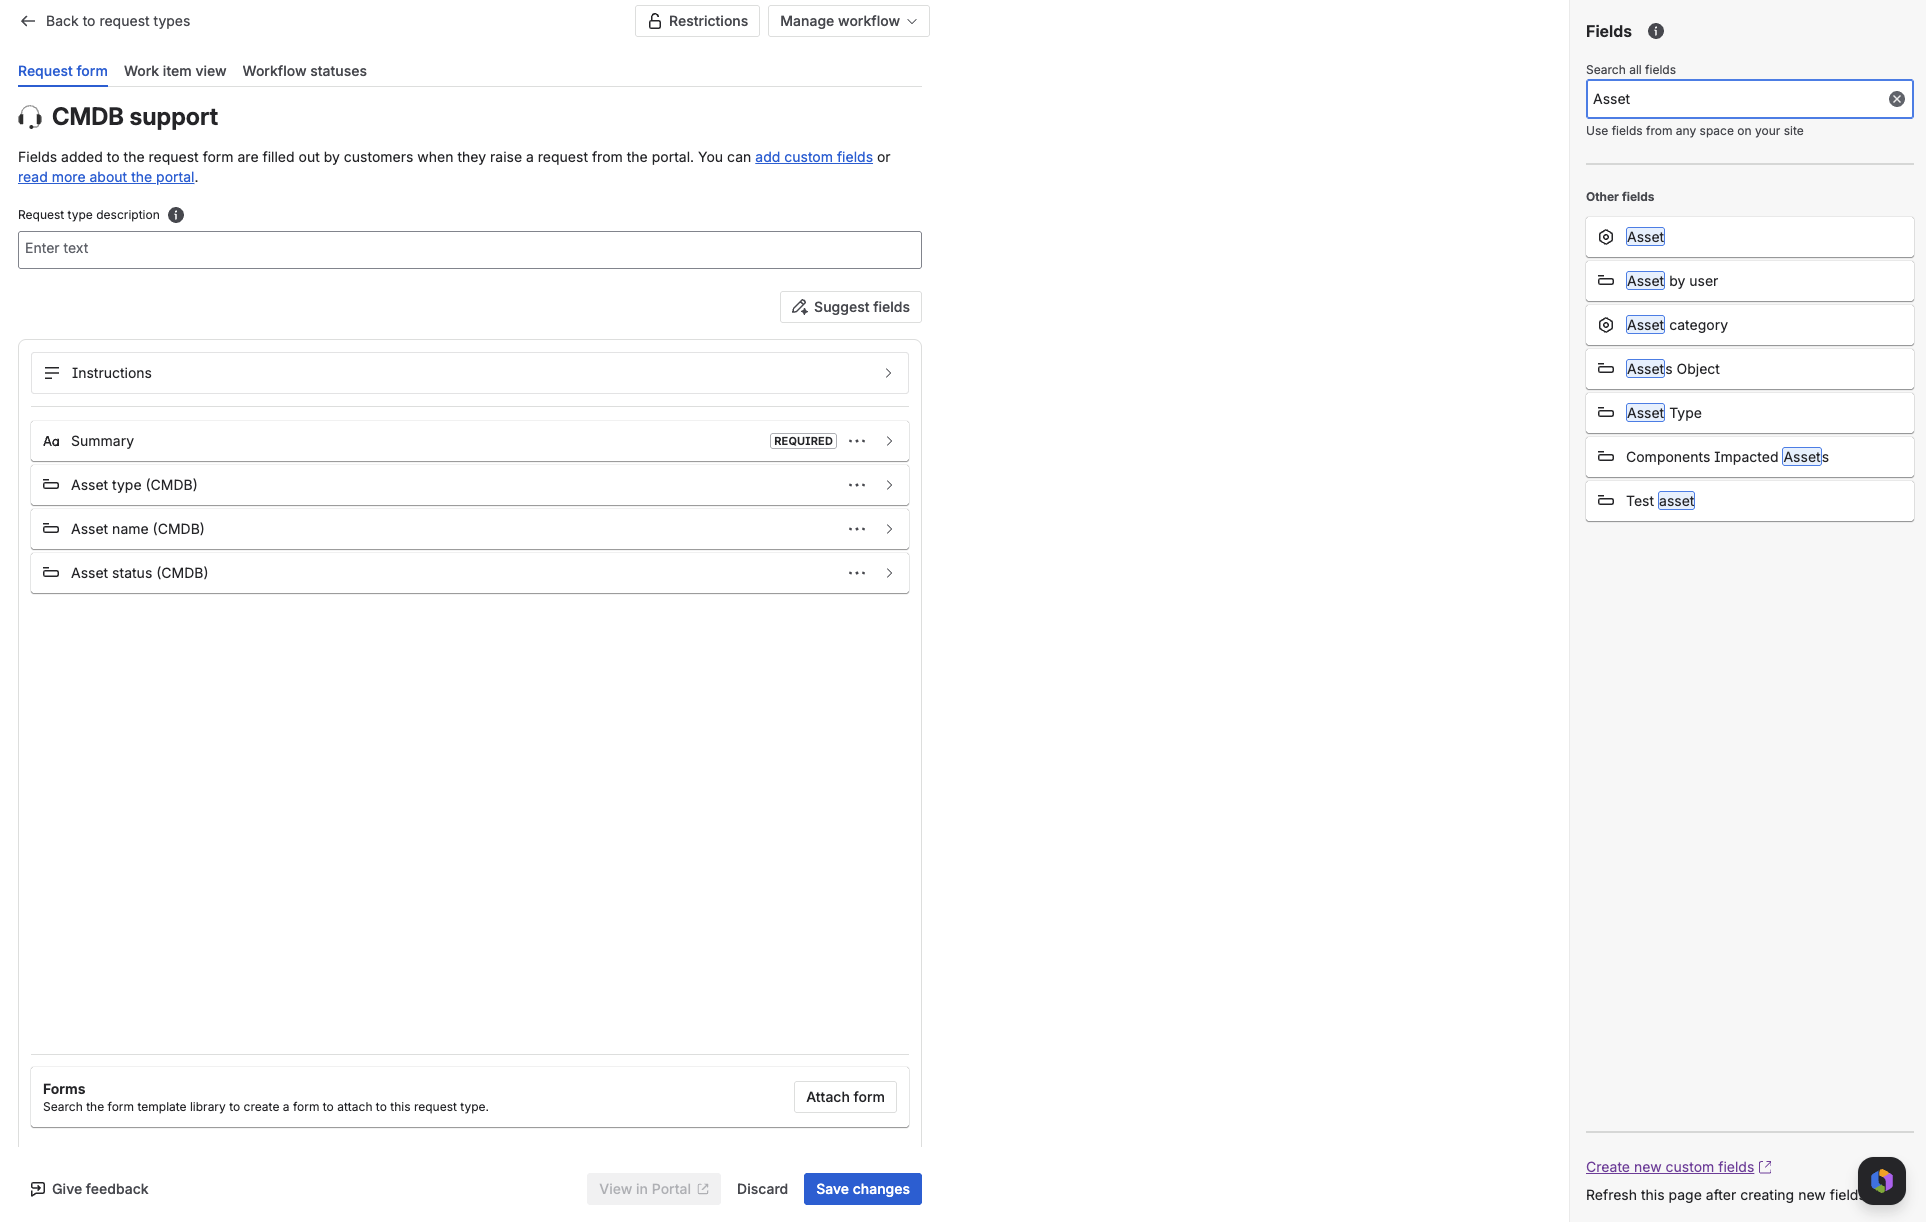
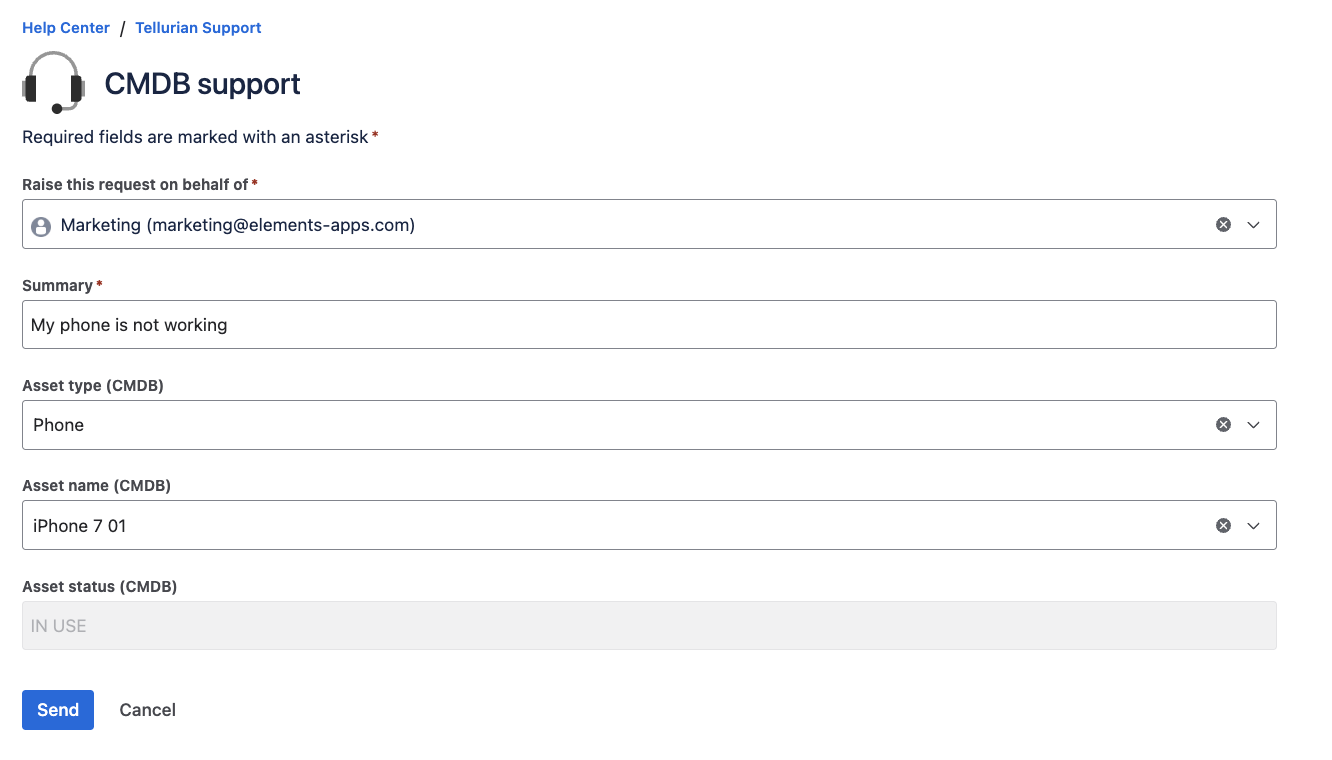
You can see your three connected custom field on the form. Select an asset type, and then an asset name. The status of the asset selected automatically displays.
Related ressources
-
Configure a local Jira instance as a data source - full setup guide for the Jira-to-Jira REST API data source used in this tutorial
-
Query guide: dynamic and cascading queries in Elements Connect - how cascading custom fields work in detail
-
Dependencies between connected fields - more cascading patterns
-
How to search Elements Connect custom fields with JQL in Jira - query and report on the assets selected by your customers