Delegate field configuration to Jira project admins with Projectrak and Elements Connect
Have you ever received that kind of request from Jira project administrators?
- "Can you add Microsoft Dynamics to the option list of the CRM field?"
- "A new version of PosgtreSQL is out, 12.0, would you please update the Database select list we are using the project?"
- "Jira 7.4.x is out of support - we won't offer it anymore, can you remove it from the list of options."
We have seen this kinds of problem when Jira is used to offer an IT service catalog.
Jira is a great tool, it offers power of customisation along with a great permission schemes.
Responsibilities are well defined: Jira admins are in charge of the user management, workflows, fields, screens, permissions, ...
And project admins... well, not that much, on Jira Server at least (things are changing with the next-gen projects on Jira Cloud).
But, sometimes Jira admins would like to give more autonomy to project admins and focus on other tasks. "Field option configuration" is one of the subject where project admins could be autonomous.
With Elements Connect and Projectrak, you can leave the configuration of custom field options to project admins.
Projectrak is an App for Jira that expands your ability to organize, monitor and search projects in Jira according to the information that matters.
Preconditions
- Projectrak and Elements Connect shall be installed on your Jira instance, with a valid license.
- You shall be a Jira admin to configure Elements Connect
- You must be a Projectrack administrator to configure Projectrak
Projectrak configuration
The configuration of Projectrak is out the scope of this article, please check the product documentation.
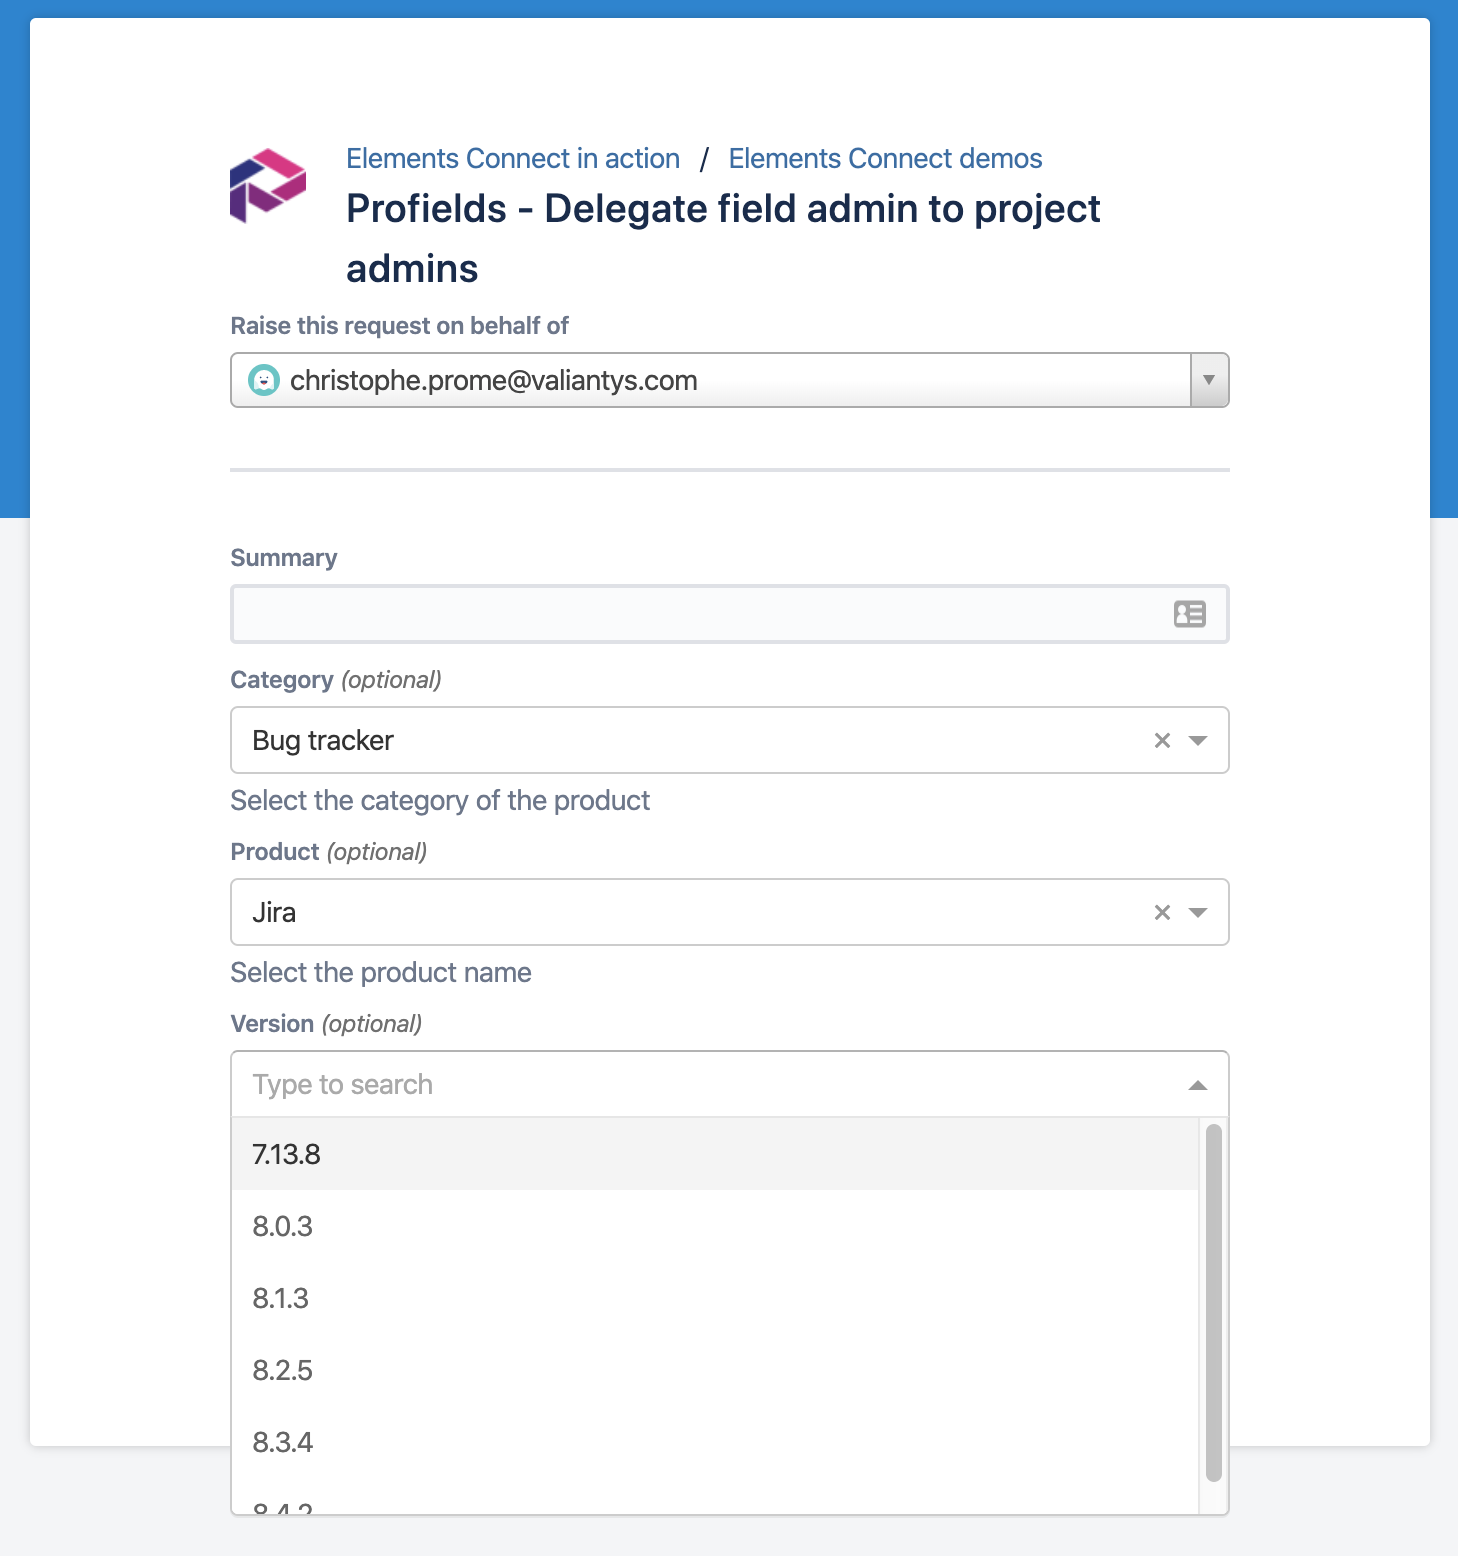
For our example above, we have created 3 select list Projectrak with dependencies:
Category → Product → Version

File option configuration with Projectrak
Elements Connect configuration
Create fields
First, we'll create the Connect fields of type "Snapshot text":
- Category
- Product
- Version
This fields will all use the "Jira REST API" datasource, preconfigured and available out of the box.
Thanks to this datasource, we have access to the Projectrak REST API that we can use to get option values of Projectrak fields.
"Category" field configuration
The first Connect field will be the main driver, the first level field.
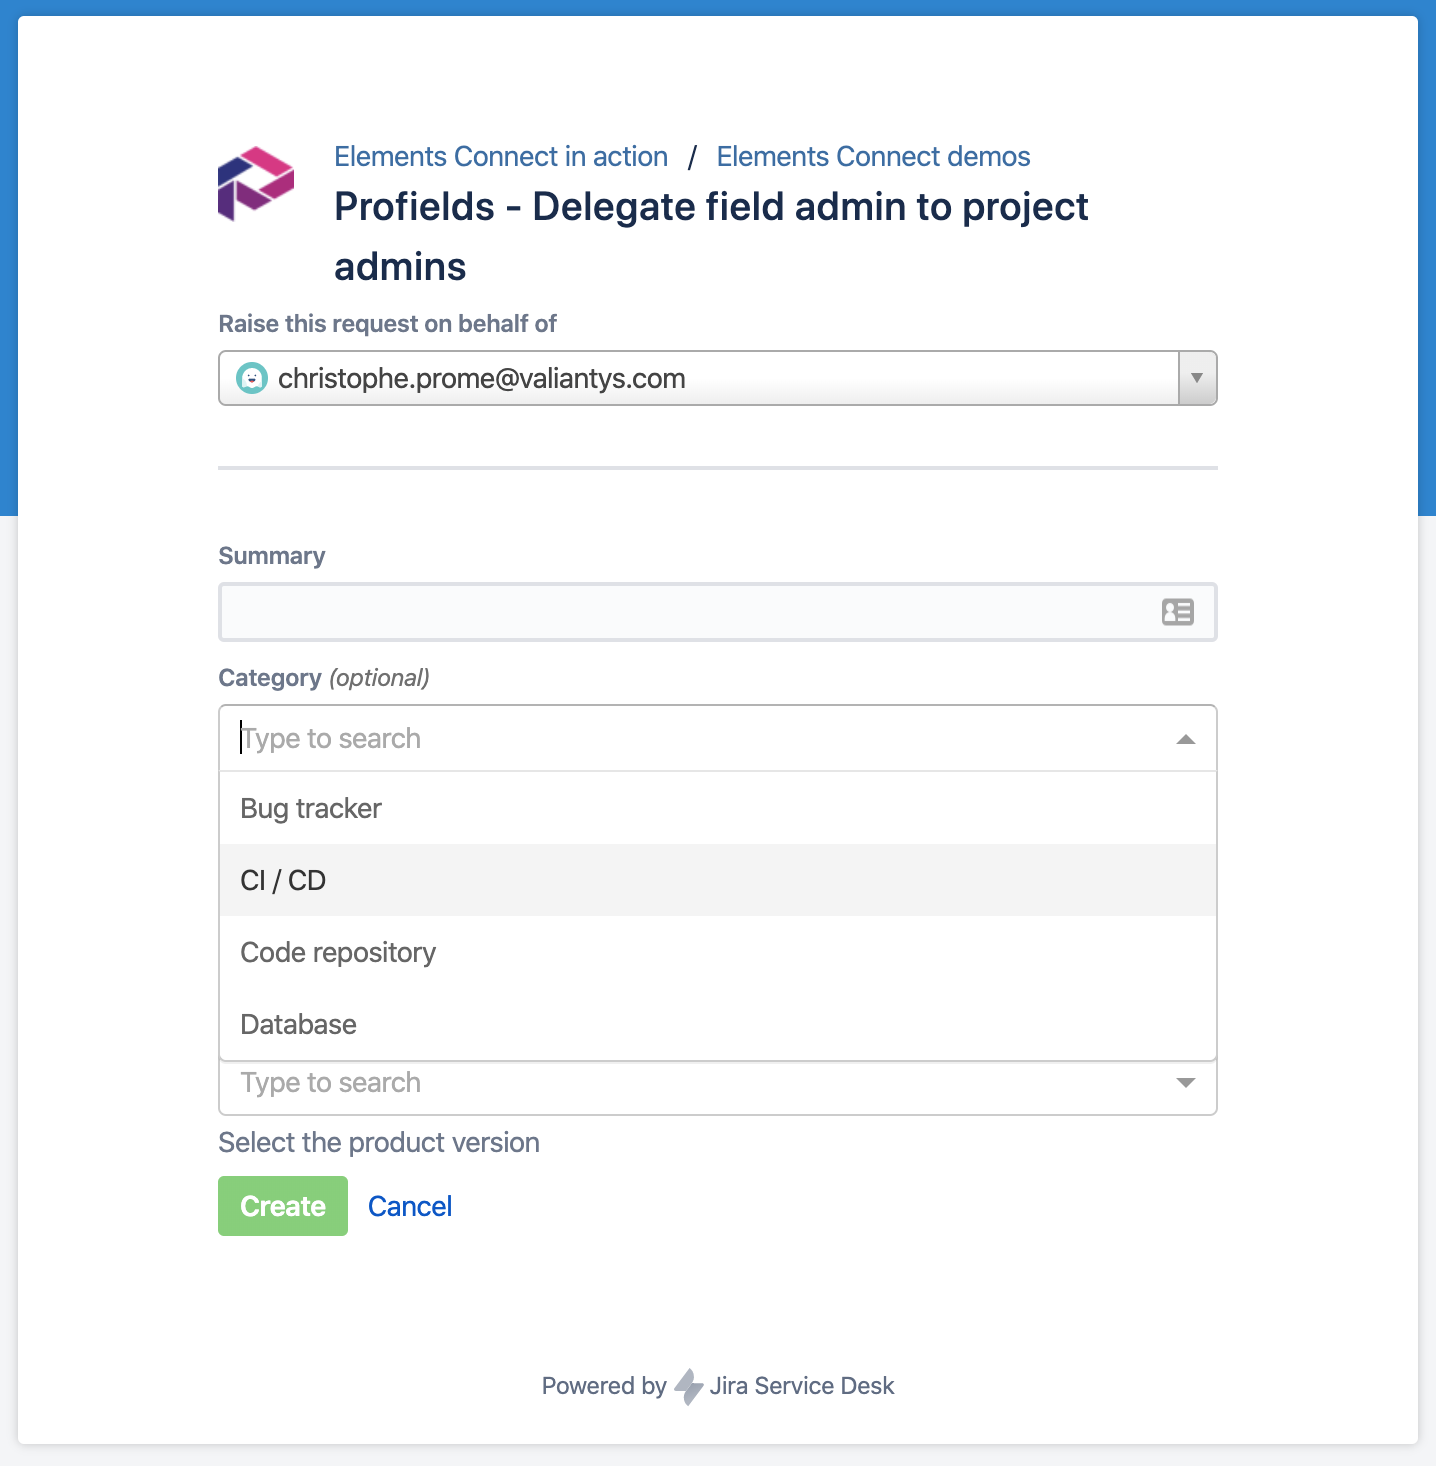
It is configured as followed:
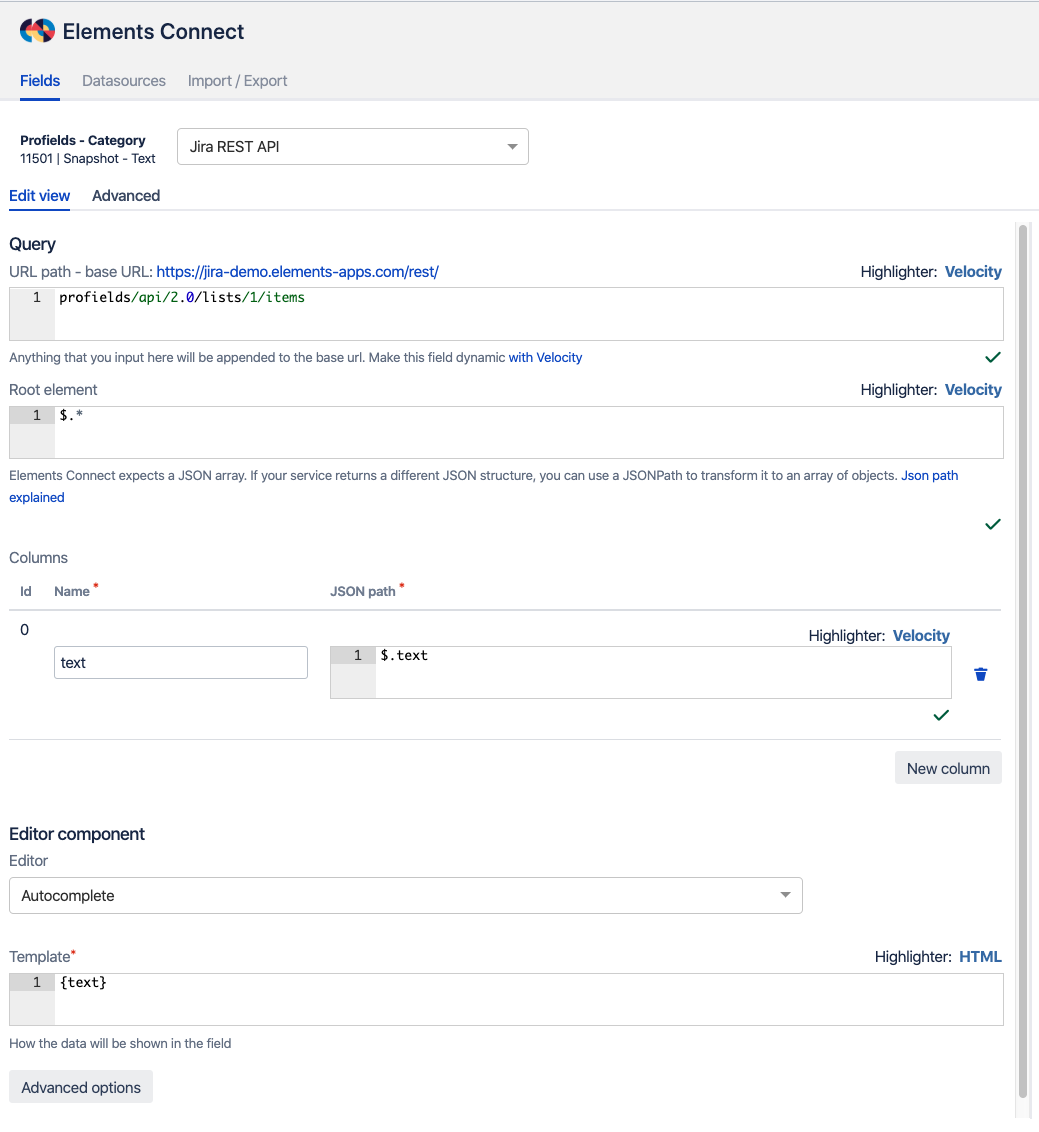
Query
It is the path to the REST resource of Projectrak API that returns all values of the custom field with ID 1 (in our example, the Category profield field).
This REST API returns the profield list values in a JSON document:
[
  {
    "id": 1,
    "text": "Database",
    "value": "Database"
  },
  {
    "id": 2,
    "text": "CI / CD",
    "value": "CI / CD"
  },
  {
    "id": 3,
    "text": "Bug tracker",
    "value": "Bug tracker"
  },
  {
    "id": 4,
    "text": "Code repository",
    "value": "Code repository"
  }
]
Root element
Here, using JSON Path, we specify the location of the options in the JSON document.
Columns
In this section, we specify the attributes we want to display.
Use the configuration tester from the field configuration to quickly test your configuration.
Editor component
In this section, we specify how the field options shall be displayed.
We use the "Autocomplete" editor and we display the field "text" value.
Use HTML tags in the display template to customize the display of options.
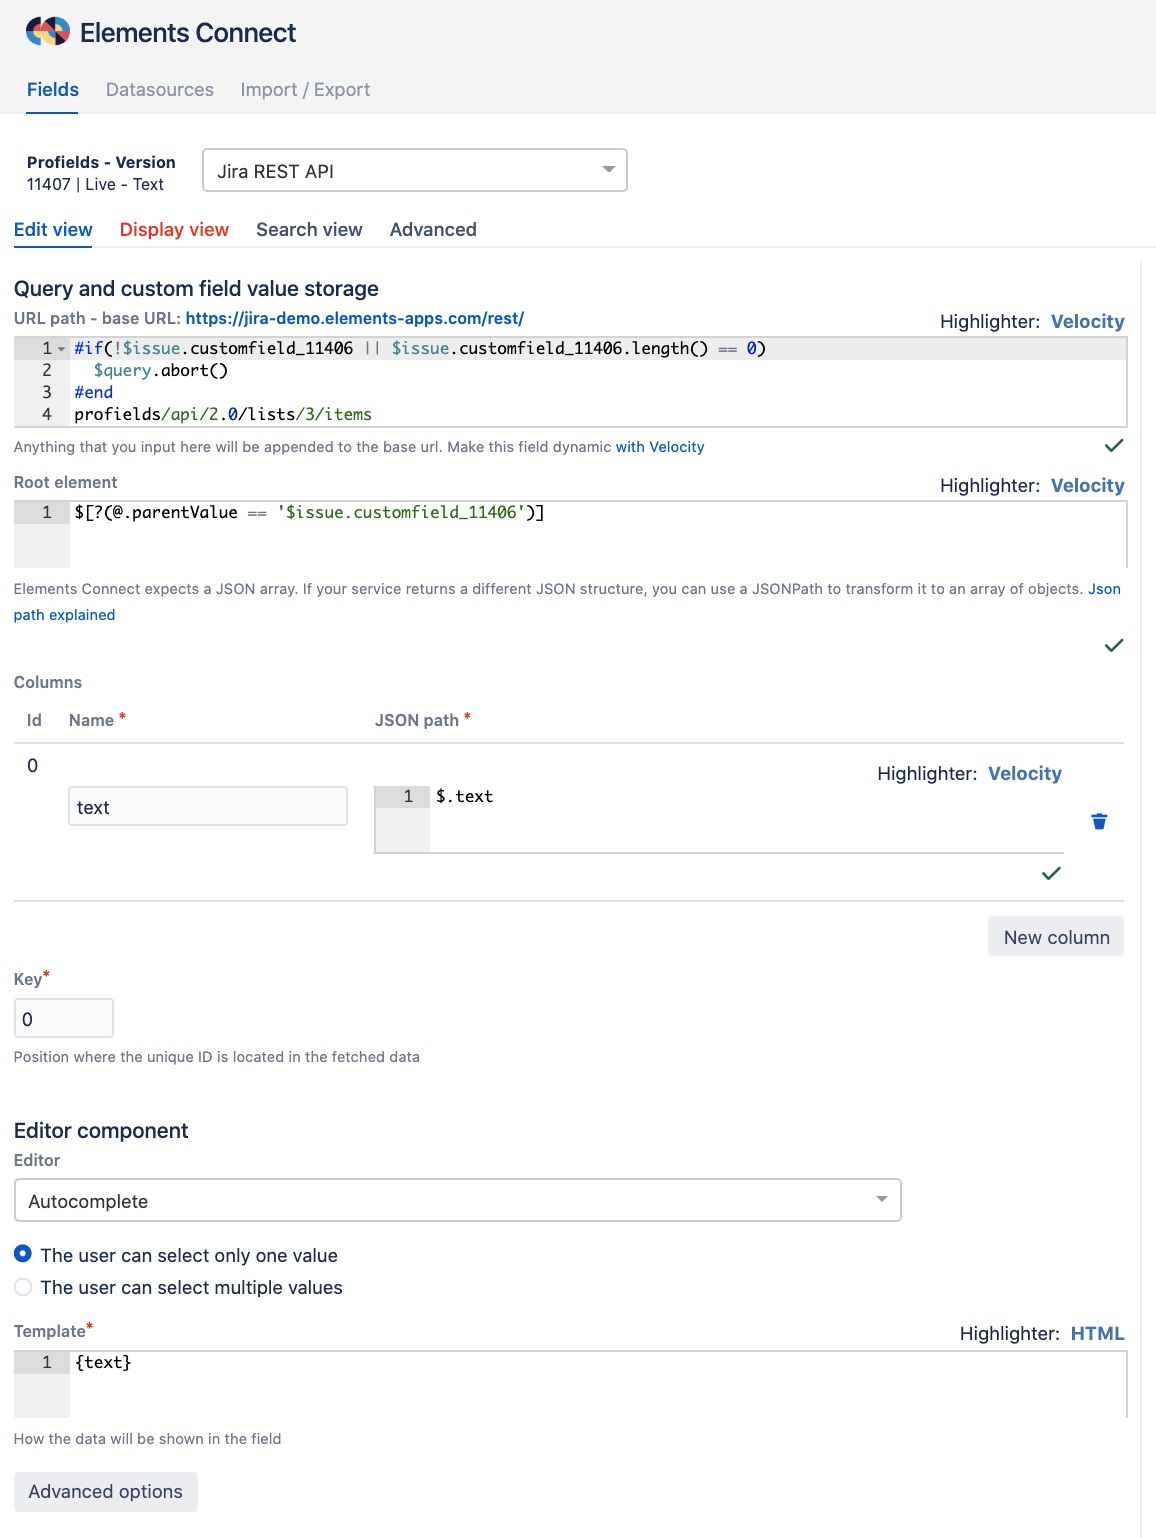
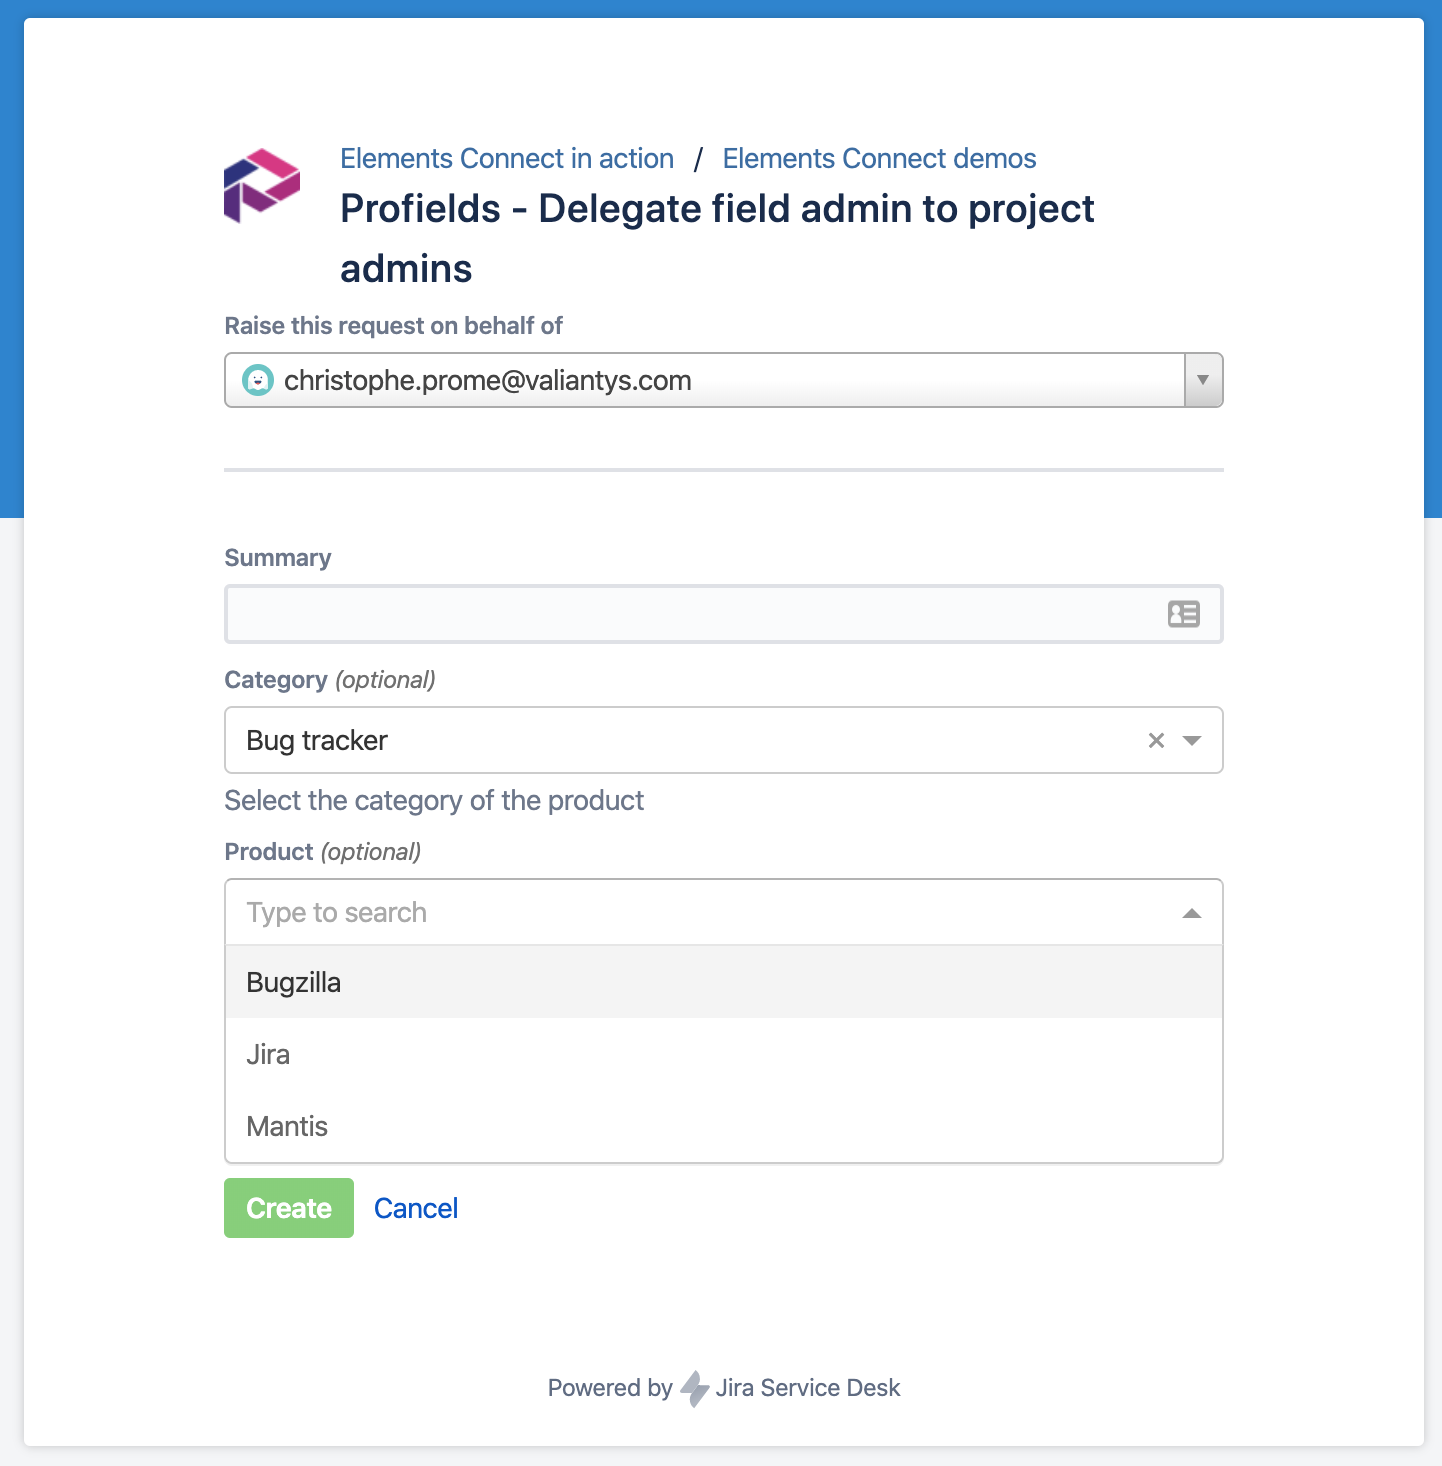
"Product" field configuration
This field depends on the value selected in the "Category" field.
It displays products of the selected category.
It is configured as followed:
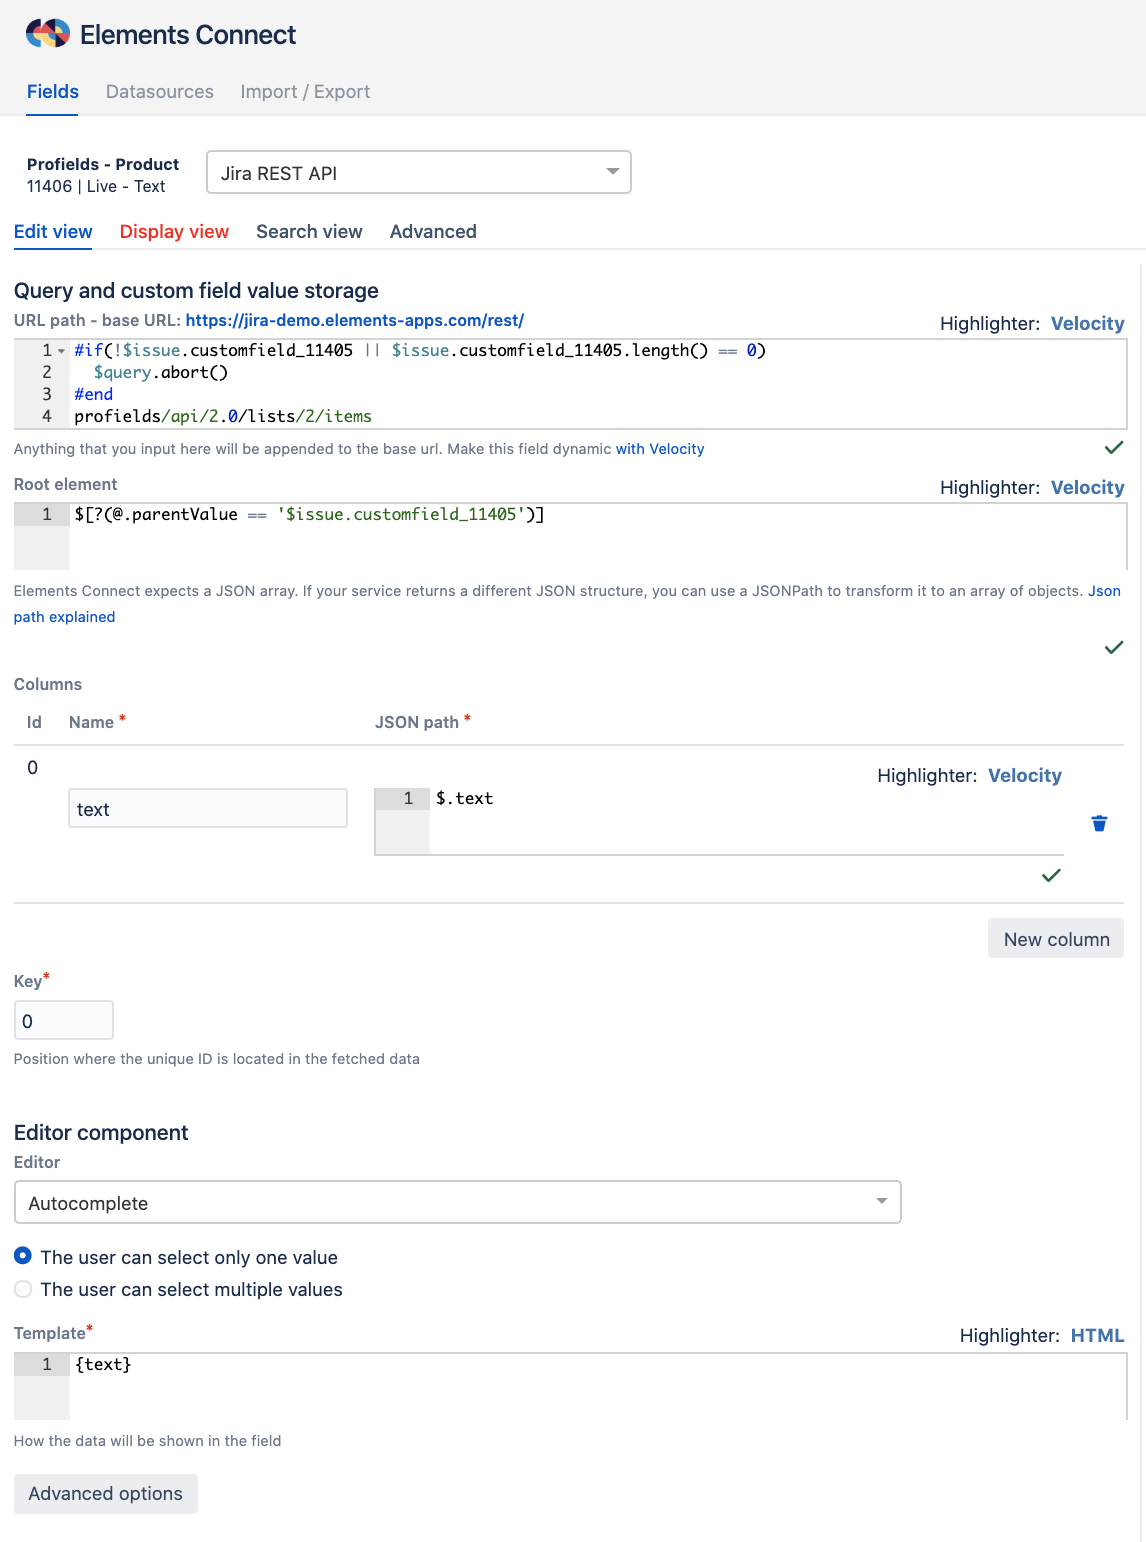
Query
We use Velocity to create a dependency between the "Product" field and the "Category" field.
If the "Category" field (with ID 11405) is set, we call Jira REST API to get all values of the "Product" profield.
Here is an abstract of the JSON document returned by this API:
[
  {
    "id": 5,
    "parentId": 1,
    "text": "Oracle",
    "parentValue": "Database",
    "value": "Oracle"
  },
  {
    "id": 7,
    "parentId": 1,
    "text": "PostgreSQL",
    "parentValue": "Database",
    "value": "PostgreSQL"
  },
  {
    "id": 6,
    "parentId": 1,
    "text": "SQL Server",
    "parentValue": "Database",
    "value": "SQL Server"
  },
  {
    "id": 8,
    "parentId": 1,
    "text": "Bamboo",
    "parentValue": "CI / CD",
    "value": "Bamboo"
  },
  {
    "id": 9,
    "parentId": 1,
    "text": "Jenkins",
    "parentValue": "CI / CD",
    "value": "Jenkins"
  },
  {
    "id": 11,
    "parentId": 1,
    "text": "Bugzilla",
    "parentValue": "Bug tracker",
    "value": "Bugzilla"
  },
(...)
Root element
In this attribute, we use the value of the "Category" field to filter values in the JSON document returned by JIRA REST API
We only keep values belonging to the category selected in the previous field.
After applying the root element filter on the document returned by the datasource, we can multiple JSON document.
Each document will be an option of the Elements Connect field.
Example (with Category set to "Bug tracker"):
{
  "id": 11,
  "parentId": 1,
  "text": "Bugzilla",
  "parentValue": "Bug tracker",
  "value": "Bugzilla"
}
{
  "id": 10,
  "parentId": 1,
  "text": "Jira",
  "parentValue": "Bug tracker",
  "value": "Jira"
}
{
  "id": 10,
  "parentId": 1,
  "text": "Jira",
  "parentValue": "Bug tracker",
  "value": "Jira"
}
"Version" field configuration
The last field to configure displays the version of the product selected in the "Product" field.
The configuration of this field is similar to that of the "product" field.
Again, we use Velocity to create a dependency between both fields.