
Introduction
Combining Elements Publish and Scroll PDF Exporter for Confluence is a powerful way to build complete, end‑to‑end project documentation workflows. While Elements Publish automates the creation and updating of Confluence pages from Jira issues, Scroll PDF Exporter extends these capabilities by enabling teams to produce polished, compliant, and portable PDF documents.
This makes this cross-app use case particularly valuable for:
-
Reporting and audit‑ready documentation
-
Compliance and regulatory processes requiring controlled outputs
-
Delivering relevant documentation to stakeholders who do not have access to Confluence
Together, the two apps allow teams to transform Jira data into structured Confluence content and then export it in a customized PDF layout, covering a complete, end‑to‑end documentation scenario.
Scenario overview
In this guide, we walk through the typical flow:
-
Use Elements Publish to automatically generate and update Confluence pages based on Jira work items.
-
Use Scroll PDF Exporter to convert these pages into high‑quality PDF documents.
The following sections detail each step.
Part 1: Automatically generate and update Confluence Pages with Elements Publish
Elements Publish creates Confluence pages from Jira work items using templates, inserts selected fields automatically and keeps them updated as the work item changes.
To start with, you need to create an Elements Publish recipe that defines the rules for how pages should be created from Jira work items.
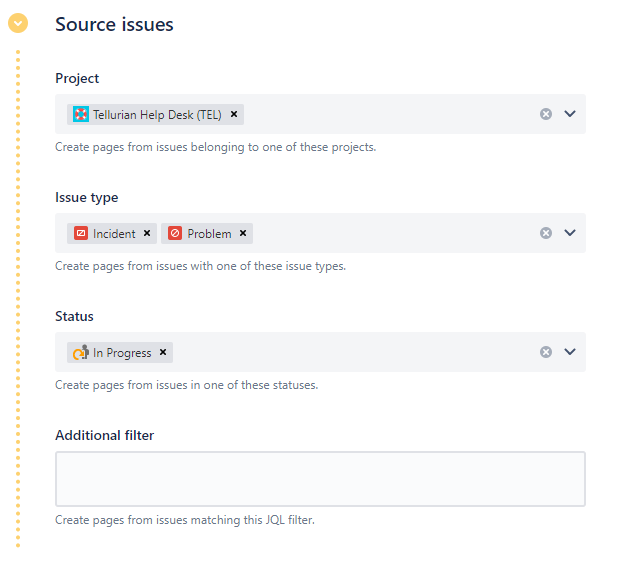
1. Select the Jira source work item
Select the Jira work item that will serve as the source, whose fields and content will be used to generate the Confluence page.
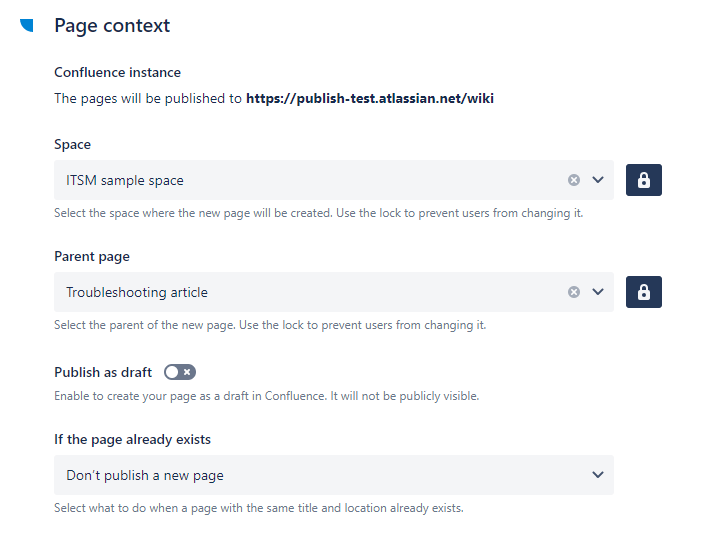
2. Select the Confluence space and parent page
Choose where the new page will live in Confluence by defining its target space and position in the parent page.
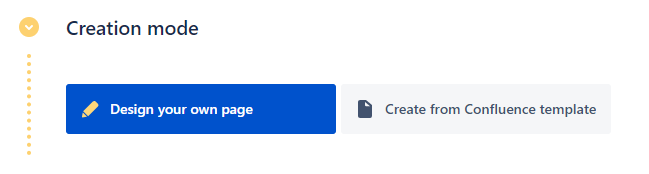
3. Design the page layout and insert Jira work item fields
Start by choosing whether to base your page on an existing Confluence template or to build the layout from scratch. Templates are ideal if your team already uses standard documentation formats, offering speed and consistency, while starting from a blank page gives you full flexibility to create a structure tailored to your specific reporting or project needs.
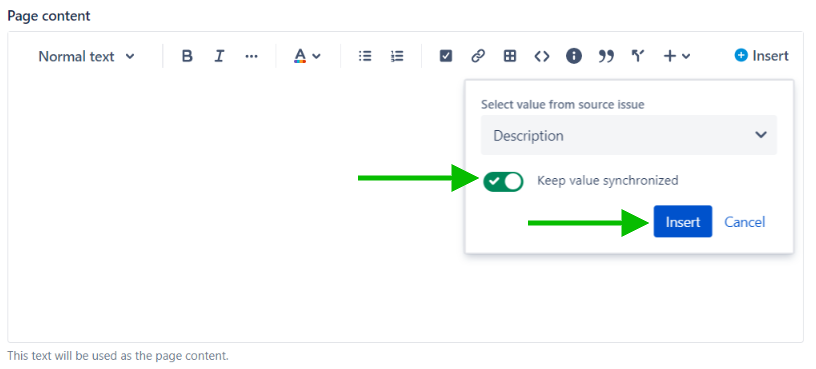
Once the structure is defined, insert smart values from your Jira work items such as fields, comments, attachments, and more, to automatically enrich the page with dynamic data. You can then enable synchronization to ensure that any updates made to the Jira work item are automatically reflected on the Confluence page, keeping your documentation accurate and up to date without manual maintenance.
Read more on how to insert Jira work item fields into a Confluence page
4. Trigger page creation
Depending on your recipe setup, page generation can happen:
-
Automatically: based on workflow transitions or any Automation trigger
-
Manually: using the "Publish to Confluence" action within the Jira work item
This creates a new Confluence page that contains structured content pulled from the Jira work item.
Read more about available triggers
💡Check out the full guide for detailed instructions on how to configure your recipe.
Part 2: Export Pages to PDF with Scroll PDF Exporter
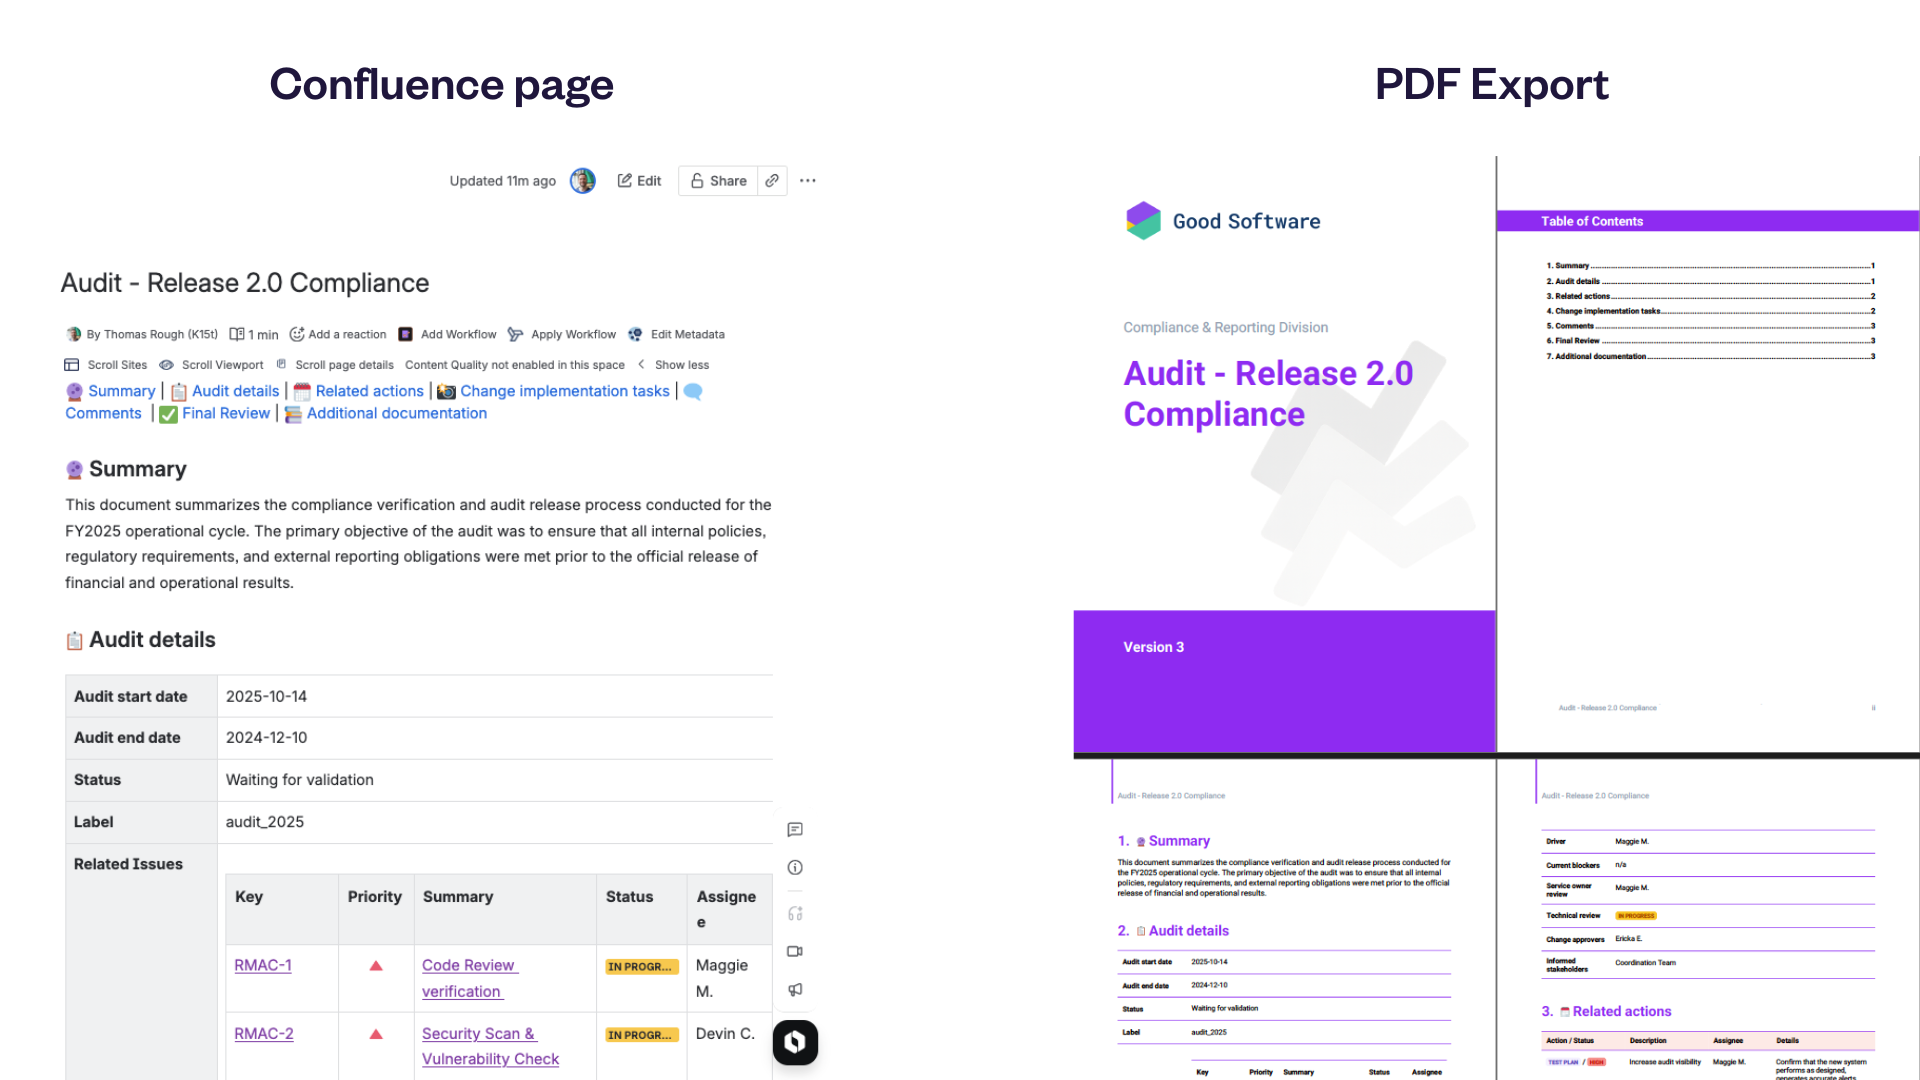
Once your Confluence content is generated with Elements Publish, you can use Scroll PDF Exporter to produce tailored PDF documents.
1. Create an export template
Scroll PDF Exporter allows you to design custom PDF templates, including:
-
Page layout & styling
-
Headers & footers
-
Dynamic placeholders
-
Table of contents options
They can be reused across any exported pages.
These templates give you full control over the structure and appearance of your exported documents, allowing you to match company branding, add contextual metadata, or include automated elements like page numbering or issue details. Once created, a template can be reused for any Confluence page, ensuring consistent, professional outputs across all your exports.
.png?cb=6748fac5dabe5b5eb432cfa3902c4d92)
.png?cb=55d12a82e8322c6f861c7f7251b9c68d)
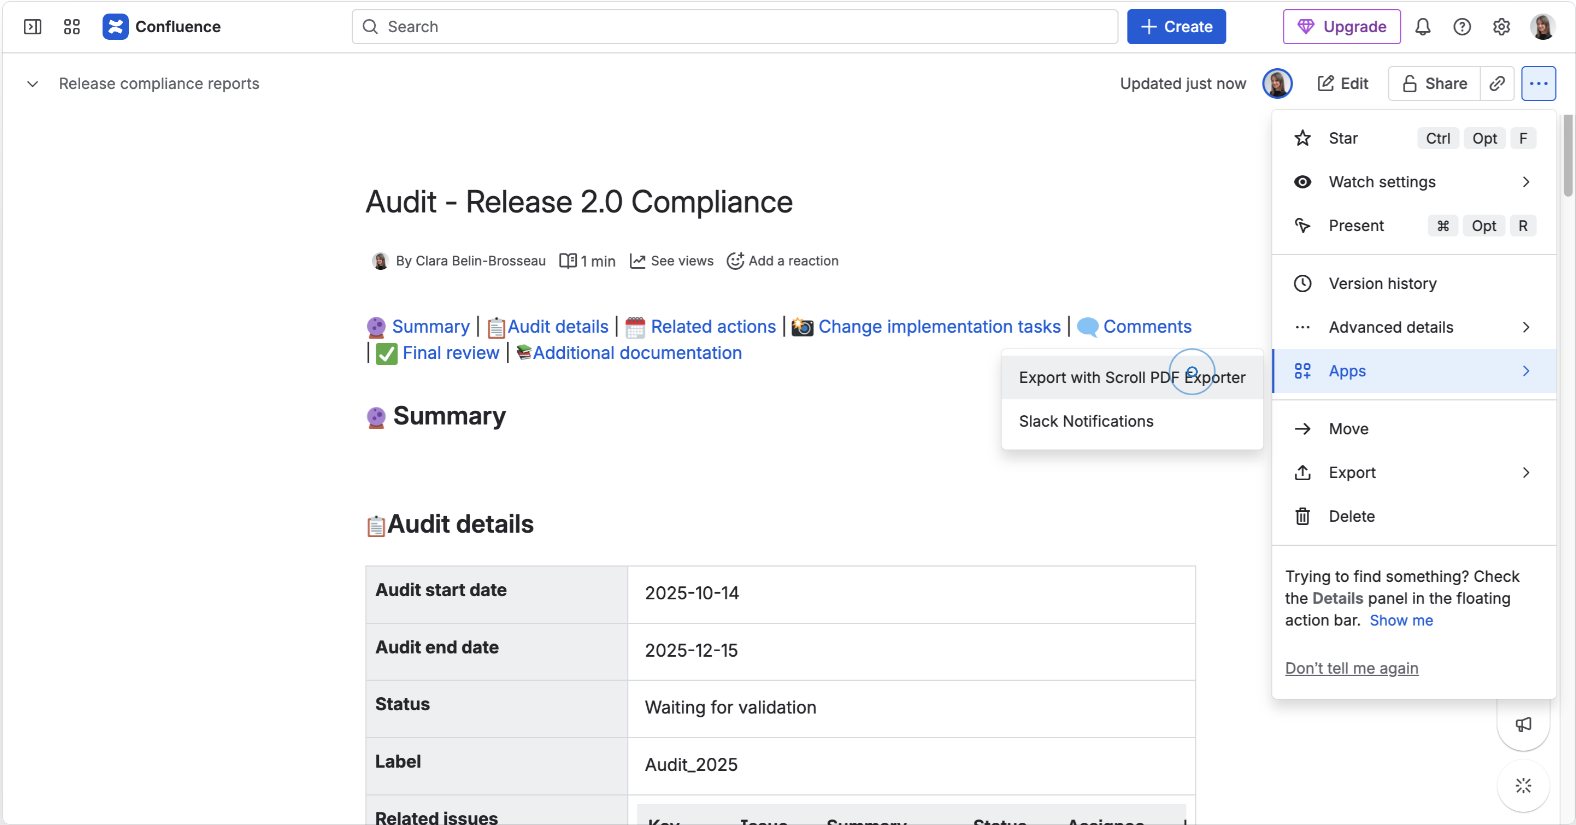
2. Export the Confluence page
From any Confluence page created by Elements Publish:
-
Go to Page Tools (•••)
-
Select Apps
-
Click on Export with Scroll PDF Exporter
-
Choose your template
-
Generate the PDF
The result is a clean, professionally‑designed document you can share internally or externally.
This workflow lets you produce polished, branded PDF documents that include always-up-to-date Jira information, ideal for sharing with stakeholders or archiving as part of your project records.
Together, Elements Publish and Scroll PDF Exporter simplify documentation production, enabling teams to create consistent, high-quality reports in just a few clicks.
Conclusion
By combining Elements Publish and Scroll PDF Exporter, teams can:
-
Automate content creation from Jira
-
Keep documentation synchronized and structured
-
Produce polished, standardized PDF deliverables
This workflow is ideal for project management, compliance documentation, audits, or any process that requires reliable, exportable content. Let your teams focus on delivery, while your tools take care of the documentation.