
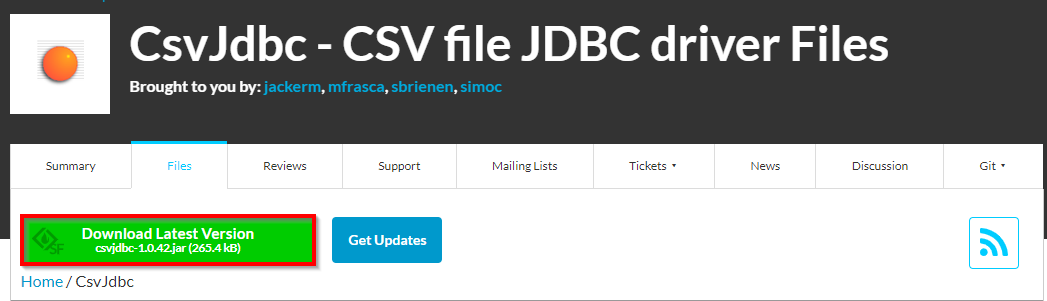
Install the CSV JDBC driver
Access the following link: https://sourceforge.net/projects/csvjdbc/files/CsvJdbc/
-
Download the jar file:
-
Copy this file into the
libfolder of your Jira server.
Copy the CSV file to Jira
Copy the CSV file to your Jira installation directory.
You can create a specific folder where all your CSV files will be grouped together:
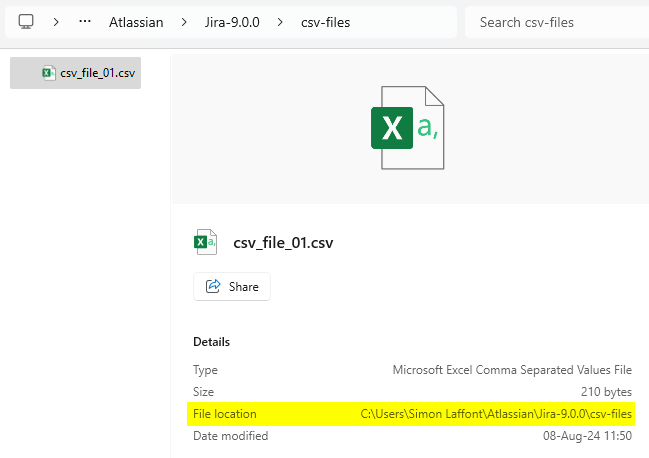
In this example, the Jira instance is a standalone installation on a Windows system, so the path is:
C:\Users\Simon Laffont\Atlassian\Jira-9.0.0\csv-files
Edit the “server.xml” file
-
Edit the server.xml file, located in the conf directory of your Jira installation. The exact path to this file depends on where you installed Jira, but it generally follows this pattern:
-
Linux/Unix/MacOS:
/path/to/jira-install-directory/conf/server.xml -
Windows:
C:\path\to\jira-install-directory\conf\server.xml
-
-
Locate the
Contextsection (underEngine>Host), and add the following resource to it:<Context path="" docBase="${catalina.home}/atlassian-jira" reloadable="false" useHttpOnly="true"> <Resource name="jdbc/{ressource_name}" auth="Container" type="javax.sql.DataSource" driverClassName="org.relique.jdbc.csv.CsvDriver" url="jdbc:relique:csv:{/Path/to/csv/files/folder}?separator=," /> </Context>Replace
{ressource_name}with the name of your choice, and{/Path/to/csv/files/folder}with the path to the CSV file. -
In this example:
-
The resource has been named "csv-datasource"
-
The CSV file path mentioned above is “C:/Users/Simon Laffont/Atlassian/Jira-9.0.0/csv-files“:
<Context path="" docBase="${catalina.home}/atlassian-jira" reloadable="false" useHttpOnly="true">
  <Resource name="jdbc/csv-datasource"
	auth="Container"
	type="javax.sql.DataSource"
	driverClassName="org.relique.jdbc.csv.CsvDriver"
	url="jdbc:relique:csv:C:/Users/Simon Laffont/Atlassian/Jira-9.0.0/csv-files?separator=,"
  />
</Context>
-
-
Then, restart the Jira instance.
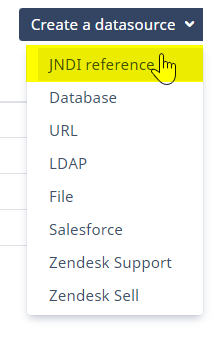
Create the JNDI datasource in Elements Connect
-
Access the Elements Connect administration
-
Go to the Datasources tab
-
Create a “JNDI reference” datasource:
-
Complete the "JNDI name" with:
java:comp/env/jdbc/{resource_name} -
In our example, we need to replace
{ressource_name}with “csv-datasource” (cf. the resource name specified in the server.xml file above):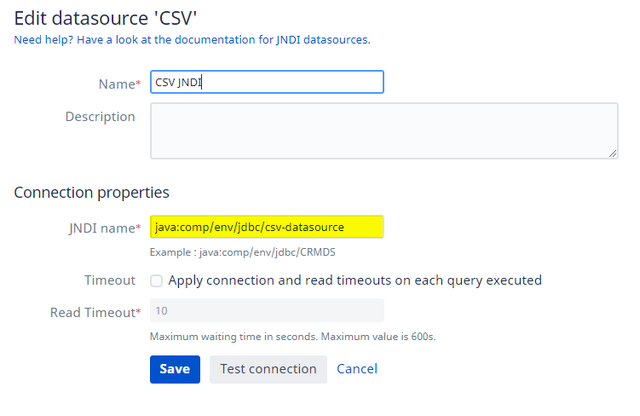
By entering the resource name, the corresponding path mentioned in the “server.xml” is retrieved.
This way, the JNDI datasource can access all CSV files that have been copied to this location.
Once the JNDI datasource is configured, any new CSV files you add to the specified path, or any updates to existing CSV files, are immediately reflected in Elements Connect, and there's no need to restart Jira.
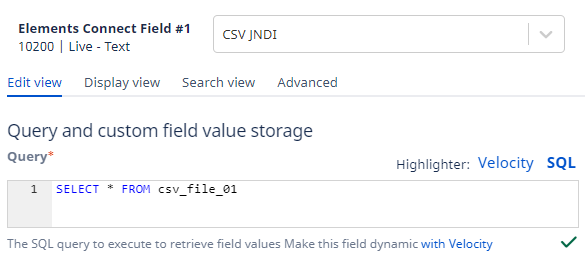
Configure a Connect field
-
Create a Connect field using the previously created JNDI datasource.
-
To retrieve data from a specific CSV file, you must specify the filename in the query, just as you would for an SQL table:
-
Here is the CSV file concerned:
.png?cb=84bf13107a30120ddc40ceb036539010)
-
And here is what the query should be:
-