Clone an issue to another project based on a custom field
Cloning and moving is the most time efficient solution to make existing information useful for other people or additional situations within Jira. A classic example is issue escalation, where you need to clone an issue from your support portal to a software team. Or maybe you have issues created regularly by internal employees, and you want to be able to clone an issue to another project based on a custom field.
What are the options for automating a process to clone and move Jira issues based on a custom field? We’ll take a look how you can clone and move Jira issues based on a custom field with native Jira options, as well as with an app. We’ll also see how automating copies as part of a workflow transition with Elements Copy & Sync can help your team.
Jira out of the box clone and move options
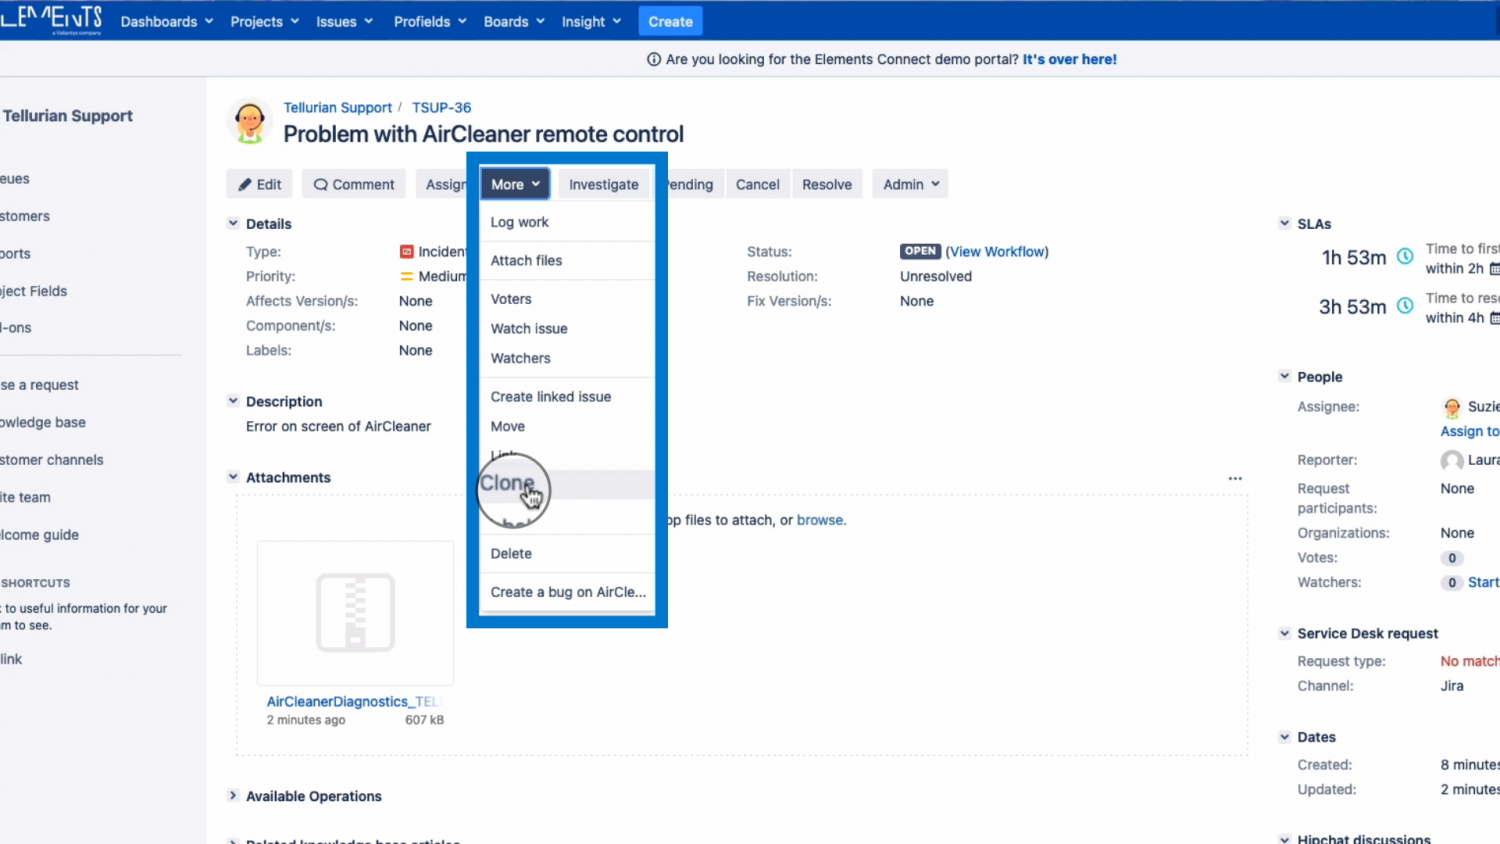
Issues can be cloned and moved individually with native Jira features available from the action menu. The manual process is fully detailed in our Ultimate guide to clone and move Jira issues.

How frequently do you need to clone and move issues? If it’s just a couple times a month, this could be the best option. Jira users would just need to check the details in the issue, and move the clone manually. Note you can’t see the issue details after you click on Move, so if you need to select a project based on those details, make a mental note beforehand.
https://youtu.be/gEi2K0WRZmUHow to clone issue to a different project based on a custom field
Looking to make the process automatic? Or reduce the risk of errors? You can streamline the process (and prevent moving issues to wrong projects) by using an Elements Copy & Sync operation (Server or Data Center) or recipe (Cloud). It works by
setting a project picker custom field,
launching the Copy & Sync operation/recipe, and
creating a linked clone in the right project.

Step 1: Create a project picker custom field
From your Jira admin, create a new custom field, selecting “Project Picker” from among the Advanced field types. Give it a clear and understandable name that is unique to your Jira instance, and save.
https://youtu.be/RgxTpMXQ4L0Step 2: Add project picker custom field to issue screens
Don’t forget to associate your custom field to all the various screens where you’ll need it, like the view/edit screen. New custom fields are added to the end of the tab on the create issue screen, so you may need to adjust the order of your fields.
https://youtu.be/K0P_ixg6ZnUStep 3: Configure Copy & Sync operation
If this is your first time configuring Elements Copy & Sync, you will need to create a field mapping before creating your operation.
Once you have a field mapping, you can create a copy operation. When configuring the operation, instead of selecting one project or a category of projects, select “From Custom Field”, and then chose the project picker custom field that is displayed.
https://youtu.be/1Hea3nOQ7YcStep 4: Clone and move issue based on your custom field
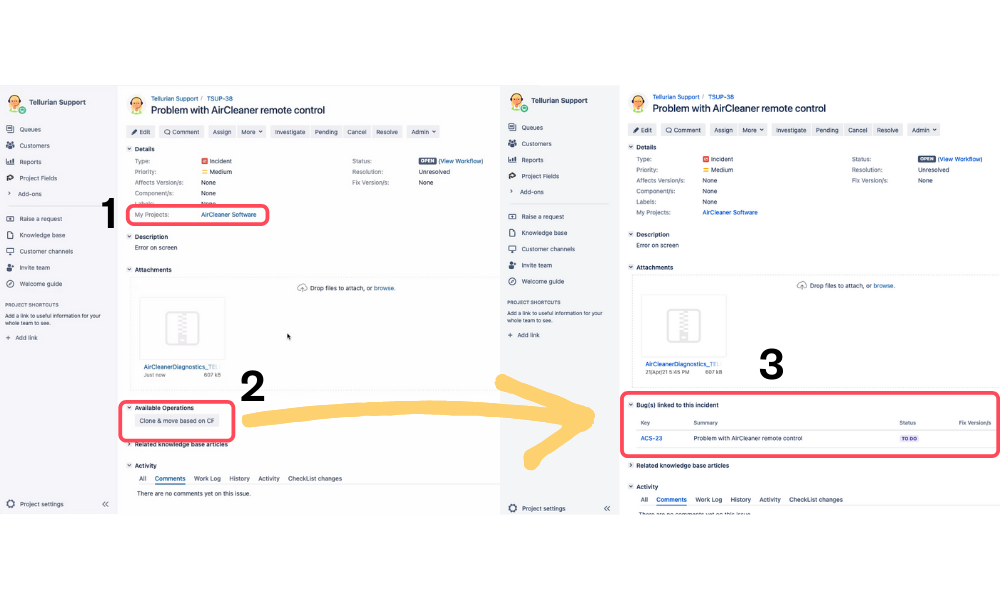
From your issue, make sure your project picker field has a value, then click on the Elements Copy & Sync operation button to create the clone in the right project. In this example, the operation also adds a link between the clone and original issue.
https://youtu.be/UJxizxXZsz4Trigger clones as part of a workflow and create on transition
Copy & Sync operations can be added as post functions to workflow transitions to make the process even smoother. Elements Copy & Sync will automatically clone issues to the right project when you transition issues.
To add an Elements Copy & Sync operation to a transition, you will need to edit your workflow and add a post-function.
https://youtu.be/puvKeniiTN4Once you’ve published your new workflow, you probably want to add the project picker custom field to the transition screen that will trigger the operation so that it’s easy for agents to update the field. This is what that process could look like:
https://youtu.be/-dekuUWmP2EThis example also includes an Elements Copy & Sync Data Panel on the incident issue, which helps you customize the information you display from linked issues (for comparison, the cloned issue in the software project has the native linked issue panel).
Using the operation as part of a workflow transition was smooth and easy: support agents can follow their usual process and transition issues, then go back to their queues. All the important information from the source issue has been cloned in to the right project for the software developers.
Automated cloning and moving is a recipe for success
The combination of native Jira project picker custom fields with the app Elements Copy & Sync is a recipe for success for cloning and moving issues to different projects (you could even say it makes it a piece of cake 😉 ). All Jira users can confidently clone and move issues based on a custom field, without worrying about remembering which project to chose. Adding the clone and move operation to a workflow transition means reducing the risk of errors as well. You can even compare the number of clicks required to manually clone and move an issue versus using Elements Copy & Sync!
Curious how a real company implemented Elements Copy & Sync to escalate issues from a support portal?
