
Context
As a Jira administrator, you have just installed Elements Publish on your Jira Cloud instance and you want to make use of it, quickly and efficiently. Why not start by creating your first Confluence page including data automatically retrieved from a Jira issue?
Tutorial
Prerequisites
-
Your Atlassian Cloud instance has both Jira and Confluence and your have admin rights on them.
-
Elements Publish has been installed on your Jira Cloud instance.
Configuration steps
1 - Open Elements Publish
As a Jira administrator, go to the "Elements Publish" administration (it is available on the “Apps” menu at the top of your screen).
Then, click on the "Create a new recipe" button (recipes are the configuration of how your Confluence pages will be published from Jira issues).
.png?cb=8eced7954e13247c974f876e9d539118)
2 - Install the Helper app
If this is the first time you use Elements Publish, you will be asked to install the Confluence helper app.
This app is entirely free. It is required to let your Jira and your Confluence communicate.
Otherwise, you can go to step 3 directly.
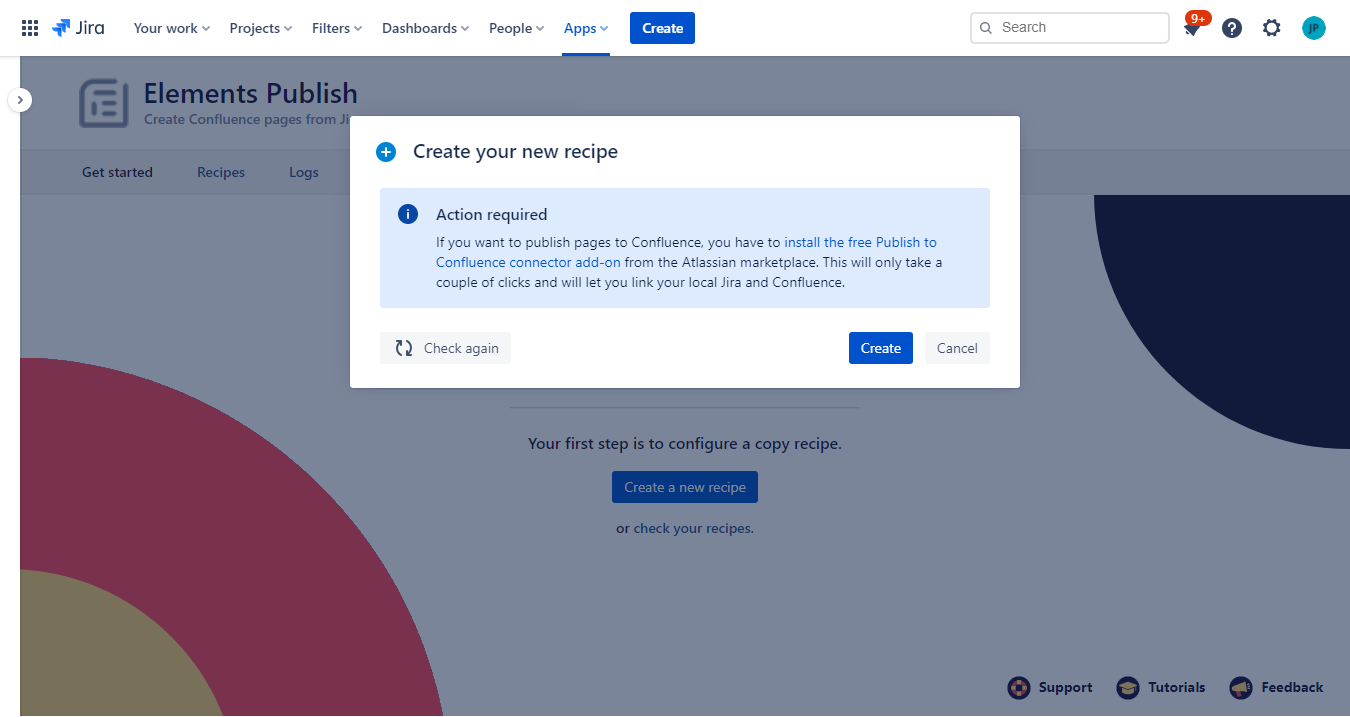
Install the app on your Confluence instance by following the link in the info panel. Your Confluence must be part of the same Cloud instance as your Jira.
Once this is done, go back to the recipe creation dialog, and click on the Check again button.
3 - Create a recipe
As the helper app has been detected, you can now enter a Name and a Description for your recipe, which will be used to identify your recipe. You can name it “Add to Knowlegde Base”, for example.
Then click on the Create button.
4 - Configure your recipe target
The first step in configuring your recipe will be to set where you want your Confluence pages to be published (that is to say, in which Confluence space and under which parent page).
To do so, click on the Target tab in your recipe configuration.
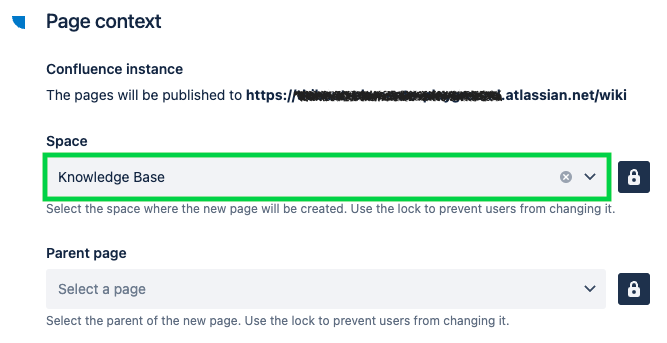
Then, in the "Page context" section, use the Space field to select a target space. In our example, it will be "Knowledge Base", but you can chose whichever space your need to publish your pages into.
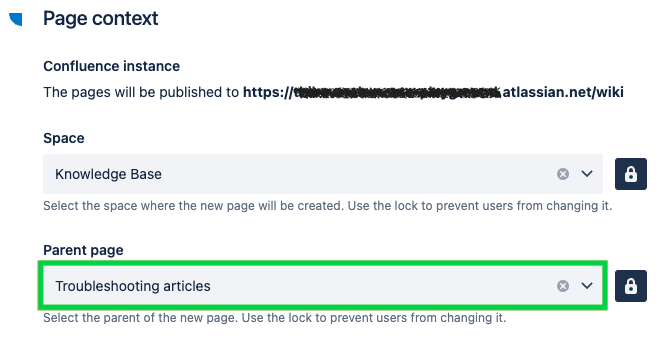
Then, use the Parent page field to select the target parent page among all the existing pages within the space selected in the previous step.
In our example, we select "Troubleshooting articles".
5 - Configure your page content
The final step in the configuration of the recipe will be to specify which information you want to publish in your Confluence page, and under which format.
Still in the Recipe configuration page, click on the Content tab.
In the "Created page" section, we will use the Page title text field to define which title will be used for the page created by the recipe. For this simple example, our title will be a static sentence “Publishing to Confluence is easy”.
Then, we will use the Page content text area to add the Description and Environment fields from the Jira issue to the page created by the recipe. This is done by clicking on the Insert button of the Page content field and then selecting the Description and Environment fields.
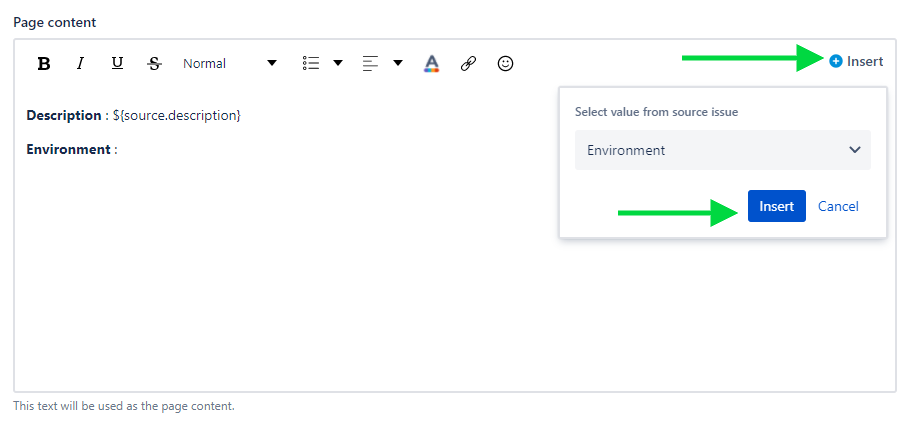
The Description and Environment are added to the page as templates, which will be replaced by their actual values when the page is created :

Click on the Save button. Then, click on the "Close" link at the right of the page.
6 - Activate your recipe
At this point, your recipe has been created, and it is now visible in the "Drafts" section of the recipe listing.
However, it won't be available to use on any Jira issue until it is activated.
In the recipe listing, click on the "..." button related to your recipe in the "Drafts" listing, and select the Activate option.
.png?cb=d5f48fd8ebfcfa47d90284b2e5daa50e)
In the confirmation window, click on the "Activate" button.
7 - Use your recipe
Now that everything has been configured, it is time to use your recipe.
There are many ways to trigger your recipe, even automatically with workflow post-functions when the status of an issue is changed or with Jira Automation. For this basic example, we will trigger the recipe manually.
Open a Jira issue. For the purpose of this example, make sure that the Description and Environment fields are initialized in your issue, as this is what we are going to publish.
In the top right corner, click on the “…” menu, then select Publish to Confluence.
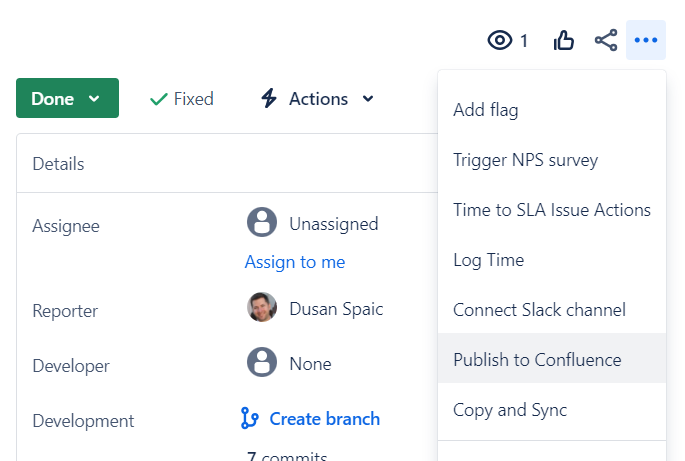
Then select your recipe (in our example, “Add to Knowledge Base”) and click on the Next button.
The next screen is a summary of where the page will be created.
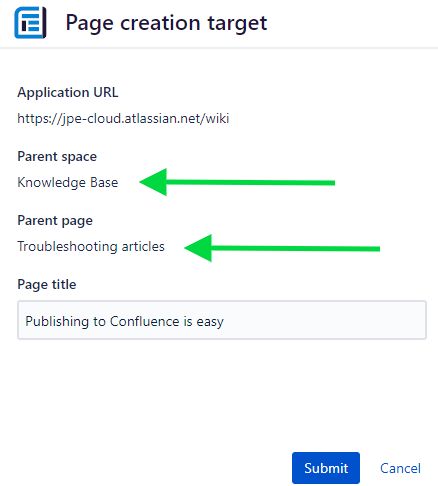
Click on Submit to publish your page.
If you open your page, you will see that the Description and Environment fields of your issue have been published to the Confluence page.
This is a very basic of what can be achieved with Elements Publish, you can also use any Confluence template that fits your use case and enhanced it with data from Jira issues.
Want to try?
If this short introduction has stirred your imagination, why not give it a try?
Try Elements Publish for free.