
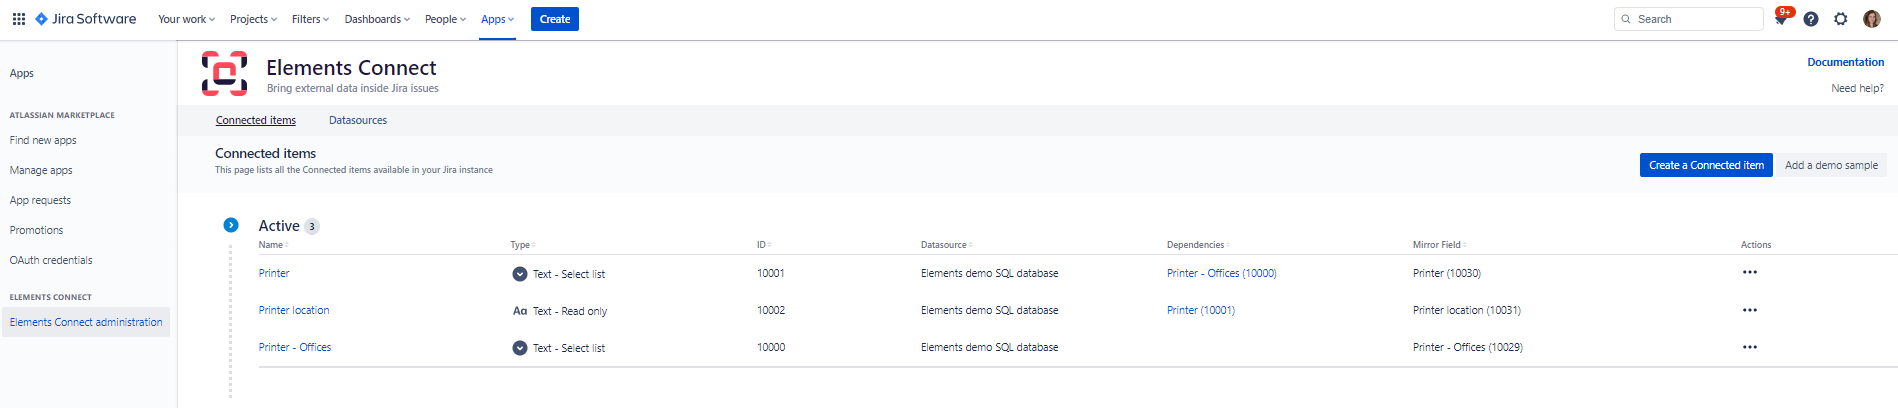
From the Connected items tab of Elements Connect global administration, you can perform the following operations:
-
Create Connected Items
-
Edit Connected Items
-
Add Connected Items to a JSM portal
-
Add Connected Items to a Jira Software/Work Management project
-
Delete Connected Items
Create Connected items
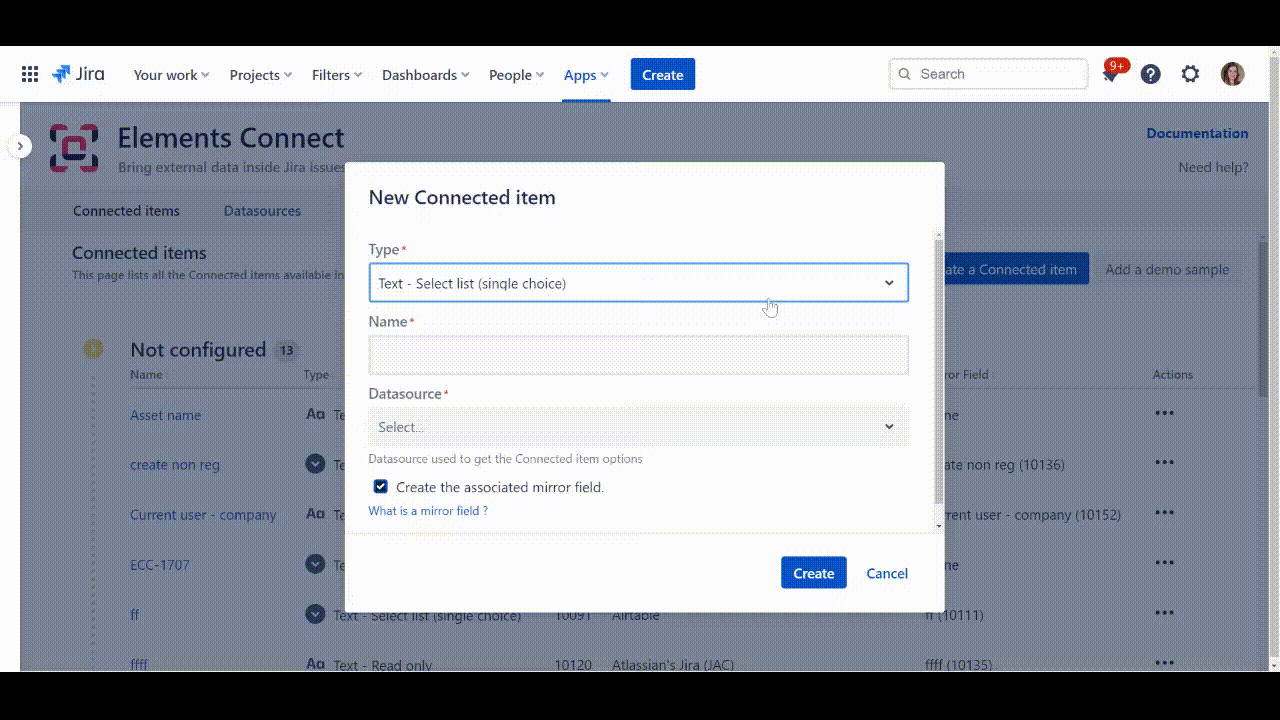
Connected items creation is straightforward:
-
Click on the Create Connected item button in the upper right corner
-
Enter a Type and a Name in the dialog
-
Select a Datasource
-
Click on Save or hit the Enter key
You will then be able to see your created Connected item in your Connected items list.
By selecting it in the list, you will then be redirected to the Connected item configuration page.
Mirror field
Elements Connect can also create a custom field called the mirror field, which will be associated to the Connected item.
We won't go into the details of the mirror field in this section, learn more about the mirror fields.
Which type should I choose?
You have the choice between three Connected items types:
-
Text - Select list (single choice) to display the result of a query in an autocomplete select list and let the users select a value when the item is edited.
-
Text - Select list (multiple choices) to display the result of a query in an autocomplete select list and let users select several values (up to 15) when the item is edited.
-
Text - Read only to display the result of a SQL query as read-only text.
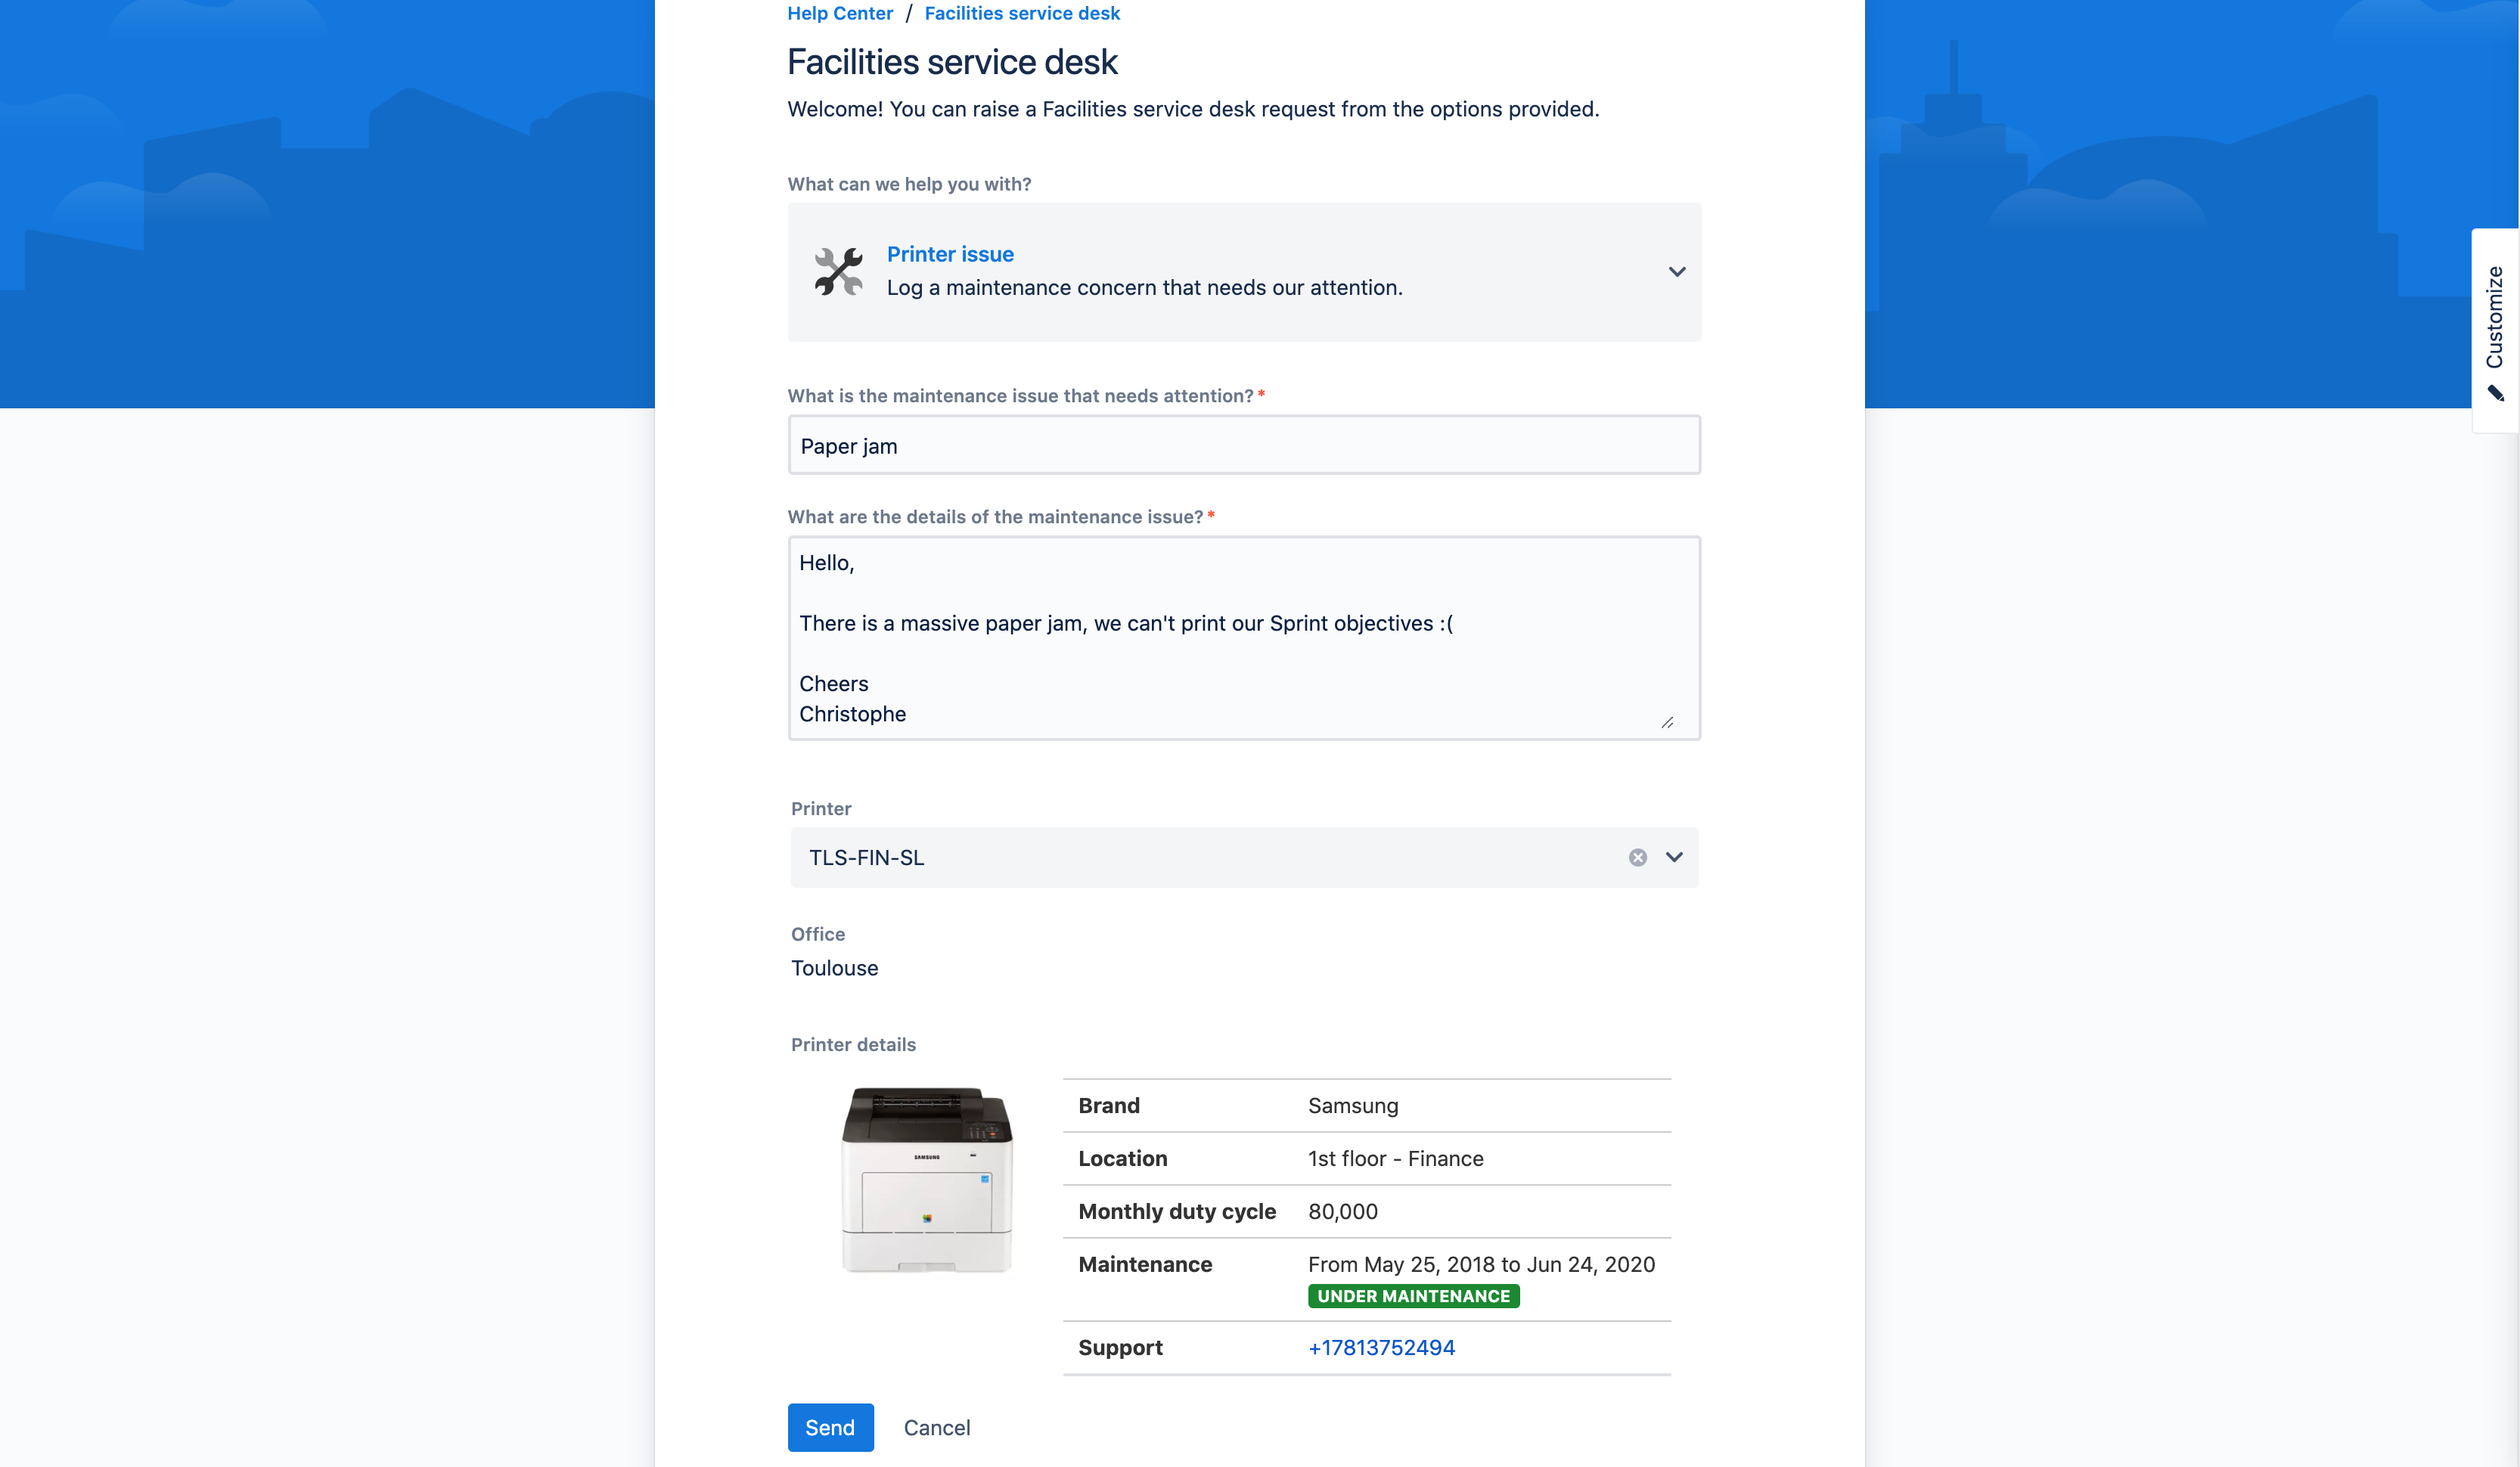
Most of the time, this type of Connected item is used to display details of an element (i.e.: an asset) selected in a Text - Select list Connected item.
The Connected item type cannot be changed after creation.
In the example above:
-
Printer is a connected item of type Text - Select list
-
Office and Printer details are Text - Read only items
It is possible to create up to 200 connected items.
If you need to create more items, please tell us why.
Edit Connected items configuration
To edit a Connected item, click on the item's name, or on the item's More menu and on the Edit configuration link on the main administration screen. You will be redirected to a screen where you can edit item configuration.
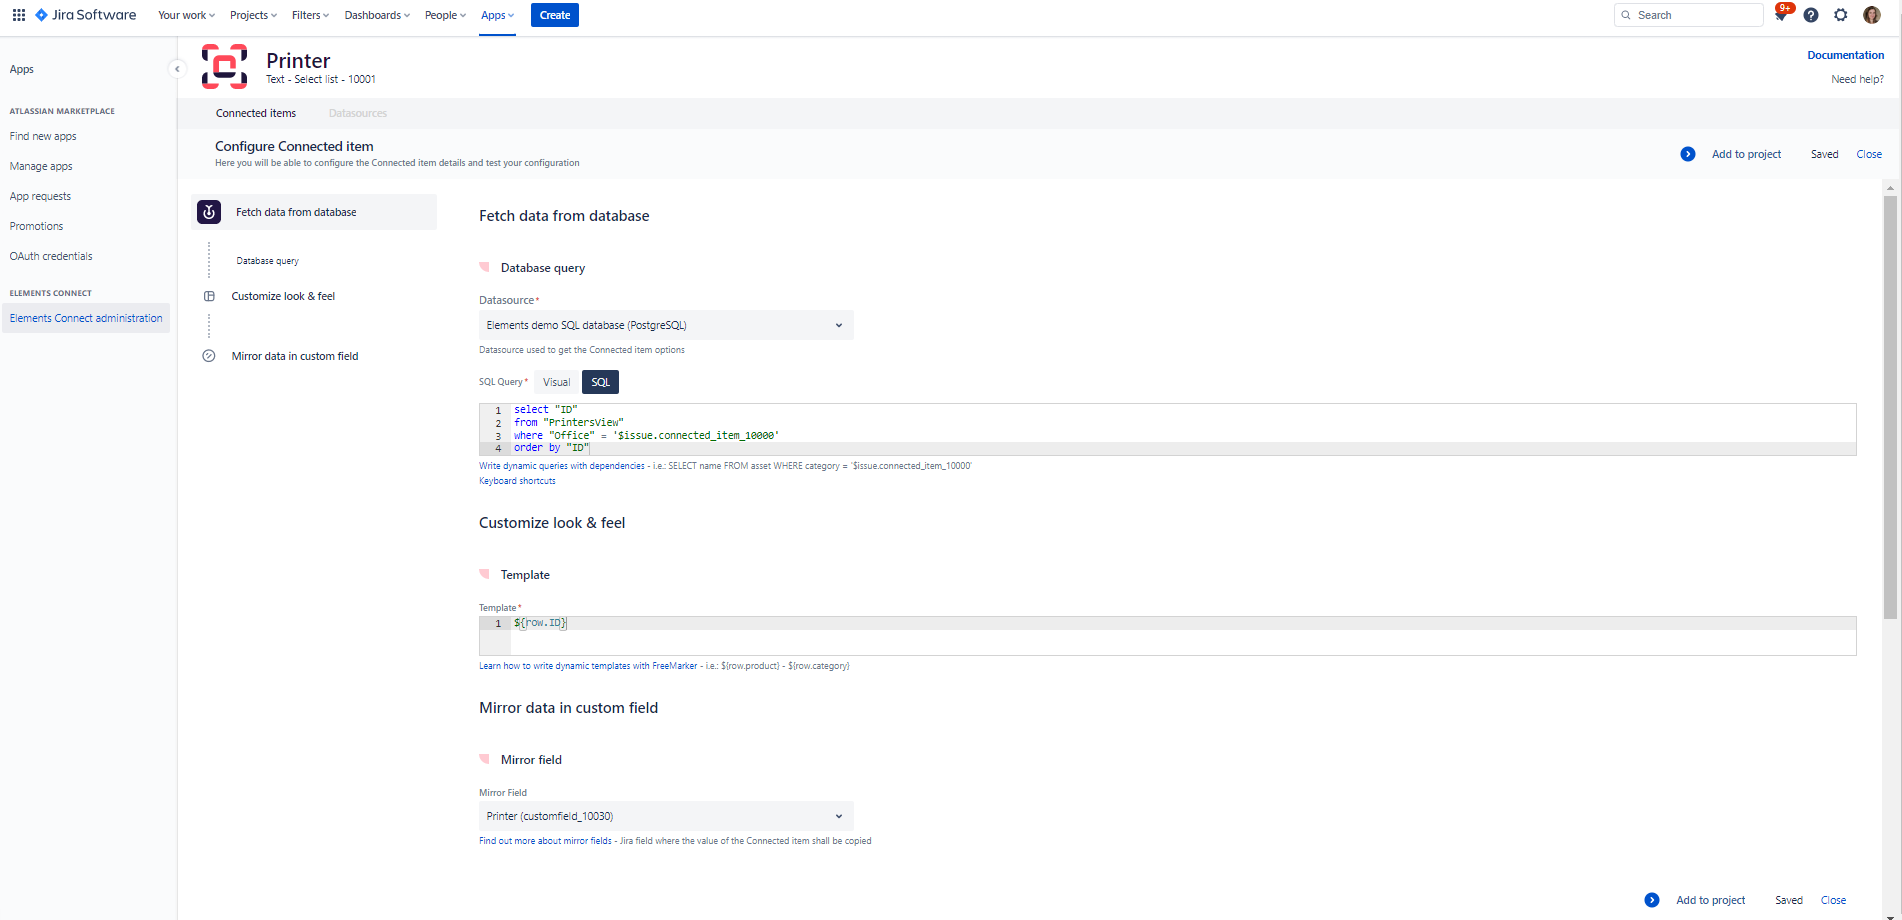
You can now configure:
-
Datasource linked to the Connected item
-
Query: to tell how to get values from the selected datasource
-
Template: to tell how to display the values in the connected item
-
Mirror Field linked to the Connected item
Once you have finished editing click on Save to apply your changes.
Add Connected Items to a project

To add a Connected item
-
Click on the item's More menu (ellipsis in the "Actions" column)
-
Select Add to project link
-
In the dialog, select a project in the dropdown menu
-
Click on Add
You will be redirected to the Connected item configuration page where you can associate Connected items with issue types or request types depending on the target project.
Delete Connected items
To delete a Connected item, click on the item's More menu, and on the Delete link on the main administration screen then confirm your choice by clicking on Yes when asked.
Deleting a Connected item moves to trash its associated mirror field.
Copy Connected items

To copy a Connected item
-
Click on the item's More menu
-
Select Copy Connected item link
-
In the dialog, enter a Name for your new Connected item
-
Click on Create
You will then be able to see your copied Connected item in your Connected items list.
What's next?