
Connected custom fields are the primary way to display external data in Jira issues and JSM tickets with Elements Connect. This guide walks you through how to create and configure them, including choosing the right field type, connecting to a data source (REST API, database, or another Jira project), configuring storage, and setting up filtering and display.
How to create connected custom fields
Once at least one data source has been configured in Elements Connect, you can use the Create a Connected field button to create your connected custom fields.
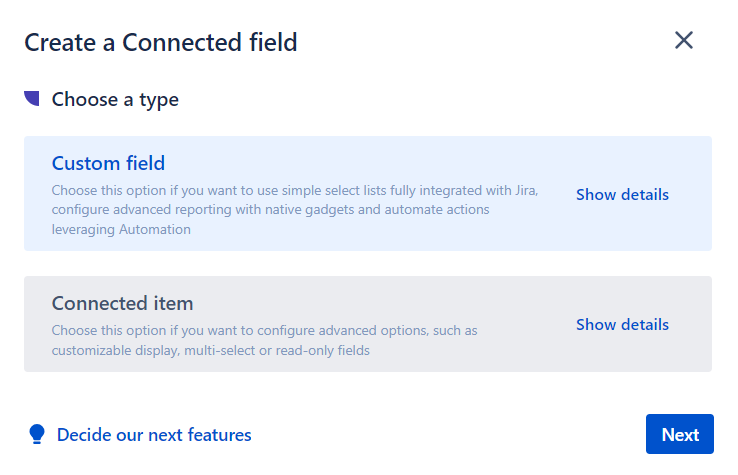
In this case, select “Custom field” and click on the Next button.
Custom field types
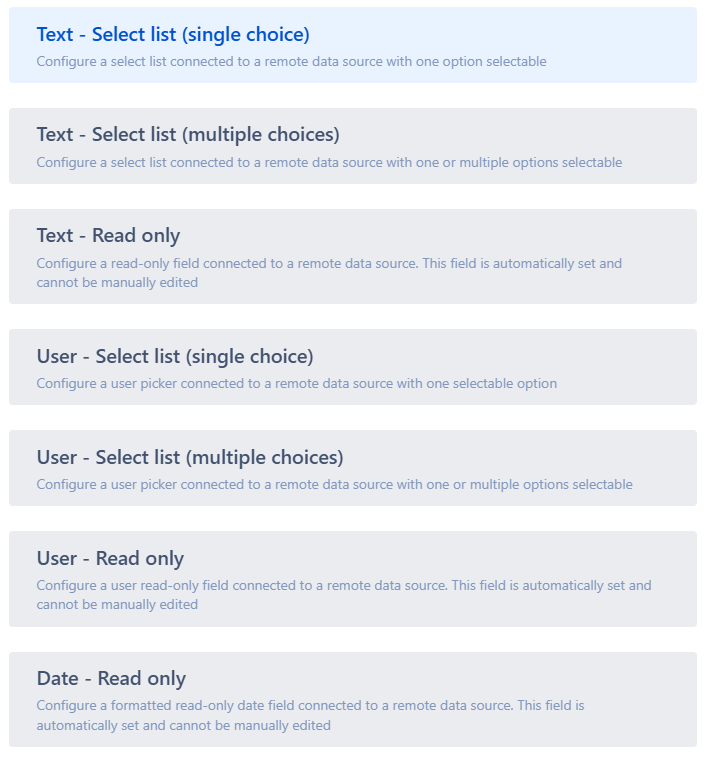
Elements Connect supports 7 types of connected custom fields, each suited to a specific use case:
|
Custom field type |
Description |
|---|---|
Text - Select list (single choice)
|
|
Text - Select list (multiple choices)
|
|
Text - Read only
|
|
User - Select list (single choice)
|
|
User - Select list (multiple choices)
|
|
User - Read only
|
|
Date - Read only
|
|
We are not stopping here! We want to bring features that matter to you, so if something is missing to achieve your use case, please contact us.
Connection to data source
The next step in the creation of a connected custom field is giving it a name and connecting it to the data source:
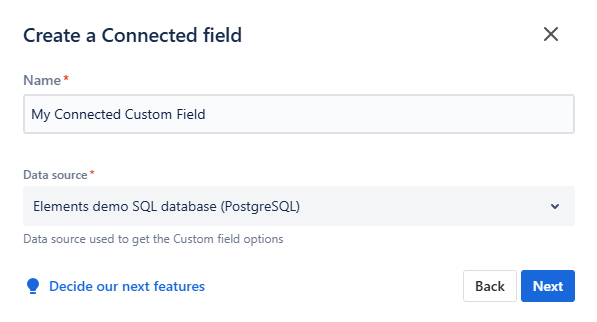
The data source can be either a REST API or a database. If needed, See Data sources configuration for details on setting up your data source.
Storage type choice
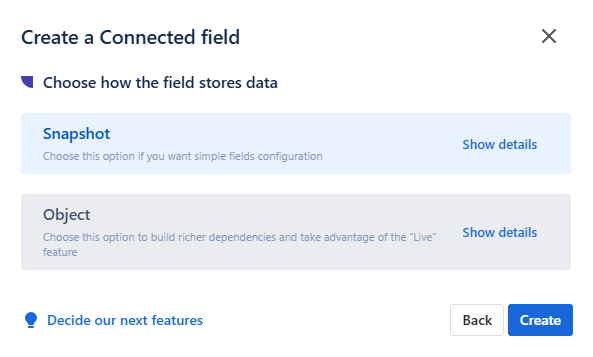
The last step in configuring a connected custom field consists in setting up how the field stores and displays data.
This choice is available only for Text fields.
Dialog for Text - Select list fields creation:
Dialog for Text - Read Only fields creation:
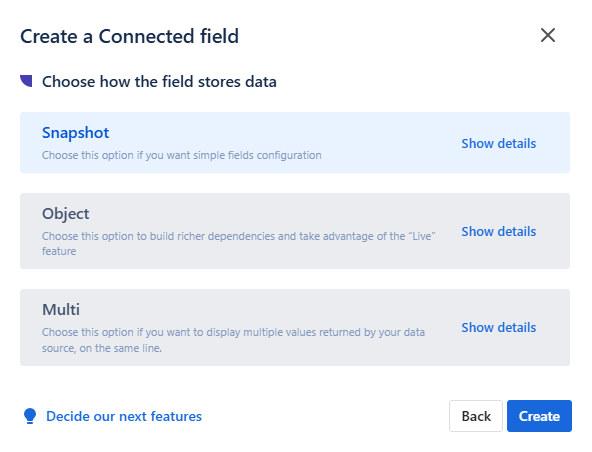
See Connected custom field storage type choice for more details.
How to configure connected custom fields
Once created, each connected custom field is configured through a dedicated edition panel:
In the following pages, you will find the full explanation of the options available when configuring connected custom fields in Elements Connect.
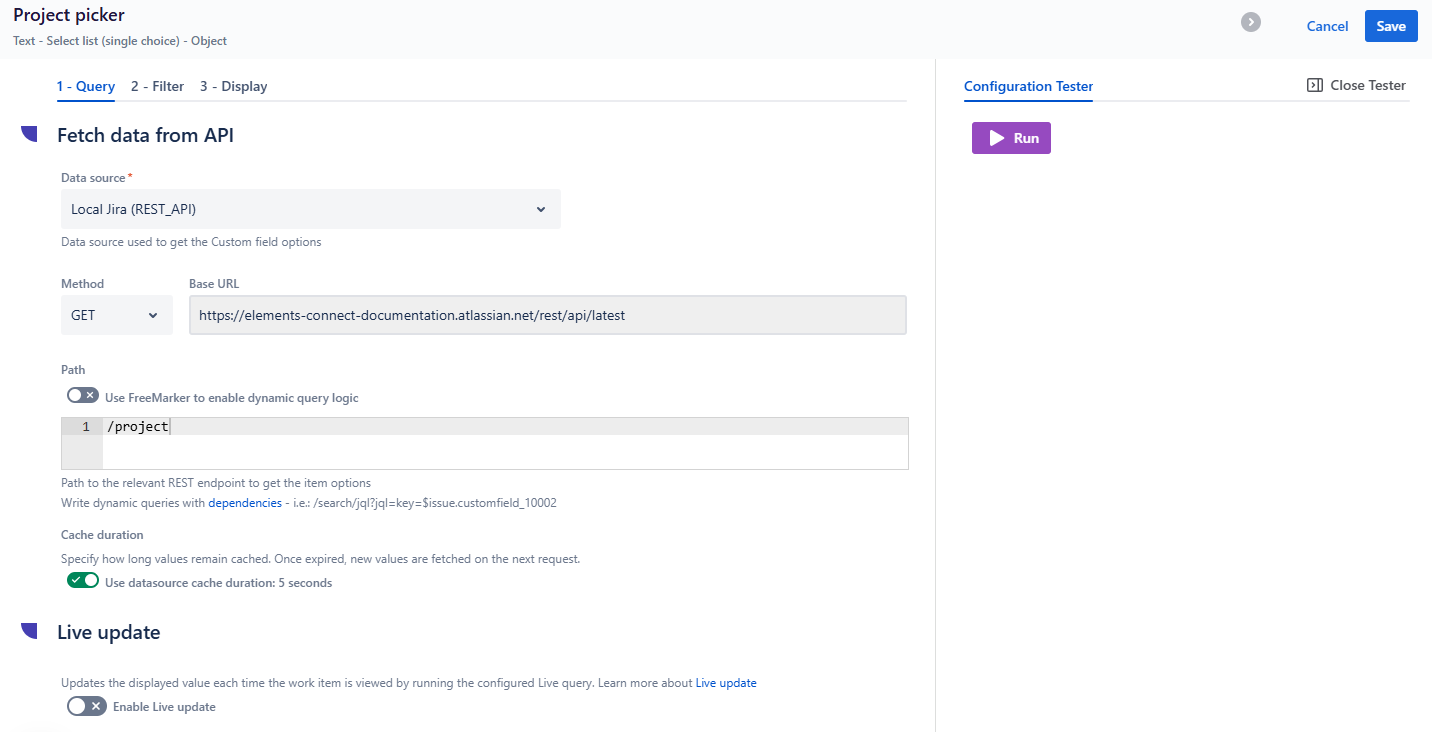
Your field configuration workflow can be divided in these steps:
1 - Fetch data from data source
Configure the query or endpoint that Elements Connect uses to fetch data from your external data source, including FreeMarker for dynamic queries and dependencies on other custom fields, the current user, user input, or the issue context.
2 - Filter data from your API response
Only for REST API data sources
Filter and shape the results returned by your REST API using JSONPath expressions, useful for extracting nested data or limiting the fields returned.
3 - Configure the display
Configure how your data appears in Elements Connect connected fields, from simple text templates to rich HTML rendering using FreeMarker.
Configuration Tester
The Configuration Tester is accessible throughout your field configuration to help you preview queries, filters, and rendering in real time, reducing setup time and avoiding trial-and-error cycles.