
02 - Prepare Connect fields on Server/DC for migration
Step 1. Create target custom fields
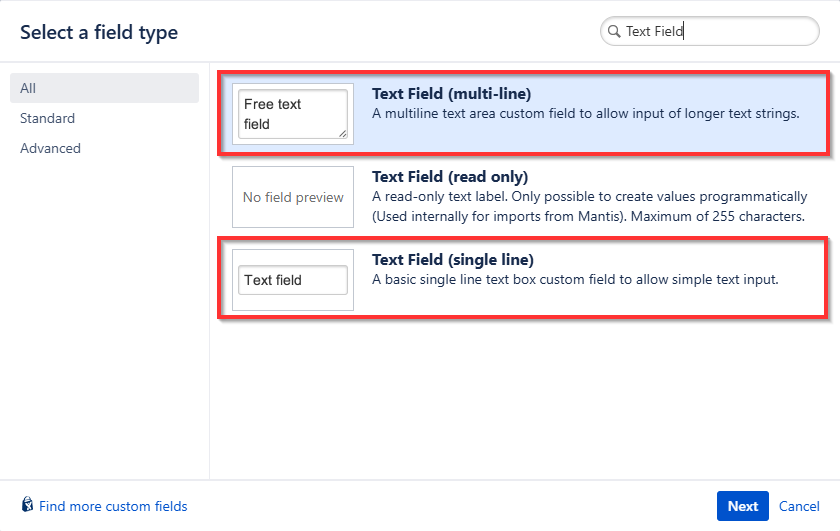
In your Server/Data Center instance, create a custom Jira Text field for each of your Elements Connect field.
Every Connect field must be mapped to a Jira Text field, regardless of its type (Snapshot, Live Text, or Live User).
If a Connect field stores large values, consider creating Text Fields (multi-line) instead of Text Fields (single-line), as single-line fields are limited to a maximum of 255 characters:
Step 2. Choose which data to copy from Connect Fields
Please carefully read 01 - Setup your configurations on the Cloud prior to copying your data.
Depending on the type of Connect field used, it's important to determine which data to copy into the Jira Text fields. You will need to make a choice based on the type of Connect field concerned.
Understanding the different types of Connect Fields:
Type | Working principle | Possible data to copy |
|---|---|---|
Live Text | Uses a key system stored in Jira, allowing the field to remain "live" while the template (i.e. the value displayed in the issue) remains in the external datasource and is retrieved when needed. |
|
Live User | Also relies on a key system and is based on the users existing in your Jira Data Center instance. |
|
Snapshot (Text, Date, Datetime) | Doesn’t use a key system and behaves like a standard Text field. The display value is stored directly in Jira, meaning only this value can be copied ℹ️ For Date and Datetime fields, Jira’s standard format will be applied, regardless of the format configured in Elements Connect. |
|
Specific case for User fields
User fields differ fundamentally between Jira Data Center and Jira Cloud. In Jira Cloud, each user is identified by an account ID, which doesn’t exist in Data Center.
The most reliable way to match a user between the two environments is by using their email address.
Therefore, it's strongly recommended to copy the email rather than the username or template.
Among the solutions listed in step 3 below, only the Scriptrunner script allows copying the user's email address.
Step 3. Copy Connect fields values to the Jira Text fields
There are two ways to achieve this:
Pros & Cons
Pros | Cons | |
|---|---|---|
Post-function | ✅ Minimal impact on Jira performance. | ❌ Cannot copy the user's email address. |
ScriptRunner for Jira | ✅ Allows copying the user’s email address, which is the most reliable way to match users between Jira Data Center and Jira Cloud. | ❌ Requires a ScriptRunner for Jira license. |
![]() With your fields ready for the move, the next step is to migrate your data: ➜ 03 - Migrate your data.
With your fields ready for the move, the next step is to migrate your data: ➜ 03 - Migrate your data.