Configure a Salesforce datasource
Looking to do this on Jira Cloud? Find the Elements Connect Cloud tutorial here
Definition
The JNDI Datasource allows you to create a bridge between your Salesforce accounts and the Elements Connect add-on.
Prerequisites:
- Have a Salesforce account with administrative privileges: required to create the OAuth credentials from Salesforce and to get the credentials from Elements Connect datasource configuration
- Have a Jira account with administrative privileges: required to configure Elements Connect
OAuth2
Unlike an URL datasource, which is very similar, Salesforce datasource uses exclusively OAuth2 for authentication.
Salesforce configuration
The first thing that you need is to setup an OAuth2 access to Salesforce. From your Salesforce dashboard, open the Setup. This item can be found in your user menu in the top right section of your dashboard page. You need to have administrator permissions.
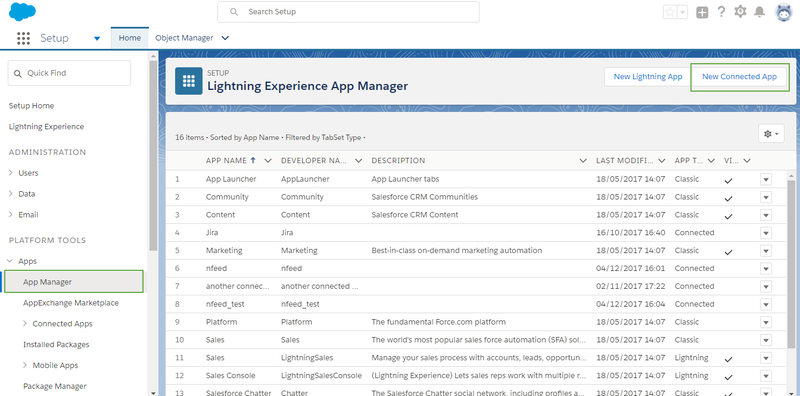
In the new screen, from the left menu, go to Platform Tools → Apps → App manager page. This can be found easily by typing 'App manager' in the quick find search bar on the left
Create a Connected App
In the top right section of this page, there should be a 'New Connected App' button. Click this button to create a new application:
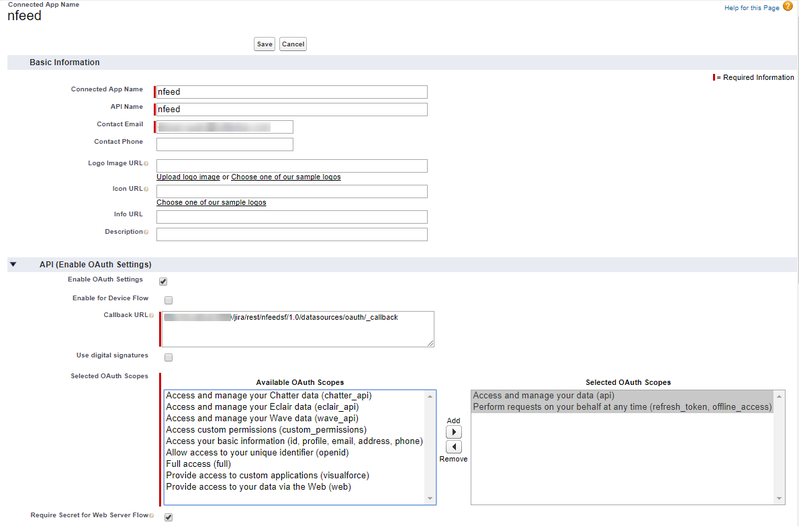
You need to set the following parameters:
Connected App Name and API Name
Input a name of your choice, Connect for example.
Contact Email
Salesforce requires this. You might want to input your own email or an administrator. This is not used by Elements Connect.
Callback URL
https://my_jira_server/rest/nfeedsf/1.0/datasources/oauth/_callback
You need to input the callback URL to Elements Connect on your platform.
In short, if your dashboard URL is https://MY_JIRA_SERVER/secure/Dashboard.jspa then the value here will be:
https://MY_JIRA_SERVER/elements-connect/admin/rest/nfeedsf/1.0/datasources/oauth/_callbackHTTPS ONLY Your Jira instance must be reachable through the HTTPS protocol.
Salesforce REST API does not accept callback urls serving with the HTTP protocol (not secured).
Important note about the base URL
The base URL in your system information is the reference. For the authentication to work properly, this base URL must be visible and accessible from the internet.
Connect version lower than 7.0.4
If you are using a Connect version lower than 7.0.4, please use the following callback URL:
https://MY_JIRA_SERVER/rest/nfeedsf/1.0/datasources/oauth/_callbackSelected OAuth Scopes
You need to tell Salesforce what Elements Connect can do here.
If you need to access the basic REST API in Salesforce, the 'Access and manage your data (api)' is certainly correct.
There is another mandatory scope for Elements Connect, which is 'Perform requests on your behalf at any time (refresh_token, offline_access)'. This last scope is mandatory to allow Elements Connect to get an authorisation and to be able to refresh it when it has expired (refresh_token).
If you do not add the refresh_token scope, your connection to Salesforce with Elements Connect will only last until the authorisation expires, which is at most 12 hours.
Now click the 'Save' button at the top of this window.
Get the credentials parameters needed to configure Elements Connect datasource
Once created, the application is displayed:
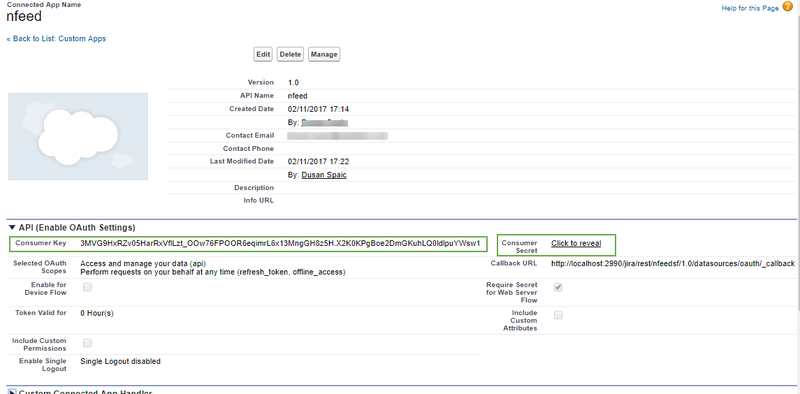
In this window, you should have access to the Consumer Key and Consumer Secret parameters. Note them down - you will need them to configure your Elements Connect datasource.
Datasource configuration
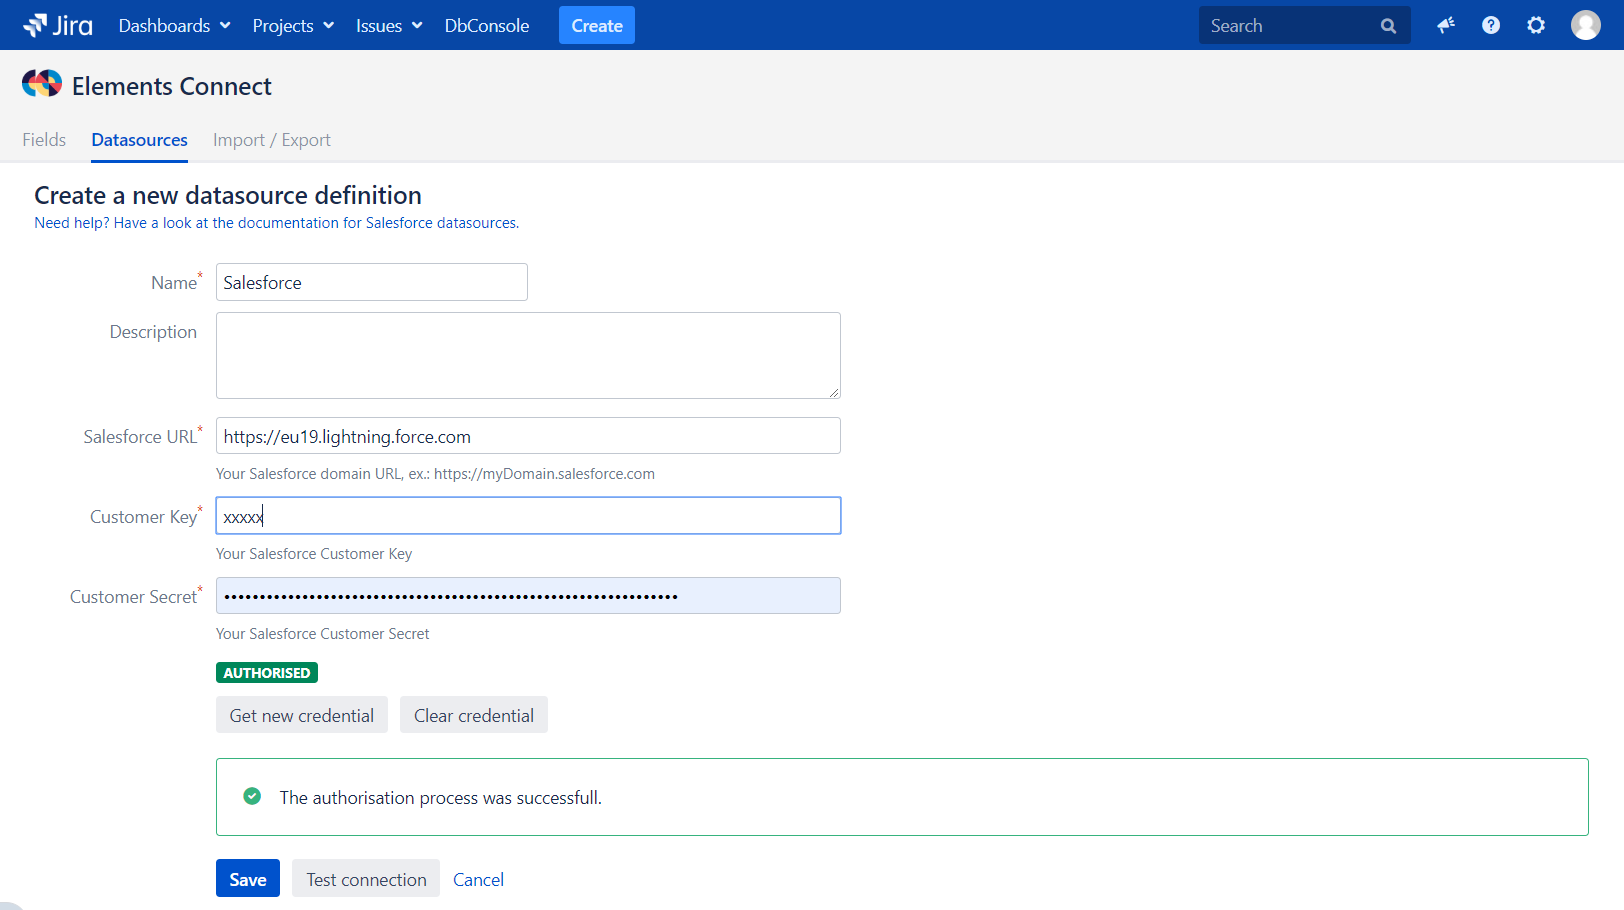
Salesforce datasource requires to obtain a credential token before they can be used by fields:
- Define the datasource Name. The name will be used later to reference the datasource connector to use in the configuration of Elements Connect custom fields.
- Write a small Description to qualify this datasource. This is a reminder of why you are using this connector.
Specify the Salesforce URL. This is your Salesforce real domain name, the one that is visible in your browser tab once you are logged in your Salesforce instance. If you are not sure what is your real domain name, you can check it in the Salesforce Settings / Company Settings / My Domain.
Salesforce URL datasource field must contain the root URL to your Salesforce service.Do not add any trailing slash ('/') or "services/data/" to the Salesforce URL.
- Specify the Customer Key and Customer Secret. Here you should paste the credentials created previously in Salesforce.
- Click on Get new credential to authorise Elements Connect to use the OAuth2 credentials created previously in Salesforce.
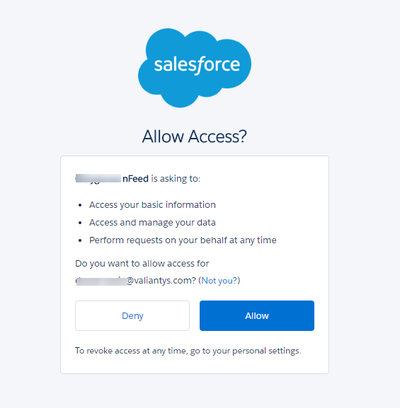
- Click on Save.
Jira public URL
Sometimes during the OAuth communication between Jira and Salesforce (or another REST API using OAuth), it is needed to use a different base url for the redirection than the default Jira base url.
For example, when Jira instance is not available to be accessed from outside of the internal network (firewall) you can setup a second (public) webserver outside of the protected area which forwards all requests to the internal Jira server.
In that case, Salesforce should redirect to the public server and not to the internal (protected) one.
If you are in this kind of scenario you can use the "Jira public URL" field.
With this field you can specify the URL of your public web server.
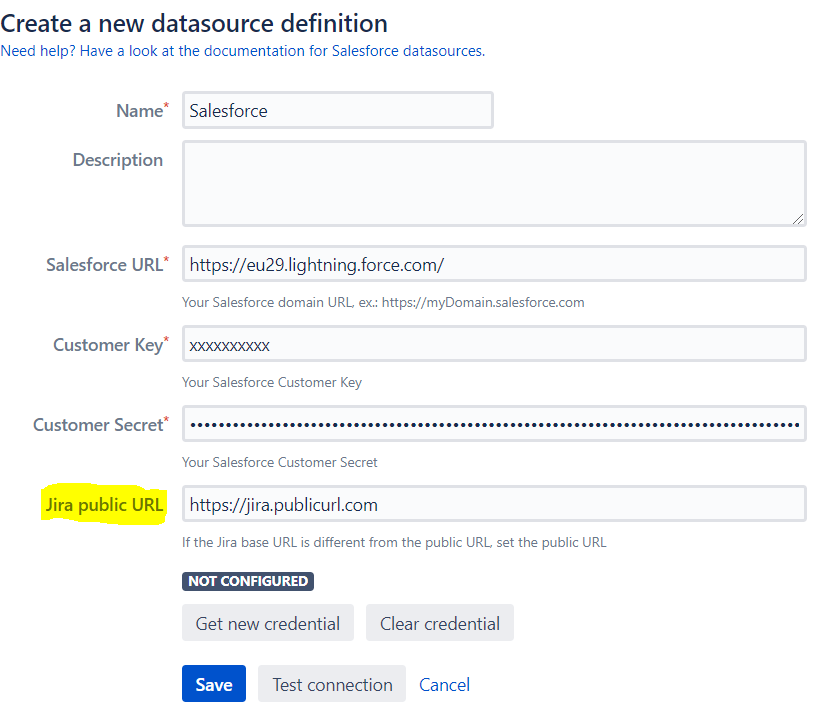
You need to configure your Salesforce datasource while being connected to Jira from the public URL so that redirection from Salesforce is done correctly.
Edit configuration
For security reason, customer secret value will not appear in the edit configuration screen.
If you want to change the customer secret you can click on Change customer secret. A field will appear to let you enter a new one.
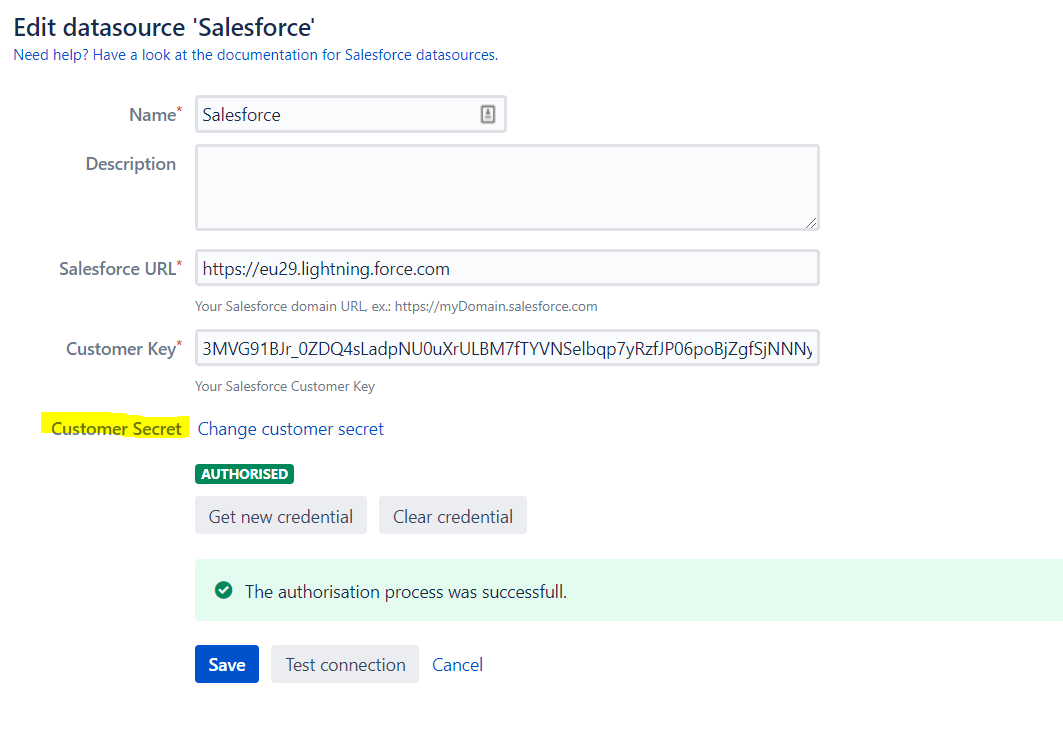
If you do not click on "Change customer secret" link while editing, Test connection and Get new credential actions will use the customer secret stored in database.
