Migration path
Step-by-step migration guide

Here are the key steps to follow to successfully migrate your Elements Connect configuration from Jira Server/Data Center to Jira Cloud:
Step 1: Evaluate the current feature parity on Cloud
First, verify that all the features you need exist on Jira Cloud by checking out the Feature Comparison table.
Awareness of the feature parity between the hosting environments is essential for you to understand if your use case can be reproduced on Cloud. Some of your configurations may not yet be available, or you need to implement another solution to achieve the same that you have done in your Jira Server / Data Center environment.
What's coming next
We are getting closer and closer to bridging the functionality gap between the Server / Data Center product and the Cloud version, and are dedicated to providing you with the same value no matter which hosting you use. Join our Early Access Program to stay updated.
Step 2: Install Elements Connect on your Jira Cloud instance
Install Elements Connect on your Jira Cloud instance following this tutorial.
We recommend you take some time to evaluate the Cloud app to better understand how it works. Feel free to take a look at our documentation for configuration help and how-tos, or to reach out to our support team.
Step 3: Manually create new configurations
This example is based on connected items set up.
Historical data copied from Jira on-premise can’t be populated into the newly created connected items on cloud.
If you are interested in creating connected custom fields, please keep in mind that:
Connected custom fields are not available in JSM projets for now (work in progress - ETA Q2 CY25)
Historical data copied from Jira on-premise can be populated for most cases into the newly created connected custom fields on cloud.
For further assistance, please contact our support team
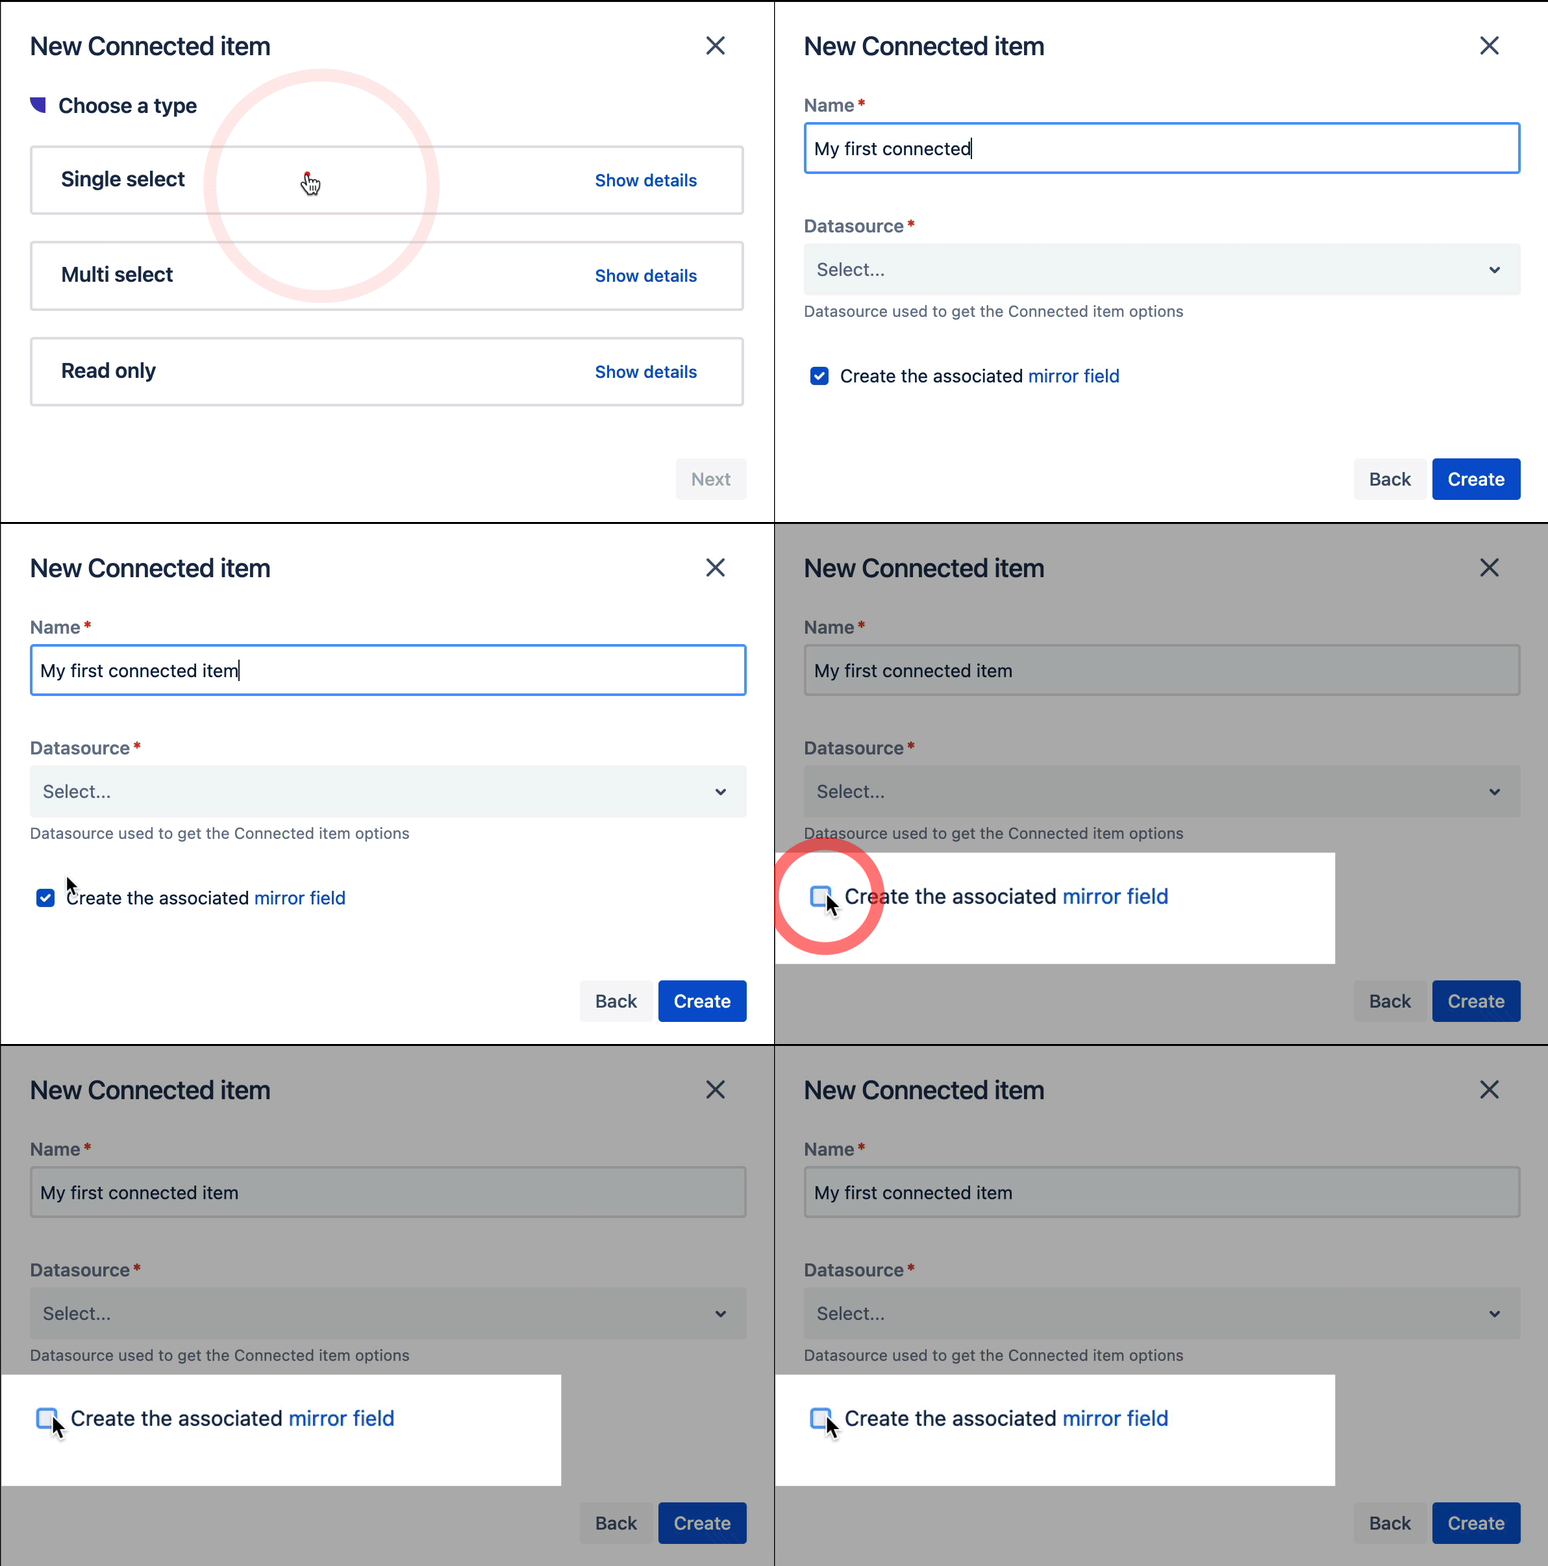
Manually create your configuration (datasources and connected items) in Elements Connect for Jira Cloud.
Don’t forget to uncheck the option "Create associated mirror field", when creating connected items.

Step 4: Prepare Connect fields on Server/DC for migration
This example is based on connected items set up → Historical data copied from Jira on-premise can’t be populated into the newly created connected items on cloud.
If you are interested in retrieving your historical data, consider creating connected custom fields → please contact our support team for assistance in your data migration.
Step 4.1. Create target custom fields
On your Server / Data Center instance, create as many Jira Text Custom fields as you have Elements Connect fields.
If your Connect field stores multiple values, or if it stores single values with many characters, then you should create Jira Text Area custom fields (as Text single-line fields are limited to a maximum of 255 characters).
Step 4.2. Copy Connect fields display to these target custom fields
Now that your target custom fields are created, you can now copy your Connect fields display to these. You can do so in two different ways:
by using the "Copy field display to another field" post-function, or
by running a ScriptRunner script to copy the field display to another field.
HTML in display template
For every Elements Connect custom fields using HTML/CSS in the display template, make sure there are no reference to HTML/CSS. To do so, you need to edit the display template for each Elements Connect custom fields and remove HTML/CSS references.
Option 1: using the "Copy field display to another field" post-function
For each workflow linked to an issue associated with an Elements Connect Custom Field, add a global transition with our post-function "Copy field display to another field"
Configure as many post-functions as needed in order to have a 1-to-1 mapping between Elements Connect Custom Fields and Jira Text Custom fields
Use a Bulk operation to execute the previous transition on all the relevant issues
User type fields
For Elements Connect User type custom fields, use the "Copy field key to another field" post-function. You will copy the user's username in the text field.
Option 2: running a ScriptRunner script to copy the field display to another field
You can also decide to use a Groovy script to copy Elements Connect field display to other custom fields. For this to work, you'll need to have Script Runner installed.
The following script will copy the field display of Elements Connect fields that are not empty which match the JQL query specified at line 21.
Or download it here:
Script - Elements Connect field display to another field.txt
How to run this script?
In order for this script to run, you will need to:
1/ Specify a JQL query to narrow down the scope of this field display copy job. (line 21)
We recommend you to start with a restrictive JQL query for testing purposes. If tests are successful, then you can extend the scope of your JQL query.
2/ Specify the Elements Connect field IDs you want to copy (source) and the field IDs of the Text Area custom fields where you want the data to be copied to (target) (start line 28). There should be as many field mappings as there are Elements Connect fields to copy.
If your JQL query returns over 1000 results, make sure to increase the default maximum limit of 1000 in Jira. Alternatively, you can run the script over as many batches as required.
If you wish to run this script over a large number of issues, we recommend you to do that during non-business hours for performance reasons.
![]() We recommend that you verify that all Elements Connect Custom Fields have their display value copied in their dedicated Jira Text Custom Field.
We recommend that you verify that all Elements Connect Custom Fields have their display value copied in their dedicated Jira Text Custom Field.
Step 5: Export fields from your Server/DC instance
You have two ways of exporting your Jira issues with their values:
Export your Jira tickets using the CSV exporter - the CSV file generated will be used to import your data in the next step.
Or
Export your Jira tickets using the Jira Cloud Migration Assistant (JCMA).
Some specificities to take into account:
HTML in display template
For every Elements Connect custom fields using HTML/CSS in the display template, make sure there are no reference to HTML/CSS in the CSV document:
Edit the display template for each Elements Connect custom fields and remove HTML/CSS references
ORMake sure there are no HTML/CSS references directly in the CSV file
User type fields
For Elements Connect User type custom fields, use the "Copy field key to another field" post-function. You will copy the user's username in the text field.
Step 6: Import the fields on Cloud
Depending on the solution you used in step 5:
If you used the CSV exporter:
On your Jira Cloud instance, create as many Jira Text Custom fields as previously created on Server/Data Center
Import the previously generated CSV file.
If you used Jira Cloud Migration Assistant (JCMA), you don't need to do anything.
Step 7: Set the mirror fields
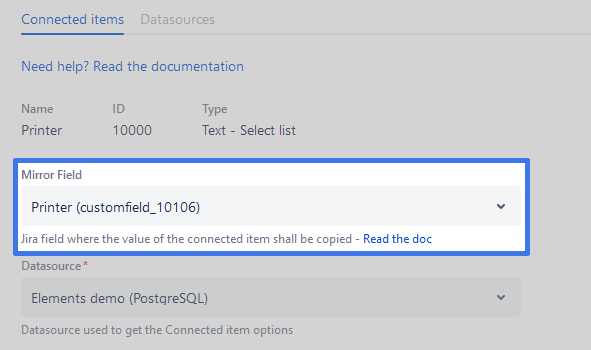
For each Connected item, you need to set the mirror field accordingly. To do so, map the custom fields created in Step 4 to the right Connected item using the mirror fields.

 Congrats! That’s it!
This migration path allows you to migrate data to Jira Cloud only. Configurations need to be performed manually again and Connected items need to be manually added to projects as well.
 We're here to help
We’re committed to making your migration to Elements Connect for Jira Cloud as smooth as possible, don’t hesitate to contact our support team should you have any questions or concerns. We recommend that you attach your support dump file to your support request, it'll help our team provide more accurate answers about your specific case.
